logo资料库

Pico入门使用手册(Getting_started_with_pico).pdf

第1页 / 共78页
第2页 / 共78页
第3页 / 共78页
第4页 / 共78页
第5页 / 共78页
第6页 / 共78页
第7页 / 共78页
第8页 / 共78页
资料共78页,剩余部分请下载后查看
Getting started with Raspberry Pi Pico
Colophon
Legal Disclaimer Notice
Table of Contents
Chapter 1. Quick Pico Setup
Chapter 2. The SDK
2.1. Get the SDK and examples
2.2. Install the Toolchain
2.3. Updating the SDK
Chapter 3. Blinking an LED in C
3.1. Building "Blink"
3.2. Load and run "Blink"
3.2.1. From the desktop
3.2.2. Using the command line
3.2.3. Aside: Other Boards
3.2.4. Aside: Hands-free Flash Programming
Chapter 4. Saying "Hello World" in C
4.1. Serial input and output on Raspberry Pi Pico
4.2. Build "Hello World"
4.3. Flash and Run "Hello World"
4.4. See "Hello World" USB output
4.5. See "Hello World" UART output
4.6. Powering the board
Chapter 5. Flash Programming with SWD
5.1. Installing OpenOCD
5.2. SWD Port Wiring
5.3. Loading a Program
Chapter 6. Debugging with SWD
6.1. Build "Hello World" debug version
6.2. Installing GDB
6.3. Use GDB and OpenOCD to debug Hello World
Chapter 7. Using Visual Studio Code
7.1. Installing Visual Studio Code
7.2. Loading a Project
7.3. Debugging a Project
7.3.1. Running "Hello USB" on the Raspberry Pi Pico
Chapter 8. Creating your own Project
8.1. Debugging your project
8.2. Working in Visual Studio Code
8.3. Automating project creation
8.3.1. Project generation from the command line
Chapter 9. Building on other platforms
9.1. Building on Apple macOS
9.1.1. Installing the Toolchain
9.1.2. Using Visual Studio Code
9.1.3. Building with CMake Tools
9.1.4. Saying "Hello World"
9.2. Building on MS Windows
9.2.1. Installing the Toolchain
9.2.2. Getting the SDK and examples
9.2.3. Building "Hello World" from the Command Line
9.2.4. Building "Hello World" from Visual Studio Code
9.2.5. Flashing and Running "Hello World"
Chapter 10. Using other Integrated Development Environments
10.1. Using Eclipse
10.1.1. Setting up Eclipse for Pico on a Linux machine
10.2. Using CLion
10.2.1. Setting up CLion
10.3. Other Environments
10.3.1. Using openocd-svd
Appendix A: Using Picoprobe
Build OpenOCD
Linux
Windows
Mac
Build and flash picoprobe
Picoprobe Wiring
Install Picoprobe driver (only needed on Windows)
Using Picoprobe’s UART
Linux
Windows
Mac
Using Picoprobe with OpenOCD
Appendix B: Using Picotool
Getting picotool
Building picotool
Using picotool
Display information
Save the program
Binary Information
Basic information
Pins
Including Binary information
Details
Setting common fields from CMake
Appendix C: Documentation Release History
Getting started with Raspberry Pi Pico Colophon Copyright © 2020-2022 Raspberry Pi Ltd (formerly Raspberry Pi (Trading) Ltd.) The documentation of the RP2040 microcontroller is licensed under a Creative Commons Attribution-NoDerivatives 4.0 International (CC BY-ND). build-date: 2022-06-17 build-version: 7028f9f-clean About the SDK Throughout the text "the SDK" refers to our Raspberry Pi Pico SDK. More details about the SDK can be found in the Raspberry Pi Pico C/C++ SDK book. Source code included in the documentation is Copyright © 2020-2022 Raspberry Pi Ltd (formerly Raspberry Pi (Trading) Ltd.) and licensed under the 3- Clause BSD license. Legal Disclaimer Notice TECHNICAL AND RELIABILITY DATA FOR RASPBERRY PI PRODUCTS (INCLUDING DATASHEETS) AS MODIFIED FROM TIME TO TIME (“RESOURCES”) ARE PROVIDED BY RASPBERRY PI LTD (“RPL”) "AS IS" AND ANY EXPRESS OR IMPLIED WARRANTIES, INCLUDING, BUT NOT LIMITED TO, THE IMPLIED WARRANTIES OF MERCHANTABILITY AND FITNESS FOR A PARTICULAR PURPOSE ARE DISCLAIMED. TO THE MAXIMUM EXTENT PERMITTED BY APPLICABLE LAW IN NO EVENT SHALL RPL BE LIABLE FOR ANY DIRECT, INDIRECT, INCIDENTAL, SPECIAL, EXEMPLARY, OR CONSEQUENTIAL DAMAGES (INCLUDING, BUT NOT LIMITED TO, PROCUREMENT OF SUBSTITUTE GOODS OR SERVICES; LOSS OF USE, DATA, OR PROFITS; OR BUSINESS INTERRUPTION) HOWEVER CAUSED AND ON ANY THEORY OF LIABILITY, WHETHER IN CONTRACT, STRICT LIABILITY, OR TORT (INCLUDING NEGLIGENCE OR OTHERWISE) ARISING IN ANY WAY OUT OF THE USE OF THE RESOURCES, EVEN IF ADVISED OF THE POSSIBILITY OF SUCH DAMAGE. RPL reserves the right to make any enhancements, improvements, corrections or any other modifications to the RESOURCES or any products described in them at any time and without further notice. The RESOURCES are intended for skilled users with suitable levels of design knowledge. Users are solely responsible for their selection and use of the RESOURCES and any application of the products described in them. User agrees to indemnify and hold RPL harmless against all liabilities, costs, damages or other losses arising out of their use of the RESOURCES. RPL grants users permission to use the RESOURCES solely in conjunction with the Raspberry Pi products. All other use of the RESOURCES is prohibited. No licence is granted to any other RPL or other third party intellectual property right. HIGH RISK ACTIVITIES. Raspberry Pi products are not designed, manufactured or intended for use in hazardous environments requiring fail safe performance, such as in the operation of nuclear facilities, aircraft navigation or communication systems, air traffic control, weapons systems or safety-critical applications (including life support systems and other medical devices), in which the failure of the products could lead directly to death, personal injury or severe physical or environmental damage (“High Risk Activities”). RPL specifically disclaims any express or implied warranty of fitness for High Risk Activities and accepts no liability for use or inclusions of Raspberry Pi products in High Risk Activities. Raspberry Pi products are provided subject to RPL’s Standard Terms. RPL’s provision of the RESOURCES does not expand or otherwise modify RPL’s Standard Terms including but not limited to the disclaimers and warranties expressed in them. Legal Disclaimer Notice 1
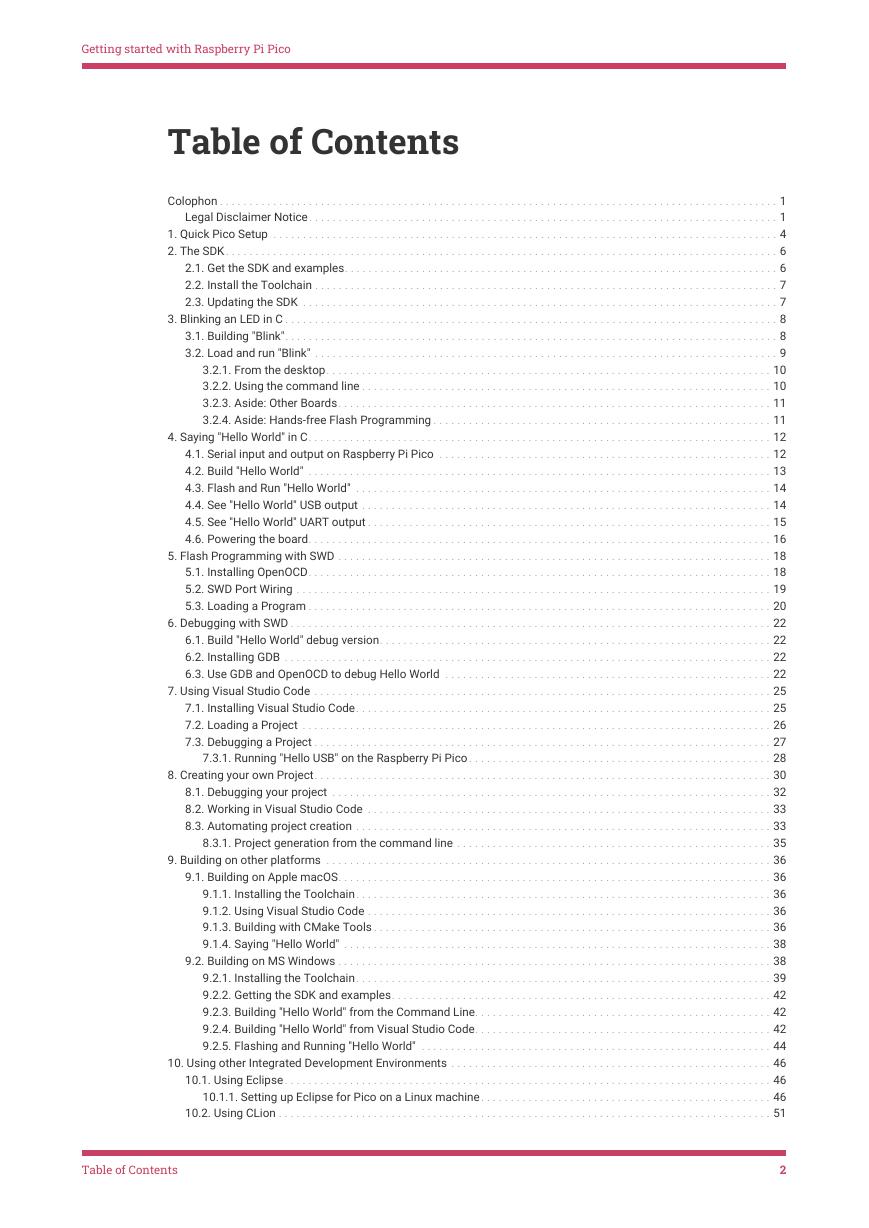
Getting started with Raspberry Pi Pico Table of Contents Colophon . . . . . . . . . . . . . . . . . . . . . . . . . . . . . . . . . . . . . . . . . . . . . . . . . . . . . . . . . . . . . . . . . . . . . . . . . . . . . . . . . . . . . . . . . . . . . .  1 Legal Disclaimer Notice. . . . . . . . . . . . . . . . . . . . . . . . . . . . . . . . . . . . . . . . . . . . . . . . . . . . . . . . . . . . . . . . . . . . . . . . . . . . . . .  1 1. Quick Pico Setup . . . . . . . . . . . . . . . . . . . . . . . . . . . . . . . . . . . . . . . . . . . . . . . . . . . . . . . . . . . . . . . . . . . . . . . . . . . . . . . . . . . . .  4 2. The SDK. . . . . . . . . . . . . . . . . . . . . . . . . . . . . . . . . . . . . . . . . . . . . . . . . . . . . . . . . . . . . . . . . . . . . . . . . . . . . . . . . . . . . . . . . . . . .  6 2.1. Get the SDK and examples. . . . . . . . . . . . . . . . . . . . . . . . . . . . . . . . . . . . . . . . . . . . . . . . . . . . . . . . . . . . . . . . . . . . . . . . .  6 2.2. Install the Toolchain . . . . . . . . . . . . . . . . . . . . . . . . . . . . . . . . . . . . . . . . . . . . . . . . . . . . . . . . . . . . . . . . . . . . . . . . . . . . . .  7 2.3. Updating the SDK . . . . . . . . . . . . . . . . . . . . . . . . . . . . . . . . . . . . . . . . . . . . . . . . . . . . . . . . . . . . . . . . . . . . . . . . . . . . . . . .  7 3. Blinking an LED in C . . . . . . . . . . . . . . . . . . . . . . . . . . . . . . . . . . . . . . . . . . . . . . . . . . . . . . . . . . . . . . . . . . . . . . . . . . . . . . . . . . .  8 3.1. Building "Blink". . . . . . . . . . . . . . . . . . . . . . . . . . . . . . . . . . . . . . . . . . . . . . . . . . . . . . . . . . . . . . . . . . . . . . . . . . . . . . . . . . .  8 3.2. Load and run "Blink" . . . . . . . . . . . . . . . . . . . . . . . . . . . . . . . . . . . . . . . . . . . . . . . . . . . . . . . . . . . . . . . . . . . . . . . . . . . . . .  9 3.2.1. From the desktop. . . . . . . . . . . . . . . . . . . . . . . . . . . . . . . . . . . . . . . . . . . . . . . . . . . . . . . . . . . . . . . . . . . . . . . . . . .  10 3.2.2. Using the command line . . . . . . . . . . . . . . . . . . . . . . . . . . . . . . . . . . . . . . . . . . . . . . . . . . . . . . . . . . . . . . . . . . . . .  10 3.2.3. Aside: Other Boards. . . . . . . . . . . . . . . . . . . . . . . . . . . . . . . . . . . . . . . . . . . . . . . . . . . . . . . . . . . . . . . . . . . . . . . . .  11 3.2.4. Aside: Hands-free Flash Programming . . . . . . . . . . . . . . . . . . . . . . . . . . . . . . . . . . . . . . . . . . . . . . . . . . . . . . . . .  11 4. Saying "Hello World" in C. . . . . . . . . . . . . . . . . . . . . . . . . . . . . . . . . . . . . . . . . . . . . . . . . . . . . . . . . . . . . . . . . . . . . . . . . . . . . .  12 4.1. Serial input and output on Raspberry Pi Pico . . . . . . . . . . . . . . . . . . . . . . . . . . . . . . . . . . . . . . . . . . . . . . . . . . . . . . . .  12 4.2. Build "Hello World" . . . . . . . . . . . . . . . . . . . . . . . . . . . . . . . . . . . . . . . . . . . . . . . . . . . . . . . . . . . . . . . . . . . . . . . . . . . . . .  13 4.3. Flash and Run "Hello World" . . . . . . . . . . . . . . . . . . . . . . . . . . . . . . . . . . . . . . . . . . . . . . . . . . . . . . . . . . . . . . . . . . . . . .  14 4.4. See "Hello World" USB output . . . . . . . . . . . . . . . . . . . . . . . . . . . . . . . . . . . . . . . . . . . . . . . . . . . . . . . . . . . . . . . . . . . . .  14 4.5. See "Hello World" UART output . . . . . . . . . . . . . . . . . . . . . . . . . . . . . . . . . . . . . . . . . . . . . . . . . . . . . . . . . . . . . . . . . . . .  15 4.6. Powering the board. . . . . . . . . . . . . . . . . . . . . . . . . . . . . . . . . . . . . . . . . . . . . . . . . . . . . . . . . . . . . . . . . . . . . . . . . . . . . .  16 5. Flash Programming with SWD . . . . . . . . . . . . . . . . . . . . . . . . . . . . . . . . . . . . . . . . . . . . . . . . . . . . . . . . . . . . . . . . . . . . . . . . .  18 5.1. Installing OpenOCD. . . . . . . . . . . . . . . . . . . . . . . . . . . . . . . . . . . . . . . . . . . . . . . . . . . . . . . . . . . . . . . . . . . . . . . . . . . . . .  18 5.2. SWD Port Wiring . . . . . . . . . . . . . . . . . . . . . . . . . . . . . . . . . . . . . . . . . . . . . . . . . . . . . . . . . . . . . . . . . . . . . . . . . . . . . . . .  19 5.3. Loading a Program . . . . . . . . . . . . . . . . . . . . . . . . . . . . . . . . . . . . . . . . . . . . . . . . . . . . . . . . . . . . . . . . . . . . . . . . . . . . . .  20 6. Debugging with SWD . . . . . . . . . . . . . . . . . . . . . . . . . . . . . . . . . . . . . . . . . . . . . . . . . . . . . . . . . . . . . . . . . . . . . . . . . . . . . . . . .  22 6.1. Build "Hello World" debug version. . . . . . . . . . . . . . . . . . . . . . . . . . . . . . . . . . . . . . . . . . . . . . . . . . . . . . . . . . . . . . . . . .  22 6.2. Installing GDB . . . . . . . . . . . . . . . . . . . . . . . . . . . . . . . . . . . . . . . . . . . . . . . . . . . . . . . . . . . . . . . . . . . . . . . . . . . . . . . . . .  22 6.3. Use GDB and OpenOCD to debug Hello World . . . . . . . . . . . . . . . . . . . . . . . . . . . . . . . . . . . . . . . . . . . . . . . . . . . . . . .  22 7. Using Visual Studio Code . . . . . . . . . . . . . . . . . . . . . . . . . . . . . . . . . . . . . . . . . . . . . . . . . . . . . . . . . . . . . . . . . . . . . . . . . . . . .  25 7.1. Installing Visual Studio Code. . . . . . . . . . . . . . . . . . . . . . . . . . . . . . . . . . . . . . . . . . . . . . . . . . . . . . . . . . . . . . . . . . . . . .  25 7.2. Loading a Project . . . . . . . . . . . . . . . . . . . . . . . . . . . . . . . . . . . . . . . . . . . . . . . . . . . . . . . . . . . . . . . . . . . . . . . . . . . . . . .  26 7.3. Debugging a Project . . . . . . . . . . . . . . . . . . . . . . . . . . . . . . . . . . . . . . . . . . . . . . . . . . . . . . . . . . . . . . . . . . . . . . . . . . . . .  27 7.3.1. Running "Hello USB" on the Raspberry Pi Pico . . . . . . . . . . . . . . . . . . . . . . . . . . . . . . . . . . . . . . . . . . . . . . . . . . .  28 8. Creating your own Project. . . . . . . . . . . . . . . . . . . . . . . . . . . . . . . . . . . . . . . . . . . . . . . . . . . . . . . . . . . . . . . . . . . . . . . . . . . . .  30 8.1. Debugging your project . . . . . . . . . . . . . . . . . . . . . . . . . . . . . . . . . . . . . . . . . . . . . . . . . . . . . . . . . . . . . . . . . . . . . . . . . .  32 8.2. Working in Visual Studio Code . . . . . . . . . . . . . . . . . . . . . . . . . . . . . . . . . . . . . . . . . . . . . . . . . . . . . . . . . . . . . . . . . . . .  33 8.3. Automating project creation . . . . . . . . . . . . . . . . . . . . . . . . . . . . . . . . . . . . . . . . . . . . . . . . . . . . . . . . . . . . . . . . . . . . . .  33 8.3.1. Project generation from the command line . . . . . . . . . . . . . . . . . . . . . . . . . . . . . . . . . . . . . . . . . . . . . . . . . . . . .  35 9. Building on other platforms . . . . . . . . . . . . . . . . . . . . . . . . . . . . . . . . . . . . . . . . . . . . . . . . . . . . . . . . . . . . . . . . . . . . . . . . . . .  36 9.1. Building on Apple macOS. . . . . . . . . . . . . . . . . . . . . . . . . . . . . . . . . . . . . . . . . . . . . . . . . . . . . . . . . . . . . . . . . . . . . . . . .  36 9.1.1. Installing the Toolchain. . . . . . . . . . . . . . . . . . . . . . . . . . . . . . . . . . . . . . . . . . . . . . . . . . . . . . . . . . . . . . . . . . . . . .  36 9.1.2. Using Visual Studio Code . . . . . . . . . . . . . . . . . . . . . . . . . . . . . . . . . . . . . . . . . . . . . . . . . . . . . . . . . . . . . . . . . . . .  36 9.1.3. Building with CMake Tools . . . . . . . . . . . . . . . . . . . . . . . . . . . . . . . . . . . . . . . . . . . . . . . . . . . . . . . . . . . . . . . . . . .  36 9.1.4. Saying "Hello World" . . . . . . . . . . . . . . . . . . . . . . . . . . . . . . . . . . . . . . . . . . . . . . . . . . . . . . . . . . . . . . . . . . . . . . . .  38 9.2. Building on MS Windows . . . . . . . . . . . . . . . . . . . . . . . . . . . . . . . . . . . . . . . . . . . . . . . . . . . . . . . . . . . . . . . . . . . . . . . . .  38 9.2.1. Installing the Toolchain. . . . . . . . . . . . . . . . . . . . . . . . . . . . . . . . . . . . . . . . . . . . . . . . . . . . . . . . . . . . . . . . . . . . . .  39 9.2.2. Getting the SDK and examples. . . . . . . . . . . . . . . . . . . . . . . . . . . . . . . . . . . . . . . . . . . . . . . . . . . . . . . . . . . . . . . .  42 9.2.3. Building "Hello World" from the Command Line. . . . . . . . . . . . . . . . . . . . . . . . . . . . . . . . . . . . . . . . . . . . . . . . . .  42 9.2.4. Building "Hello World" from Visual Studio Code. . . . . . . . . . . . . . . . . . . . . . . . . . . . . . . . . . . . . . . . . . . . . . . . . .  42 9.2.5. Flashing and Running "Hello World" . . . . . . . . . . . . . . . . . . . . . . . . . . . . . . . . . . . . . . . . . . . . . . . . . . . . . . . . . . .  44 10. Using other Integrated Development Environments . . . . . . . . . . . . . . . . . . . . . . . . . . . . . . . . . . . . . . . . . . . . . . . . . . . . . .  46 10.1. Using Eclipse. . . . . . . . . . . . . . . . . . . . . . . . . . . . . . . . . . . . . . . . . . . . . . . . . . . . . . . . . . . . . . . . . . . . . . . . . . . . . . . . . .  46 10.1.1. Setting up Eclipse for Pico on a Linux machine. . . . . . . . . . . . . . . . . . . . . . . . . . . . . . . . . . . . . . . . . . . . . . . . .  46 10.2. Using CLion . . . . . . . . . . . . . . . . . . . . . . . . . . . . . . . . . . . . . . . . . . . . . . . . . . . . . . . . . . . . . . . . . . . . . . . . . . . . . . . . . . .  51 Table of Contents 2
Getting started with Raspberry Pi Pico 10.2.1. Setting up CLion. . . . . . . . . . . . . . . . . . . . . . . . . . . . . . . . . . . . . . . . . . . . . . . . . . . . . . . . . . . . . . . . . . . . . . . . . . .  51 10.3. Other Environments . . . . . . . . . . . . . . . . . . . . . . . . . . . . . . . . . . . . . . . . . . . . . . . . . . . . . . . . . . . . . . . . . . . . . . . . . . . .  54 10.3.1. Using openocd-svd . . . . . . . . . . . . . . . . . . . . . . . . . . . . . . . . . . . . . . . . . . . . . . . . . . . . . . . . . . . . . . . . . . . . . . . .  54 Appendix A: Using Picoprobe . . . . . . . . . . . . . . . . . . . . . . . . . . . . . . . . . . . . . . . . . . . . . . . . . . . . . . . . . . . . . . . . . . . . . . . . . . . .  57 Build OpenOCD . . . . . . . . . . . . . . . . . . . . . . . . . . . . . . . . . . . . . . . . . . . . . . . . . . . . . . . . . . . . . . . . . . . . . . . . . . . . . . . . . . . . .  57 Linux. . . . . . . . . . . . . . . . . . . . . . . . . . . . . . . . . . . . . . . . . . . . . . . . . . . . . . . . . . . . . . . . . . . . . . . . . . . . . . . . . . . . . . . . . . .  57 Windows . . . . . . . . . . . . . . . . . . . . . . . . . . . . . . . . . . . . . . . . . . . . . . . . . . . . . . . . . . . . . . . . . . . . . . . . . . . . . . . . . . . . . . .  58 Mac . . . . . . . . . . . . . . . . . . . . . . . . . . . . . . . . . . . . . . . . . . . . . . . . . . . . . . . . . . . . . . . . . . . . . . . . . . . . . . . . . . . . . . . . . . .  59 Build and flash picoprobe . . . . . . . . . . . . . . . . . . . . . . . . . . . . . . . . . . . . . . . . . . . . . . . . . . . . . . . . . . . . . . . . . . . . . . . . . . . .  60 Picoprobe Wiring . . . . . . . . . . . . . . . . . . . . . . . . . . . . . . . . . . . . . . . . . . . . . . . . . . . . . . . . . . . . . . . . . . . . . . . . . . . . . . . . . . .  61 Install Picoprobe driver (only needed on Windows). . . . . . . . . . . . . . . . . . . . . . . . . . . . . . . . . . . . . . . . . . . . . . . . . . . . . . .  62 Using Picoprobe’s UART . . . . . . . . . . . . . . . . . . . . . . . . . . . . . . . . . . . . . . . . . . . . . . . . . . . . . . . . . . . . . . . . . . . . . . . . . . . . .  62 Linux. . . . . . . . . . . . . . . . . . . . . . . . . . . . . . . . . . . . . . . . . . . . . . . . . . . . . . . . . . . . . . . . . . . . . . . . . . . . . . . . . . . . . . . . . . .  62 Windows . . . . . . . . . . . . . . . . . . . . . . . . . . . . . . . . . . . . . . . . . . . . . . . . . . . . . . . . . . . . . . . . . . . . . . . . . . . . . . . . . . . . . . .  63 Mac . . . . . . . . . . . . . . . . . . . . . . . . . . . . . . . . . . . . . . . . . . . . . . . . . . . . . . . . . . . . . . . . . . . . . . . . . . . . . . . . . . . . . . . . . . .  64 Using Picoprobe with OpenOCD . . . . . . . . . . . . . . . . . . . . . . . . . . . . . . . . . . . . . . . . . . . . . . . . . . . . . . . . . . . . . . . . . . . . . . .  64 Appendix B: Using Picotool. . . . . . . . . . . . . . . . . . . . . . . . . . . . . . . . . . . . . . . . . . . . . . . . . . . . . . . . . . . . . . . . . . . . . . . . . . . . . .  65 Getting picotool . . . . . . . . . . . . . . . . . . . . . . . . . . . . . . . . . . . . . . . . . . . . . . . . . . . . . . . . . . . . . . . . . . . . . . . . . . . . . . . . . . . .  65 Building picotool. . . . . . . . . . . . . . . . . . . . . . . . . . . . . . . . . . . . . . . . . . . . . . . . . . . . . . . . . . . . . . . . . . . . . . . . . . . . . . . . . . . .  65 Using picotool. . . . . . . . . . . . . . . . . . . . . . . . . . . . . . . . . . . . . . . . . . . . . . . . . . . . . . . . . . . . . . . . . . . . . . . . . . . . . . . . . . . . . .  66 Display information . . . . . . . . . . . . . . . . . . . . . . . . . . . . . . . . . . . . . . . . . . . . . . . . . . . . . . . . . . . . . . . . . . . . . . . . . . . . . .  67 Save the program . . . . . . . . . . . . . . . . . . . . . . . . . . . . . . . . . . . . . . . . . . . . . . . . . . . . . . . . . . . . . . . . . . . . . . . . . . . . . . . .  69 Binary Information . . . . . . . . . . . . . . . . . . . . . . . . . . . . . . . . . . . . . . . . . . . . . . . . . . . . . . . . . . . . . . . . . . . . . . . . . . . . . . . . . .  70 Basic information . . . . . . . . . . . . . . . . . . . . . . . . . . . . . . . . . . . . . . . . . . . . . . . . . . . . . . . . . . . . . . . . . . . . . . . . . . . . . . . .  70 Pins . . . . . . . . . . . . . . . . . . . . . . . . . . . . . . . . . . . . . . . . . . . . . . . . . . . . . . . . . . . . . . . . . . . . . . . . . . . . . . . . . . . . . . . . . . .  70 Including Binary information . . . . . . . . . . . . . . . . . . . . . . . . . . . . . . . . . . . . . . . . . . . . . . . . . . . . . . . . . . . . . . . . . . . . . . .  71 Details . . . . . . . . . . . . . . . . . . . . . . . . . . . . . . . . . . . . . . . . . . . . . . . . . . . . . . . . . . . . . . . . . . . . . . . . . . . . . . . . . . . . . . . . .  71 Setting common fields from CMake . . . . . . . . . . . . . . . . . . . . . . . . . . . . . . . . . . . . . . . . . . . . . . . . . . . . . . . . . . . . . . . .  73 Appendix C: Documentation Release History . . . . . . . . . . . . . . . . . . . . . . . . . . . . . . . . . . . . . . . . . . . . . . . . . . . . . . . . . . . . . . .  74 Table of Contents 3
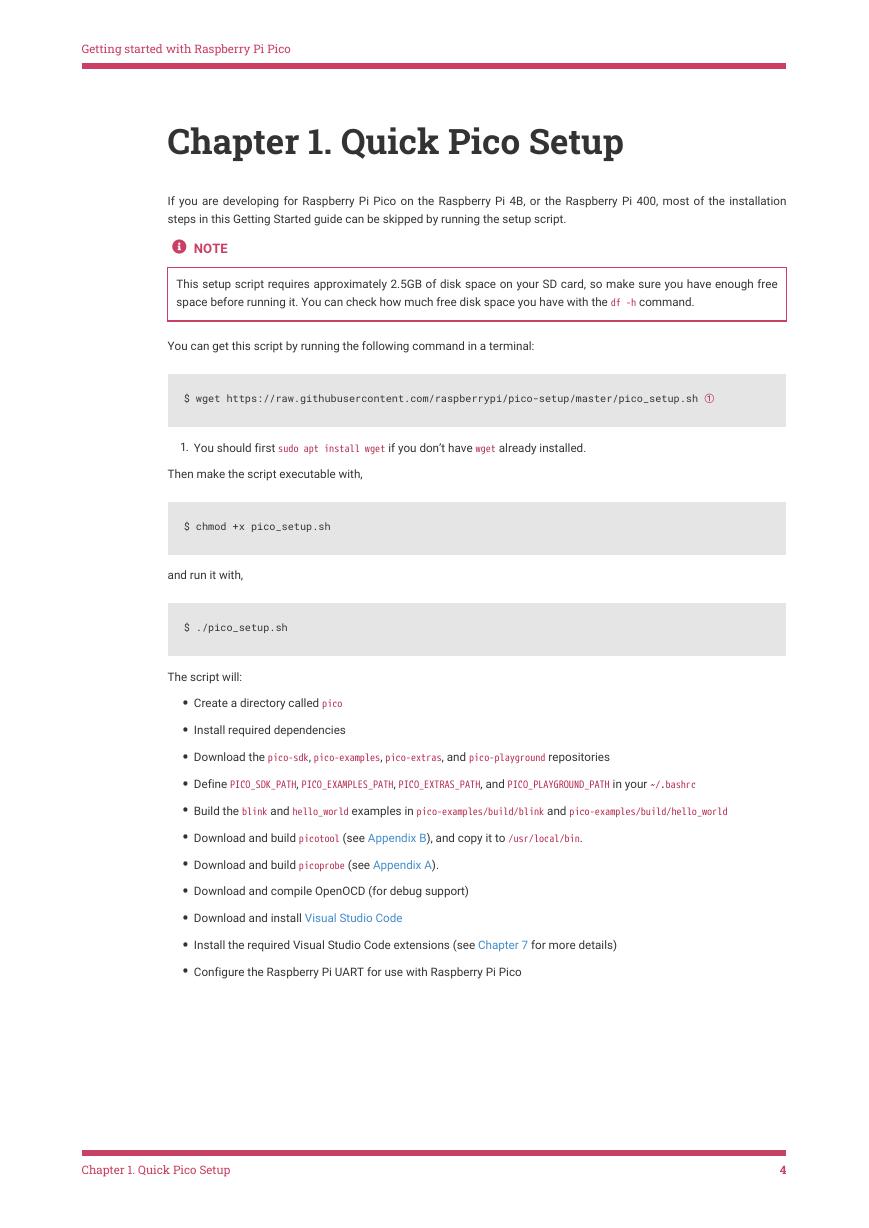
Getting started with Raspberry Pi Pico Chapter 1. Quick Pico Setup If you are developing for Raspberry Pi Pico on the Raspberry Pi 4B, or the Raspberry Pi 400, most of the installation steps in this Getting Started guide can be skipped by running the setup script.  NOTE This setup script requires approximately 2.5GB of disk space on your SD card, so make sure you have enough free space before running it. You can check how much free disk space you have with the df -h command. You can get this script by running the following command in a terminal: $ wget https://raw.githubusercontent.com/raspberrypi/pico-setup/master/pico_setup.sh ① 1. You should first sudo apt install wget if you don’t have wget already installed. Then make the script executable with, $ chmod +x pico_setup.sh and run it with, $ ./pico_setup.sh The script will: • Create a directory called pico • Install required dependencies • Download the pico-sdk, pico-examples, pico-extras, and pico-playground repositories • Define PICO_SDK_PATH, PICO_EXAMPLES_PATH, PICO_EXTRAS_PATH, and PICO_PLAYGROUND_PATH in your ~/.bashrc • Build the blink and hello_world examples in pico-examples/build/blink and pico-examples/build/hello_world • Download and build picotool (see Appendix B), and copy it to /usr/local/bin. • Download and build picoprobe (see Appendix A). • Download and compile OpenOCD (for debug support) • Download and install Visual Studio Code • Install the required Visual Studio Code extensions (see Chapter 7 for more details) • Configure the Raspberry Pi UART for use with Raspberry Pi Pico Chapter 1. Quick Pico Setup 4
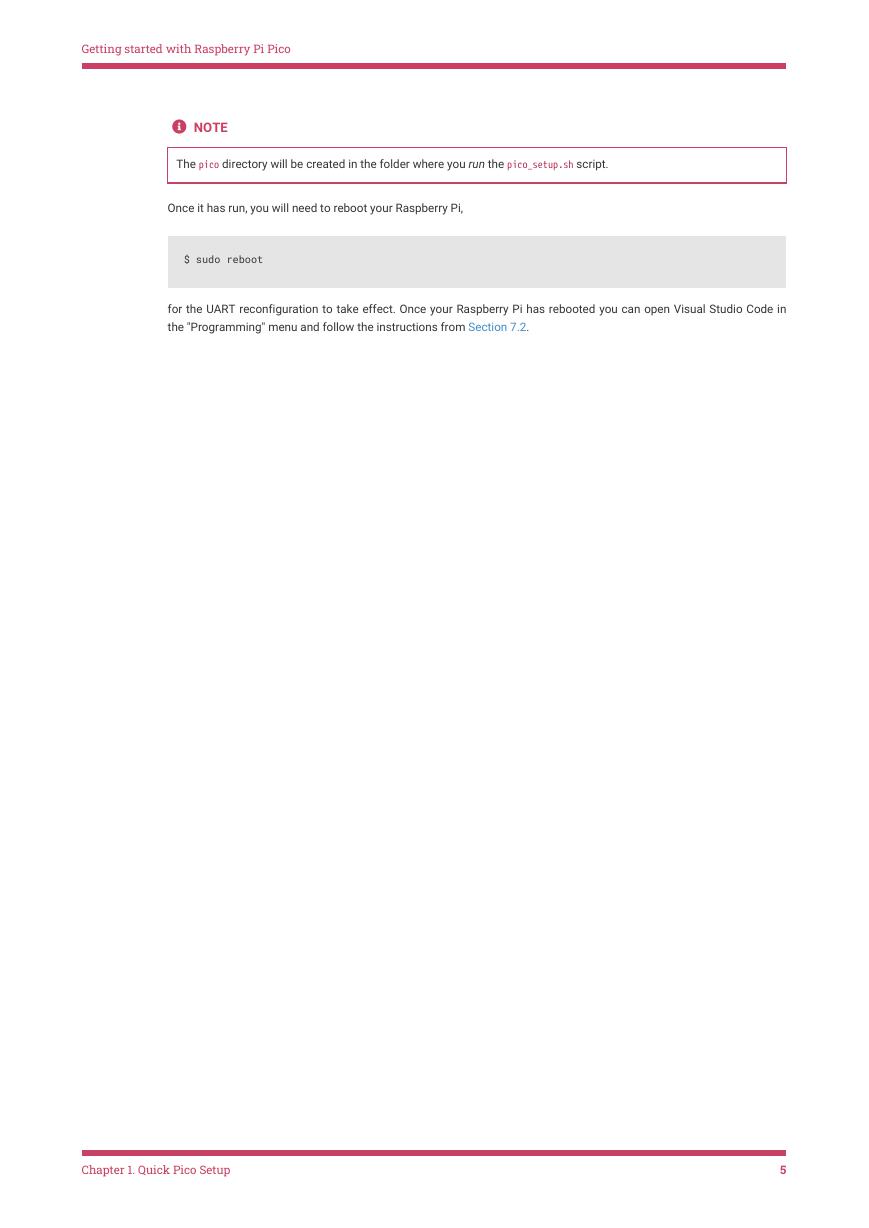
Getting started with Raspberry Pi Pico  NOTE The pico directory will be created in the folder where you run the pico_setup.sh script. Once it has run, you will need to reboot your Raspberry Pi, $ sudo reboot for the UART reconfiguration to take effect. Once your Raspberry Pi has rebooted you can open Visual Studio Code in the "Programming" menu and follow the instructions from Section 7.2. Chapter 1. Quick Pico Setup 5
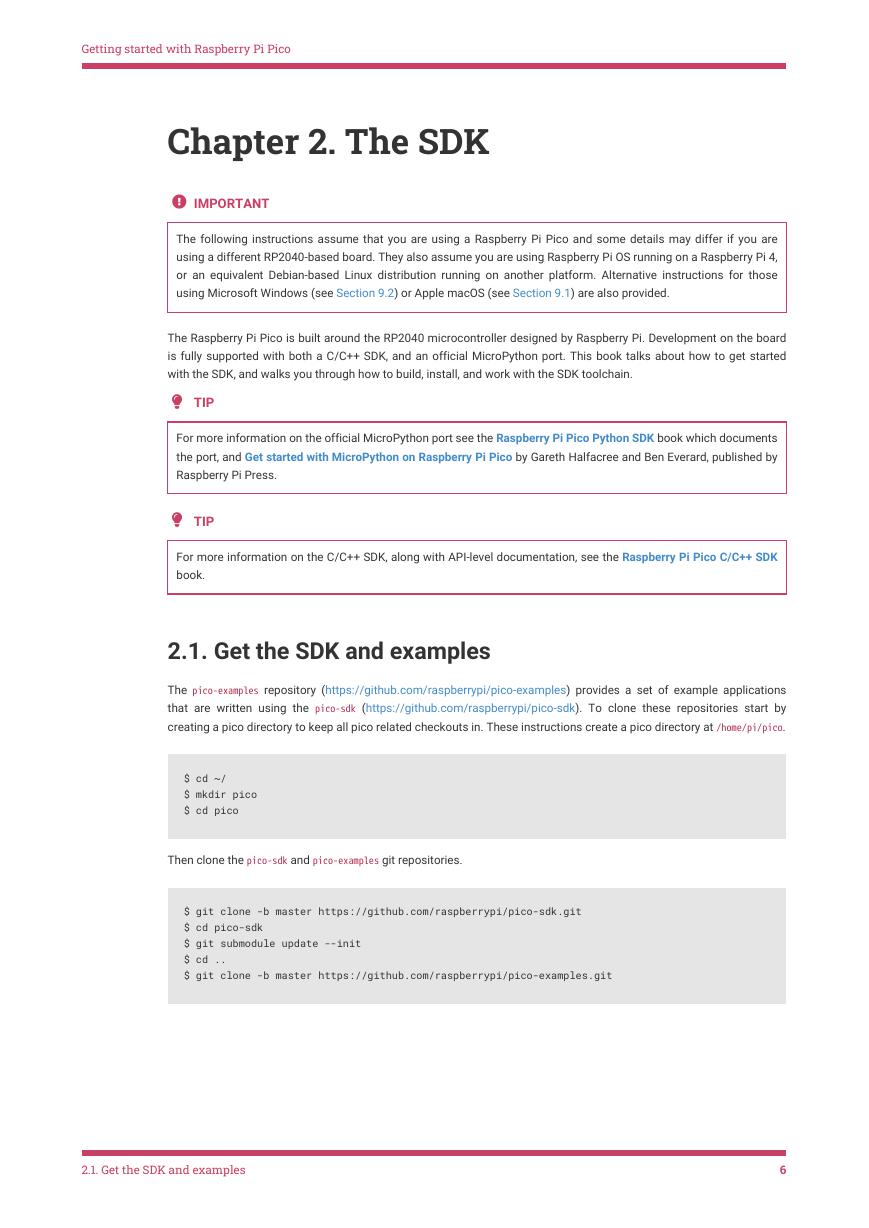
Getting started with Raspberry Pi Pico Chapter 2. The SDK  IMPORTANT The following instructions assume that you are using a Raspberry Pi Pico and some details may differ if you are using a different RP2040-based board. They also assume you are using Raspberry Pi OS running on a Raspberry Pi 4, or an equivalent Debian-based Linux distribution running on another platform. Alternative instructions for those using Microsoft Windows (see Section 9.2) or Apple macOS (see Section 9.1) are also provided. The Raspberry Pi Pico is built around the RP2040 microcontroller designed by Raspberry Pi. Development on the board is fully supported with both a C/C++ SDK, and an official MicroPython port. This book talks about how to get started with the SDK, and walks you through how to build, install, and work with the SDK toolchain.  TIP For more information on the official MicroPython port see the Raspberry Pi Pico Python SDK book which documents the port, and Get started with MicroPython on Raspberry Pi Pico by Gareth Halfacree and Ben Everard, published by Raspberry Pi Press.  TIP For more information on the C/C++ SDK, along with API-level documentation, see the Raspberry Pi Pico C/C++ SDK book. 2.1. Get the SDK and examples The pico-examples repository (https://github.com/raspberrypi/pico-examples) provides a set of example applications that are written using the pico-sdk (https://github.com/raspberrypi/pico-sdk). To clone these repositories start by creating a pico directory to keep all pico related checkouts in. These instructions create a pico directory at /home/pi/pico. $ cd ~/ $ mkdir pico $ cd pico Then clone the pico-sdk and pico-examples git repositories. $ git clone -b master https://github.com/raspberrypi/pico-sdk.git $ cd pico-sdk $ git submodule update --init $ cd .. $ git clone -b master https://github.com/raspberrypi/pico-examples.git 2.1. Get the SDK and examples 6
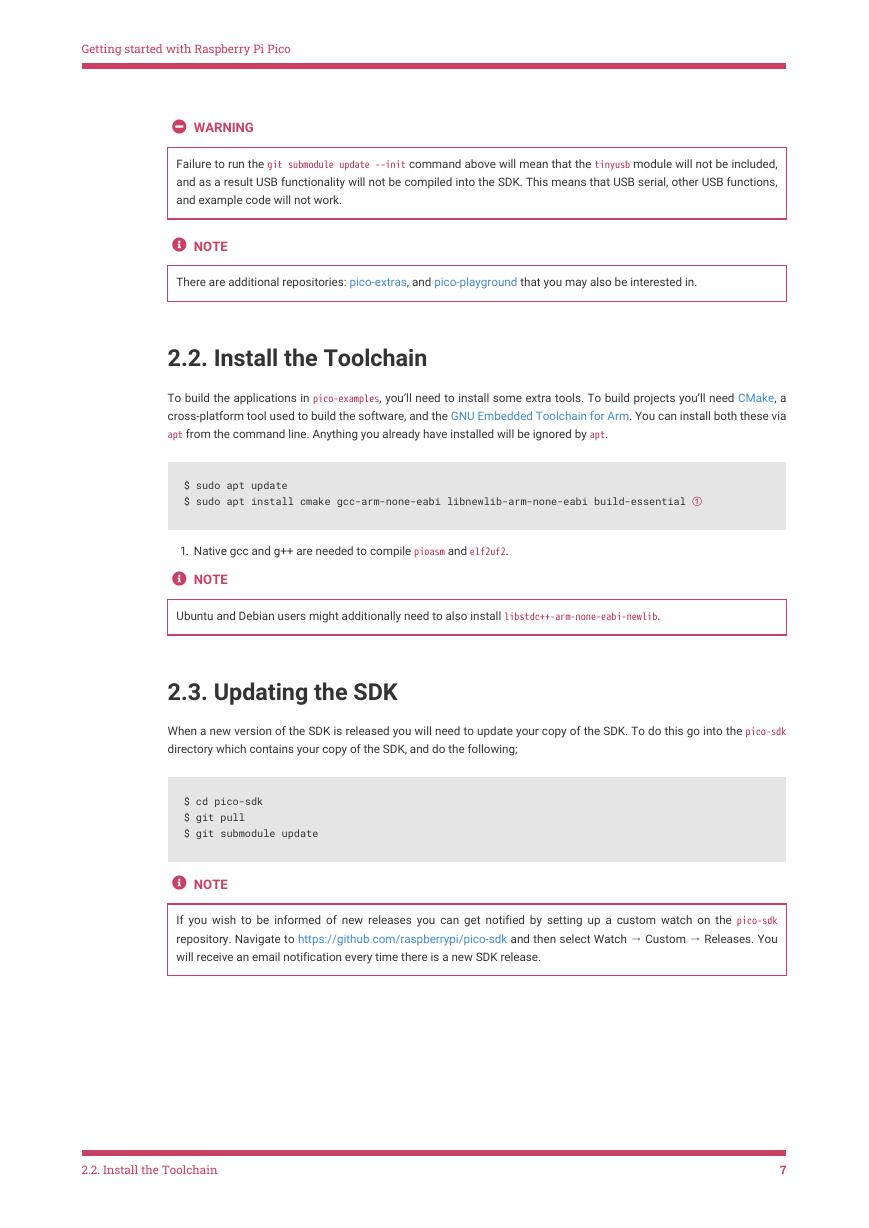
Getting started with Raspberry Pi Pico  WARNING Failure to run the git submodule update --init command above will mean that the tinyusb module will not be included, and as a result USB functionality will not be compiled into the SDK. This means that USB serial, other USB functions, and example code will not work.  NOTE There are additional repositories: pico-extras, and pico-playground that you may also be interested in. 2.2. Install the Toolchain To build the applications in pico-examples, you’ll need to install some extra tools. To build projects you’ll need CMake, a cross-platform tool used to build the software, and the GNU Embedded Toolchain for Arm. You can install both these via apt from the command line. Anything you already have installed will be ignored by apt. $ sudo apt update $ sudo apt install cmake gcc-arm-none-eabi libnewlib-arm-none-eabi build-essential ① 1. Native gcc and g++ are needed to compile pioasm and elf2uf2.  NOTE Ubuntu and Debian users might additionally need to also install libstdc++-arm-none-eabi-newlib. 2.3. Updating the SDK When a new version of the SDK is released you will need to update your copy of the SDK. To do this go into the pico-sdk directory which contains your copy of the SDK, and do the following; $ cd pico-sdk $ git pull $ git submodule update  NOTE If you wish to be informed of new releases you can get notified by setting up a custom watch on the pico-sdk repository. Navigate to https://github.com/raspberrypi/pico-sdk and then select Watch → Custom → Releases. You will receive an email notification every time there is a new SDK release. 2.2. Install the Toolchain 7
分享到:
收藏