Bear Paw 1200
USER’S GUIDE
The TWAIN Dialog Box
Appendices
2
Scanning Methods
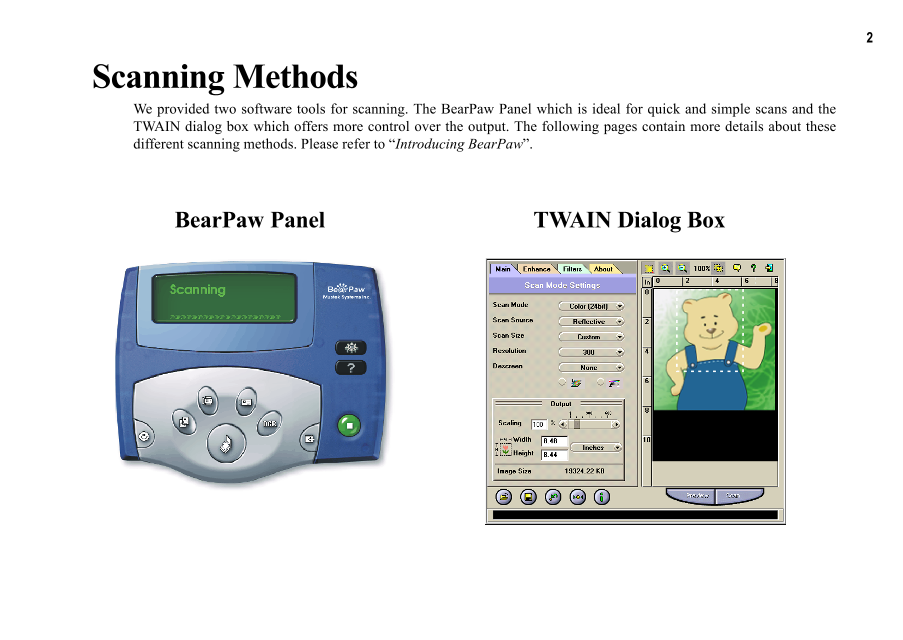
We provided two software tools for scanning. The BearPaw Panel which is ideal for quick and simple scans and the
TWAIN dialog box which offers more control over the output. The following pages contain more details about these
different scanning methods. Please refer to “Introducing BearPaw”.
BearPaw Panel TWAIN Dialog Box
3
The TWAIN Dialog Box
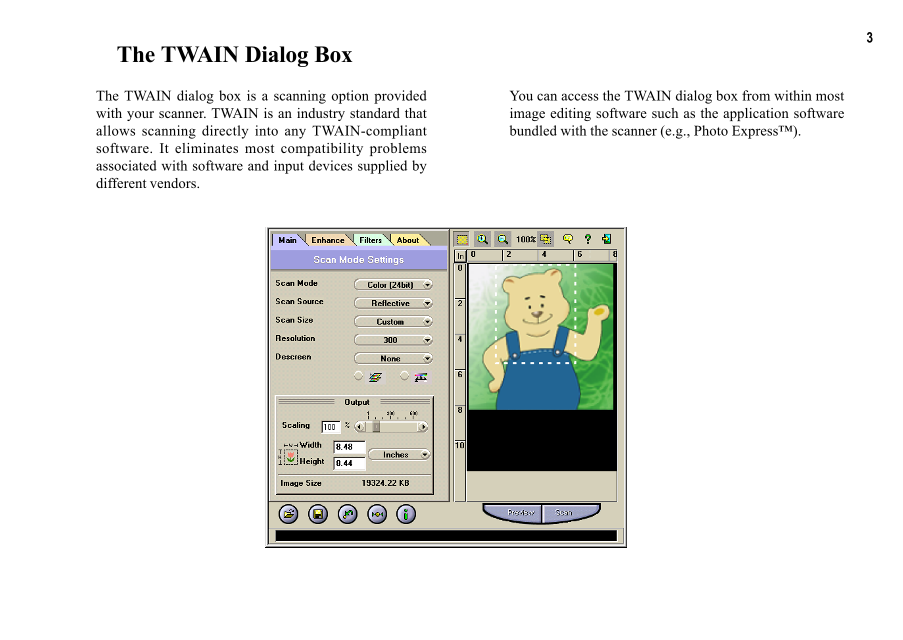
The TWAIN dialog box is a scanning option provided You can access the TWAIN dialog box from within most
with your scanner. TWAIN is an industry standard that image editing software such as the application software
allows scanning directly into any TWAIN-compliant bundled with the scanner (e.g., Photo Express™).
software. It eliminates most compatibility problems
associated with software and input devices supplied by
different vendors.
4
To Acquire the TWAIN Dialog Box
You can acquire the TWAIN dialog box from within any To acquire the TWAIN dialog box in other TWAIN-
TWAIN-compliant software (i.e., Picture Publisher™). To compliant image editing software, please refer to the On-
acquire the TWAIN dialog box, using Photo Express as an line Help System, Software Reference.
example, the steps are:
1. Launch Windows®.
2. Launch Photo Express™ (TWAIN-compliant program).
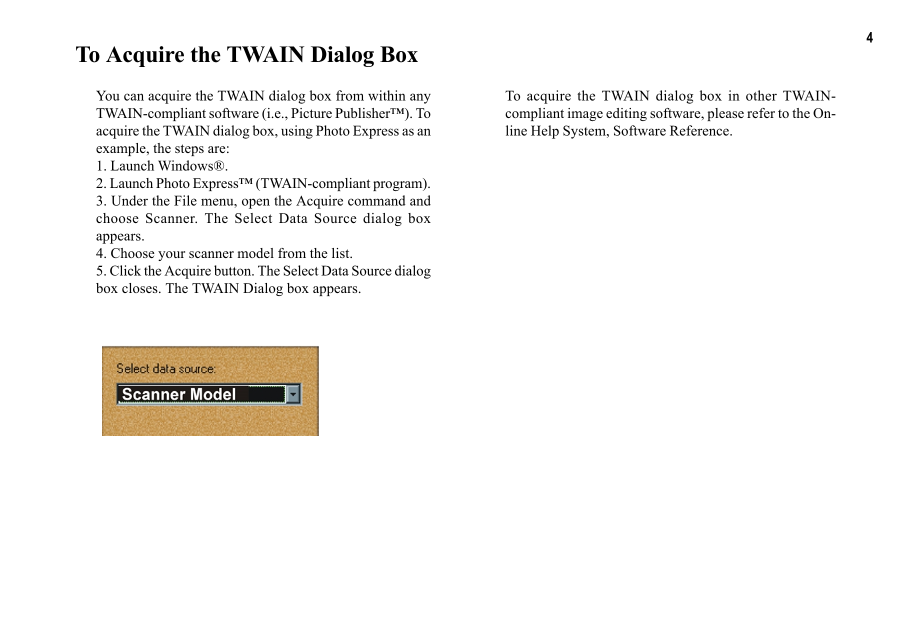
3. Under the File menu, open the Acquire command and
choose Scanner. The Select Data Source dialog box
appears.
4. Choose your scanner model from the list.
5. Click the Acquire button. The Select Data Source dialog
box closes. The TWAIN Dialog box appears.
5
Performing a Simple Scan (1) Place the Document/Image
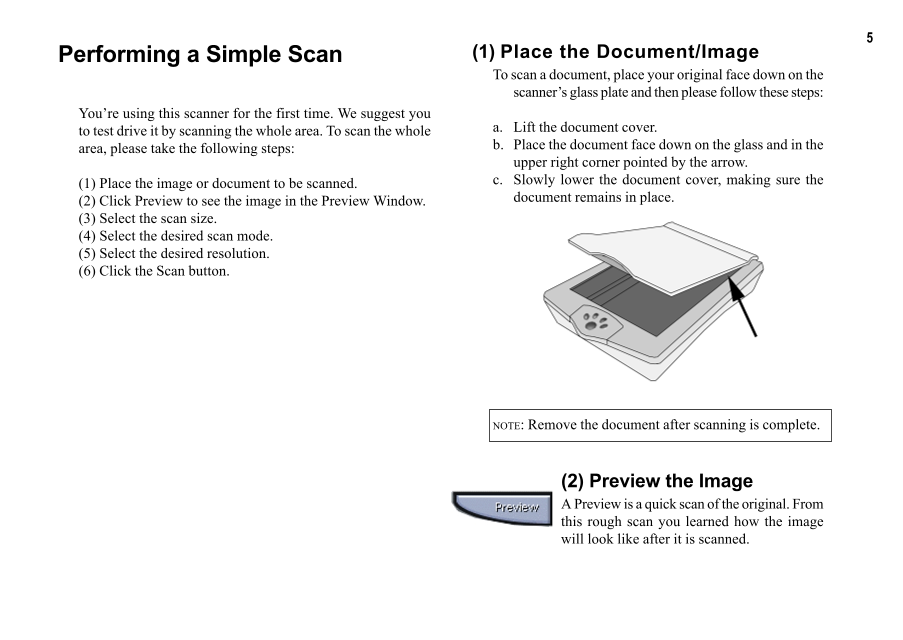
To scan a document, place your original face down on the
scanner’s glass plate and then please follow these steps:
You’re using this scanner for the first time. We suggest you
to test drive it by scanning the whole area. To scan the whole a. Lift the document cover.
area, please take the following steps: b. Place the document face down on the glass and in the
upper right corner pointed by the arrow.
(1) Place the image or document to be scanned. c. Slowly lower the document cover, making sure the
(2) Click Preview to see the image in the Preview Window. document remains in place.
(3) Select the scan size.
(4) Select the desired scan mode.
(5) Select the desired resolution.
(6) Click the Scan button.
NOTE: Remove the document after scanning is complete.
(2) Preview the Image
A Preview is a quick scan of the original. From
this rough scan you learned how the image
will look like after it is scanned.
6
(3) Select the Scan Size (6) Execute the Scan
From the list of available paper sizes, select the size of The scan button is used once you have
the document you wish to scan. If you want to scan the completed the preview, determined the
whole area, select A4. Custom will automatically be scan region and have selected the final scan
selected when you use the Crop Frame to change the settings to be used for the scan.
image area to be scanned.
Congratulations! You’ve scanned your first image. In
(4) Set the Scan Mode the following sections. We’ll show you how to modify
The Scan Mode determines how the settings so this scanner meets your needs better.
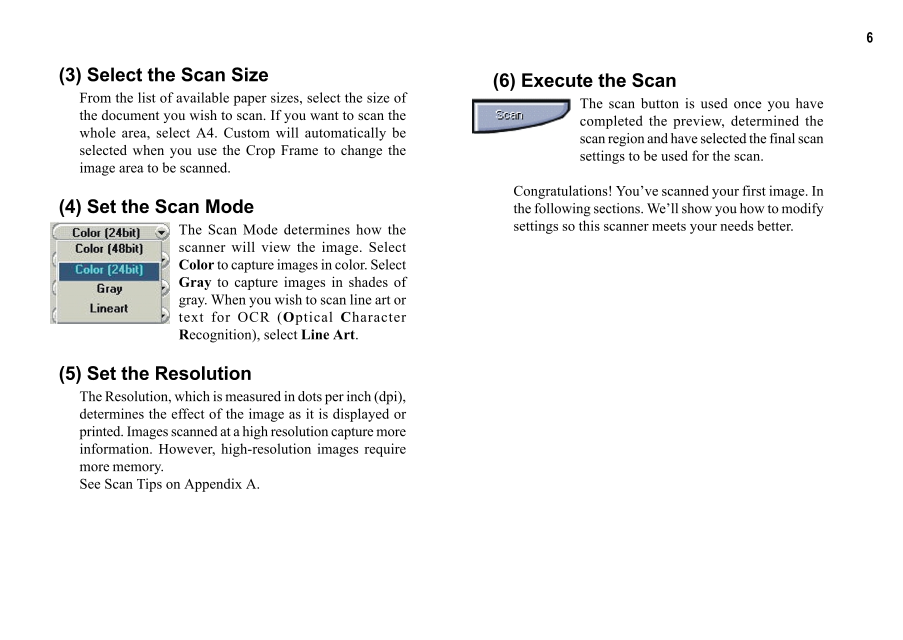
scanner will view the image. Select
Color to capture images in color. Select
Gray to capture images in shades of
gray. When you wish to scan line art or
text for OCR (Optical Character
Recognition), select Line Art.
(5) Set the Resolution
The Resolution, which is measured in dots per inch (dpi),
determines the effect of the image as it is displayed or
printed. Images scanned at a high resolution capture more
information. However, high-resolution images require
more memory.
See Scan Tips on Appendix A.
7
The TWAIN Dialog Box (Details)
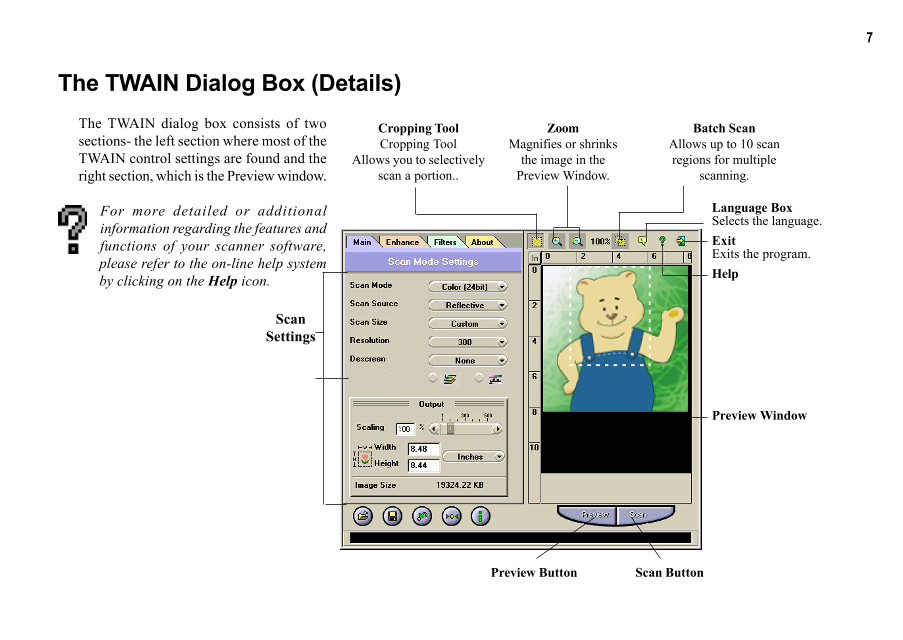
The TWAIN dialog box consists of two Cropping Tool Zoom Batch Scan
sections- the left section where most of the Cropping Tool Magnifies or shrinks Allows up to 10 scan
TWAIN control settings are found and the Allows you to selectively the image in the regions for multiple
right section, which is the Preview window. scan a portion.. Preview Window. scanning.
For more detailed or additional Language Box
information regarding the features and Selects the language.
functions of your scanner software, Exit
Exits the program.
please refer to the on-line help system
by clicking on the Help icon. Help
Scan
Settings
Preview Window
Preview Button Scan Button
8
The Preview Window & Buttons
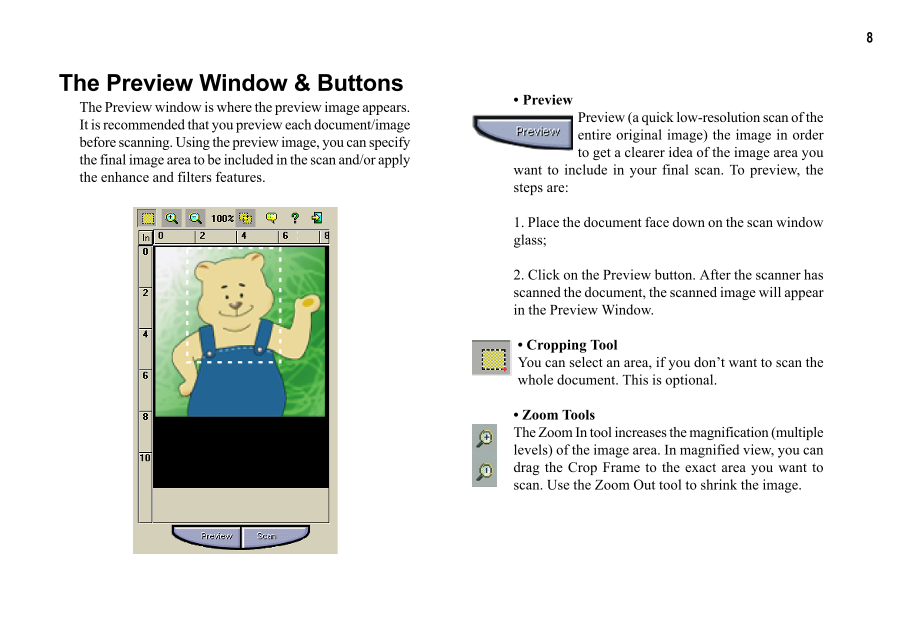
The Preview window is where the preview image appears. • Preview
It is recommended that you preview each document/image Preview (a quick low-resolution scan of the
before scanning. Using the preview image, you can specify entire original image) the image in order
the final image area to be included in the scan and/or apply to get a clearer idea of the image area you
the enhance and filters features. want to include in your final scan. To preview, the
steps are:
1. Place the document face down on the scan window
glass;
2. Click on the Preview button. After the scanner has
scanned the document, the scanned image will appear
in the Preview Window.
• Cropping Tool
You can select an area, if you don’t want to scan the
whole document. This is optional.
• Zoom Tools
The Zoom In tool increases the magnification (multiple
levels) of the image area. In magnified view, you can
drag the Crop Frame to the exact area you want to
scan. Use the Zoom Out tool to shrink the image.


 V2版本原理图(Capacitive-Fingerprint-Reader-Schematic_V2).pdf
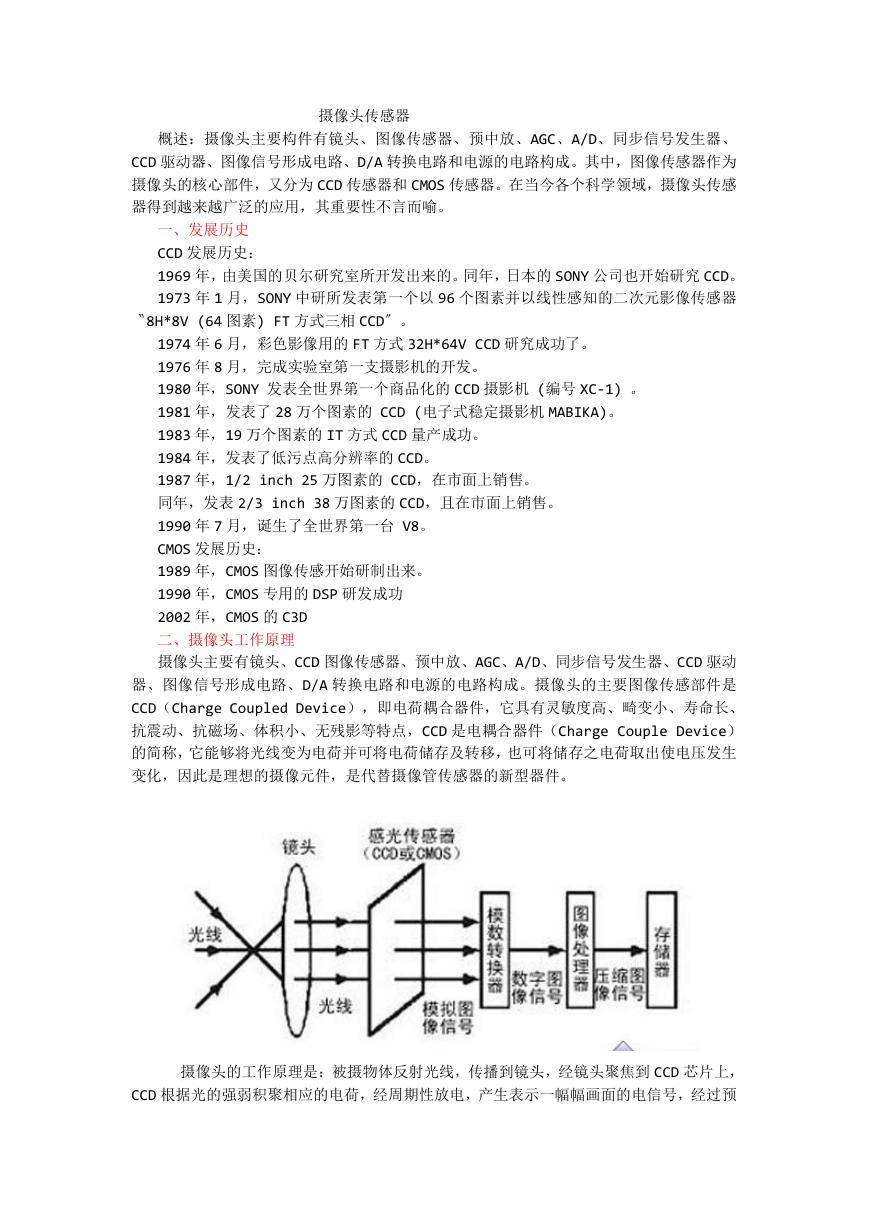 摄像头工作原理.doc
 VL53L0X简要说明(En.FLVL53L00216).pdf
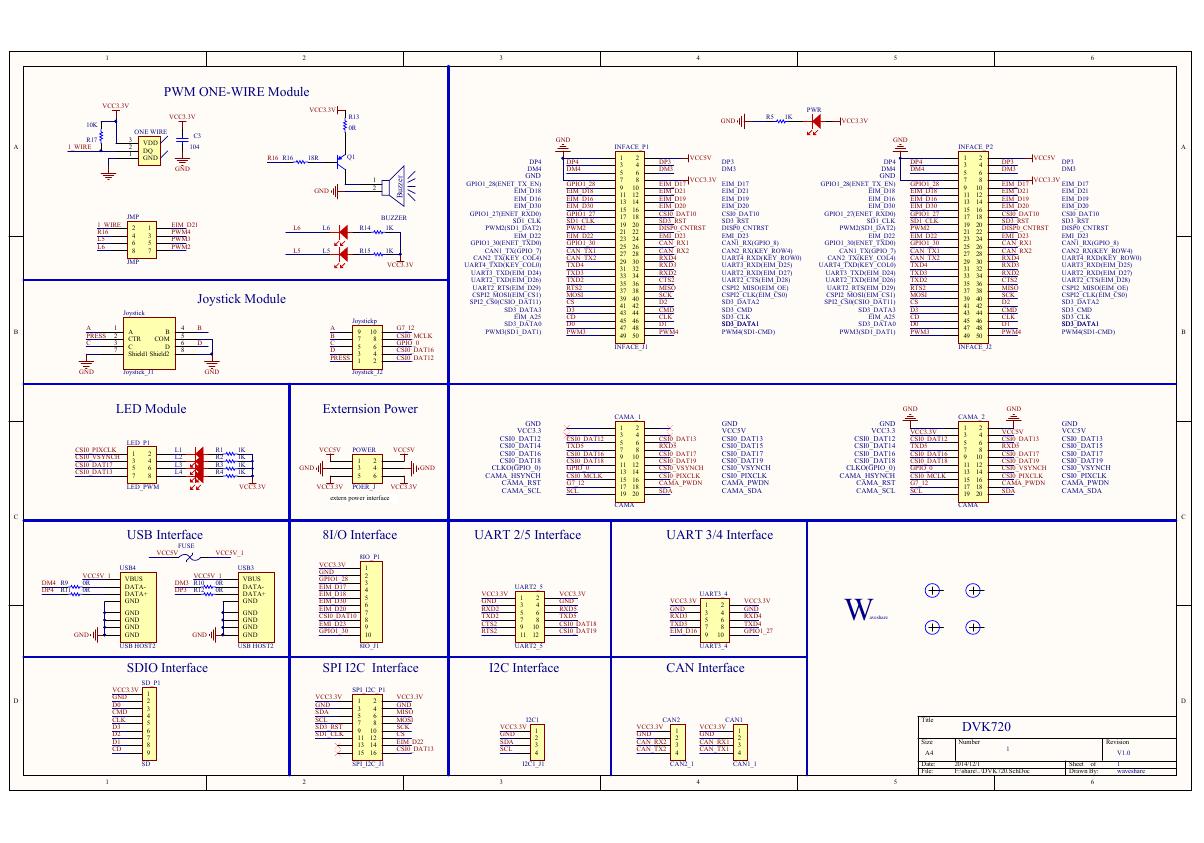 原理图(DVK720-Schematic).pdf
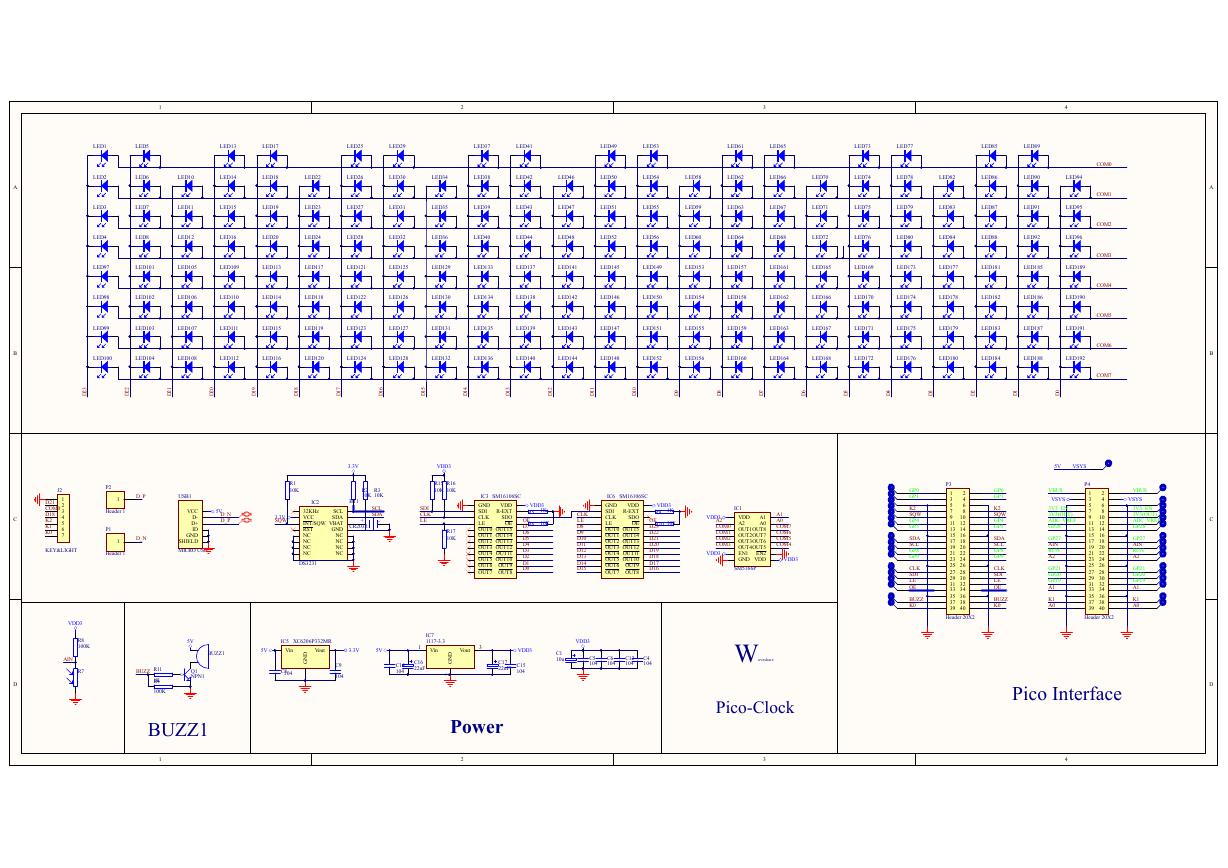 原理图(Pico-Clock-Green-Schdoc).pdf
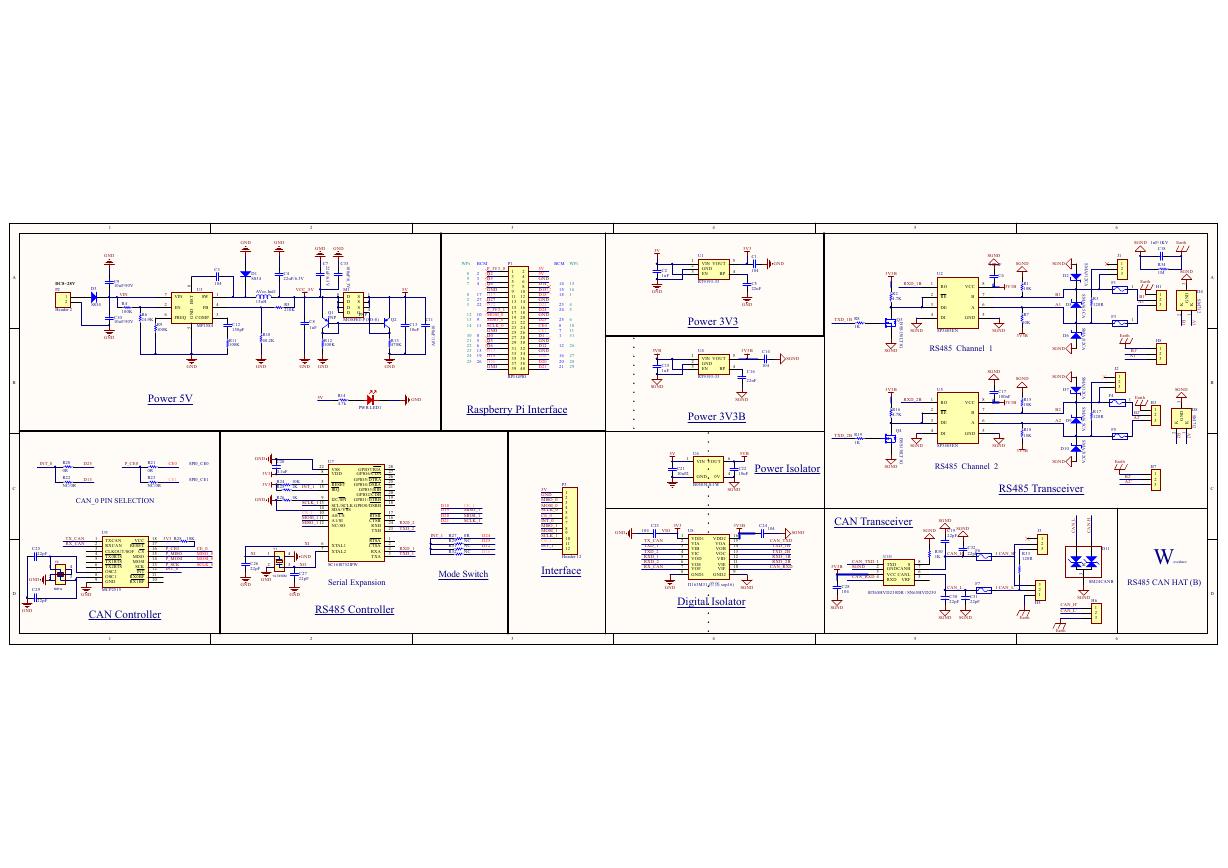 原理图(RS485-CAN-HAT-B-schematic).pdf
 File:SIM7500_SIM7600_SIM7800 Series_SSL_Application Note_V2.00.pdf
 ADS1263(Ads1262).pdf
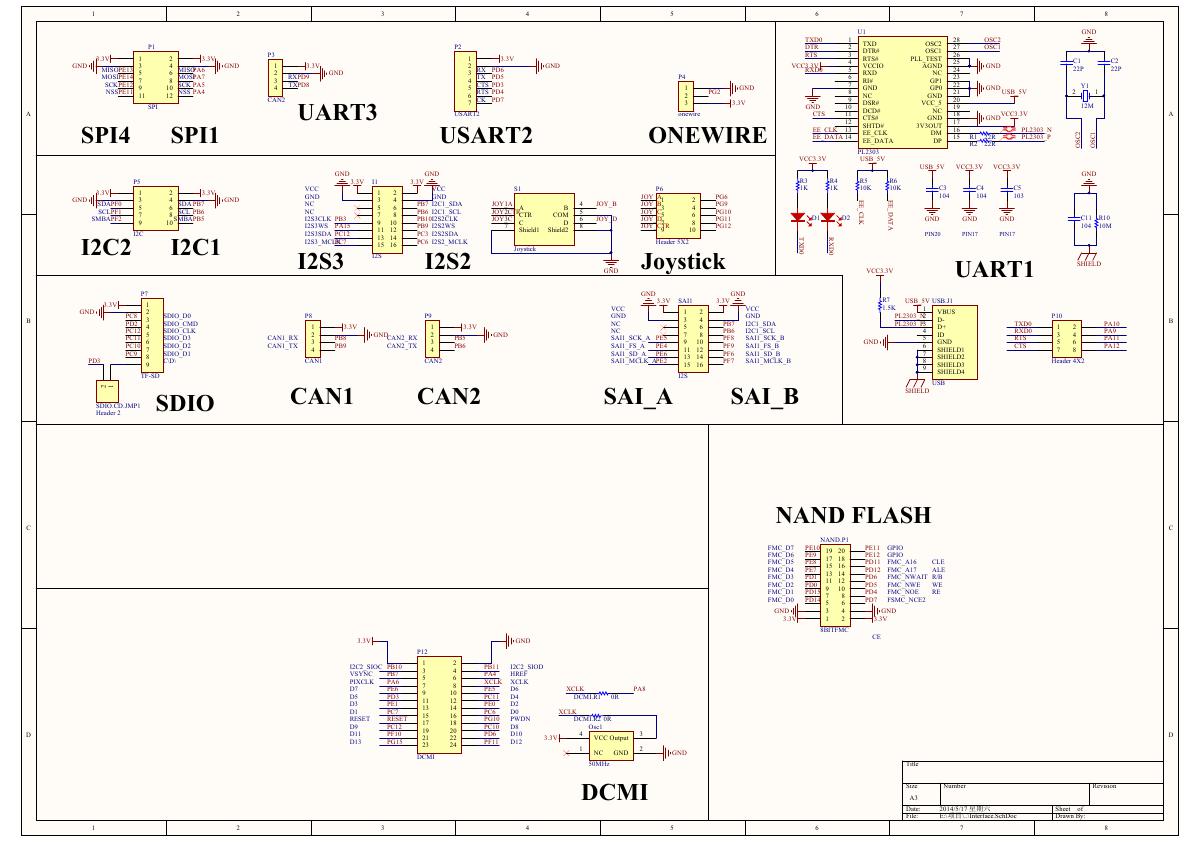 原理图(Open429Z-D-Schematic).pdf
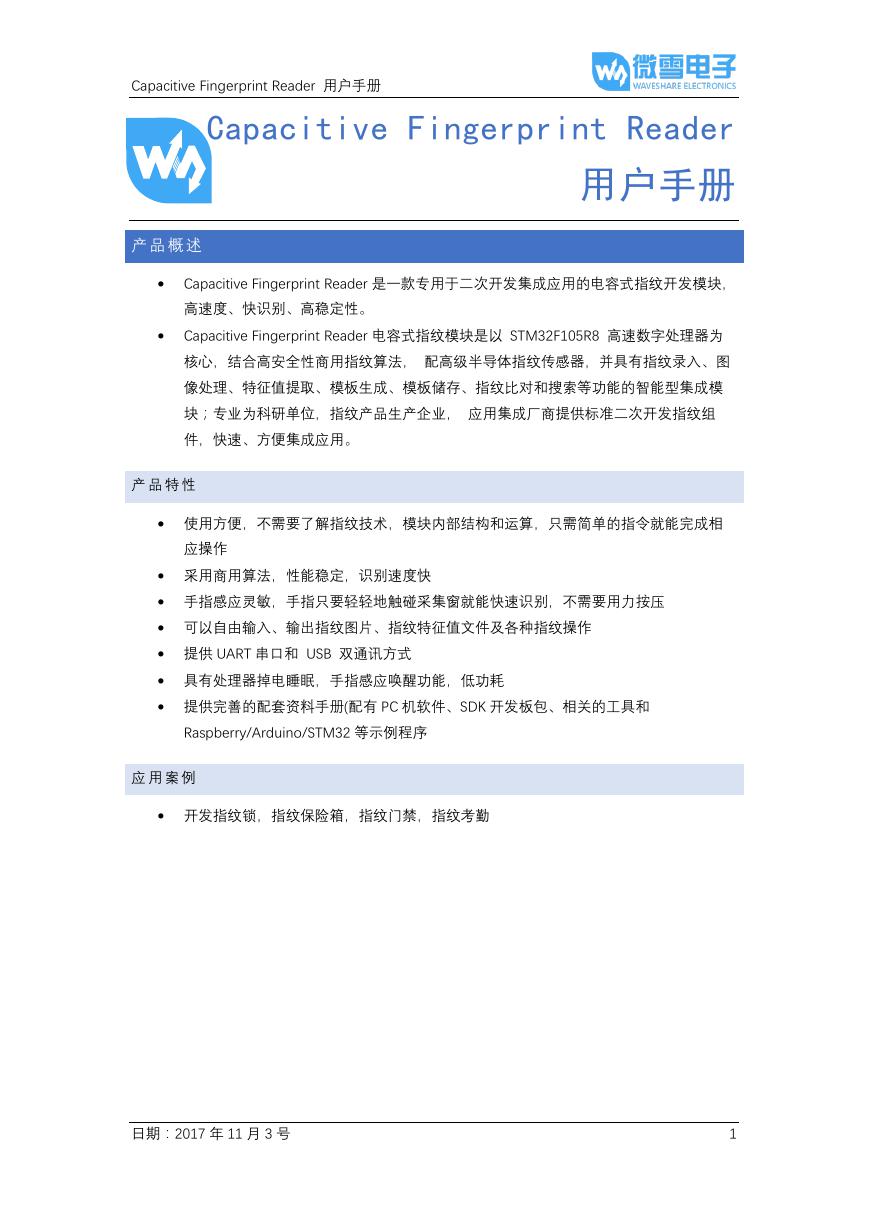 用户手册(Capacitive_Fingerprint_Reader_User_Manual_CN).pdf
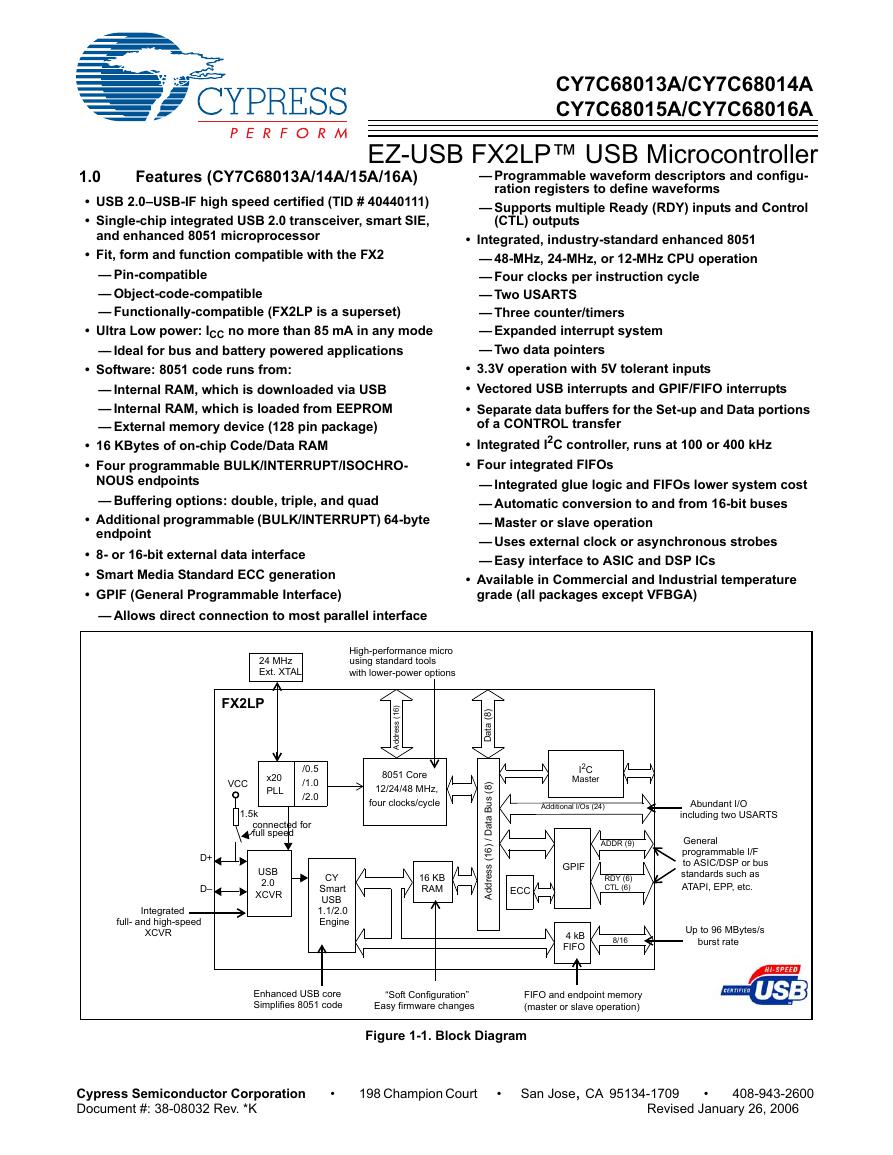 CY7C68013A(英文版)(CY7C68013A).pdf
 TechnicalReference_Dem.pdf