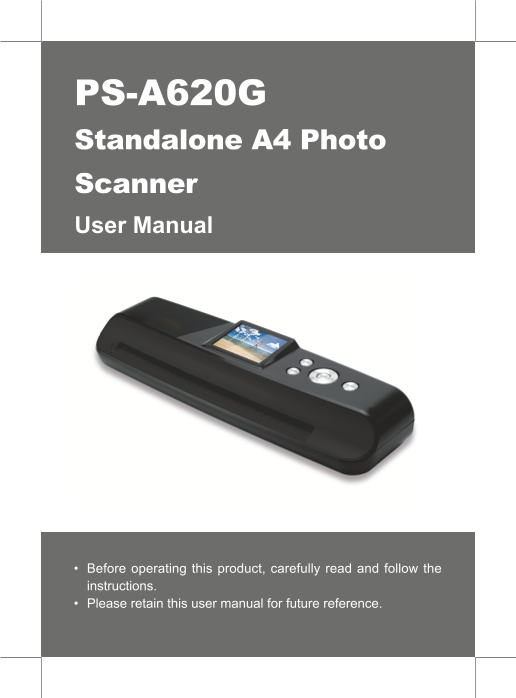
PS-A620G
Standalone A4 Photo
Scanner
User Manual
• Before operating this product, carefully read and follow the
instructions.
• Please retain this user manual for future reference.
CONTENTS
SAFETY INFORMATION................................................3
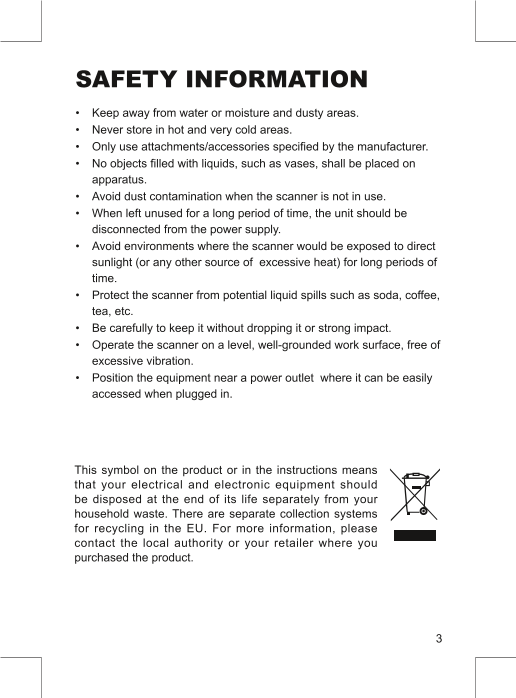
PACKAGE CONTENTS..................................................4
SCANNER PARTS..........................................................5
SCANNER SETUP..........................................................6
- Connecting to Power...................................................................6
- Turning on/off the Scanner................................................................6
- Inserting a Flash Memory Device......................................................6
SCAN AND PLAYBACK.................................................7
- Setting Scan/Playback mode............................................................7
- Scan Mode Settings..........................................................................7
- Inserting a Photo/Document.............................................................8
- Using the Photo Protective Sleeve....................................................8
- Scanning JPEG, single-page PDF, and Multipage PDF fi le...............9
- Playing back the Scanned Images...............................................10
- Zoom.........................................................................................10
- Playback Settings...........................................................................11
TRANSFERRING THE SCANNED FILES TO PC.........12
- Disconnecting the Scanner from PC...............................................12
CLEANING AND CALIBRATING THE SCANNER.......13
SPECIFICATION..........................................................15
HELPFUL HINTS.........................................................15
2
SAFETY INFORMATION
• Keep away from water or moisture and dusty areas.
• Never store in hot and very cold areas.
• Only use attachments/accessories specifi ed by the manufacturer.
• No objects fi lled with liquids, such as vases, shall be placed on
apparatus.
• Avoid dust contamination when the scanner is not in use.
• When left unused for a long period of time, the unit should be
disconnected from the power supply.
• Avoid environments where the scanner would be exposed to direct
sunlight (or any other source of excessive heat) for long periods of
time.
• Protect the scanner from potential liquid spills such as soda, coffee,
tea, etc.
• Be carefully to keep it without dropping it or strong impact.
• Operate the scanner on a level, well-grounded work surface, free of
excessive vibration.
• Position the equipment near a power outlet where it can be easily
accessed when plugged in.
This symbol on the product or in the instructions means
that your electrical and electronic equipment should
be disposed at the end of its life separately from your
household waste. There are separate collection systems
for recycling in the EU. For more information, please
contact the local authority or your retailer where you
purchased the product.
3
Thank you for purchasing this Standalone A4 Photo Scanner.
With this new standalone scan-and-view technology, scanning is easy!
There is no software installation or PC needed. You can preview the
scanned images instantaneously on the 2.4” display screen, and store
them directly into a SD/SDHC/MMC memory card or USB fl ash drive.
It makes your scanning experience easier and enjoyable. You can also
transfer the scanned images to your PC via mini USB port. Please read
the following instructions for more details.
PACKAGE CONTENTS
Please remove this sheet before use
Entfernen Sie bitte dieses Blatt vor Benutzung
S.V.P. Retirer cette notice avant utilization
Перед использованием, пожалуйста, удалите данный лист
Scanner with spacer sheet(*) mini USB Cable Cleaning Stick
(*) Please remove the spacer
sheet before use. Always
replace it after use.
Power Adapter Quick Guide User Manual
Insert this card with the WHITE side down to the scanner.
Insérez cette carte dans le scanner en orientant la face BLANCHE
vers le bas.
Schieben Sie diese Karte mit der WEISSEN Seite nach unten in den ( )
Scanner.
Insert this card with the WHITE side down to the scanner. Калибровочная карта
Insérez cette carte dans le scanner en orientant la face BLANCHE
vers le bas.
Schieben Sie diese Karte mit der WEISSEN Seite nach unten in den ( ) Вставьте данную карту в сканер БЕЛОЙ стороной вниз.
Scanner.
Калибровочная карта
Вставьте данную карту в сканер БЕЛОЙ стороной вниз.
Inisira este cartão com o lado BRANCO voltado para baixo. المعايرة بطاقة
Cartão de calibragem متجًها األبيض الجانب يكون بحيث البطاقة هذه أدخل
Inserte esta tarjeta en el escáner con la cara BLANCA hacia abajo. الضوئية. الماسحة تجاه ألسفل
82-329-00070 Inisira este cartão com o lado BRANCO voltado para baixo. المعايرة بطاقة
Cartão de calibragem متجًها األبيض الجانب يكون بحيث البطاقة هذه أدخل
Inserte esta tarjeta en el escáner con la cara BLANCA hacia abajo. الضوئية. الماسحة تجاه ألسفل
82-329-00071
Calibration Paper Cleaning Paper Photo Protective
Sleeve
4
B
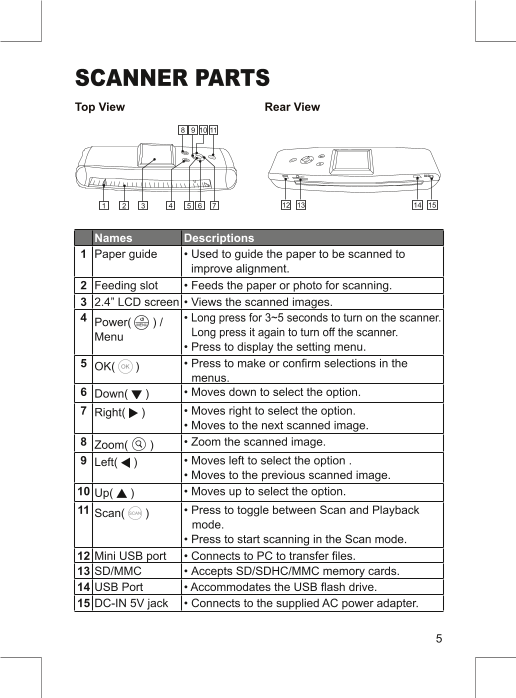
SCANNER PARTS
Top View Rear View
8 9 10 11
1 2 3 4 5 6 7 12 13 14 15
Names Descriptions
1 Paper guide • Used to guide the paper to be scanned to
improve alignment.
2 Feeding slot • Feeds the paper or photo for scanning.
3 2.4” LCD screen • Views the scanned images.
4 Power( ) / • Long press for 3~5 seconds to turn on the scanner.
MENU
Menu Long press it again to turn off the scanner.
• Press to display the setting menu.
5 OK( OK ) • Press to make or confi rm selections in the
menus.
6 Down( ) • Moves down to select the option.
7 Right( ) • Moves right to select the option.
• Moves to the next scanned image.
8 Zoom( ) • Zoom the scanned image.
9 Left( ) • Moves left to select the option .
• Moves to the previous scanned image.
10 Up( ) • Moves up to select the option.
11 Scan( SCAN ) • Press to toggle between Scan and Playback
mode.
• Press to start scanning in the Scan mode.
12 Mini USB port • Connects to PC to transfer fi les.
13 SD/MMC • Accepts SD/SDHC/MMC memory cards.
14 USB Port • Accommodates the USB fl ash drive.
15 DC-IN 5V jack • Connects to the supplied AC power adapter.
5
SCANNER SETUP
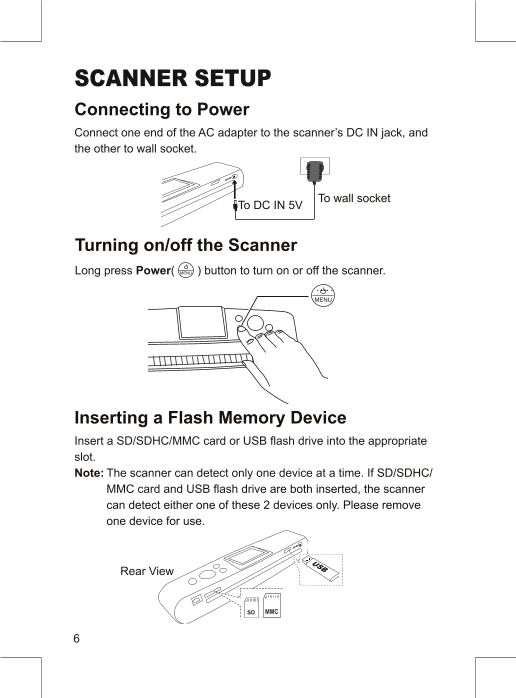
Connecting to Power
Connect one end of the AC adapter to the scanner’s DC IN jack, and
the other to wall socket.
To DC IN 5V To wall socket
Turning on/off the Scanner
Long press Power( MENU ) button to turn on or off the scanner.
MMEENNUU
Inserting a Flash Memory Device
Insert a SD/SDHC/MMC card or USB fl ash drive into the appropriate
slot.
Note: The scanner can detect only one device at a time. If SD/SDHC/
MMC card and USB fl ash drive are both inserted, the scanner
can detect either one of these 2 devices only. Please remove
one device for use.
Rear View
6
SCAN AND PLAYBACK
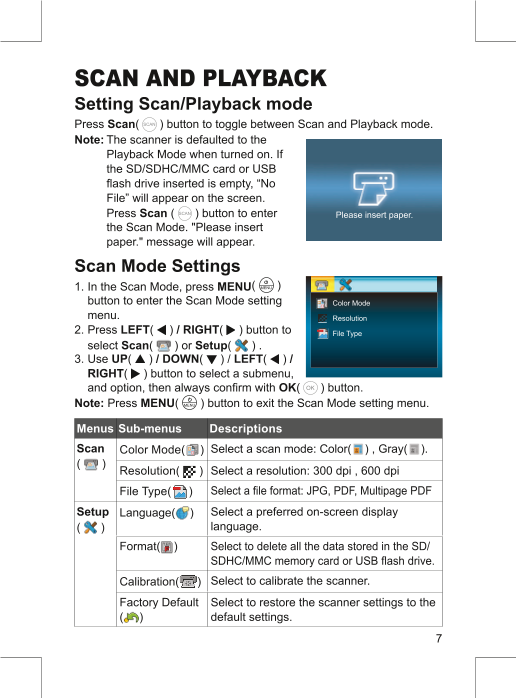
Setting Scan/Playback mode
Press Scan( SCAN ) button to toggle between Scan and Playback mode.
Note: The scanner is defaulted to the
Playback Mode when turned on. If
the SD/SDHC/MMC card or USB
fl ash drive inserted is empty, “No
File” will appear on the screen.
Press Scan ( SCAN ) button to enter Please insert paper.
the Scan Mode. "Please insert
paper." message will appear.
Scan Mode Settings
1. In the Scan Mode, press MENU( MENU )
button to enter the Scan Mode setting Color Mode
menu. Resolution
2. Press LEFT( ) / RIGHT( ) button to File Type
select Scan( ) or Setup( ) .
3. Use UP( ) / DOWN( ) / LEFT( ) /
RIGHT( ) button to select a submenu,
and option, then always confi rm with OK( OK ) button.
Note: Press MENU( MENU ) button to exit the Scan Mode setting menu.
Menus Sub-menus Descriptions
Scan Color Mode( ) Select a scan mode: Color( ) , Gray( ).
( ) Resolution( ) Select a resolution: 300 dpi , 600 dpi
File Type( ) Select a fi le format: JPG, PDF, Multipage PDF
Setup Language( ) Select a preferred on-screen display
( ) language.
Format( ) Select to delete all the data stored in the SD/
SDHC/MMC memory card or USB fl ash drive.
Calibration( ) Select to calibrate the scanner.
Factory Default Select to restore the scanner settings to the
( ) default settings.
7
Inserting a Photo/Document
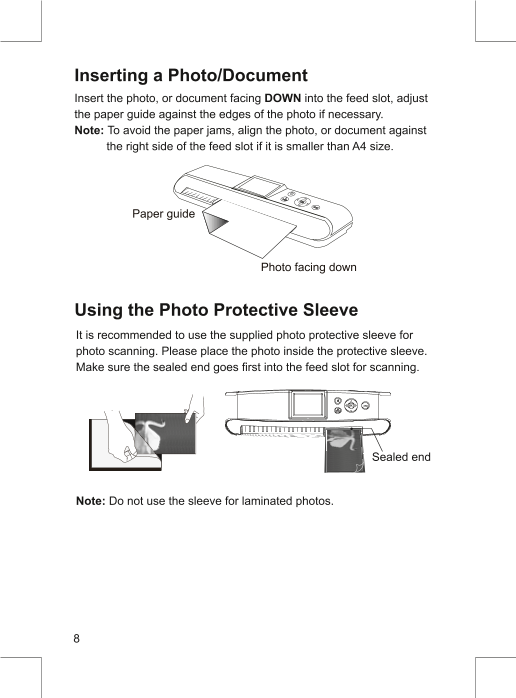
Insert the photo, or document facing DOWN into the feed slot, adjust
the paper guide against the edges of the photo if necessary.
Note: To avoid the paper jams, align the photo, or document against
the right side of the feed slot if it is smaller than A4 size.
Paper guide
Photo facing down
Using the Photo Protective Sleeve
It is recommended to use the supplied photo protective sleeve for
photo scanning. Please place the photo inside the protective sleeve.
Make sure the sealed end goes fi rst into the feed slot for scanning.
Sealed end
Note: Do not use the sleeve for laminated photos.
8


 V2版本原理图(Capacitive-Fingerprint-Reader-Schematic_V2).pdf
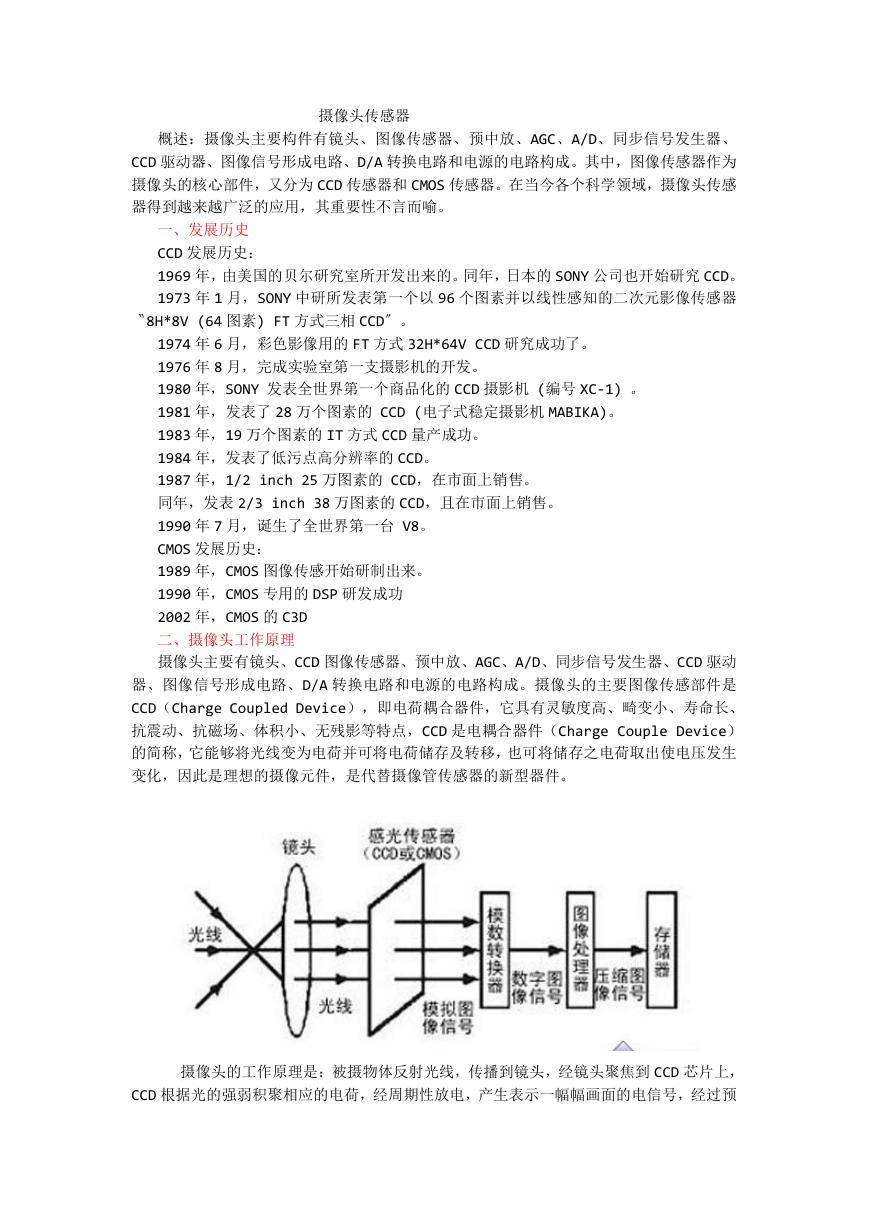 摄像头工作原理.doc
 VL53L0X简要说明(En.FLVL53L00216).pdf
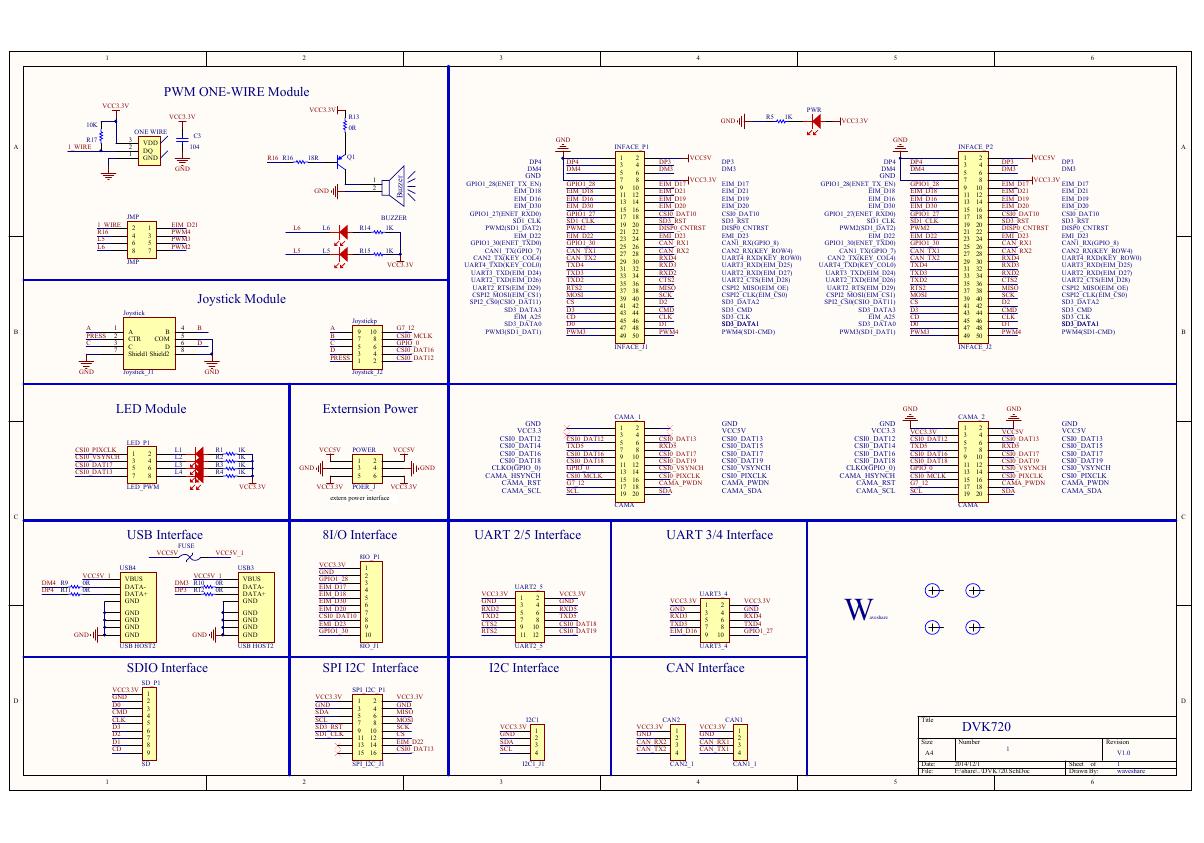 原理图(DVK720-Schematic).pdf
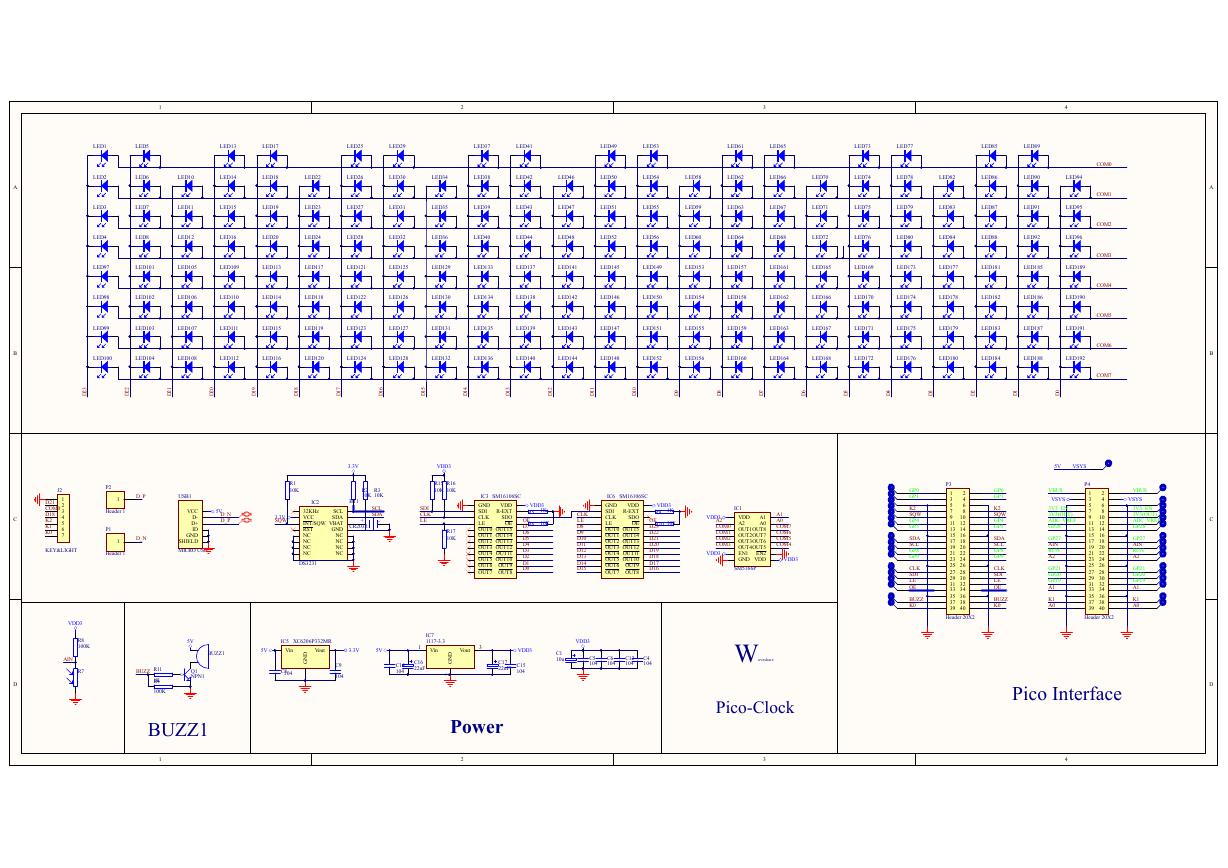 原理图(Pico-Clock-Green-Schdoc).pdf
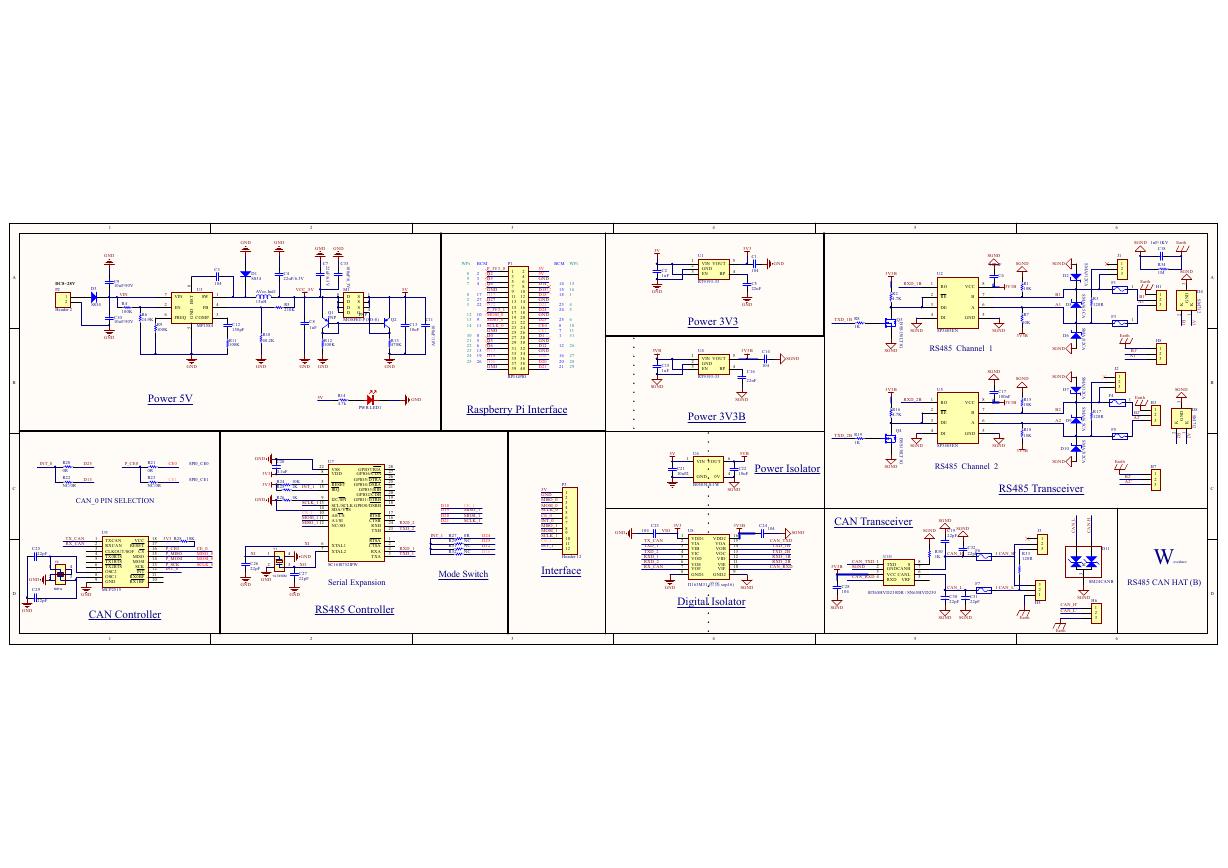 原理图(RS485-CAN-HAT-B-schematic).pdf
 File:SIM7500_SIM7600_SIM7800 Series_SSL_Application Note_V2.00.pdf
 ADS1263(Ads1262).pdf
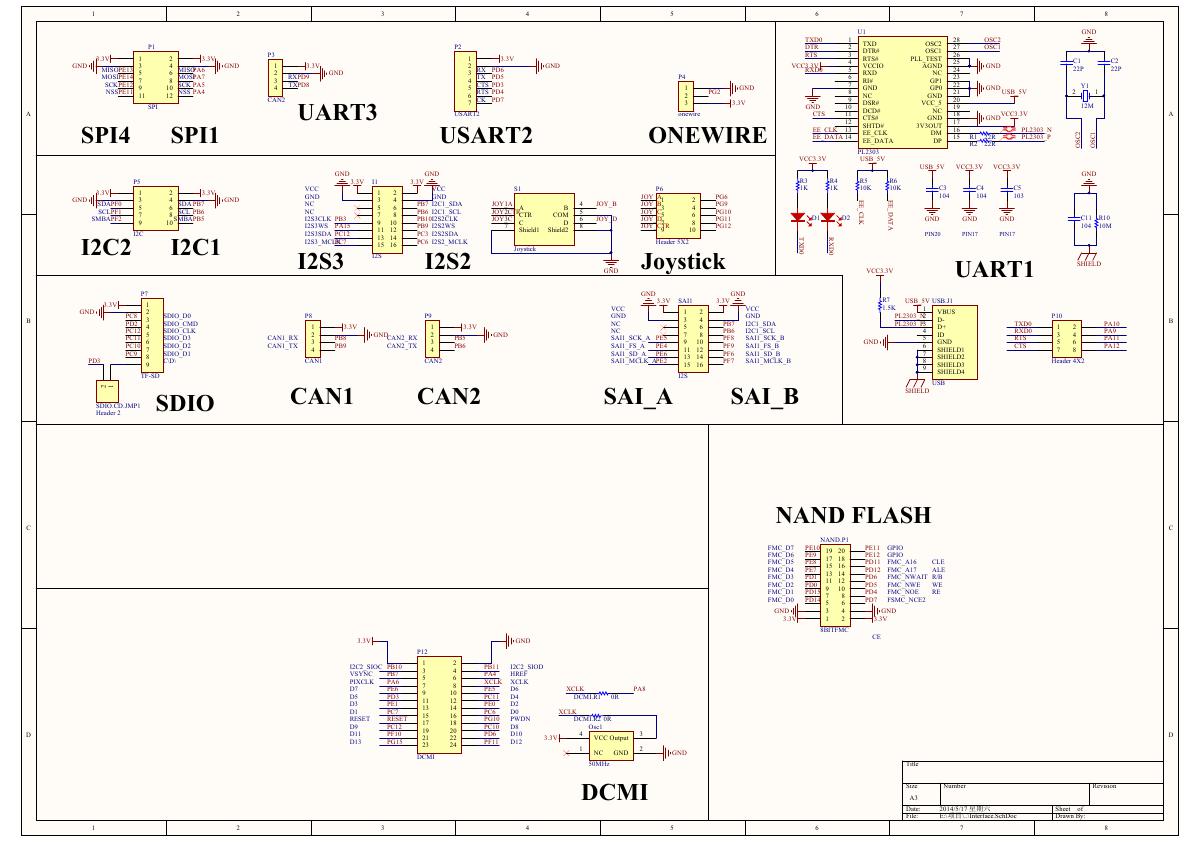 原理图(Open429Z-D-Schematic).pdf
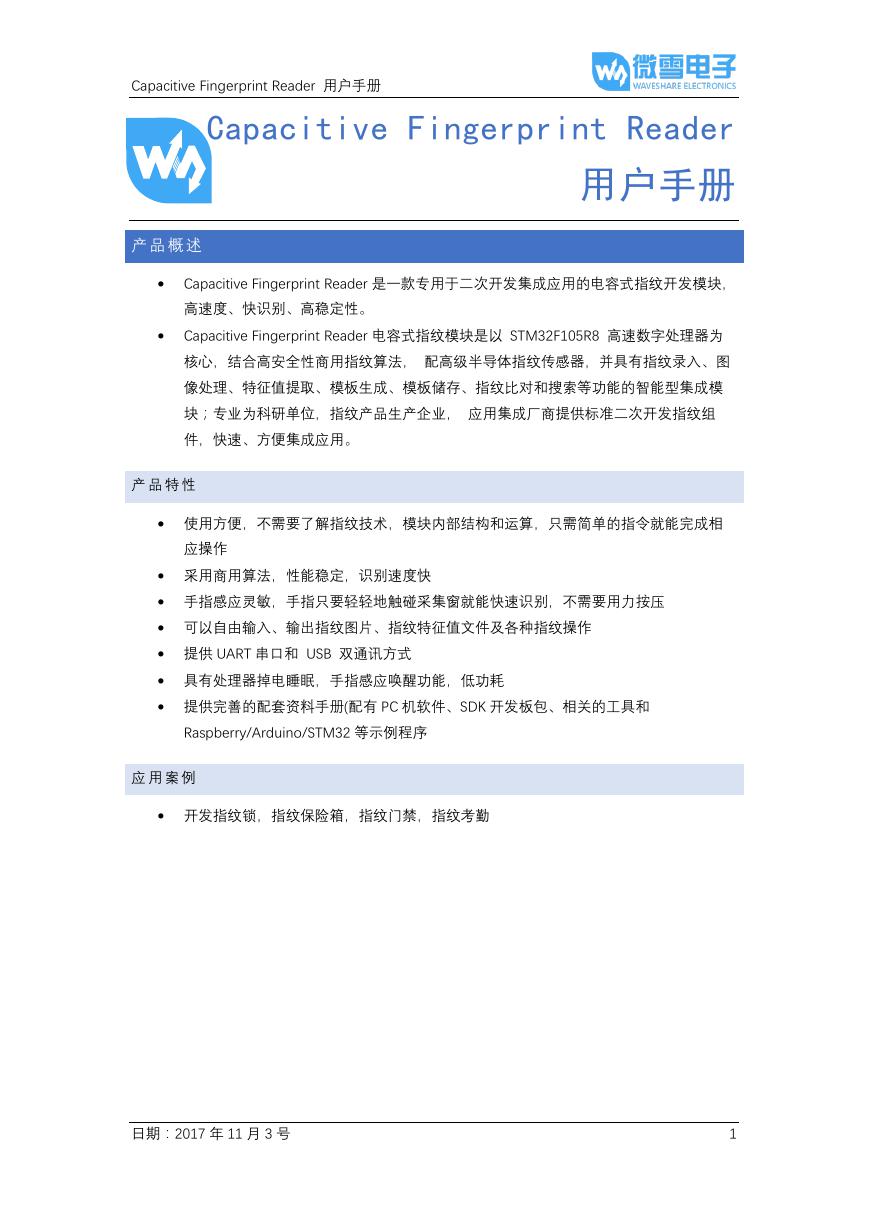 用户手册(Capacitive_Fingerprint_Reader_User_Manual_CN).pdf
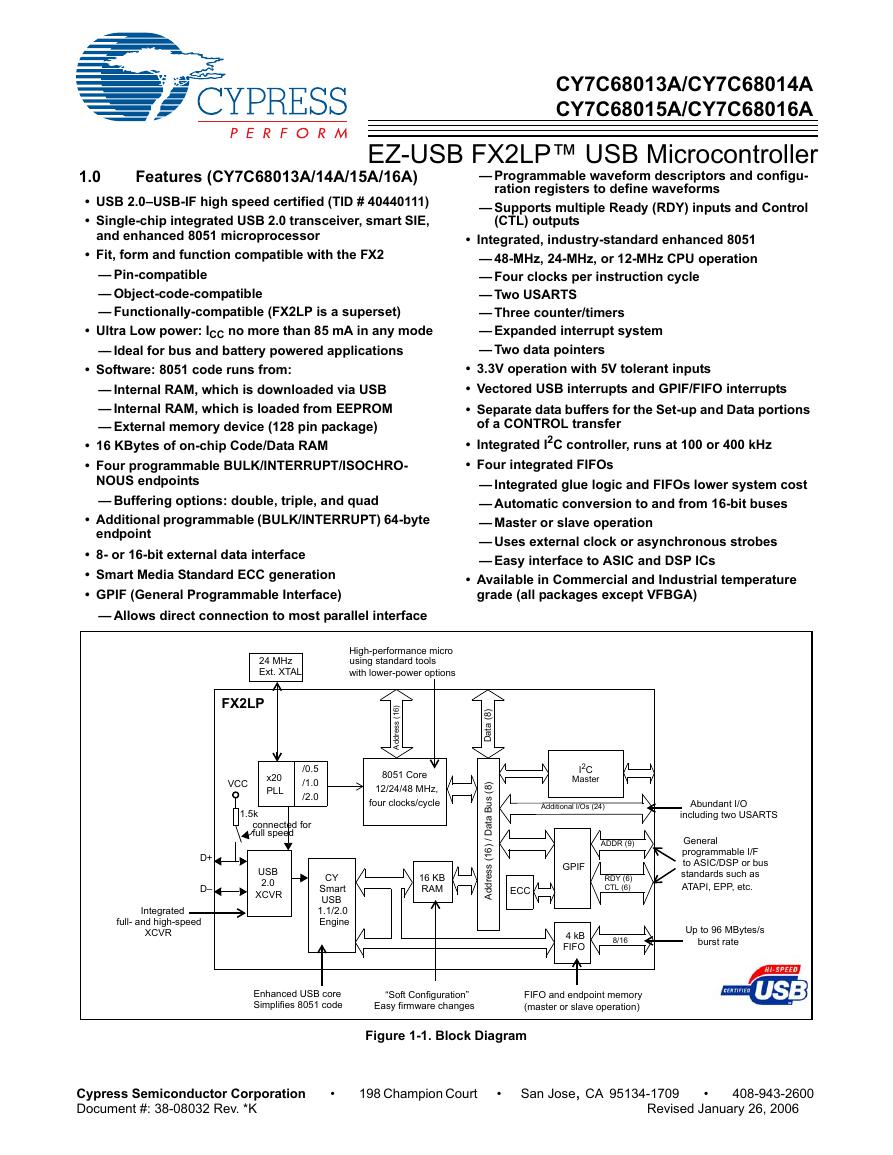 CY7C68013A(英文版)(CY7C68013A).pdf
 TechnicalReference_Dem.pdf