User Manual
Flextight X5 / X1
English – v/1.3
Table of contents
Warnings and Restrictions 4
System Requirements 4
Parts and components 5
Fr o n t p a n e l 5
B a c k p a n e l a n d c u t a w ay v i e w 6
Setting up the Scanner 7
E nv i r o n m e n t a l R e q u i r e m e n t s
E l e c t r i c a l R e q u i r e m e n t s
I n s t a l l a t i o n P r o c e d u r e, F i r eW i r e I n t e r f a c e
Operating Instructions 9
Resolutions 10
Tr u e R e s o l u t i o n s
Calibrating the Scanner 11
F o c u s C a l i b r a t i o n 12
W h i t e C a l i b r a t i o n f o r R e f l e c t i ve s 13
The Light Tubes 14
Cleaning the Ex ternal Sur face of the Scanner 16
Disposal 16
Technical Specifications 16
FCC Notice 17
CE - Declaration of conformit y 18
Fl e x t i g h t X1 18
Fl e x t i g h t X 5 19
The Flextight X1 and the Flextight X5 satisfy the demand Removal and both utilize Hasselblad’s unique FlexColor
for image quality and speed requirements from profes- software and 3F – Flexible File Format. These features pro-
sional photographers and production environments alike. duce a digital data management system to provide users
with a fully integrated workflow solution that spans from
Developed around Hasselblad’s patented virtual drum image capture to output. Both scanners are PC and Mac
design and flexible magnetic holder and incorporating a compatible using a FireWire interface.
3x8000 optic CCD sensor and a Linos (Rodenstock) lens,
both scanners are fast, easy-to-use and offer unparalleled The Flextight scanners also include a full selection of hold-
image quality. They also feature a new time-saving facility ers for mounting all of the most common original formats
– an ‘Auto Scan’ button, which with one press automati- without requiring gel, tape or glass plates and include a
cally delivers a superb, high resolution scan. full selection of the most common negative film set-up
profiles. Support for special formats, such as panoramas,
The Flextight X1 scans 35mm originals at a maximum can also be customised and supplied by Hasselblad. The
non-interpolated optical resolution of 6300 dpi at a maxi- scanners use glass-free original holders that ‘flex’ the
mum speed of 60MB per minute while the Flextight X5 original during the scanning process to form a completely
scans 35mm originals at up to 8000 dpi and at 300MB per straight line that places nothing between the original and
minute, making it the world’s fastest, high-end scanner. the electronic image sensor. This ensures that the quality
The Flextight X5 also has an A4 reflective scanning op- remains at its highest level without glass distortions and
tion, can take a batch or a slide feeder and incorporates other unwanted artifacts.
Hasselblad’s active cooling capability, where an electronic
device is placed directly on the CCD to cool it down and For the optimum in investment security, a Flextight X1
prevent an increase in electrical noise. can be modified and upgraded to a Flextight X5 model at
a later date for approximately the difference in price be-
As with all Hasselblad scanners, the Flextight X1 and tween the two scanners. Either way you can rest
Flextight X5 offer outstanding sharpness and image qual- assured you have made the right choice.
ity and are designed to bring out the finest details and
the full tonal range from the professional photographer’s The supreme Hasselblad potential is there,
negatives or transparencies. Both Flextight models offer a
maximum non-interpolated, optical resolution of 3200 dpi it’s up to you to exploit it!
in true 8 or 16 bit colour from 60mm originals and 2040
dpi from 4” x 5” originals, both positive and negative. The
two scanners also provide automatic frame detection,
batch scanning, automatic focus and calibration, hard-
ware (Flextight X5 only) and software-based Auto Dust
3
Warnings and restrictions
• Read all of the included documentation before attempting to install and use the
scanner.
• Do not touch the originals and/or the original holder while scanning.
• Do not start scanning or previewing until an original holder with an original has
been mounted.
• The original holder is only to be mounted or removed when the drum is in the load
position.
• When you turn on the scanner, the drum will roll to the load position, if it is not
there already. Do not touch the scanner while the drum is rotating.
• Do not place your fingers or any other object into the scanner while it is connected
to power.
• Before servicing or opening the scanner, the power supply must be disconnected
from the mains (unplugged). It is not sufficient simply to press the on/off button.
• Install the scanner in a location where children can not get to it. It contains small
openings and moving parts that can cause injury.
System requirements
Below are the basic hardware requirements for the PC or Macintosh system to which
the scanner is to be connected. For information about the processor, operating
system, RAM and harddisk requirements please refer to the “Software Reference”
manual, that comes with the FlexColor software.
• Screen resolution of minimum 800 x 600 pixels with true colors (24-bits).
• Mouse or other pointing device.
• FireWire interface.
Preventive maintenance
All Flextight scanners should be serviced every 25,000 scans or every 12 months,
whichever comes first. If a Feeder is mounted, the recommended number of scans is
15,000 provided that the feeder is mounted for all scans. Please note that previews are
also counted as scans.
Newer Flextight scanners have a counter installed so that the number of scans can be
monitored from FlexColor. Please refer to the FlexColor manual to learn more about
monitoring the number of scans.
Failures or faults originating from lack of service and/or daily maintenance are not
covered by the factory warranty.
4
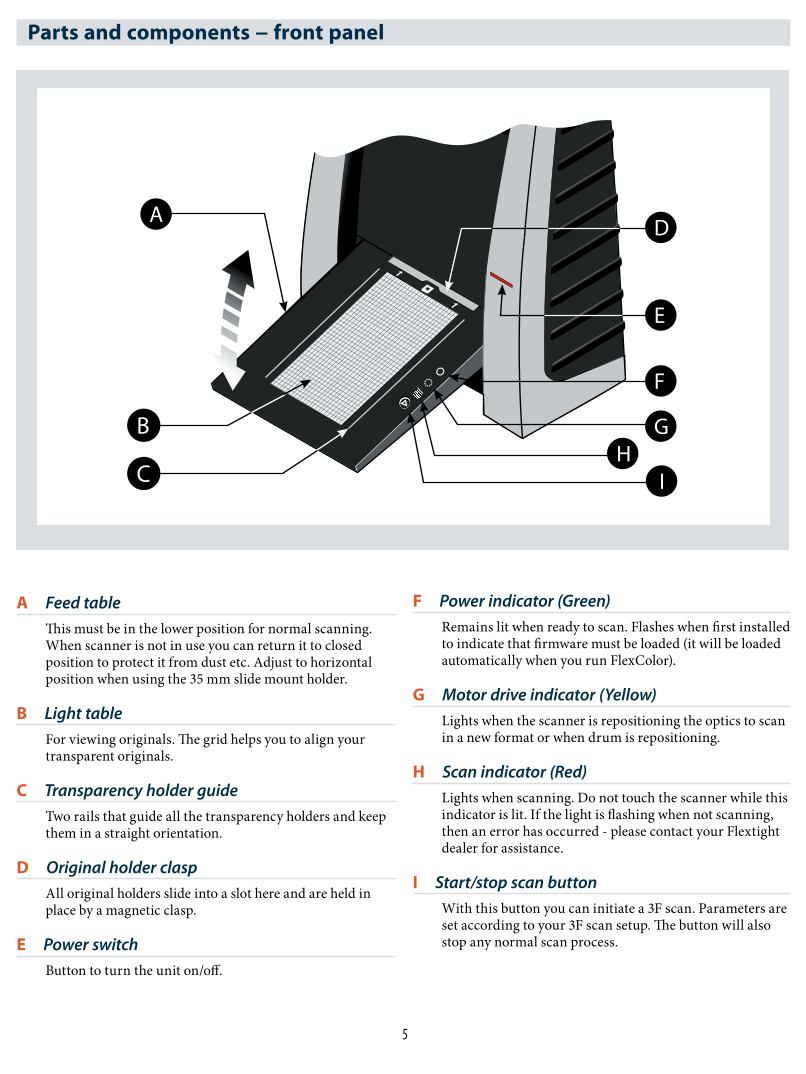
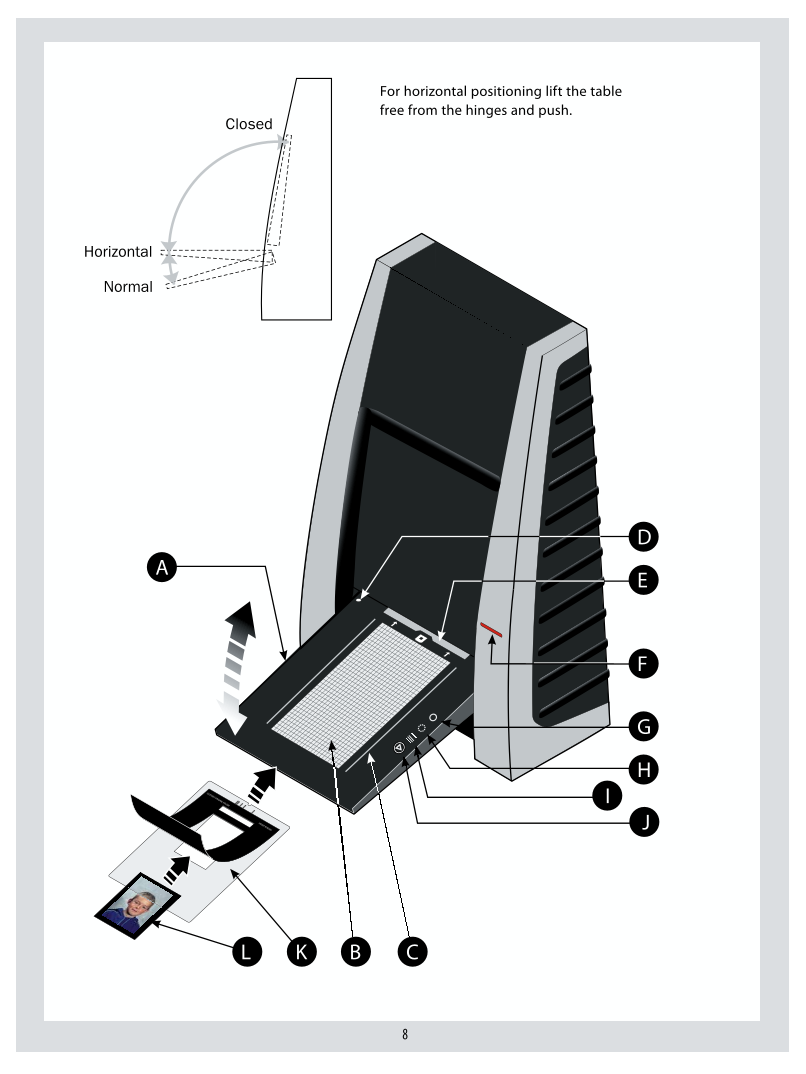
Parts and components − front panel
A
D
E
F
B G
H
C I
A Feed table F Power indicator (Green)
This must be in the lower position for normal scanning. Remains lit when ready to scan. Flashes when first installed
When scanner is not in use you can return it to closed to indicate that firmware must be loaded (it will be loaded
position to protect it from dust etc. Adjust to horizontal automatically when you run FlexColor).
position when using the 35 mm slide mount holder.
G Motor drive indicator (Yellow)
B Light table Lights when the scanner is repositioning the optics to scan
For viewing originals. The grid helps you to align your in a new format or when drum is repositioning.
transparent originals.
H Scan indicator (Red)
C Transparency holder guide Lights when scanning. Do not touch the scanner while this
Two rails that guide all the transparency holders and keep indicator is lit. If the light is flashing when not scanning,
them in a straight orientation. then an error has occurred - please contact your Flextight
dealer for assistance.
D Original holder clasp
I Start/stop scan button
All original holders slide into a slot here and are held in
place by a magnetic clasp. With this button you can initiate a 3F scan. Parameters are
set according to your 3F scan setup. The button will also
E Power switch stop any normal scan process.
Button to turn the unit on/off.
5
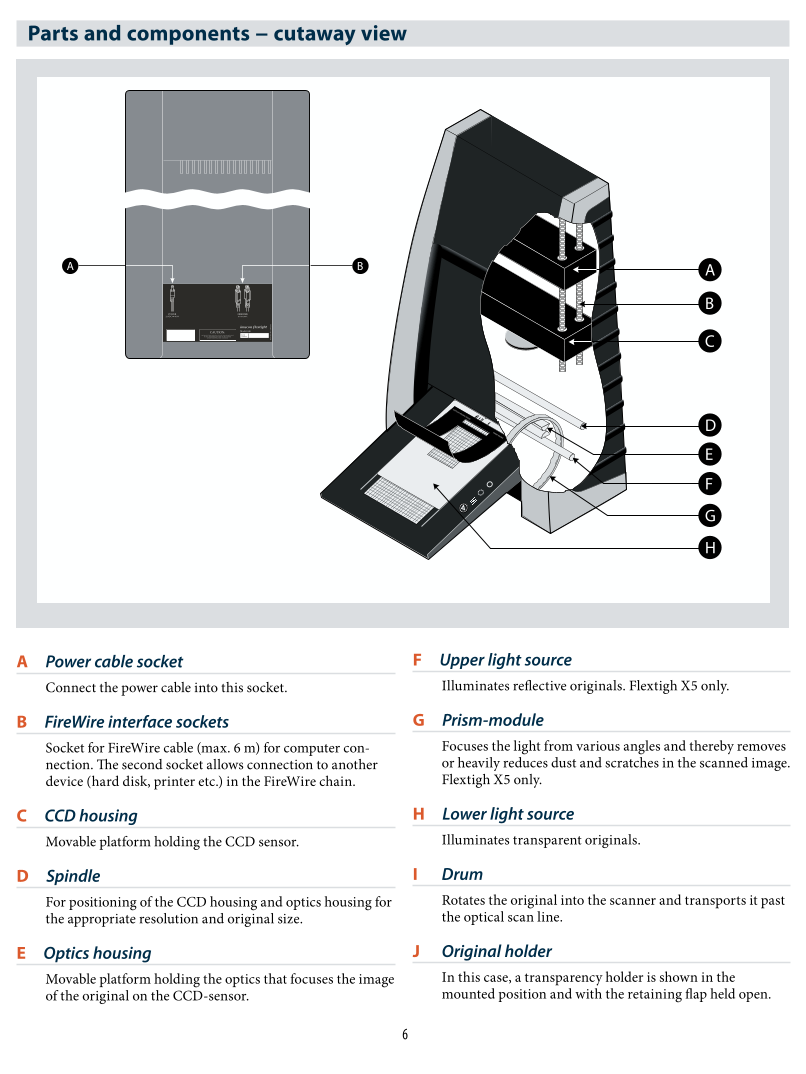
Parts and components − cutaway view
A B A
B
C
FLEXTIGHT ORIGINAL HOLDER
D
PATENT PENDING
E
F
G
H
A Power cable socket F Upper light source
Connect the power cable into this socket. Illuminates reflective originals. Flextigh X5 only.
B FireWire interface sockets G Prism-module
Socket for FireWire cable (max. 6 m) for computer con- Focuses the light from various angles and thereby removes
nection. The second socket allows connection to another or heavily reduces dust and scratches in the scanned image.
device (hard disk, printer etc.) in the FireWire chain. Flextigh X5 only.
C CCD housing H Lower light source
Movable platform holding the CCD sensor. Illuminates transparent originals.
D Spindle I Drum
For positioning of the CCD housing and optics housing for Rotates the original into the scanner and transports it past
the appropriate resolution and original size. the optical scan line.
E Optics housing J Original holder
Movable platform holding the optics that focuses the image In this case, a transparency holder is shown in the
of the original on the CCD-sensor. mounted position and with the retaining flap held open.
6
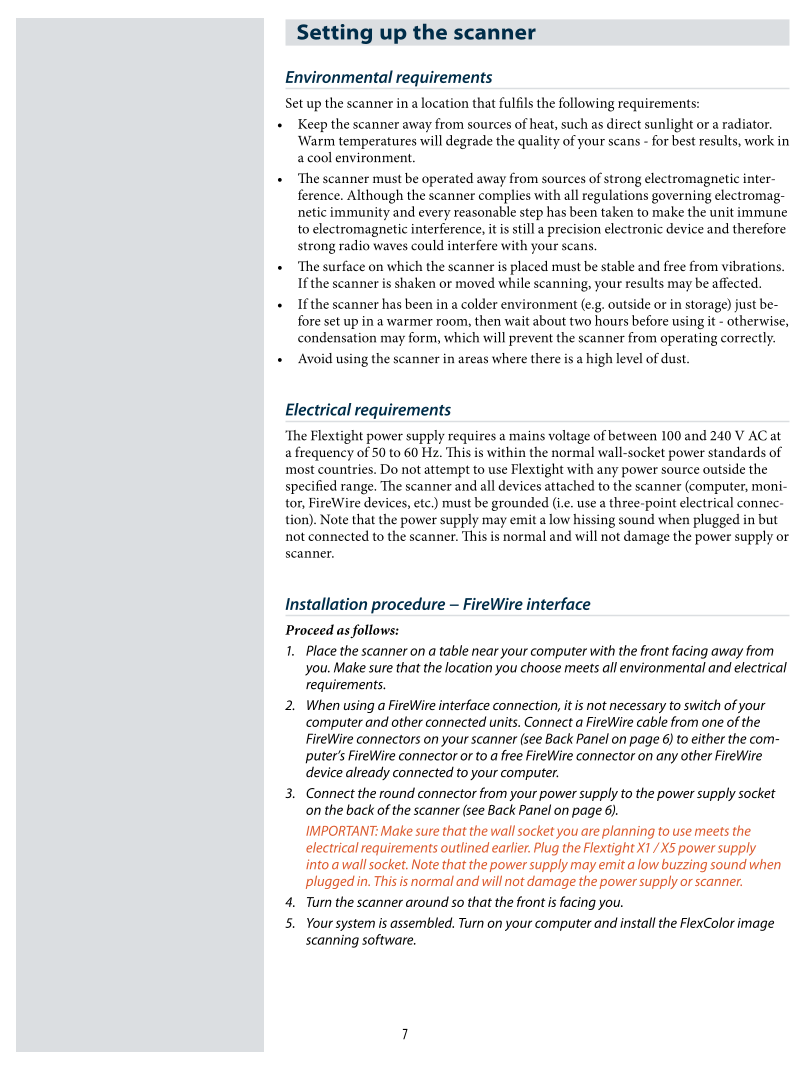
Setting up the scanner
Environmental requirements
Set up the scanner in a location that fulfils the following requirements:
• Keep the scanner away from sources of heat, such as direct sunlight or a radiator.
Warm temperatures will degrade the quality of your scans - for best results, work in
a cool environment.
• The scanner must be operated away from sources of strong electromagnetic inter-
ference. Although the scanner complies with all regulations governing electromag-
netic immunity and every reasonable step has been taken to make the unit immune
to electromagnetic interference, it is still a precision electronic device and therefore
strong radio waves could interfere with your scans.
• The surface on which the scanner is placed must be stable and free from vibrations.
If the scanner is shaken or moved while scanning, your results may be affected.
• If the scanner has been in a colder environment (e.g. outside or in storage) just be-
fore set up in a warmer room, then wait about two hours before using it - otherwise,
condensation may form, which will prevent the scanner from operating correctly.
• Avoid using the scanner in areas where there is a high level of dust.
Electrical requirements
The Flextight power supply requires a mains voltage of between 100 and 240 V AC at
a frequency of 50 to 60 Hz. This is within the normal wall-socket power standards of
most countries. Do not attempt to use Flextight with any power source outside the
specified range. The scanner and all devices attached to the scanner (computer, moni-
tor, FireWire devices, etc.) must be grounded (i.e. use a three-point electrical connec-
tion). Note that the power supply may emit a low hissing sound when plugged in but
not connected to the scanner. This is normal and will not damage the power supply or
scanner.
Installation procedure − FireWire interface
Proceed as follows:
1. Place the scanner on a table near your computer with the front facing away from
you. Make sure that the location you choose meets all environmental and electrical
requirements.
2. When using a FireWire interface connection, it is not necessary to switch of your
computer and other connected units. Connect a FireWire cable from one of the
FireWire connectors on your scanner (see Back Panel on page 6) to either the com-
puter’s FireWire connector or to a free FireWire connector on any other FireWire
device already connected to your computer.
3. Connect the round connector from your power supply to the power supply socket
on the back of the scanner (see Back Panel on page 6).
IMPORTANT: Make sure that the wall socket you are planning to use meets the
electrical requirements outlined earlier. Plug the Flextight X1 / X5 power supply
into a wall socket. Note that the power supply may emit a low buzzing sound when
plugged in. This is normal and will not damage the power supply or scanner.
4. Turn the scanner around so that the front is facing you.
5. Your system is assembled. Turn on your computer and install the FlexColor image
scanning software.
7
For horizontal positioning lift the table
free from the hinges and push.
Closed
Horizontal
Normal
D
A
E
F
G
H
FLEXTIGHT ORIGINAL HOL I
DER
PATENT PENDING J
L K B C
8




 V2版本原理图(Capacitive-Fingerprint-Reader-Schematic_V2).pdf
 摄像头工作原理.doc
 VL53L0X简要说明(En.FLVL53L00216).pdf
 原理图(DVK720-Schematic).pdf
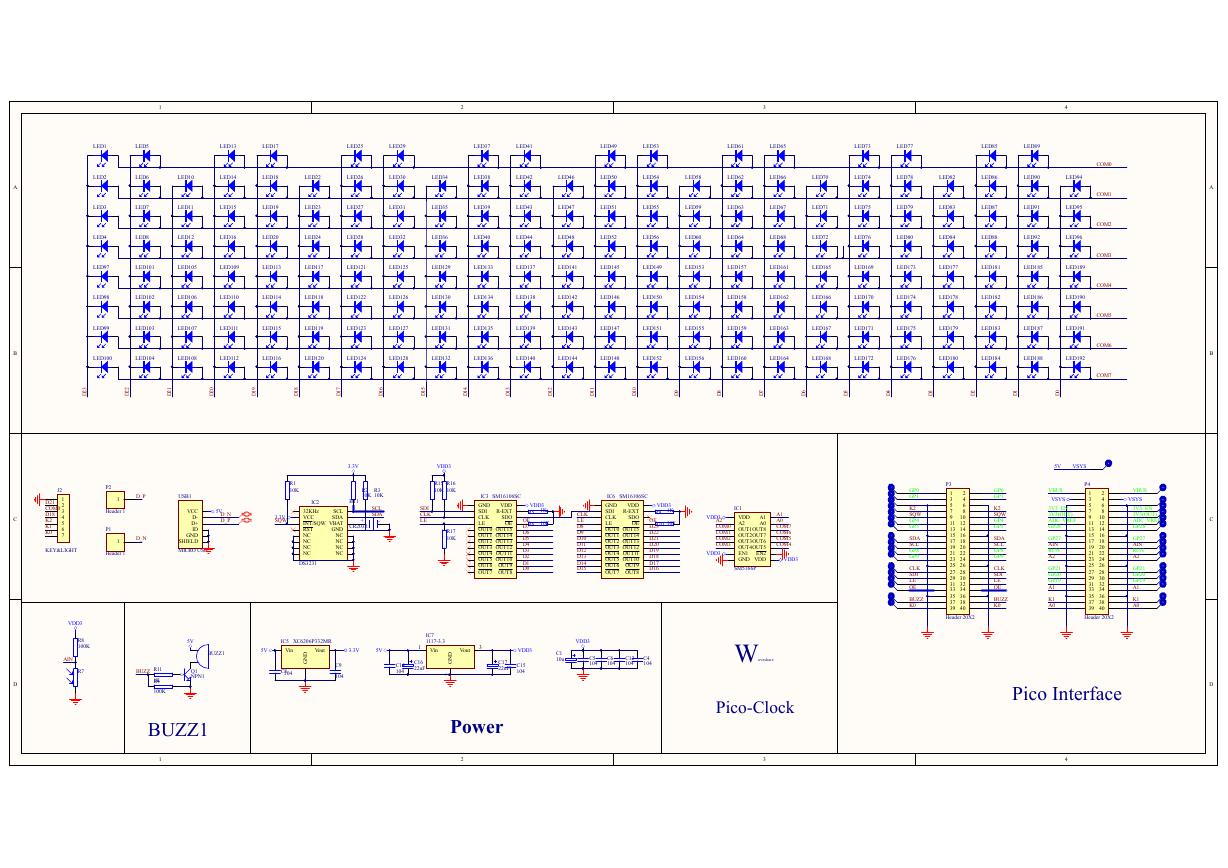 原理图(Pico-Clock-Green-Schdoc).pdf
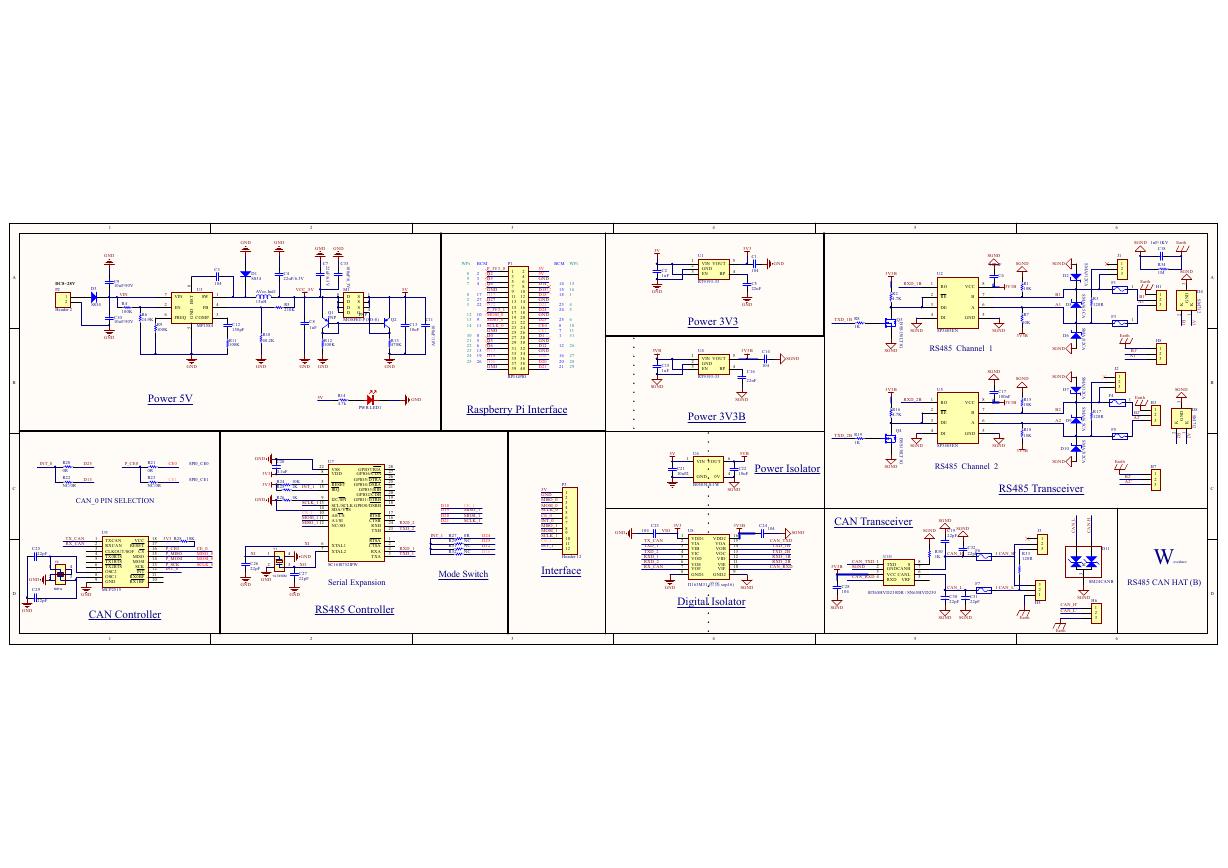 原理图(RS485-CAN-HAT-B-schematic).pdf
 File:SIM7500_SIM7600_SIM7800 Series_SSL_Application Note_V2.00.pdf
 ADS1263(Ads1262).pdf
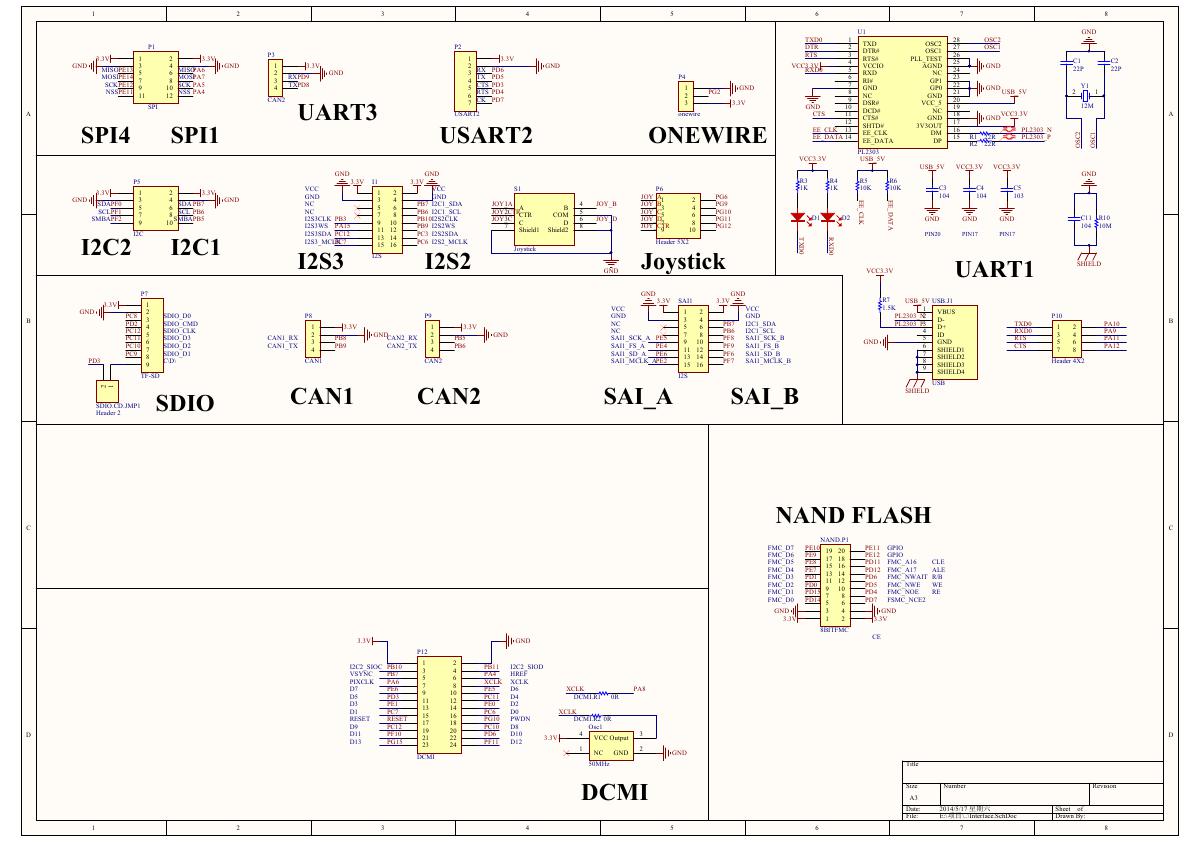 原理图(Open429Z-D-Schematic).pdf
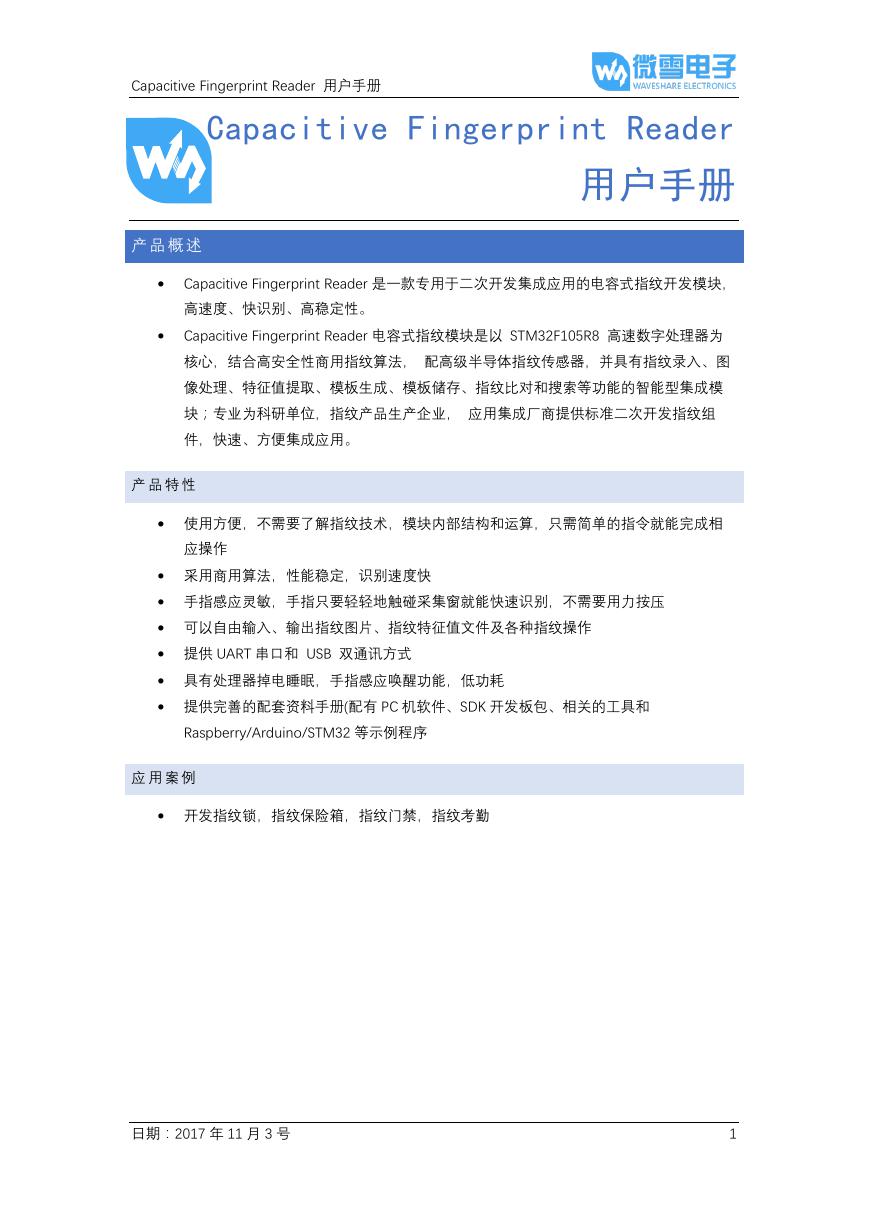 用户手册(Capacitive_Fingerprint_Reader_User_Manual_CN).pdf
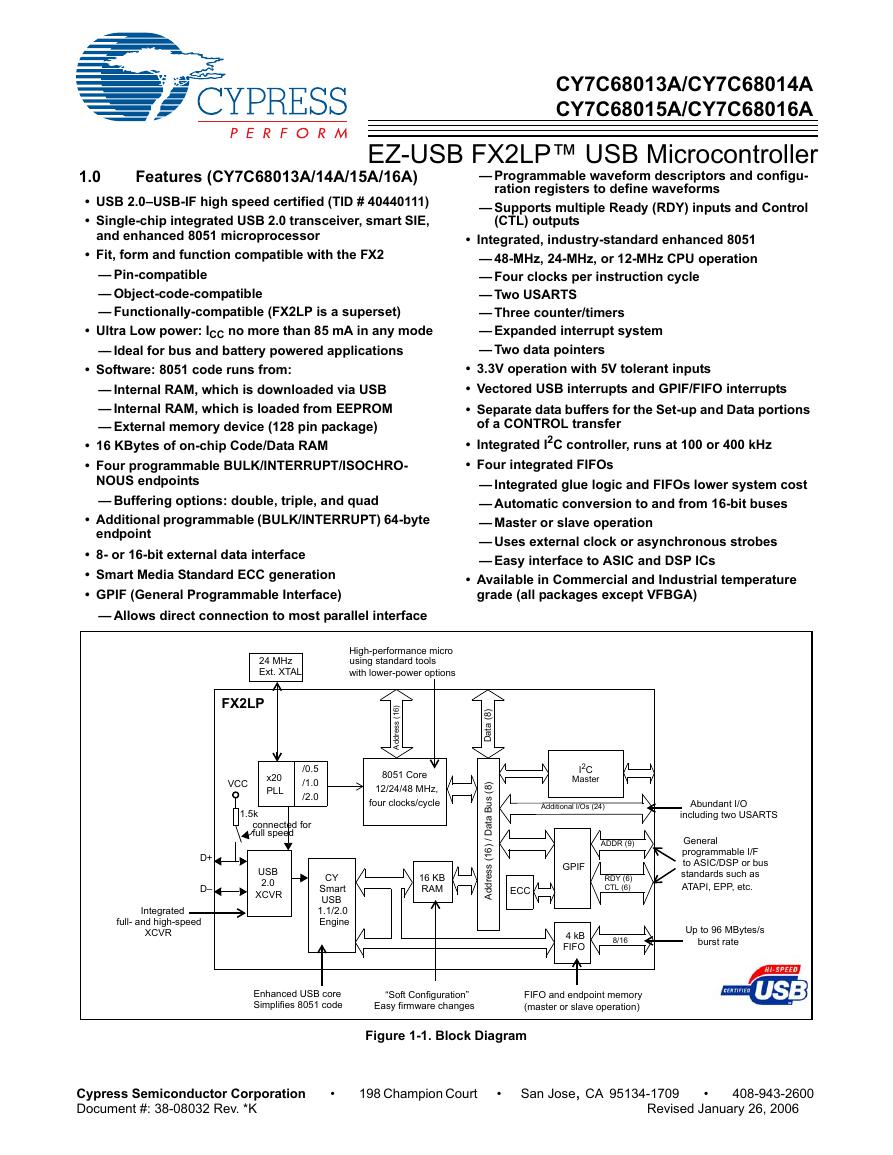 CY7C68013A(英文版)(CY7C68013A).pdf
 TechnicalReference_Dem.pdf