RVS2000_EN_CD__cover 7 04.9.21, 8:58 AM
IMPORTANT
For your assistance in reporting the loss or
theft of your Projector, please record the Model No.:
Model and Serial Number located on the
bottom of the projector and retain this Serial No.:
information. Before recycling the packag-
ing, please be sure that you have checked
the contents of the carton thoroughly
against the list of “Supplied accessories”
on page 11.
SPECIAL NOTE FOR USERS IN THE U.K.
The mains lead of this product is fitted with a non-rewireable (moulded) plug incorporat-
ing a 5A fuse. Should the fuse need to be replaced, a BSI or ASTA approved BS 1362
fuse marked or and of the same rating as above, which is also indicated on the pin
face of the plug, must be used.
Always refit the fuse cover after replacing the fuse. Never use the plug without the fuse
cover fitted.
In the unlikely event of the socket outlet in your home not being compatible with the plug
supplied, cut off the mains plug and fit an appropriate type.
DANGER:
The fuse from the cut-off plug should be removed and the cut-off plug destroyed immedi-
ately and disposed of in a safe manner.
Under no circumstances should the cut-off plug be inserted elsewhere into a 5A socket
outlet, as a serious electric shock may occur.
To fit an appropriate plug to the mains lead, follow the instructions below:
WARNING:
THIS APPARATUS MUST BE EARTHED.
IMPORTANT:
The wires in this mains lead are coloured in accordance with the following code:
Green-and-yellow : Earth
Blue : Neutral
Brown : Live
As the colours of the wires in the mains lead of this apparatus may not correspond with the
coloured markings identifying the terminals in your plug proceed as follows:
• The wire which is coloured green-and-yellow must be connected to the terminal in the
plug which is marked by the letter E or by the safety earth symbol or coloured green or
green-and-yellow.
• The wire which is coloured blue must be connected to the terminal which is marked with
the letter N or coloured black.
• The wire which is coloured brown must be connected to the terminal which is marked with
the letter L or coloured red.
IF YOU HAVE ANY DOUBT, CONSULT A QUALIFIED ELECTRICIAN.
RVS2000_EN_CD_a 2 04.9.21, 8:37 AM
RVS2000_EN_CD_a 3 04.9.21, 8:37 AM
The supplied CD-ROM contains operation instructions in English, German, French,
Spanish, Italian, Dutch and Japanese. Carefully read through the operation instructions
before operating the projector.
Die mitgelieferte CD-ROM enthält Bedienungsanleitungen in Englisch, Deutsch, Französisch,
Spanisch, Italienisch, Niederländisch und Japanisch. Bitte lesen Sie die Bedienungsanleitung
vor der Verwendung des Projektors sorgfältig durch.
Le CD-ROM fourni contient les instructions de fonctionnement en anglais, allemand,
français, espagnol, italien, néerlandais et japonais. Veuillez lire attentivement ces
instructions avant de faire fonctionner le projecteur.
El CD-ROM suministrado contiene instrucciones de operación en inglés, alemán,
francés, español, italiano, holandés y japonés. Lea cuidadosamente las instrucciones de
operación antes de utilizar el proyector.
Il CD-ROM in dotazione contiene istruzioni per l’uso in inglese, tedesco, francese,
spagnolo, italiano, olandese e giapponese. Leggere attentamente le istruzioni per l’uso
prima di usare il proiettore.
De meegeleverde CD-ROM bevat handleidingen in het Engels, Duits, Frans, Spaans,
Italiaans, Nederlands en Japans. Lees de handleiding zorgvuldig door voor u de
projector in gebruik neemt.
RVS2000_EN_CD_a 4 04.9.21, 8:37 AM
Before using the projector, please read this operation manual carefully.
Introduction ENGLISH
WARNING: High brightness light source. Do not stare into the beam of light, or view
directly. Be especially careful that children do not stare directly into the
beam of light.
WARNING: To reduce the risk of fire or electric shock, do not expose
this product to rain or moisture.
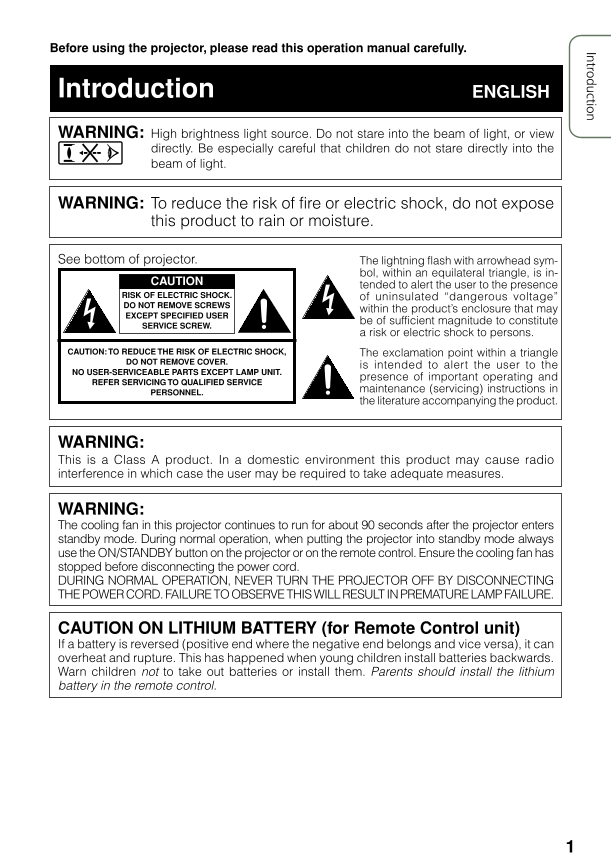
See bottom of projector. The lightning flash with arrowhead sym-
bol, within an equilateral triangle, is in-
CAUTION tended to alert the user to the presence
RISK OF ELECTRIC SHOCK. of uninsulated “dangerous voltage”
DO NOT REMOVE SCREWS within the product’s enclosure that may
EXCEPT SPECIFIED USER
SERVICE SCREW. be of sufficient magnitude to constitute
a risk or electric shock to persons.
CAUTION: TO REDUCE THE RISK OF ELECTRIC SHOCK, The exclamation point within a triangle
DO NOT REMOVE COVER. is intended to alert the user to the
NO USER-SERVICEABLE PARTS EXCEPT LAMP UNIT.
REFER SERVICING TO QUALIFIED SERVICE presence of important operating and
PERSONNEL. maintenance (servicing) instructions in
the literature accompanying the product.
WARNING:
This is a Class A product. In a domestic environment this product may cause radio
interference in which case the user may be required to take adequate measures.
WARNING:
The cooling fan in this projector continues to run for about 90 seconds after the projector enters
standby mode. During normal operation, when putting the projector into standby mode always
use the ON/STANDBY button on the projector or on the remote control. Ensure the cooling fan has
stopped before disconnecting the power cord.
DURING NORMAL OPERATION, NEVER TURN THE PROJECTOR OFF BY DISCONNECTING
THE POWER CORD. FAILURE TO OBSERVE THIS WILL RESULT IN PREMATURE LAMP FAILURE.
CAUTION ON LITHIUM BATTERY (for Remote Control unit)
If a battery is reversed (positive end where the negative end belongs and vice versa), it can
overheat and rupture. This has happened when young children install batteries backwards.
Warn children not to take out batteries or install them. Parents should install the lithium
battery in the remote control.
1
RVS2000_EN_CD_b 1 04.9.21, 8:42 AM
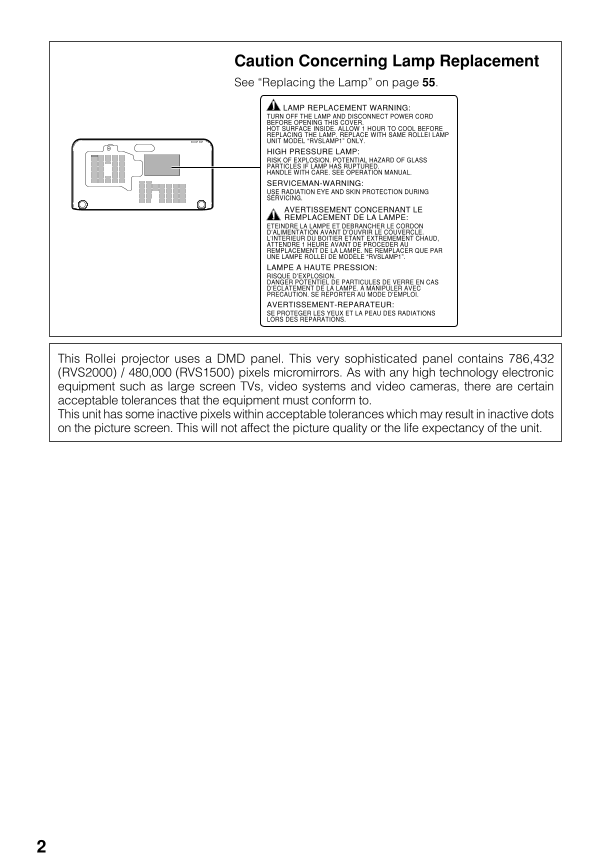
Caution Concerning Lamp Replacement
See “Replacing the Lamp” on page 55.
LAMP REPLACEMENT WARNING:
TURN OFF THE LAMP AND DISCONNECT POWER CORD
BEFORE OPENING THIS COVER.
HOT SURFACE INSIDE. ALLOW 1 HOUR TO COOL BEFORE
REPLACING THE LAMP. REPLACE WITH SAME ROLLEI LAMP
UNIT MODEL “RVSLAMP1” ONLY.
HIGH PRESSURE LAMP:
RISK OF EXPLOSION. POTENTIAL HAZARD OF GLASS
PARTICLES IF LAMP HAS RUPTURED.
HANDLE WITH CARE. SEE OPERATION MANUAL.
SERVICEMAN-WARNING:
USE RADIATION EYE AND SKIN PROTECTION DURING
SERVICING.
AVERTISSEMENT CONCERNANT LE
REMPLACEMENT DE LA LAMPE:
ETEINDRE LA LAMPE ET DEBRANCHER LE CORDON
D’ALIMENTATION AVANT D’OUVRIR LE COUVERCLE.
L’INTERIEUR DU BOITIER ETANT EXTREMEMENT CHAUD,
ATTENDRE 1 HEURE AVANT DE PROCEDER AU
REMPLACEMENT DE LA LAMPE. NE REMPLACER QUE PAR
UNE LAMPE ROLLEI DE MODÈLE “RVSLAMP1”.
LAMPE A HAUTE PRESSION:
RISQUE D’EXPLOSION.
DANGER POTENTIEL DE PARTICULES DE VERRE EN CAS
D’ECLATEMENT DE LA LAMPE. A MANIPULER AVEC
PRECAUTION. SE REPORTER AU MODE D’EMPLOI.
AVERTISSEMENT-REPARATEUR:
SE PROTEGER LES YEUX ET LA PEAU DES RADIATIONS
LORS DES REPARATIONS.
This Rollei projector uses a DMD panel. This very sophisticated panel contains 786,432
(RVS2000) / 480,000 (RVS1500) pixels micromirrors. As with any high technology electronic
equipment such as large screen TVs, video systems and video cameras, there are certain
acceptable tolerances that the equipment must conform to.
This unit has some inactive pixels within acceptable tolerances which may result in inactive dots
on the picture screen. This will not affect the picture quality or the life expectancy of the unit.
2
RVS2000_EN_CD_b 2 04.9.21, 8:42 AM
How to Read this Operation Manual
� The specifications of the RVS2000 are slightly different from those of the RVS1500, however,
you can connect and operate both models in the same manner. This operation manual uses the
RVS1500 for the purpose of explanation.
• In this operation manual, the illustration and the screen display are simplified for explanation, and
may differ slightly from actual display.
Using the Menu Screen
The menu can be operated to achieve two functions, adjustment and setting. (For setting the menu
items, see pages 38 and 39.)
Operating with the projector
When “PRJ - ADJ” - “Guide LEDs” is set to “On”, the buttons used for menu adjustment on the
projector light up.
Example: When W, Y and the MENU/HELP button light up on the projector, you can use those
buttons for operation.
Adjustment buttons (W/Y/V/X)
MENU/HELP button
ENTER button MENU/HELP
button
MOUSE/Adjustment
button (P/R/O/Q)
ENTER button Buttons used in
RETURN button this operation
Menu Selections (Adjustments)
Example: Adjusting “Bright”. Button used in
• This operation can also be performed by using the buttons on the projector.
1 this step
Press BMENU. Example: “Picture” screen menu for INPUT 1
• The “Picture” menu screen for the se- (RGB) mode
lected input mode is displayed. Menu item
2 Press Q or O to display the other Picture SCR - ADJ PRJ - ADJ Help
menu screen. Picture Mode Standard
• The selected menu item is highlighted. Contrast 0
Bright 0
Red 0 On-screen
Blue 0
CLR Temp 7 5 0 0 K
Bright Boost Off display
sRGB Off
Reset
SEL./ADJ. ENTER END
36
Info ........Indicates safeguards for using the projector.
Note .........Indicates additional information for setting up and operating the
projector.
For Future Reference
Maintenance Troubleshooting Index
P. 52 PP. 60 and 61 P. 65
3
RVS2000_EN_CD_b 3 04.9.21, 8:43 AM
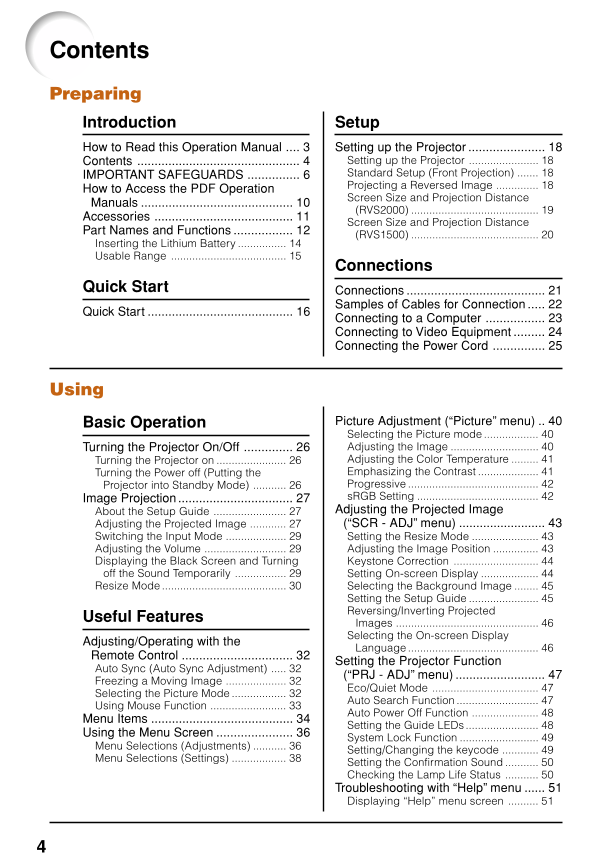
Contents
Preparing
Introduction Setup
How to Read this Operation Manual .... 3 Setting up the Projector ...................... 18
Contents ............................................... 4 Setting up the Projector ....................... 18
IMPORTANT SAFEGUARDS ............... 6 Standard Setup (Front Projection) ....... 18
How to Access the PDF Operation Projecting a Reversed Image .............. 18
Manuals ............................................ 10 Screen Size and Projection Distance
Accessories ........................................ 11 (RVS2000) .......................................... 19
Screen Size and Projection Distance
Part Names and Functions ................. 12 (RVS1500) .......................................... 20
Inserting the Lithium Battery ................ 14
Usable Range ...................................... 15
Connections
Quick Start Connections ........................................ 21
Samples of Cables for Connection ..... 22
Quick Start .......................................... 16 Connecting to a Computer ................. 23
Connecting to Video Equipment ......... 24
Connecting the Power Cord ............... 25
Using
Basic Operation Picture Adjustment (“Picture” menu) .. 40
Selecting the Picture mode .................. 40
Turning the Projector On/Off .............. 26 Adjusting the Image ............................. 40
Turning the Projector on ....................... 26 Adjusting the Color Temperature ......... 41
Turning the Power off (Putting the Emphasizing the Contrast .................... 41
Projector into Standby Mode) ........... 26 Progressive ........................................... 42
Image Projection ................................. 27 sRGB Setting ........................................ 42
About the Setup Guide ........................ 27 Adjusting the Projected Image
Adjusting the Projected Image ............ 27 (“SCR - ADJ” menu) ......................... 43
Switching the Input Mode .................... 29 Setting the Resize Mode ...................... 43
Adjusting the Volume ........................... 29 Adjusting the Image Position ............... 43
Displaying the Black Screen and Turning Keystone Correction ............................ 44
off the Sound Temporarily ................. 29 Setting On-screen Display ................... 44
Resize Mode ......................................... 30 Selecting the Background Image ........ 45
Setting the Setup Guide ....................... 45
Useful Features Reversing/Inverting Projected
Images ............................................... 46
Adjusting/Operating with the Selecting the On-screen Display
Language ........................................... 46
Remote Control ................................ 32 Setting the Projector Function
Auto Sync (Auto Sync Adjustment) ..... 32
Freezing a Moving Image .................... 32 (“PRJ - ADJ” menu) .......................... 47
Selecting the Picture Mode .................. 32 Eco/Quiet Mode ................................... 47
Using Mouse Function ......................... 33 Auto Search Function ........................... 47
Menu Items ......................................... 34 Auto Power Off Function ...................... 48
Setting the Guide LEDs ........................ 48
Using the Menu Screen ...................... 36 System Lock Function .......................... 49
Menu Selections (Adjustments) ........... 36 Setting/Changing the keycode ............ 49
Menu Selections (Settings) .................. 38 Setting the Confirmation Sound ........... 50
Checking the Lamp Life Status ........... 50
Troubleshooting with “Help” menu ...... 51
Displaying “Help” menu screen .......... 51
4
RVS2000_EN_CD_b 4 04.9.21, 8:43 AM




 V2版本原理图(Capacitive-Fingerprint-Reader-Schematic_V2).pdf
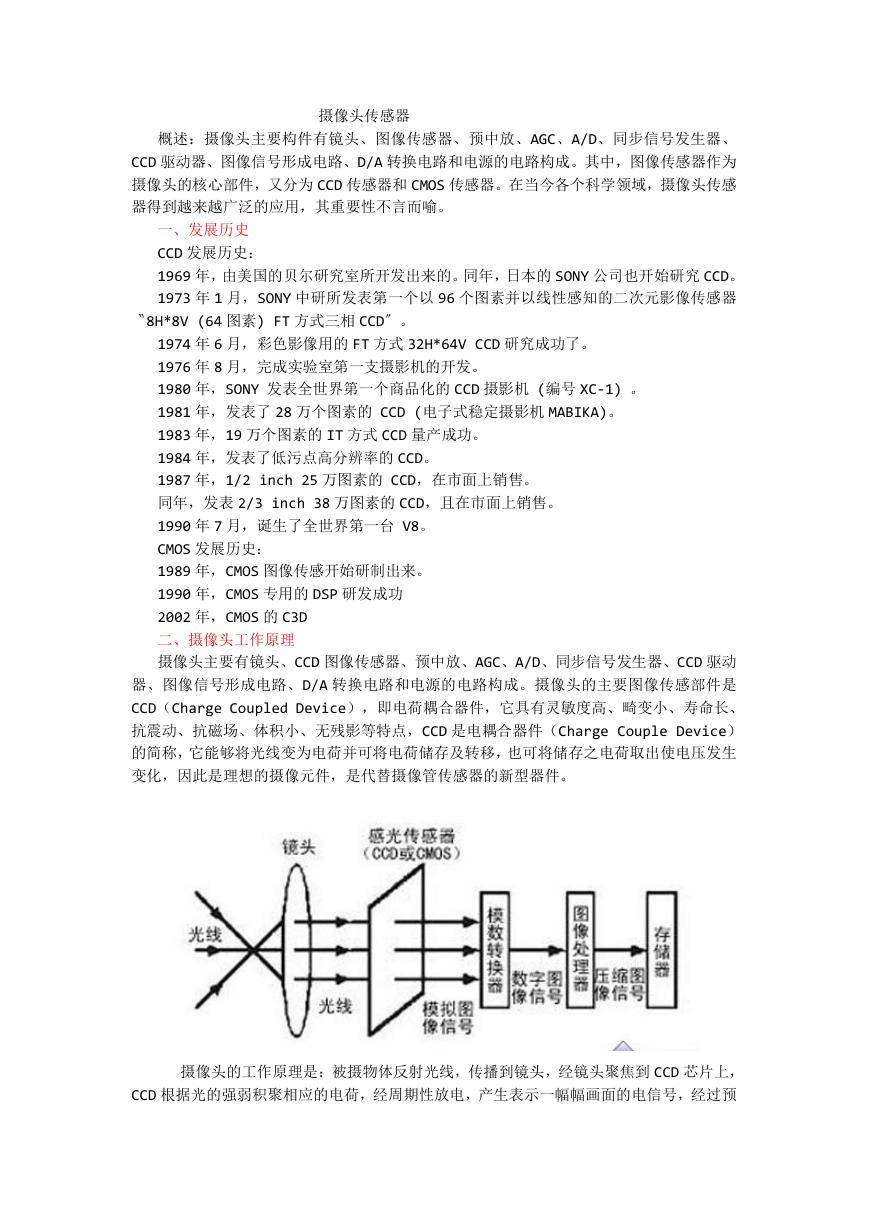 摄像头工作原理.doc
 VL53L0X简要说明(En.FLVL53L00216).pdf
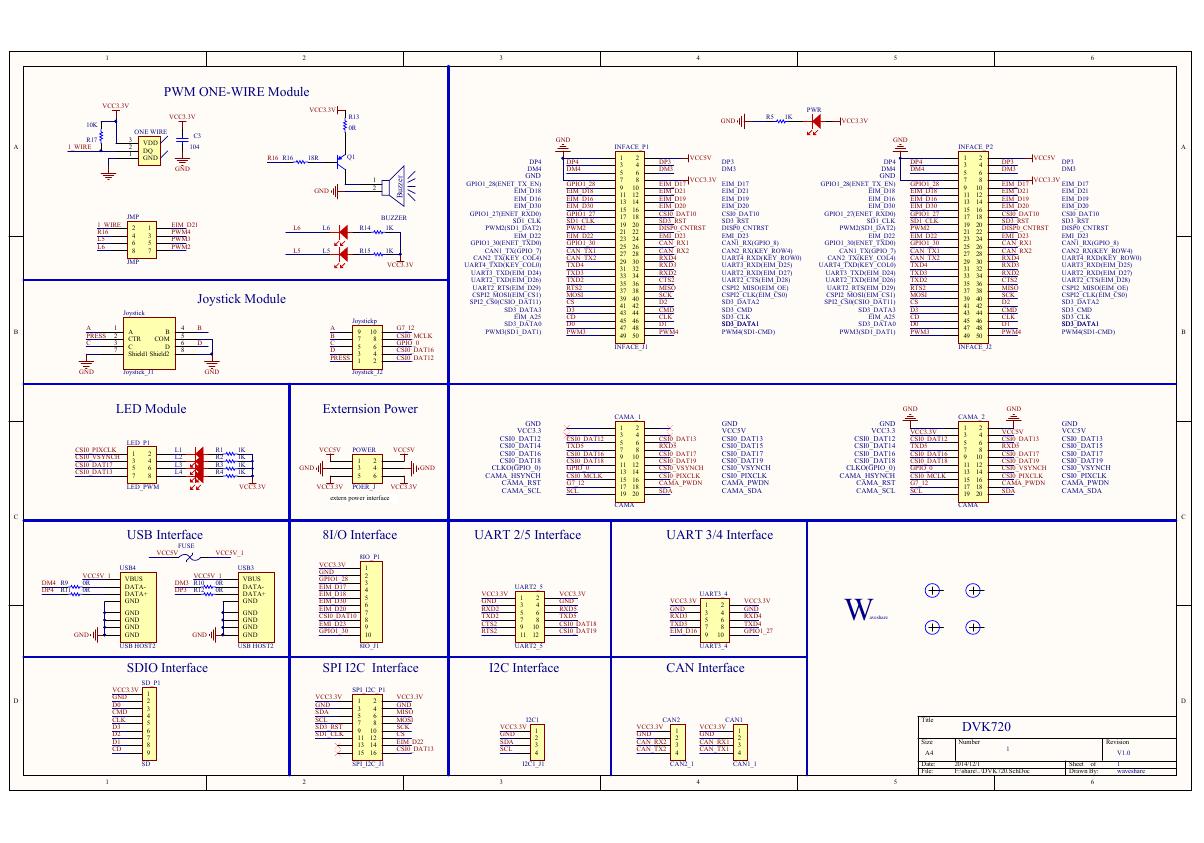 原理图(DVK720-Schematic).pdf
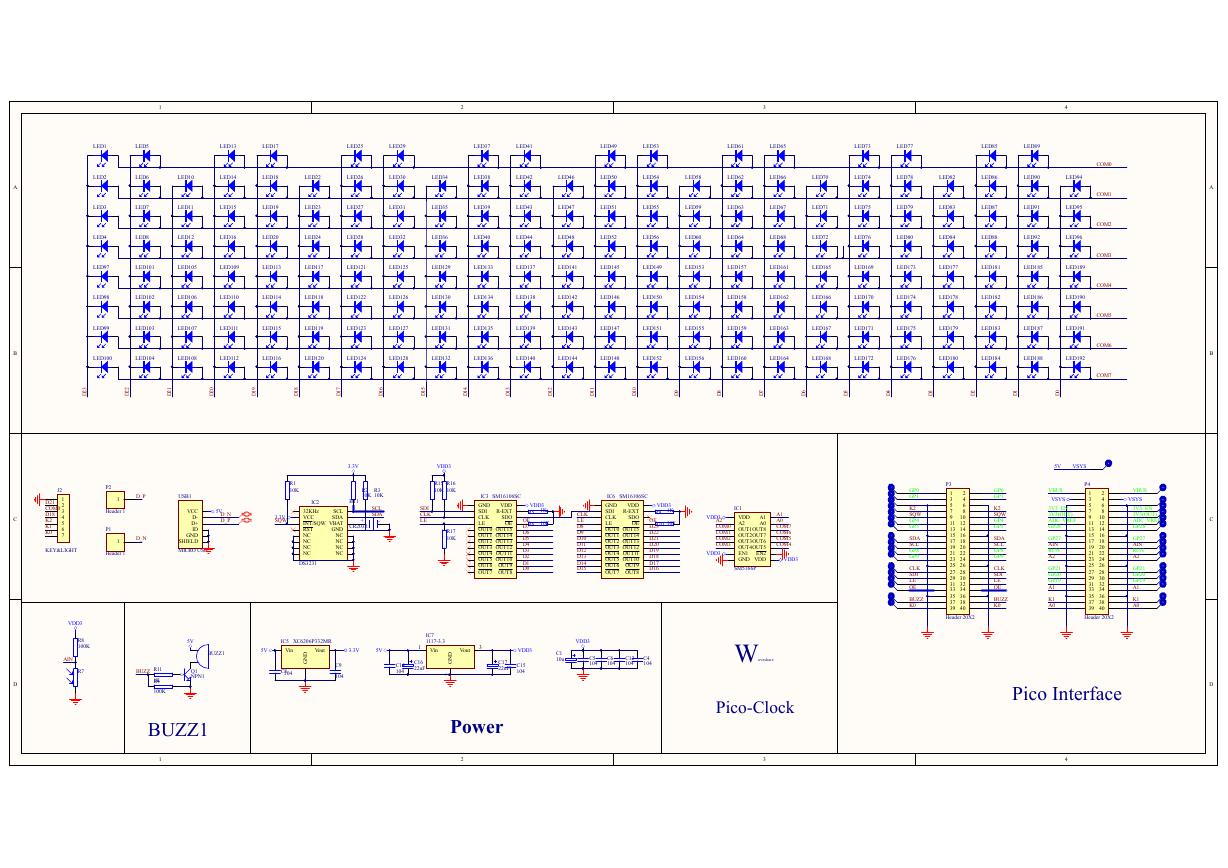 原理图(Pico-Clock-Green-Schdoc).pdf
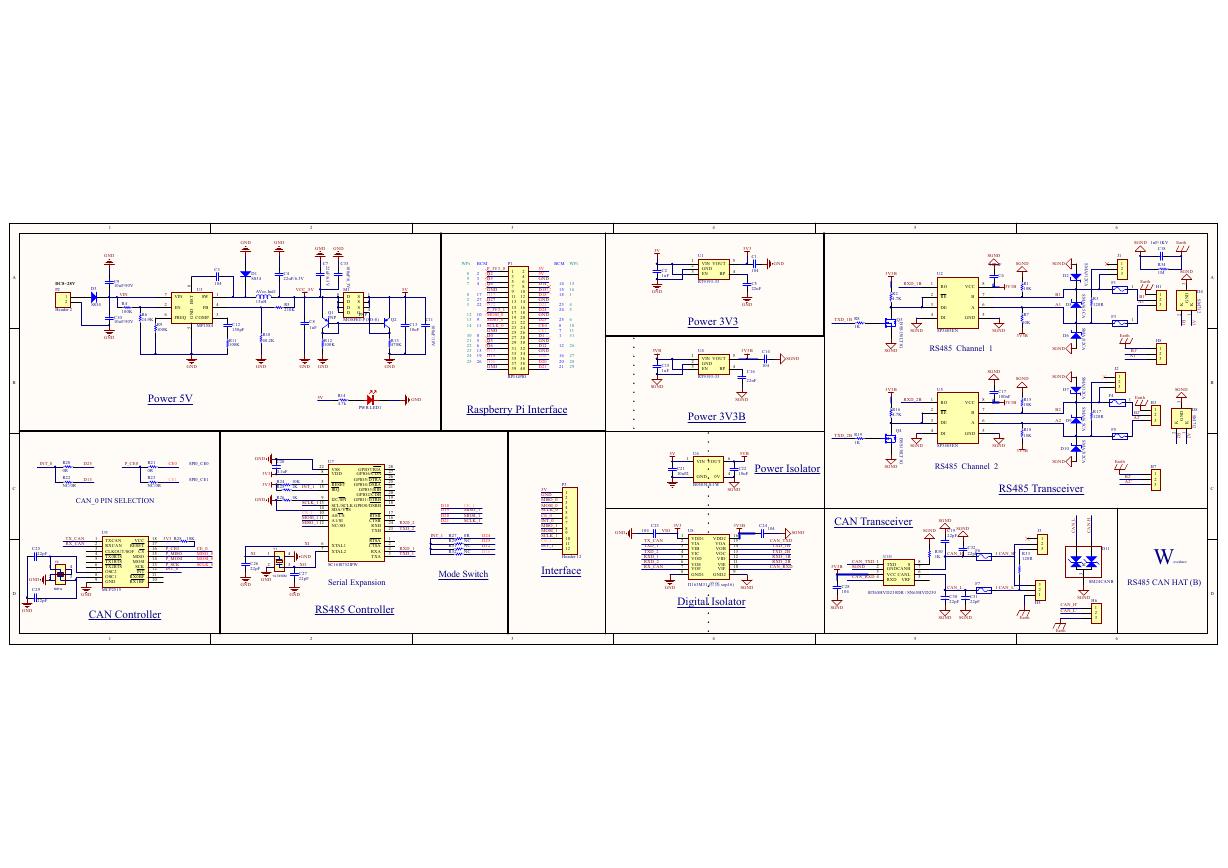 原理图(RS485-CAN-HAT-B-schematic).pdf
 File:SIM7500_SIM7600_SIM7800 Series_SSL_Application Note_V2.00.pdf
 ADS1263(Ads1262).pdf
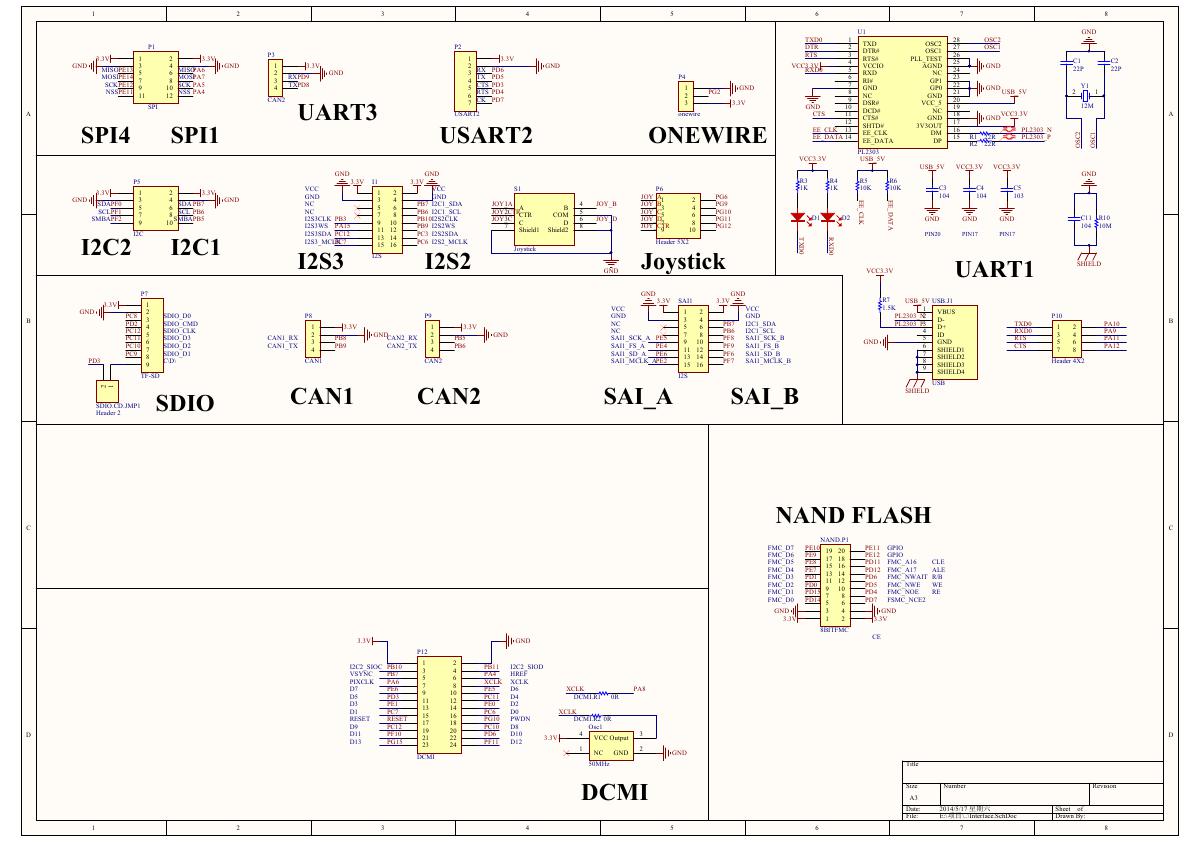 原理图(Open429Z-D-Schematic).pdf
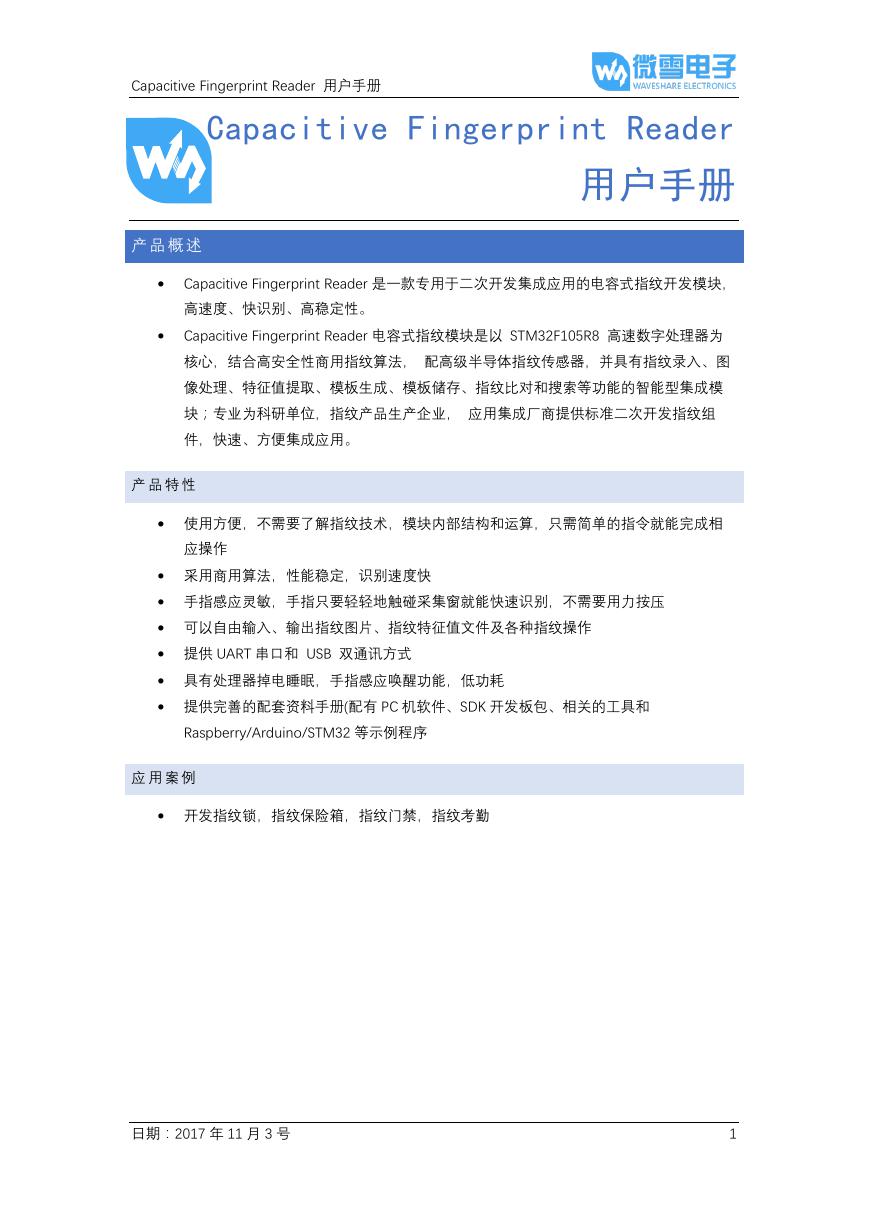 用户手册(Capacitive_Fingerprint_Reader_User_Manual_CN).pdf
 CY7C68013A(英文版)(CY7C68013A).pdf
 TechnicalReference_Dem.pdf