Raspberry Pi
High Quality Camera
Getting started
Operating instructions, regulatory compliance
information, and safety information
Published in April 2020
by Raspberry Pi Trading Ltd.
www.raspberrypi.org
�
Operating instructions
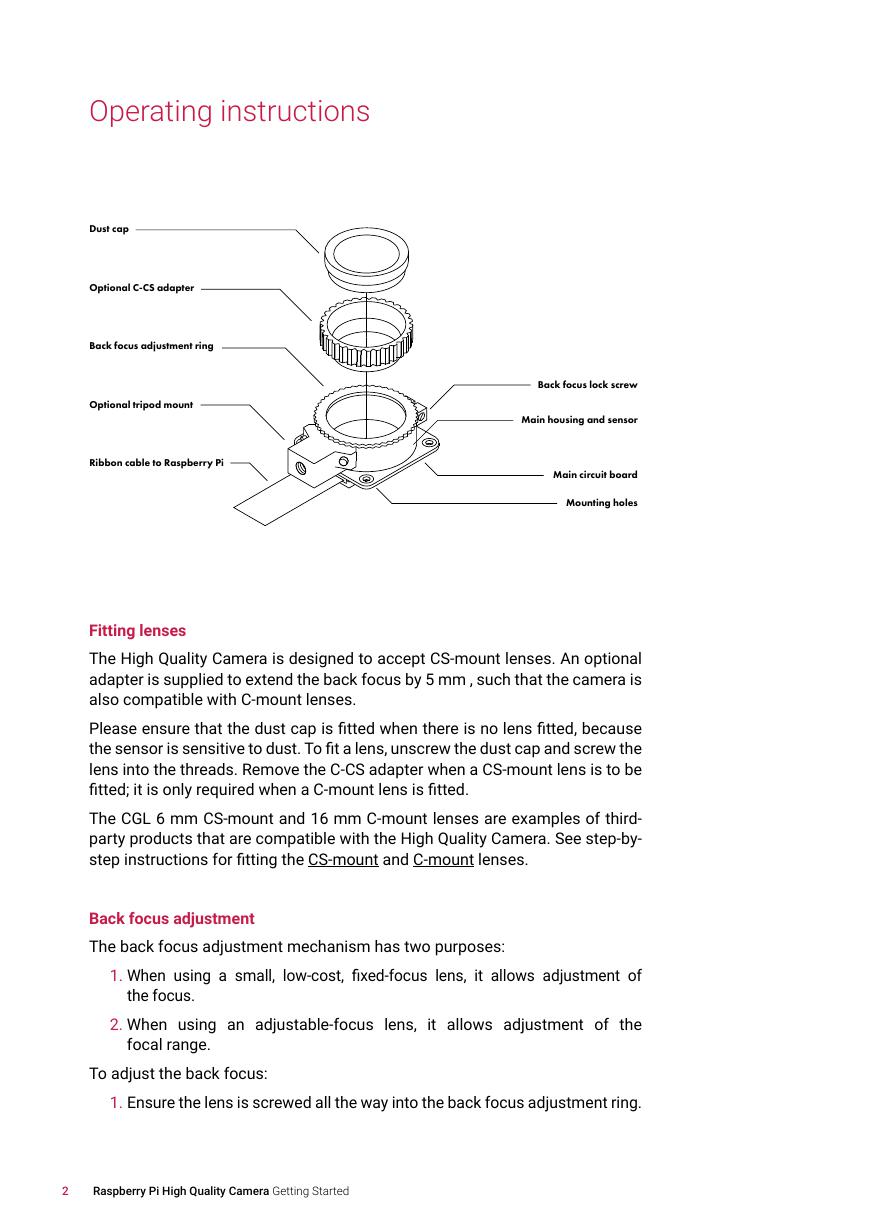
Dust cap
Optional C-CS adapter
Back focus adjustment ring
Optional tripod mount
Ribbon cable to Raspberry Pi
Back focus lock screw
Main housing and sensor
Main circuit board
Mounting holes
Fitting lenses
The High Quality Camera is designed to accept CS-mount lenses. An optional
adapter is supplied to extend the back focus by 5 mm , such that the camera is
also compatible with C-mount lenses.
Please ensure that the dust cap is fitted when there is no lens fitted, because
the sensor is sensitive to dust. To fit a lens, unscrew the dust cap and screw the
lens into the threads. Remove the C-CS adapter when a CS-mount lens is to be
fitted; it is only required when a C-mount lens is fitted.
The CGL 6 mm CS-mount and 16 mm C-mount lenses are examples of third-
party products that are compatible with the High Quality Camera. See step-by-
step instructions for fitting the CS-mount and C-mount lenses.
Back focus adjustment
The back focus adjustment mechanism has two purposes:
1. When using a small, low-cost, fixed-focus lens, it allows adjustment of
the focus.
2. When using an adjustable-focus lens, it allows adjustment of the
focal range.
To adjust the back focus:
1. Ensure the lens is screwed all the way into the back focus adjustment ring.
2
Raspberry Pi High Quality Camera Getting Started
�
2. Loosen the back focus lock screw with a small flat screwdriver.
3. Adjust the back focus height by turning the back focus adjustment ring
clockwise or anti-clockwise relative to the main housing until the camera
is in focus.
4. Tighten the back focus lock screw.
Tripod mount
The tripod mount is an optional component, and it can be unscrewed when it is
not needed. If it is needed, take care not to damage the ribbon when screwing
the tripod into the camera.
Connecting the High Quality Camera to a Raspberry Pi computer
Ensure your Raspberry Pi is switched off, then carefully release the plastic
catch on the Raspberry Pi’s camera connector. Insert the camera ribbon with
the contacts facing away from the catch. Once you have pushed the ribbon
in as far as it will go, push the catch back in. It is now safe to power up your
Raspberry Pi.
Operating the camera
First, enable the camera in Raspbian: in the Raspbian menu, select Preferences,
then Raspberry Pi Configuration. Click the Interfaces tab, find the Camera
entry in the list, and select Enabled. Click OK, and reboot your Raspberry Pi
when prompted.
raspistill is a command line tool for capturing camera images. To check
your camera is correctly installed, open a terminal window (Raspbian menu >
Accessories > Terminal) and take a test photograph by entering the command:
raspistill -o test.jpg
When you hit ENTER a live preview image will appear, and after a default period
of five seconds, the camera will capture a single still image. This will be saved
in your home folder and named test.jpg.
To use the camera just as a viewfinder, without saving a photo, use this
command:
raspistill -t 0
For more detailed information about installing and operating camera software,
refer to https://www.raspberrypi.org/documentation/configuration/camera.md.
For more advanced
the camera, see
https://www.raspberrypi.org/documentation/raspbian/applications/camera.md.
Alternatively, refer to The Official Raspberry Pi Camera Guide, published by
Raspberry Pi Press.
information about controlling
3
Raspberry Pi High Quality Camera Getting Started
�
Other features of the camera
Rotating the camera
It is possible to position the camera circuit board upside down with respect
to the tripod mount. In this situation the ribbon will extend out from the top of
the unit, rather than from the bottom.
To rotate the camera:
1. Work in a clean and dust-free environment, as the sensor will be exposed
to the air. Work with the sensor facing downwards throughout the process.
2. Unscrew the two 1.5 mm hex lock keys on the underside of the main
circuit board. Be careful not to let the washers roll away.
3. Lift the main housing and rotate it 180 degrees. The gasket will remain on
the circuit board, so realign the housing with the gasket.
4. The nylon washer prevents damage to the circuit board; apply this
washer first. Next, fit the steel washer, which prevents damage to the
nylon washer.
5. Screw down the two hex lock keys. As long as the washers have been
fitted in the correct order, they do not need to be screwed very tightly.
Infrared (IR) filter
The High Quality Camera contains an IR filter, which is used to reduce the
camera’s sensitivity to infrared light. It is possible to remove this filter, but doing
so will void the warranty on the product, and is likely to prove irreversible. See
further information on removing the IR filter.
4
Raspberry Pi High Quality Camera Getting Started
�
Regulatory compliance
EU
The Raspberry Pi High Quality Camera is in conformity with the following
applicable community harmonised legislation:
Electromagnetic Compatibility Directive (EMC) 2014/30/EU,
Restriction of Hazardous Substances (RoHS) Directive 2011/65/EU
The following harmonised standards have been used to demonstrate conformity
to these standards:
EN 55032:2015
EN 55024:2010
IEC60695-2-11
EN60950-1
WEEE Directive Statement for the European Union
This marking indicates that this product should not be disposed with other household wastes throughout the
EU. To prevent possible harm to the environment or human health from uncontrolled waste disposal, recycle
it responsibly to promote the sustainable reuse of material resources. To return your used device, please use
the return and collection systems or contact the retailer where the product was purchased. They can take
this product for environmental safe recycling.
Note: See a full online copy of this Declaration
For compliance information for all Raspberry Pi products, see https://www.raspberrypi.org/compliance/
FCC
The Raspberry Pi High Quality Camera is in conformity with the requirements
of the following specifications:
FCC 47 CFR Part 15, Subpart B, Class B Digital Device.
This device complies with part 15 of the FCC Rules. Operation is subject to the
following two conditions: (1) This device may not cause harmful interference,
and (2) this device must accept any interference received, including interference
that may cause undesired operation.
5
Raspberry Pi High Quality Camera Getting Started
�
Safety information
IMPORTANT: PLEASE RETAIN THIS INFORMATION FOR FUTURE REFERENCE
WARNINGS
•
This product should only be connected to and powered by a Raspberry Pi computer. Any external power
supply used with the Raspberry Pi should comply with relevant regulations and standards applicable in
the country of intended use.
This product should be operated in a well ventilated environment and should not be covered.
This product should be placed on a stable, flat, non-conductive surface while it is in use, and it should not
be contacted by conductive items.
•
•
INSTRUCTIONS FOR SAFE USE
To avoid malfunction of or damage to your Raspberry Pi High Quality Camera, please observe the following:
•
•
Do not expose it to water or moisture, or place it on a conductive surface whilst in operation.
Do not expose it to heat from any source; the Raspberry Pi High Quality Camera is designed for reliable
operation at normal ambient room temperatures.
Take care whilst handling to avoid mechanical or electrical damage to the printed circuit board and
exposed connectors. Use a tripod with the device to minimise damage to the electronic components.
Avoid handling the Raspberry Pi High Quality Camera while it is powered. Handle only by the edges or by
the lens mount assembly to minimise the risk of causing damage by electrostatic discharge.
Take care not to damage any of the exposed electronics components. These are easily damaged if the
unit is dropped, and this is especially the case if a large lens is fitted.
•
•
•
For all compliance certificates and numbers, please visit https://www.raspberrypi.org/compliance/
6
Raspberry Pi High Quality Camera Getting Started
�
MIPI DSI and MIPI CSI are service marks of MIPI Alliance, Inc
Raspberry Pi and the Raspberry Pi logo are trademarks of the Raspberry Pi Foundation
www.raspberrypi.org
�



 V2版本原理图(Capacitive-Fingerprint-Reader-Schematic_V2).pdf
 摄像头工作原理.doc
 VL53L0X简要说明(En.FLVL53L00216).pdf
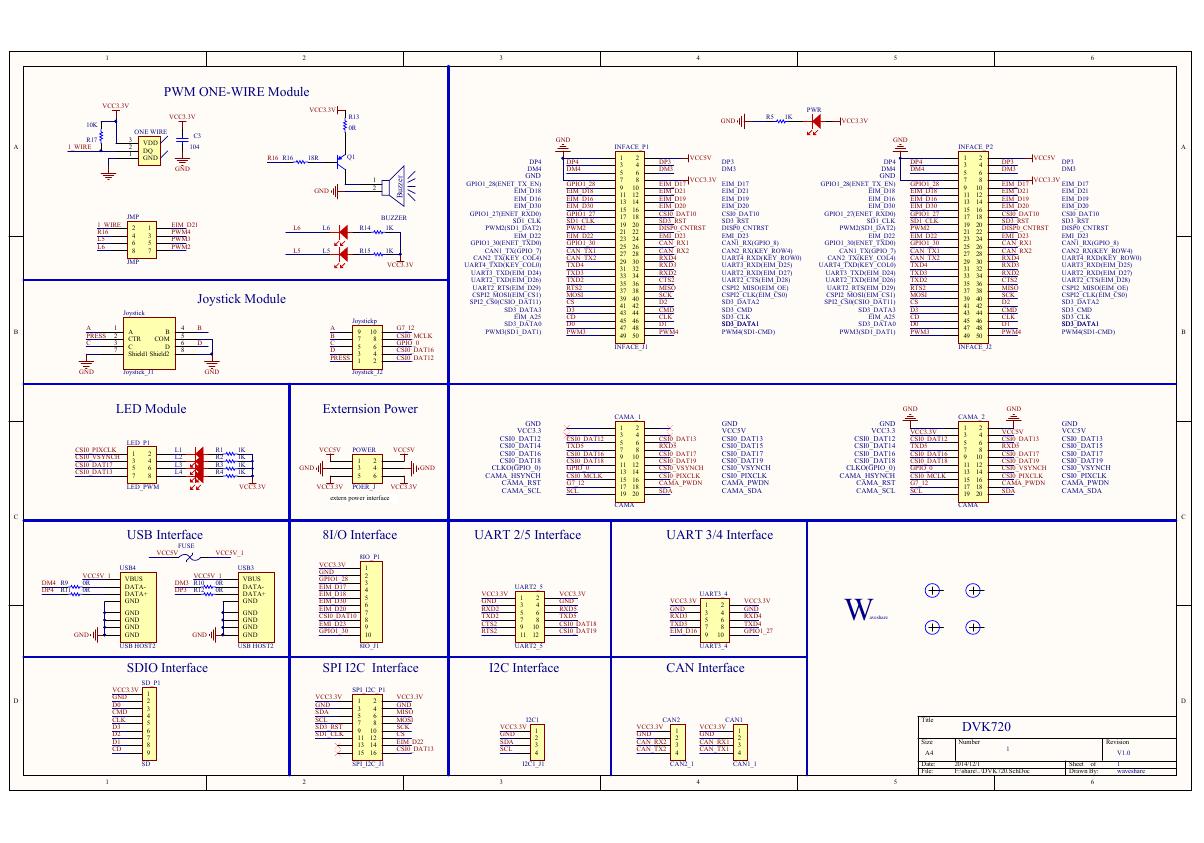 原理图(DVK720-Schematic).pdf
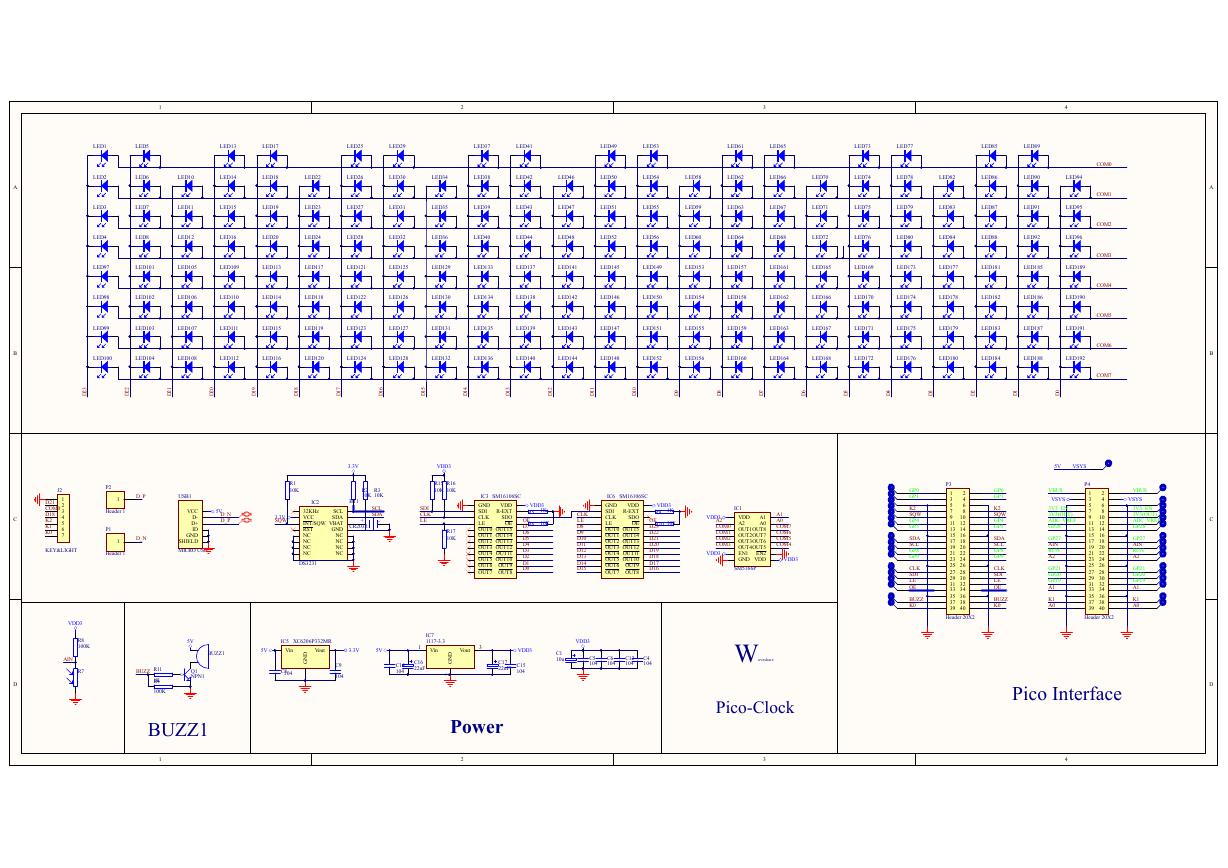 原理图(Pico-Clock-Green-Schdoc).pdf
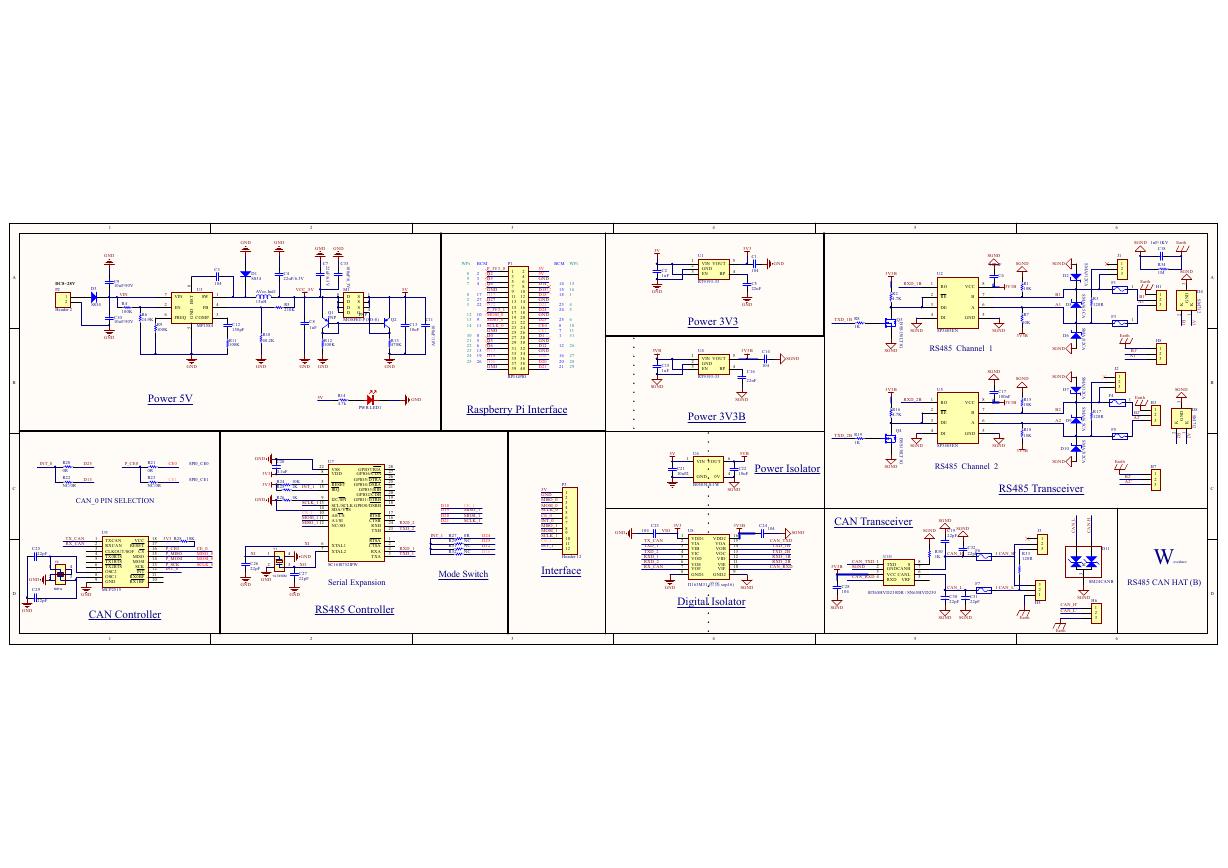 原理图(RS485-CAN-HAT-B-schematic).pdf
 File:SIM7500_SIM7600_SIM7800 Series_SSL_Application Note_V2.00.pdf
 ADS1263(Ads1262).pdf
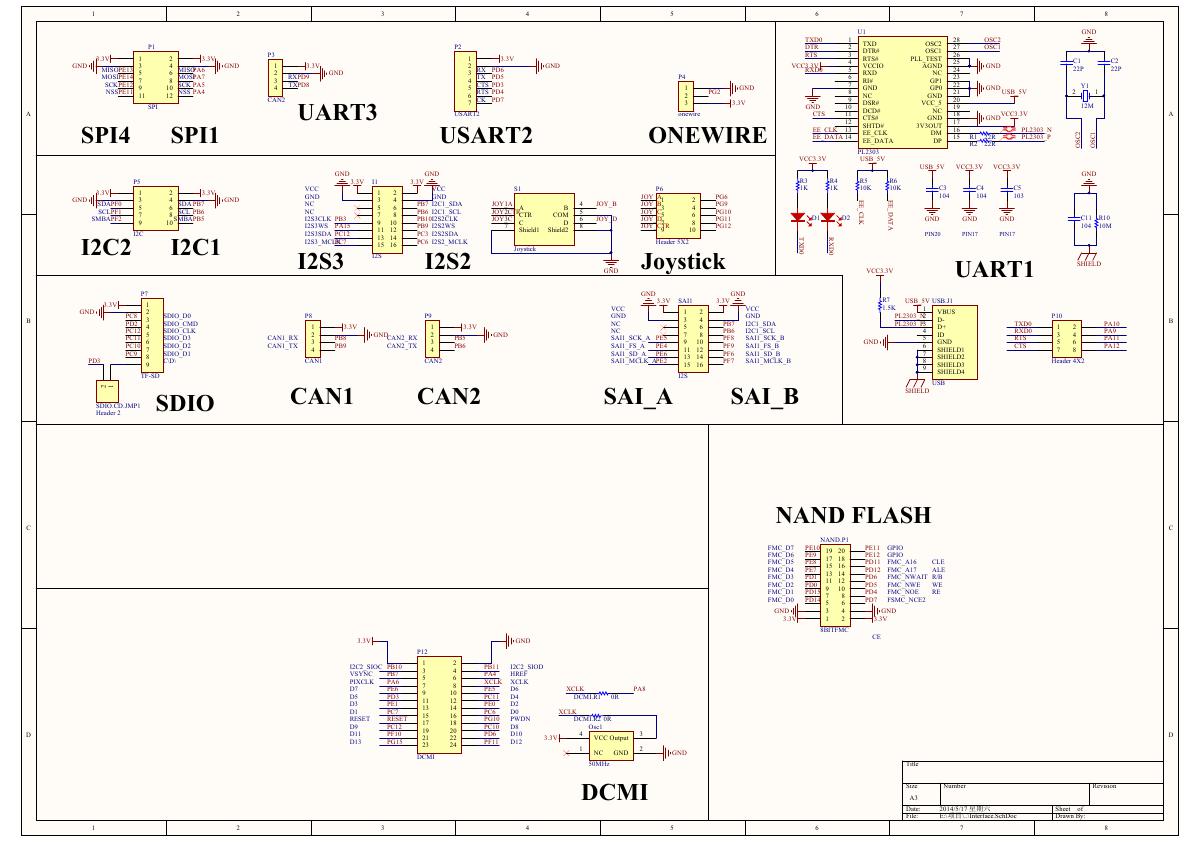 原理图(Open429Z-D-Schematic).pdf
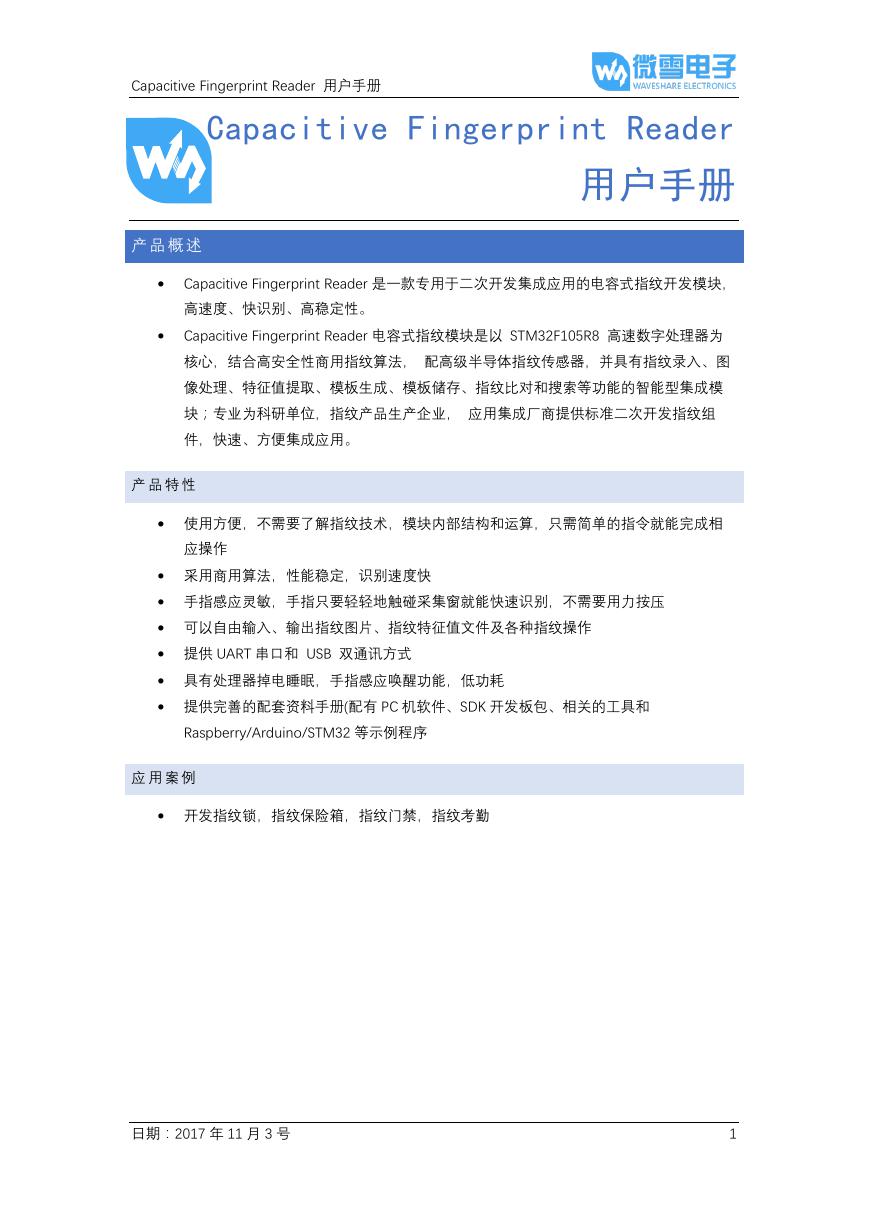 用户手册(Capacitive_Fingerprint_Reader_User_Manual_CN).pdf
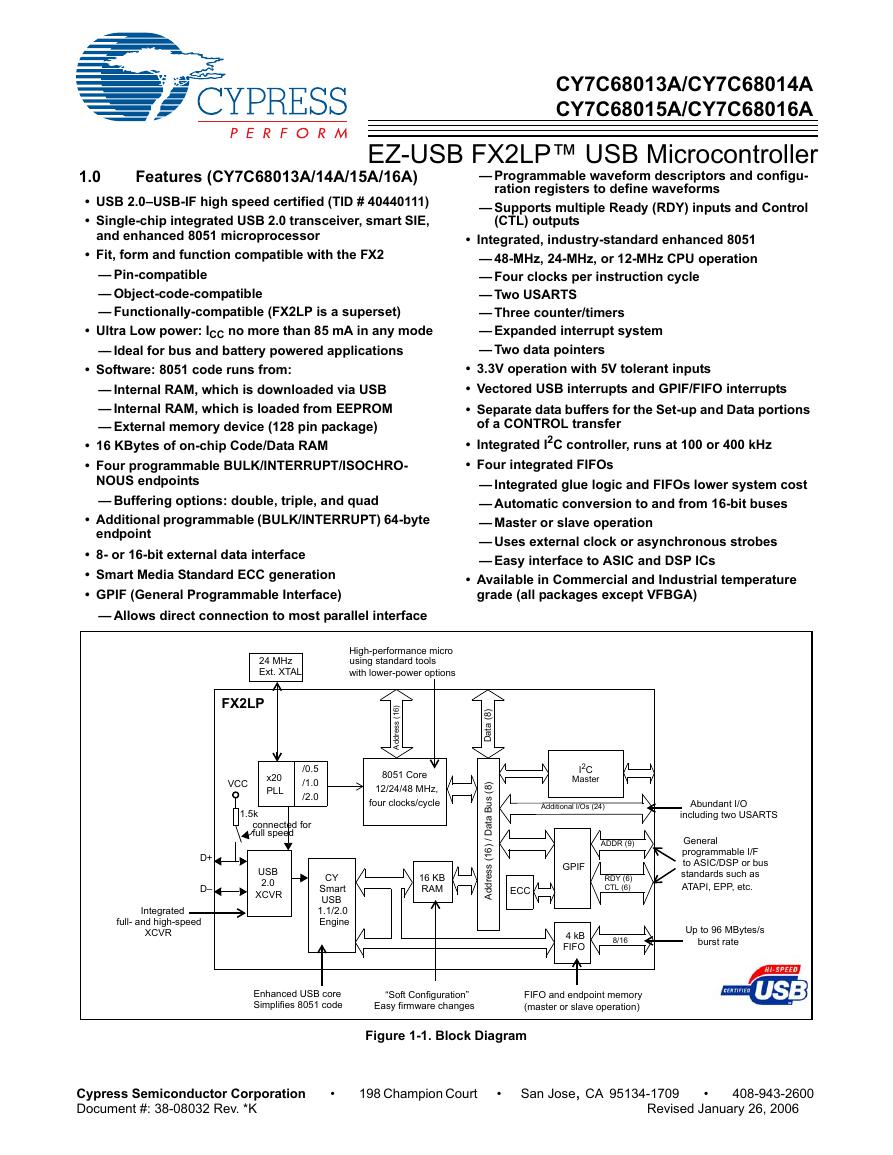 CY7C68013A(英文版)(CY7C68013A).pdf
 TechnicalReference_Dem.pdf