Proper Belt Tensioning
Tensioning Mechanism
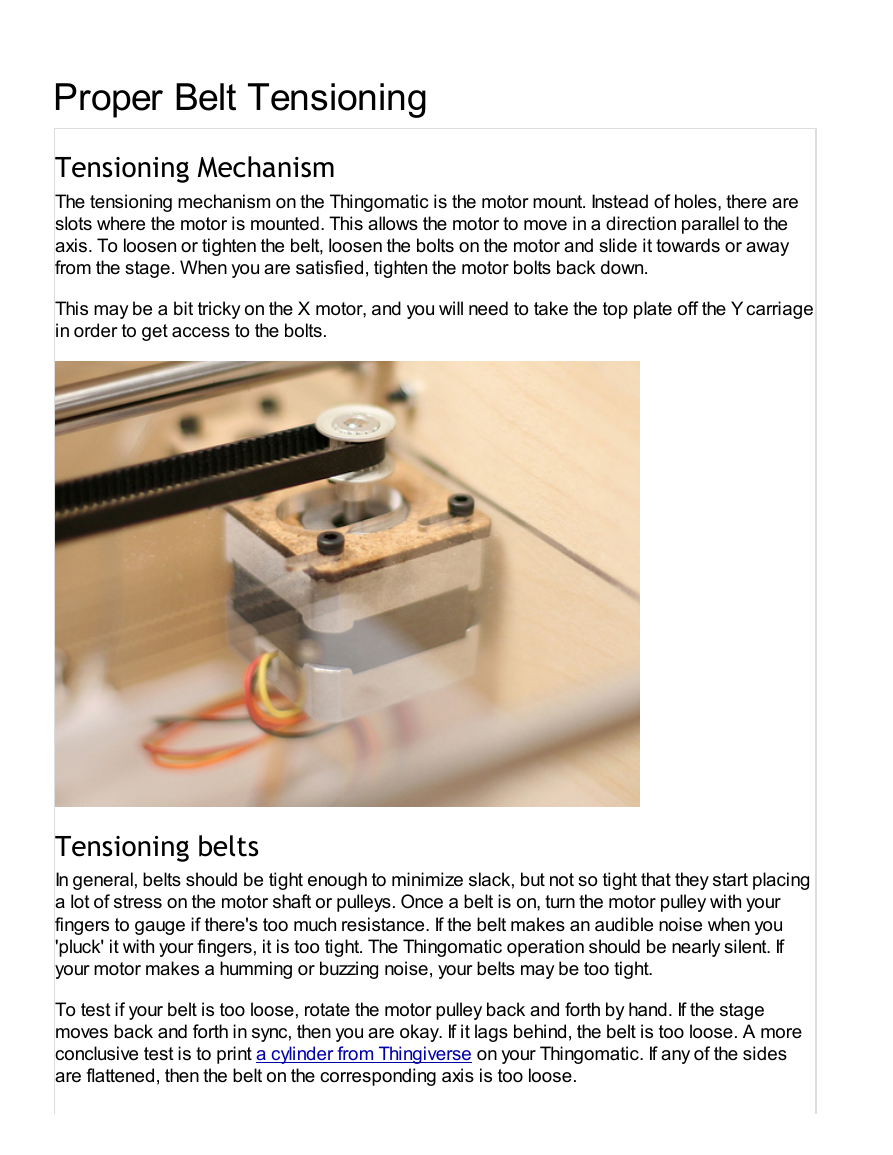
The tensioning mechanism on the Thingomatic is the motor mount. Instead of holes, there are
slots where the motor is mounted. This allows the motor to move in a direction parallel to the
axis. To loosen or tighten the belt, loosen the bolts on the motor and slide it towards or away
from the stage. When you are satisfied, tighten the motor bolts back down.
This may be a bit tricky on the X motor, and you will need to take the top plate off the Y carriage
in order to get access to the bolts.
Tensioning belts
In general, belts should be tight enough to minimize slack, but not so tight that they start placing
a lot of stress on the motor shaft or pulleys. Once a belt is on, turn the motor pulley with your
fingers to gauge if there's too much resistance. If the belt makes an audible noise when you
'pluck' it with your fingers, it is too tight. The Thingomatic operation should be nearly silent. If
your motor makes a humming or buzzing noise, your belts may be too tight.
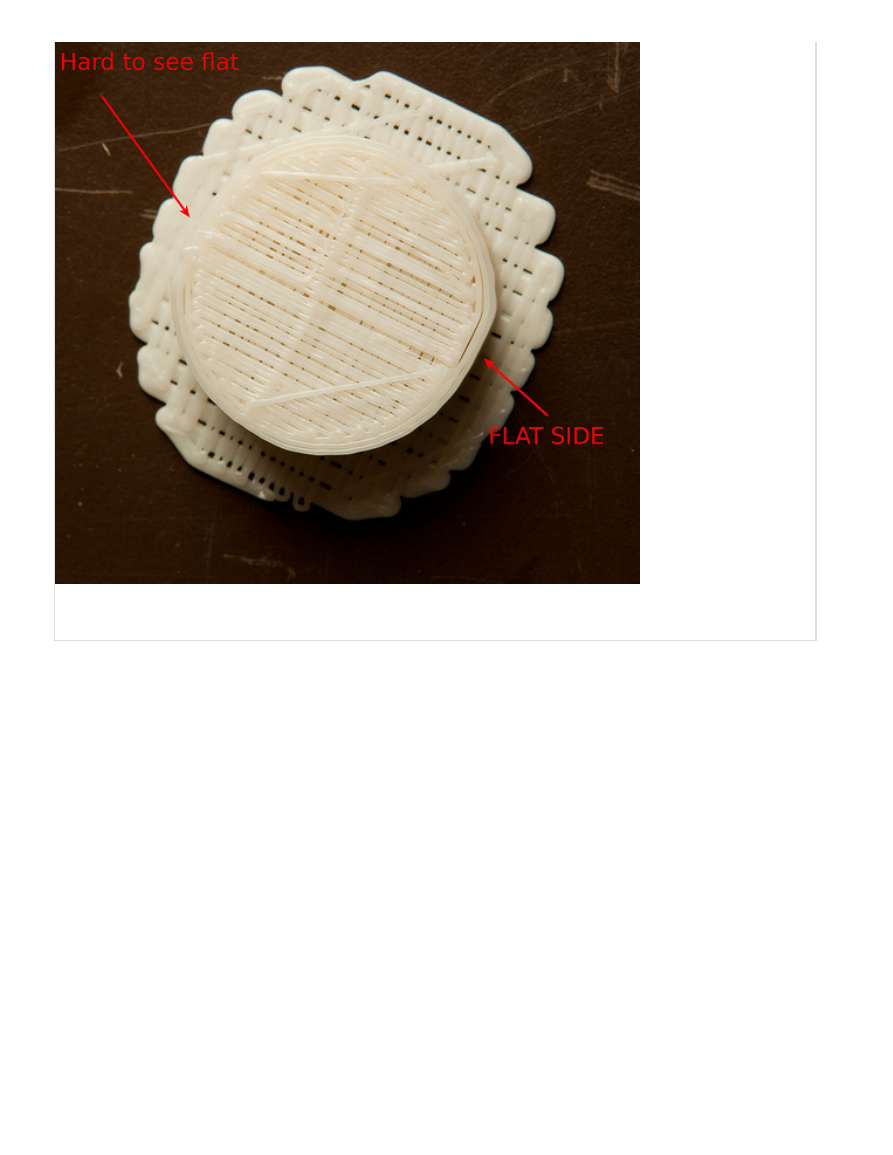
To test if your belt is too loose, rotate the motor pulley back and forth by hand. If the stage
moves back and forth in sync, then you are okay. If it lags behind, the belt is too loose. A more
conclusive test is to print a cylinder from Thingiverse on your Thingomatic. If any of the sides
are flattened, then the belt on the corresponding axis is too loose.
�
�
Testing Your Bot
Connect to your bot
Double-check your voltage
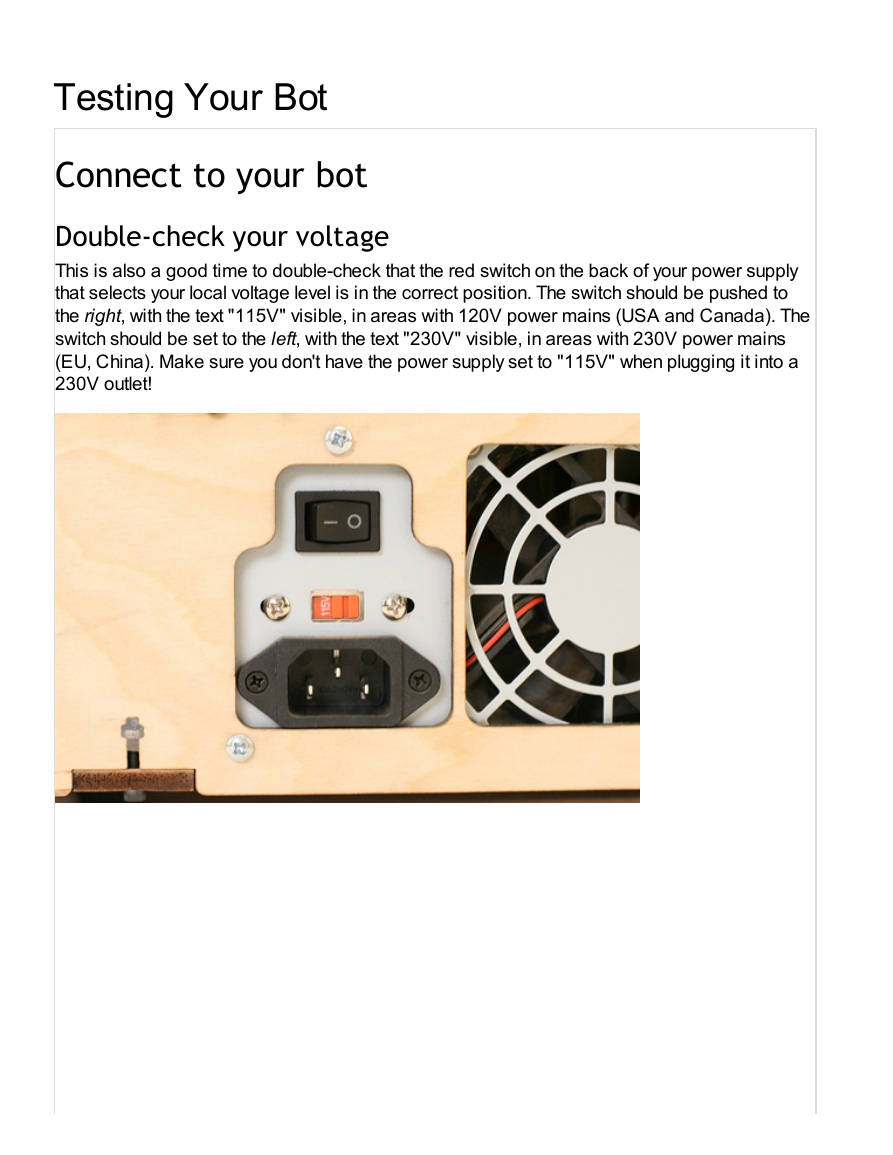
This is also a good time to double-check that the red switch on the back of your power supply
that selects your local voltage level is in the correct position. The switch should be pushed to
the right, with the text "115V" visible, in areas with 120V power mains (USA and Canada). The
switch should be set to the left, with the text "230V" visible, in areas with 230V power mains
(EU, China). Make sure you don't have the power supply set to "115V" when plugging it into a
230V outlet!
�
Plug in the power and turn it on
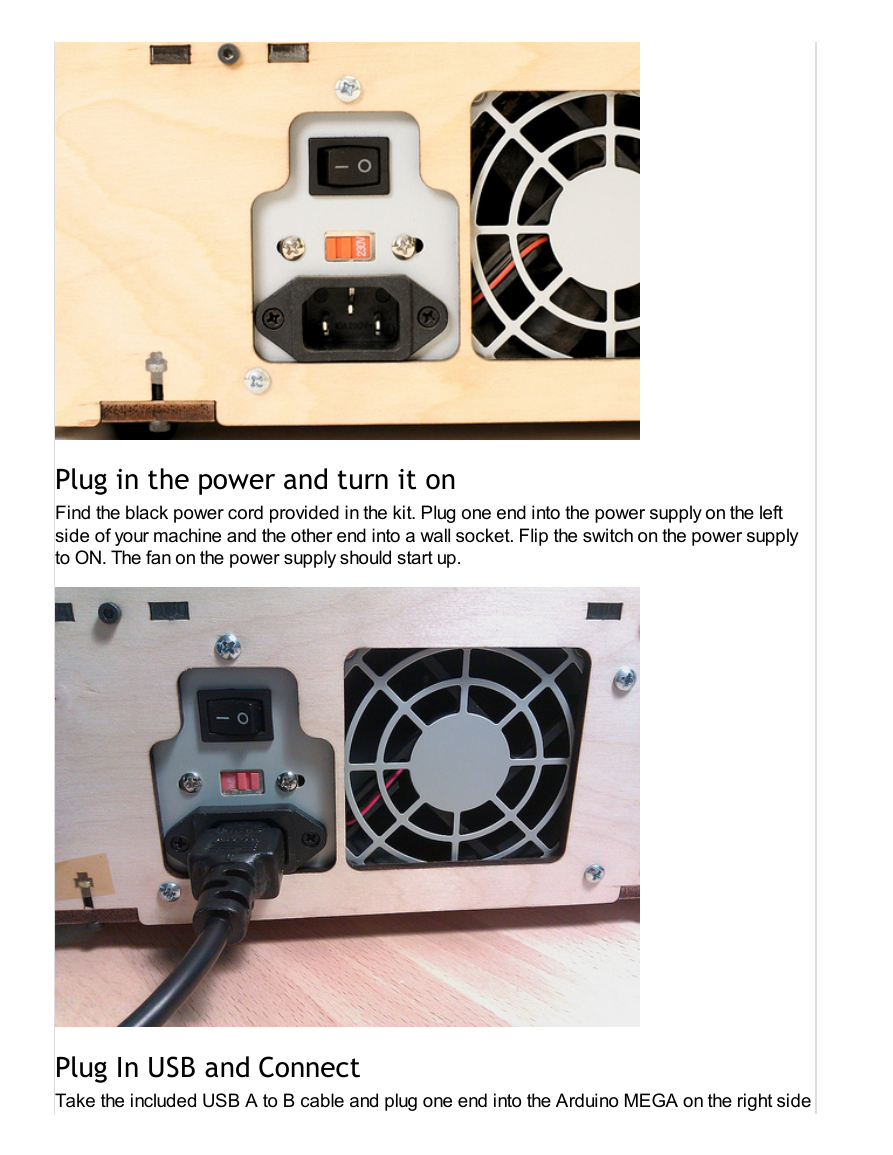
Find the black power cord provided in the kit. Plug one end into the power supply on the left
side of your machine and the other end into a wall socket. Flip the switch on the power supply
to ON. The fan on the power supply should start up.
Plug In USB and Connect
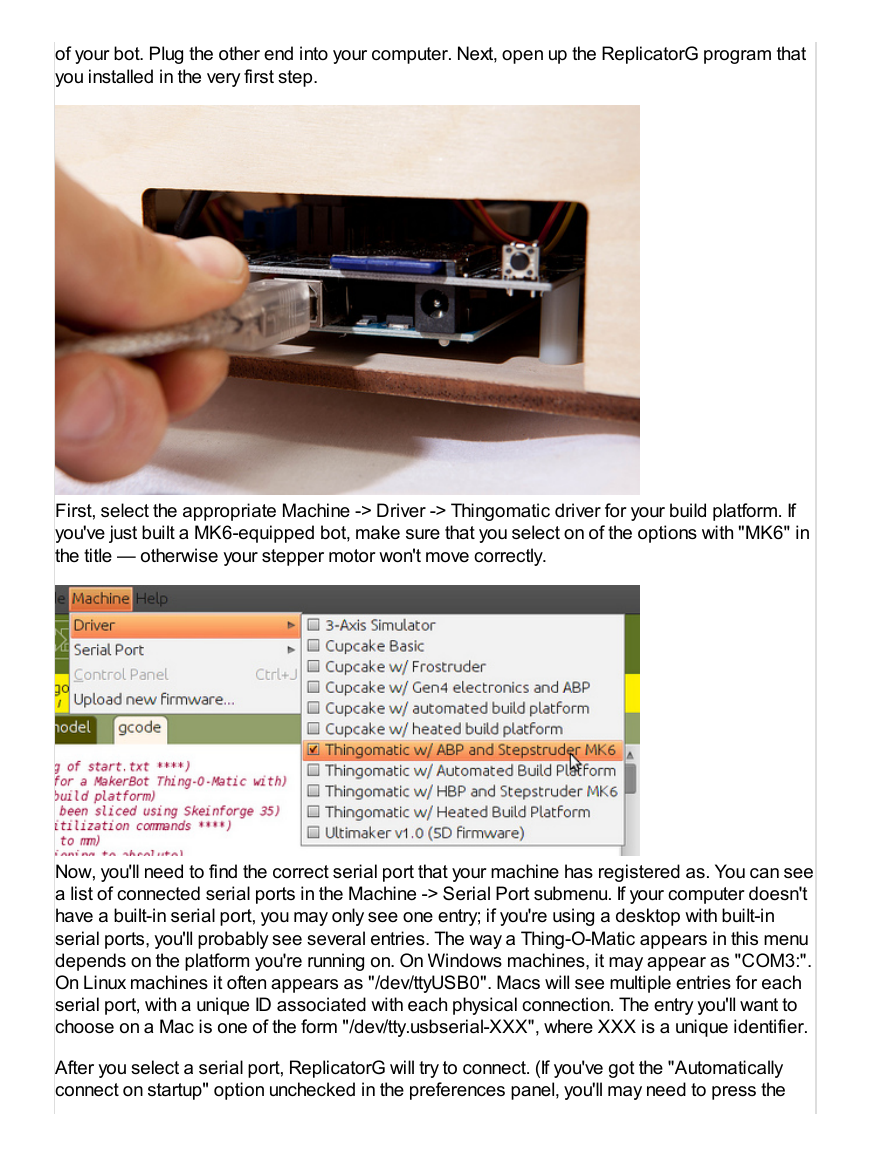
Take the included USB A to B cable and plug one end into the Arduino MEGA on the right side
�
of your bot. Plug the other end into your computer. Next, open up the ReplicatorG program that
you installed in the very first step.
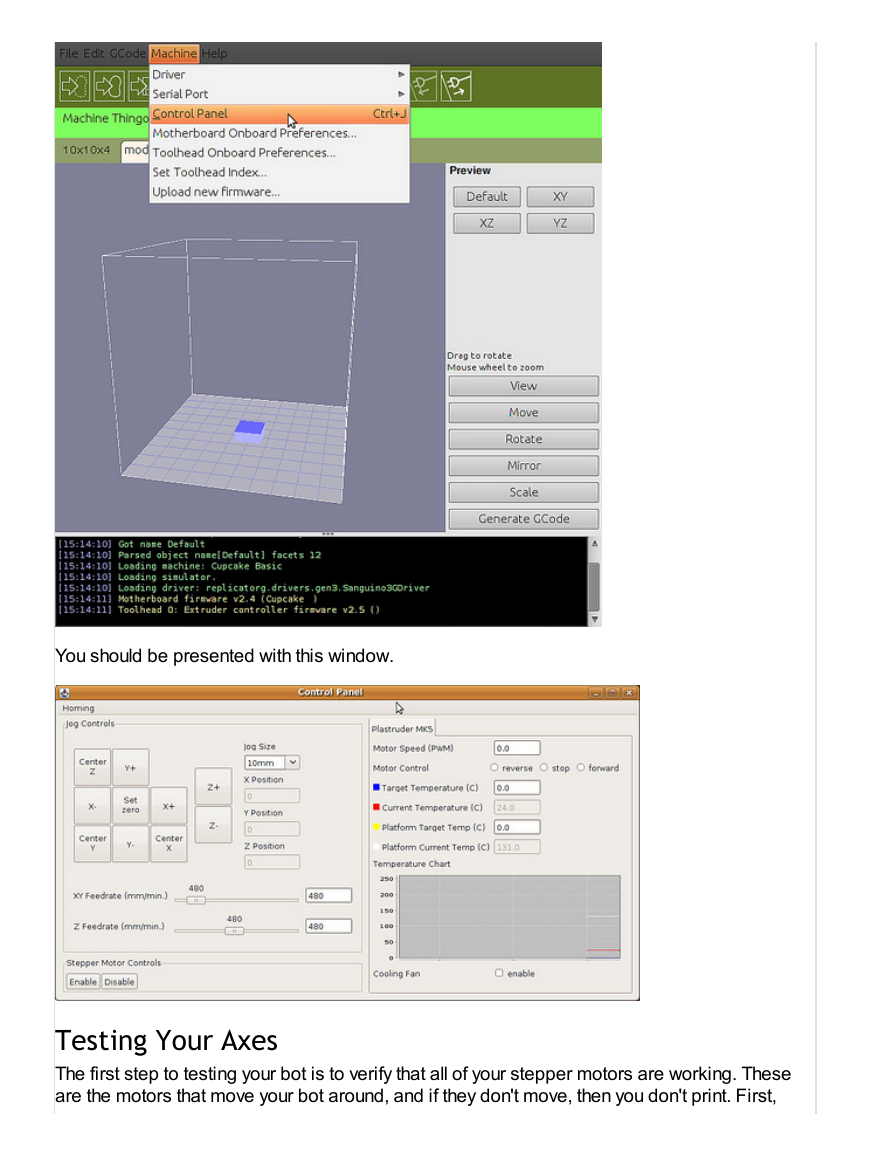
First, select the appropriate Machine -> Driver -> Thingomatic driver for your build platform. If
you've just built a MK6-equipped bot, make sure that you select on of the options with "MK6" in
the title — otherwise your stepper motor won't move correctly.
Now, you'll need to find the correct serial port that your machine has registered as. You can see
a list of connected serial ports in the Machine -> Serial Port submenu. If your computer doesn't
have a built-in serial port, you may only see one entry; if you're using a desktop with built-in
serial ports, you'll probably see several entries. The way a Thing-O-Matic appears in this menu
depends on the platform you're running on. On Windows machines, it may appear as "COM3:".
On Linux machines it often appears as "/dev/ttyUSB0". Macs will see multiple entries for each
serial port, with a unique ID associated with each physical connection. The entry you'll want to
choose on a Mac is one of the form "/dev/tty.usbserial-XXX", where XXX is a unique identifier.
After you select a serial port, ReplicatorG will try to connect. (If you've got the "Automatically
connect on startup" option unchecked in the preferences panel, you'll may need to press the
�
'Connect' icon on the right side of the button bar to tell ReplicatorG to connect.) The status bar
should turn green, as shown. The console window below should list both a Motherboard
and Firmware version.
If the console window reports that the motherboard can not connect to the toolhead, make sure
your patch cable is connected between the motherboard and extruder controller, that the
extruder controller is plugged into the power supply, and that the power on the Thing-O-Matic is
switched on.
Step 3: Open your Control Panel
Open the control panel by selecting the Machine -> Control Panel.
�
You should be presented with this window.
Testing Your Axes
The first step to testing your bot is to verify that all of your stepper motors are working. These
are the motors that move your bot around, and if they don't move, then you don't print. First,
�
there is some information you need to know about your XYZ axes configuration.
Get to know your axes
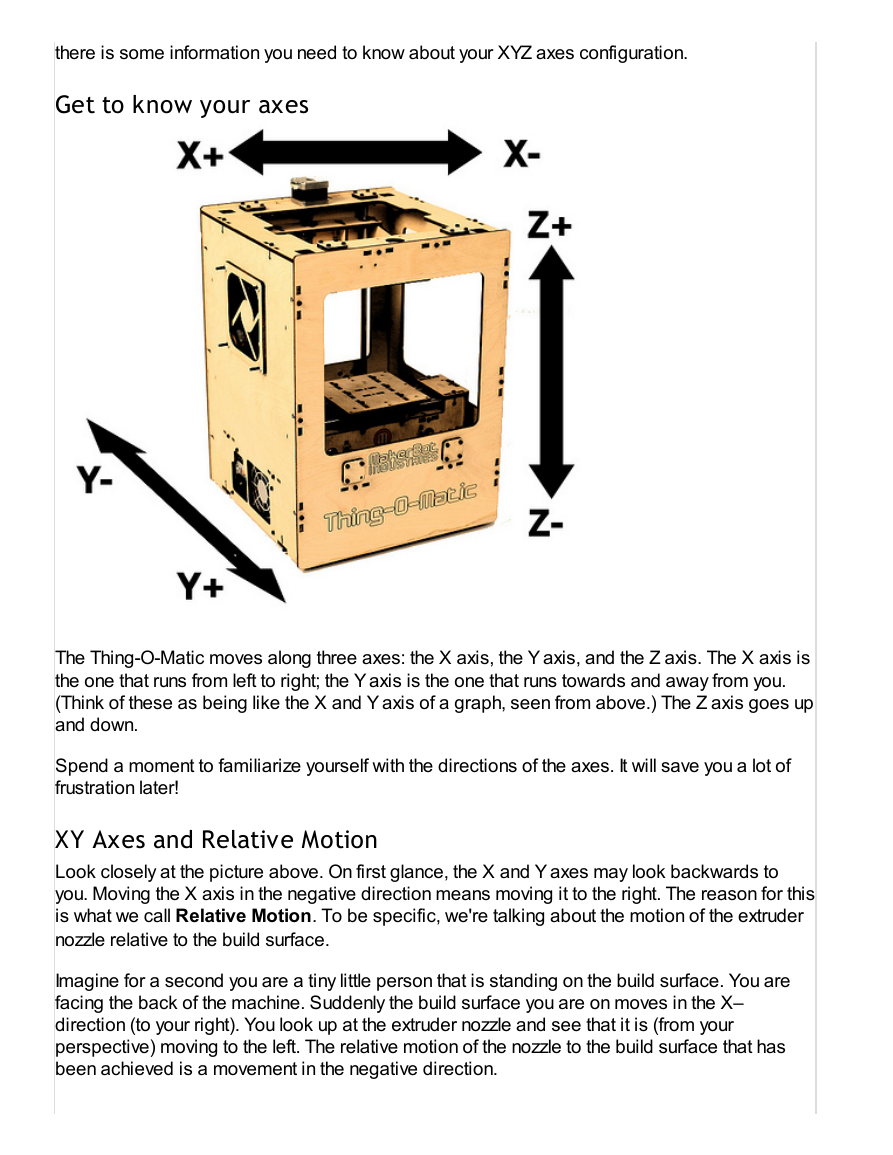
The Thing-O-Matic moves along three axes: the X axis, the Y axis, and the Z axis. The X axis is
the one that runs from left to right; the Y axis is the one that runs towards and away from you.
(Think of these as being like the X and Y axis of a graph, seen from above.) The Z axis goes up
and down.
Spend a moment to familiarize yourself with the directions of the axes. It will save you a lot of
frustration later!
XY Axes and Relative Motion
Look closely at the picture above. On first glance, the X and Y axes may look backwards to
you. Moving the X axis in the negative direction means moving it to the right. The reason for this
is what we call Relative Motion. To be specific, we're talking about the motion of the extruder
nozzle relative to the build surface.
Imagine for a second you are a tiny little person that is standing on the build surface. You are
facing the back of the machine. Suddenly the build surface you are on moves in the X–
direction (to your right). You look up at the extruder nozzle and see that it is (from your
perspective) moving to the left. The relative motion of the nozzle to the build surface that has
been achieved is a movement in the negative direction.
�



 2023年江西萍乡中考道德与法治真题及答案.doc
 2012年重庆南川中考生物真题及答案.doc
 2013年江西师范大学地理学综合及文艺理论基础考研真题.doc
 2020年四川甘孜小升初语文真题及答案I卷.doc
 2020年注册岩土工程师专业基础考试真题及答案.doc
 2023-2024学年福建省厦门市九年级上学期数学月考试题及答案.doc
 2021-2022学年辽宁省沈阳市大东区九年级上学期语文期末试题及答案.doc
 2022-2023学年北京东城区初三第一学期物理期末试卷及答案.doc
 2018上半年江西教师资格初中地理学科知识与教学能力真题及答案.doc
 2012年河北国家公务员申论考试真题及答案-省级.doc
 2020-2021学年江苏省扬州市江都区邵樊片九年级上学期数学第一次质量检测试题及答案.doc
 2022下半年黑龙江教师资格证中学综合素质真题及答案.doc