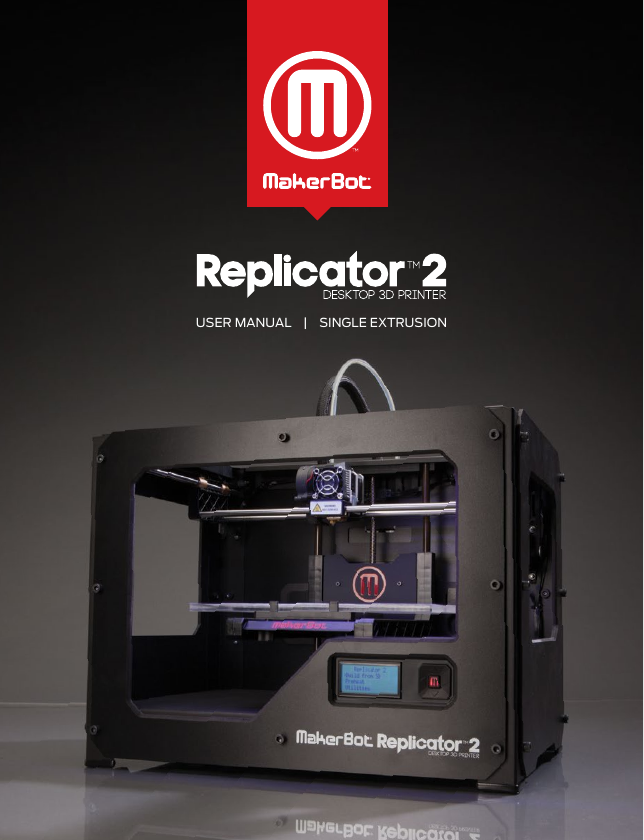
USER MANUAL | SINGLE EXTRUSION
�
�
TABLE OF CONTENTS
Specifications
How It Works
Terminology
A WELCOME. LET’S GET STARTED
B SETTInG up YOuR MAkERBOT REpLICATOR 2 DESkTOp 3D pRInTER
What’s in The Box
MakerBot Replicator 2 Desktop 3D printer Diagram
unpacking Your MakerBot Replicator 2 Desktop 3D printer
Installing Build plate
Installing Filament Guide Tube and Spool Holder
Mounting Filament Spool and Attaching uSB Cable
Attaching power Supply and powering On
C STARTup pROCESS: LEvELInG, LOADInG, TESTInG
Leveling the Build platform
Loading MakerBot pLA Filament
Making a Test Object from the SD Card
D MAkInG An OBjECT WITH MAkERBOT MAkERWARE
E TROuBLESHOOTInG, DIAGnOSTICS, AnD MAInTEnAnCE
Troubleshooting
Diagnostics
LCD panel | Top-Level Menu
LCD panel | utilities Menu
LCD panel | Info and Settings Menu
Maintenance
unloading MakerBot pLA Filament
Lubricating the Threaded Rod and the X-Axis Idler pulley
Cleaning the Drive Gear
Adjusting the plunger
F TERMS OF SERvICE
04
06
07
08
10
12
13
14
16
17
18
19
20
22
27
32
34
44
46
47
47
48
49
50
50
50
52
54
56
V 1
TABLE OF CONTENTS
03
�
A
Welcome.
Let’s get started.
�
This User Guide is designed to start your journey
with the MakerBot® Replicator™2 Desktop 3D Printer
off in the right direction. Even if you are familiar
with earlier MakerBot machines, it is essential that
you read through this guide, as there are several
important and exciting updates with the MakerBot
Replicator 2 Desktop 3D Printer.
In chapters A and B, you will learn the basics of
the MakerBot Replicator 2 Desktop 3D Printer, how
to unbox safely, and how to get set up. Chapters
C–E will take you through leveling, printing,
maintenance, and troubleshooting.
MakerBot is excited to welcome you to the world
of the MakerBot Replicator 2 Desktop 3D Printer.
Following this guide will help ensure that you are
getting the most out of your machine, and that you
continue to make amazing things.
WARNING: The MakerBot Replicator 2 Desktop 3D Printer generates high temperatures and includes
moving parts that can cause injury. Never reach inside the MakerBot Replicator 2 while it is in operation.
Always allow the MakerBot Replicator 2 to cool down before reaching inside.
CAUTION: If opening the MakerBot Replicator 2 for service, ensure that the power supply is turned off and
the cord is disconnected.
A WELCOME, LET’S GET STARTED
05
�
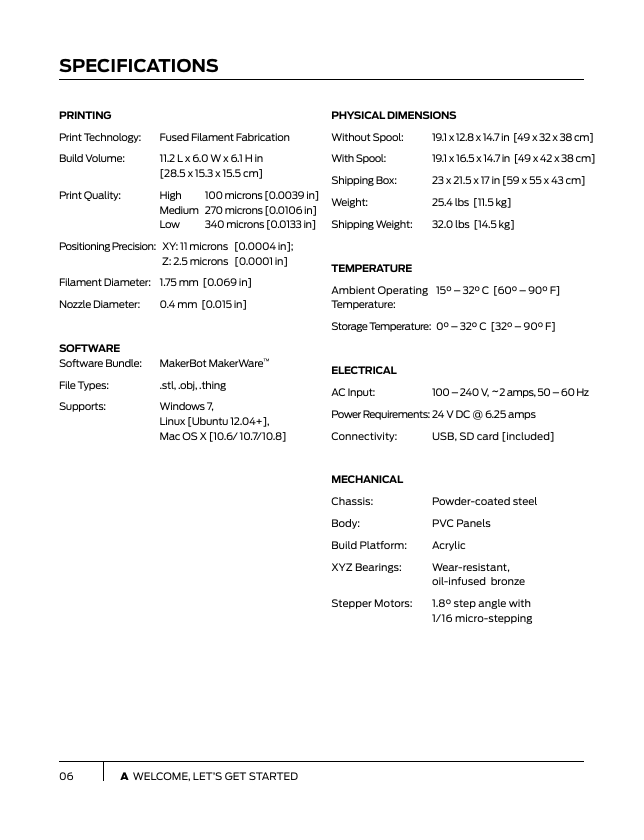
SPECiFiCATiONS
PriNTiNg
PhySiCAL DimENSiONS
Print Technology:
Fused Filament Fabrication
Without Spool:
19.1 x 12.8 x 14.7 in [49 x 32 x 38 cm]
Build Volume:
Print Quality:
11.2 L x 6.0 W x 6.1 H in
[28.5 x 15.3 x 15.5 cm]
With Spool:
19.1 x 16.5 x 14.7 in [49 x 42 x 38 cm]
Shipping Box:
23 x 21.5 x 17 in [59 x 55 x 43 cm]
High
100 microns [0.0039 in]
Medium 270 microns [0.0106 in]
Low
340 microns [0.0133 in]
Weight:
25.4 lbs [11.5 kg]
Shipping Weight:
32.0 lbs [14.5 kg]
Positioning Precision: XY: 11 microns [0.0004 in];
Z: 2.5 microns [0.0001 in]
Filament Diameter: 1.75 mm [0.069 in]
Nozzle Diameter: 0.4 mm [0.015 in]
TEmPErATUrE
Ambient Operating 15° – 32° C [60° – 90° F]
Temperature:
Storage Temperature: 0° – 32° C [32° – 90° F]
SOFTwArE
Software Bundle:
File Types:
Supports:
MakerBot MakerWare™
.stl, .obj, .thing
Windows 7,
Linux [Ubuntu 12.04+],
Mac OS X [10.6/ 10.7/10.8]
ELECTriCAL
AC Input:
100 – 240 V, ~2 amps, 50 – 60 Hz
Power Requirements: 24 V DC @ 6.25 amps
Connectivity:
USB, SD card [included]
mEChANiCAL
Chassis:
Body:
Powder-coated steel
PVC Panels
Build Platform:
Acrylic
XYZ Bearings:
Stepper Motors:
Wear-resistant,
oil-infused bronze
1.8° step angle with
1/16 micro-stepping
06
A WELCOME, LET’S GET STARTED
�
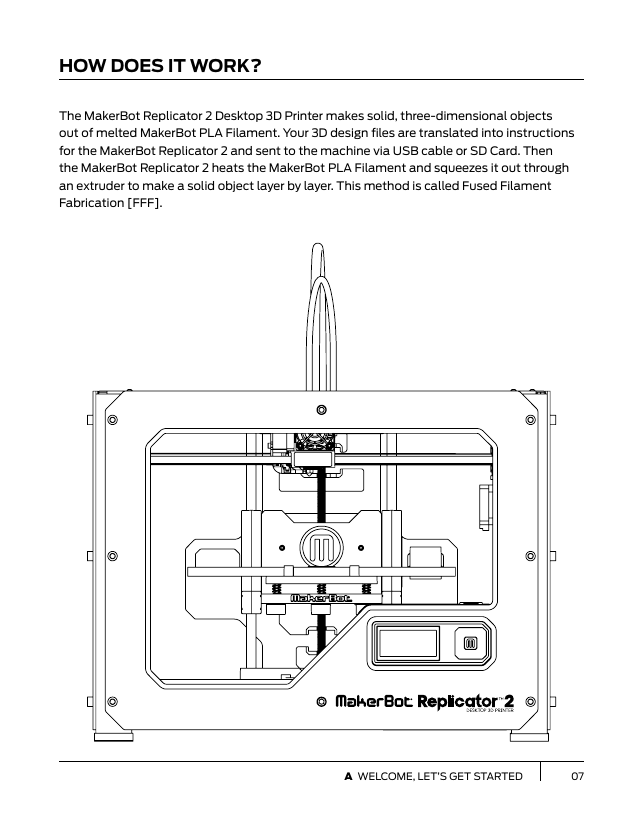
hOw DOES iT wOrK?
The MakerBot Replicator 2 Desktop 3D Printer makes solid, three-dimensional objects
out of melted MakerBot PLA Filament. Your 3D design files are translated into instructions
for the MakerBot Replicator 2 and sent to the machine via USB cable or SD Card. Then
the MakerBot Replicator 2 heats the MakerBot PLA Filament and squeezes it out through
an extruder to make a solid object layer by layer. This method is called Fused Filament
Fabrication [FFF].
A WELCOME, LET’S GET STARTED
07
�
TErmiNOLOgy
ACTivE COOLiNg FAN: The fan that
cools the MakerBot PLA Filament as
it extrudes.
BUiLD PLATE: The surface on which the
MakerBot Replicator 2 makes an object.
BUiLD PLATFOrm: The support for the
build plate. The build platform includes
knobs for manual leveling.
PLUNgEr: A part of the extruder
assembly. The Delrin plunger pushes the
MakerBot PLA Filament against
the drive gear.
DrivE gEAr: The gear that drives the
MakerBot PLA Filament into the heater.
ExTrUDEr: Draws MakerBot PLA
Filament from the spool and pushes it
into the nozzle, where it is heated and
squeezed onto the build plate
ExTrUDEr FAN: The fan that keeps the
MakerBot Replicator 2 motor cool and
disperses heat from the heat sink.
FAN gUArD: A grill that protects the
extruder fan and protects the user
from the fan.
gCODE: A computer language used to
describe the toolpath your MakerBot
Replicator 2 will use to build an object.
GCode is converted to S3G before being
sent to your machine.
hEAT SiNK: An active heat sink that
dissipates heat from the cartridge heater.
It looks like an aluminum plate with fins.
LCD CONTrOL PANEL: The liquid-
crystal display in the front lower right
corner of the MakerBot Replicator 2. This
control panel provides status information
about the MakerBot Replicator 2 and
includes control menus and diagnostics.
mAKErBOT PLA FiLAmENT: Polylactic
acid filament. PLA is a renewable
bioplastic. MakerBot PLA Filament is the
source material from which you make
objects on the MakerBot Replicator 2.
mAKErBOT rEPLiCATOr 2: The
MakerBot Replicator 2 Desktop 3D Printer.
mAKErwArE: Free software created
by MakerBot that allows you to load 3D
model files, manipulate and edit those
files, and send them to the MakerBot
Replicator 2 for building.
FiLAmENT gUiDE TUBE: A plastic tube
that guides the MakerBot PLA Filament
from the filament spool to the extruder.
mOTOr ASSEmBLy: The stepper motor
and the drive block that push filament
into the extruder.
08
A WELCOME, LET’S GET STARTED
�





 2023年江西萍乡中考道德与法治真题及答案.doc
 2012年重庆南川中考生物真题及答案.doc
 2013年江西师范大学地理学综合及文艺理论基础考研真题.doc
 2020年四川甘孜小升初语文真题及答案I卷.doc
 2020年注册岩土工程师专业基础考试真题及答案.doc
 2023-2024学年福建省厦门市九年级上学期数学月考试题及答案.doc
 2021-2022学年辽宁省沈阳市大东区九年级上学期语文期末试题及答案.doc
 2022-2023学年北京东城区初三第一学期物理期末试卷及答案.doc
 2018上半年江西教师资格初中地理学科知识与教学能力真题及答案.doc
 2012年河北国家公务员申论考试真题及答案-省级.doc
 2020-2021学年江苏省扬州市江都区邵樊片九年级上学期数学第一次质量检测试题及答案.doc
 2022下半年黑龙江教师资格证中学综合素质真题及答案.doc