Halcon 深度学习知识点
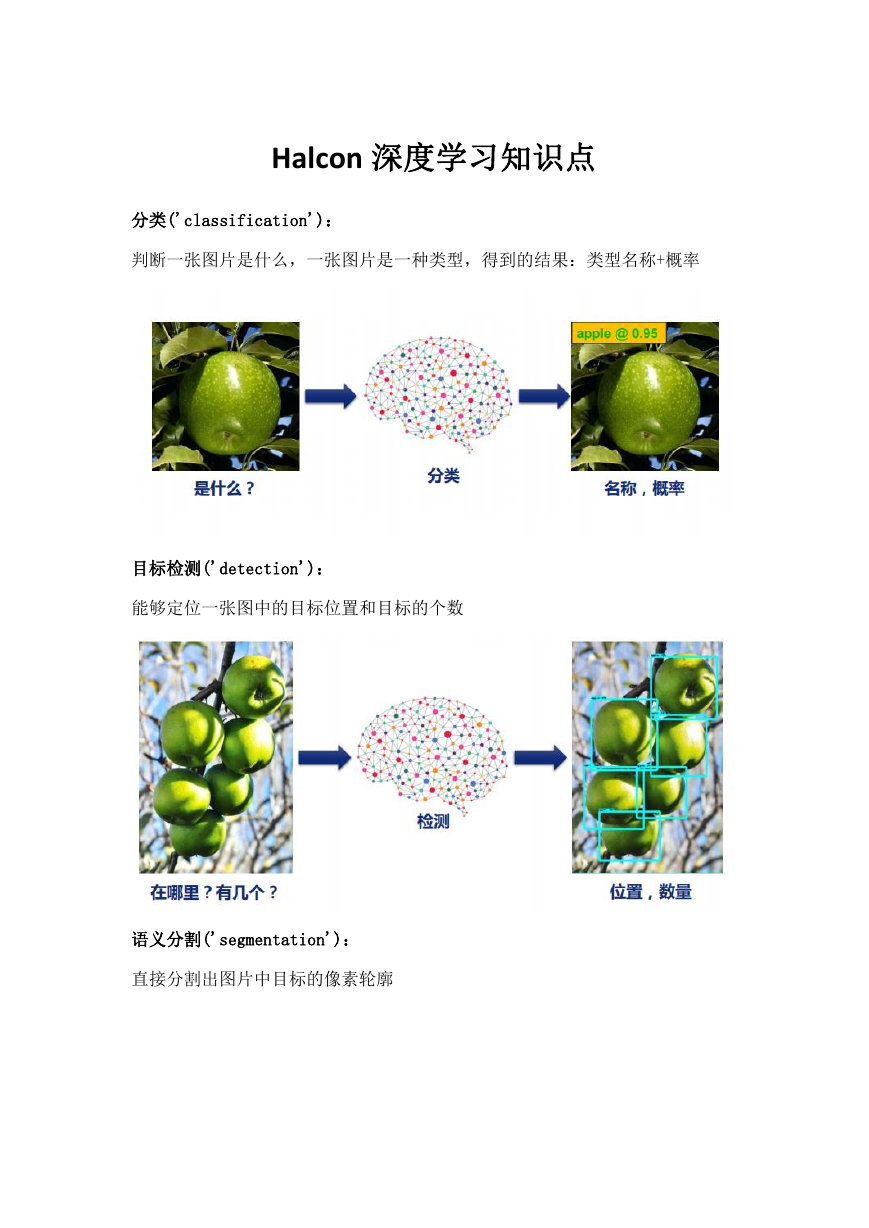
分类('classification'):
判断一张图片是什么,一张图片是一种类型,得到的结果:类型名称+概率
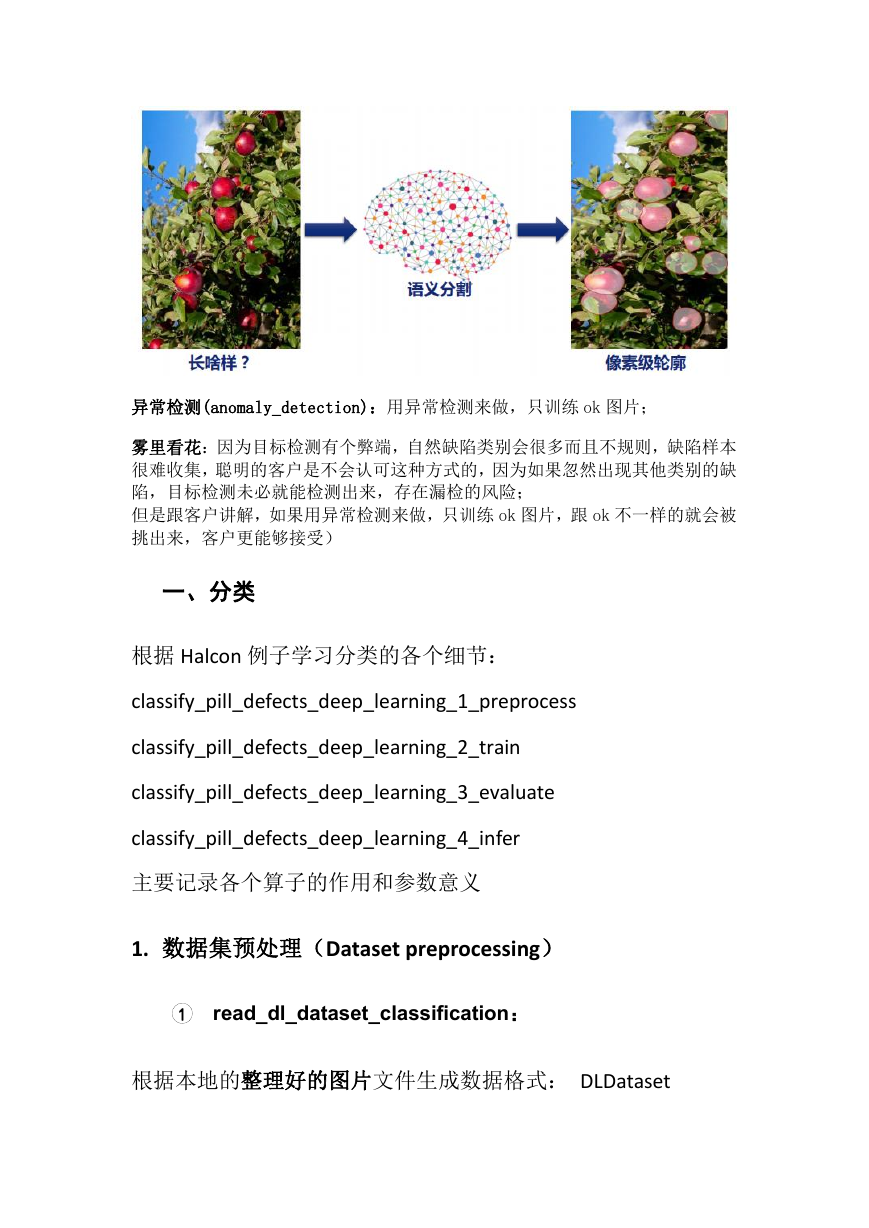
目标检测('detection'):
能够定位一张图中的目标位置和目标的个数
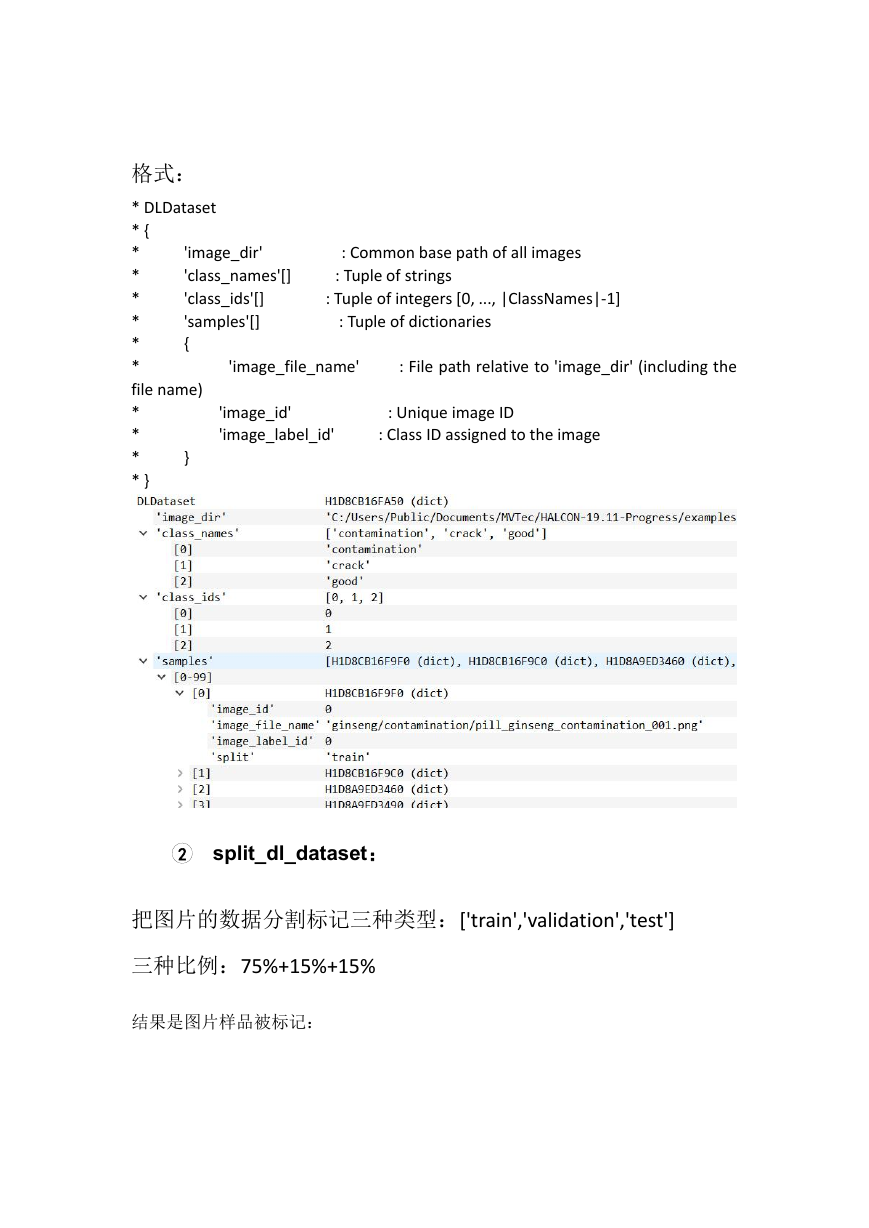
语义分割('segmentation'):
直接分割出图片中目标的像素轮廓
�
异常检测(anomaly_detection):用异常检测来做,只训练 ok 图片;
雾里看花:因为目标检测有个弊端,自然缺陷类别会很多而且不规则,缺陷样本
很难收集,聪明的客户是不会认可这种方式的,因为如果忽然出现其他类别的缺
陷,目标检测未必就能检测出来,存在漏检的风险;
但是跟客户讲解,如果用异常检测来做,只训练 ok 图片,跟 ok 不一样的就会被
挑出来,客户更能够接受)
一、分类
根据 Halcon 例子学习分类的各个细节:
classify_pill_defects_deep_learning_1_preprocess
classify_pill_defects_deep_learning_2_train
classify_pill_defects_deep_learning_3_evaluate
classify_pill_defects_deep_learning_4_infer
主要记录各个算子的作用和参数意义
1. 数据集预处理(Dataset preprocessing)
1
read_dl_dataset_classification:
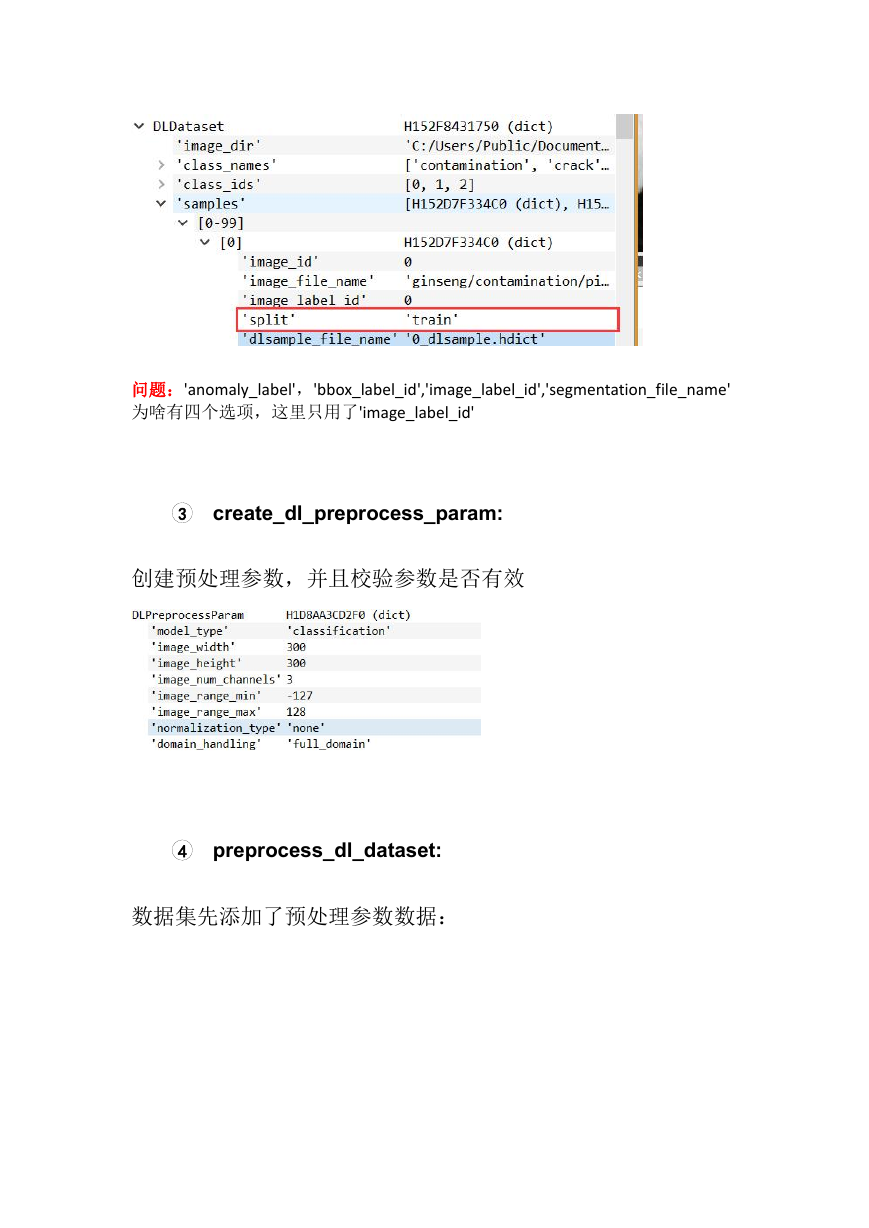
根据本地的整理好的图片文件生成数据格式: DLDataset
�
'image_dir'
'class_names'[]
'class_ids'[]
'samples'[]
{
: Common base path of all images
: Tuple of strings
: Tuple of integers [0, ..., |ClassNames|-1]
: Tuple of dictionaries
格式:
* DLDataset
* {
*
*
*
*
*
*
file name)
*
*
*
* }
}
'image_file_name'
: File path relative to 'image_dir' (including the
'image_id'
'image_label_id'
: Unique image ID
: Class ID assigned to the image
2
split_dl_dataset:
把图片的数据分割标记三种类型:['train','validation','test']
三种比例:75%+15%+15%
结果是图片样品被标记:
�
问题:'anomaly_label','bbox_label_id','image_label_id','segmentation_file_name'
为啥有四个选项,这里只用了'image_label_id'
3
create_dl_preprocess_param:
创建预处理参数,并且校验参数是否有效
4
preprocess_dl_dataset:
数据集先添加了预处理参数数据:
�
数据集添加样本的输出路径:
函数内核心方法:
A. gen_dl_samples:
每个样本生成 DLSample 词典:
�
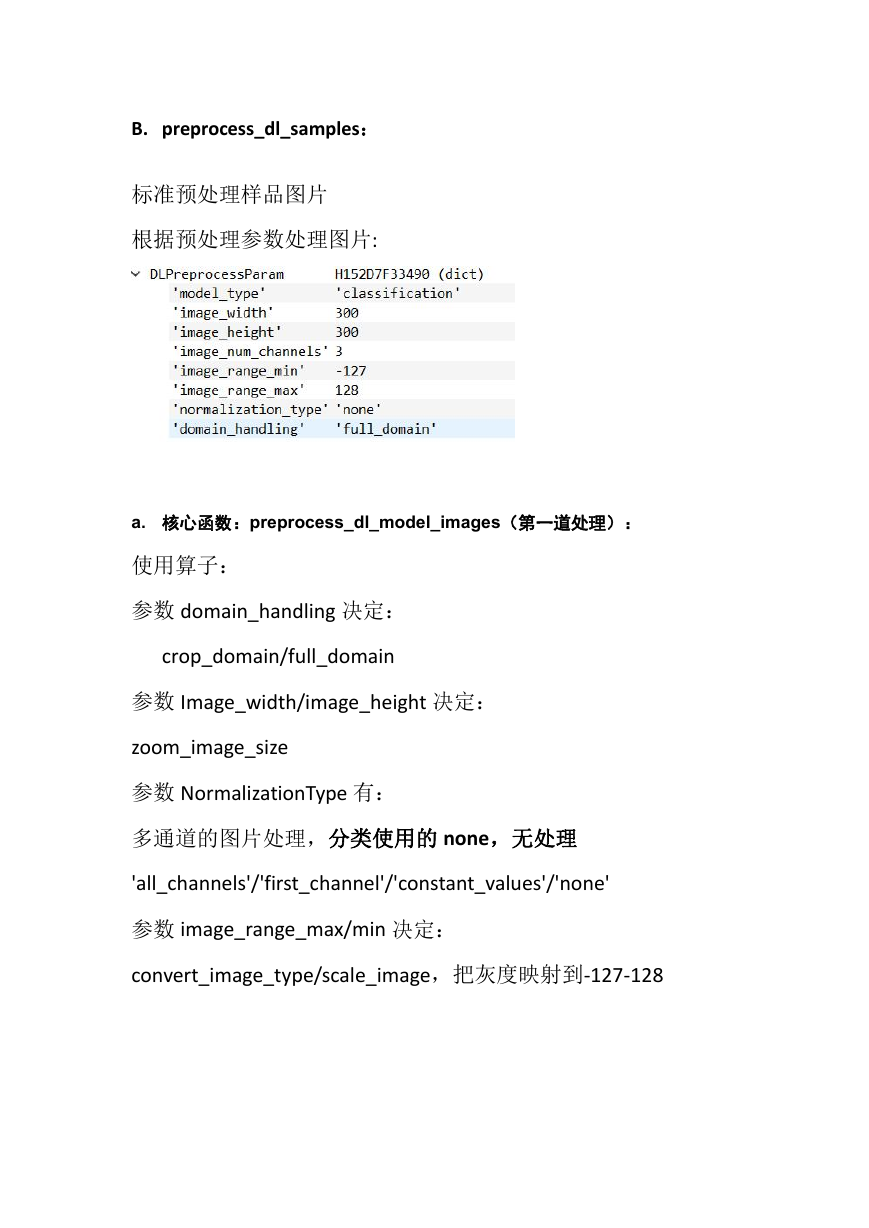
B. preprocess_dl_samples:
标准预处理样品图片
根据预处理参数处理图片:
a. 核心函数:preprocess_dl_model_images(第一道处理):
使用算子:
参数 domain_handling 决定:
crop_domain/full_domain
参数 Image_width/image_height 决定:
zoom_image_size
参数 NormalizationType 有:
多通道的图片处理,分类使用的 none,无处理
'all_channels'/'first_channel'/'constant_values'/'none'
参数 image_range_max/min 决定:
convert_image_type/scale_image,把灰度映射到-127-128
�
b. model specific sample keys(第二道预处理)
分类没有进行此步骤的处理
'anomaly_ground_truth':
算子:preprocess_dl_model_anomaly
'bbox_row1':'rectangle1':
算子:preprocess_dl_model_bbox_rect1
'bbox_phi':'rectangle2':
算子:preprocess_dl_model_bbox_rect2
'segmentation_image':'semantic segmentation'
算子:preprocess_dl_model_segmentations
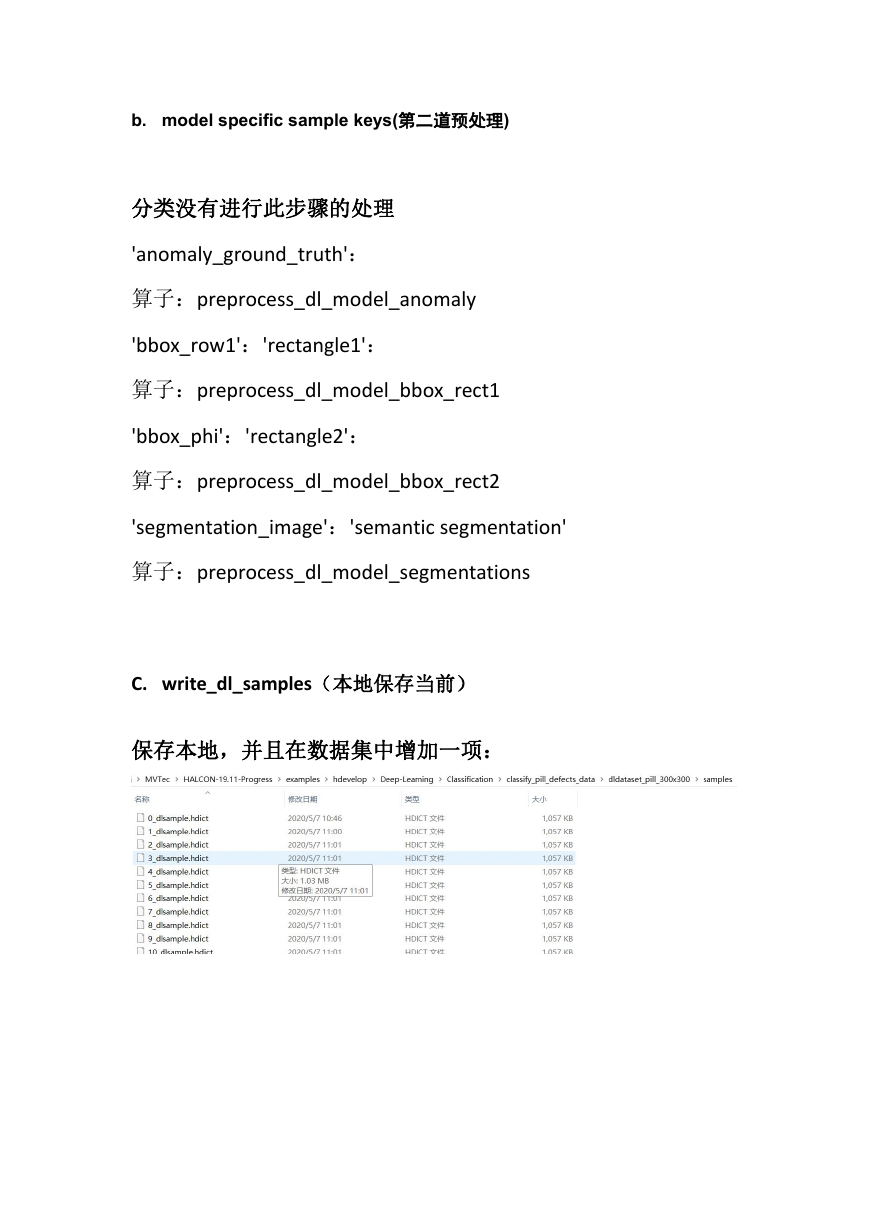
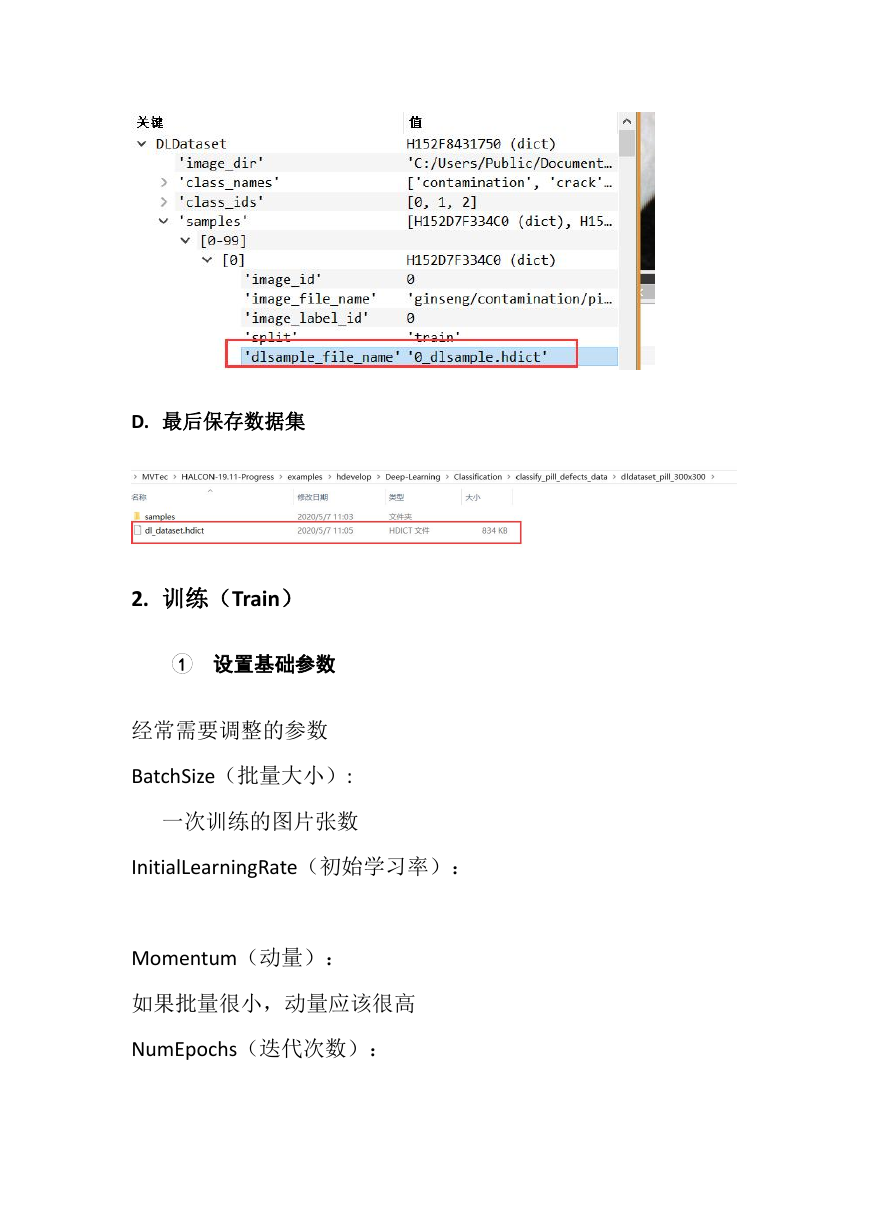
C. write_dl_samples(本地保存当前)
保存本地,并且在数据集中增加一项:
�
D. 最后保存数据集
2. 训练(Train)
1 设置基础参数
经常需要调整的参数
BatchSize(批量大小):
一次训练的图片张数
InitialLearningRate(初始学习率):
Momentum(动量):
如果批量很小,动量应该很高
NumEpochs(迭代次数):
�



 2023年江西萍乡中考道德与法治真题及答案.doc
 2012年重庆南川中考生物真题及答案.doc
 2013年江西师范大学地理学综合及文艺理论基础考研真题.doc
 2020年四川甘孜小升初语文真题及答案I卷.doc
 2020年注册岩土工程师专业基础考试真题及答案.doc
 2023-2024学年福建省厦门市九年级上学期数学月考试题及答案.doc
 2021-2022学年辽宁省沈阳市大东区九年级上学期语文期末试题及答案.doc
 2022-2023学年北京东城区初三第一学期物理期末试卷及答案.doc
 2018上半年江西教师资格初中地理学科知识与教学能力真题及答案.doc
 2012年河北国家公务员申论考试真题及答案-省级.doc
 2020-2021学年江苏省扬州市江都区邵樊片九年级上学期数学第一次质量检测试题及答案.doc
 2022下半年黑龙江教师资格证中学综合素质真题及答案.doc