logo资料库

Mimaki打印机-APC-130说明书.pdf

第1页 / 共114页
第2页 / 共114页
第3页 / 共114页
第4页 / 共114页
第5页 / 共114页
第6页 / 共114页
第7页 / 共114页
第8页 / 共114页
资料共114页,剩余部分请下载后查看
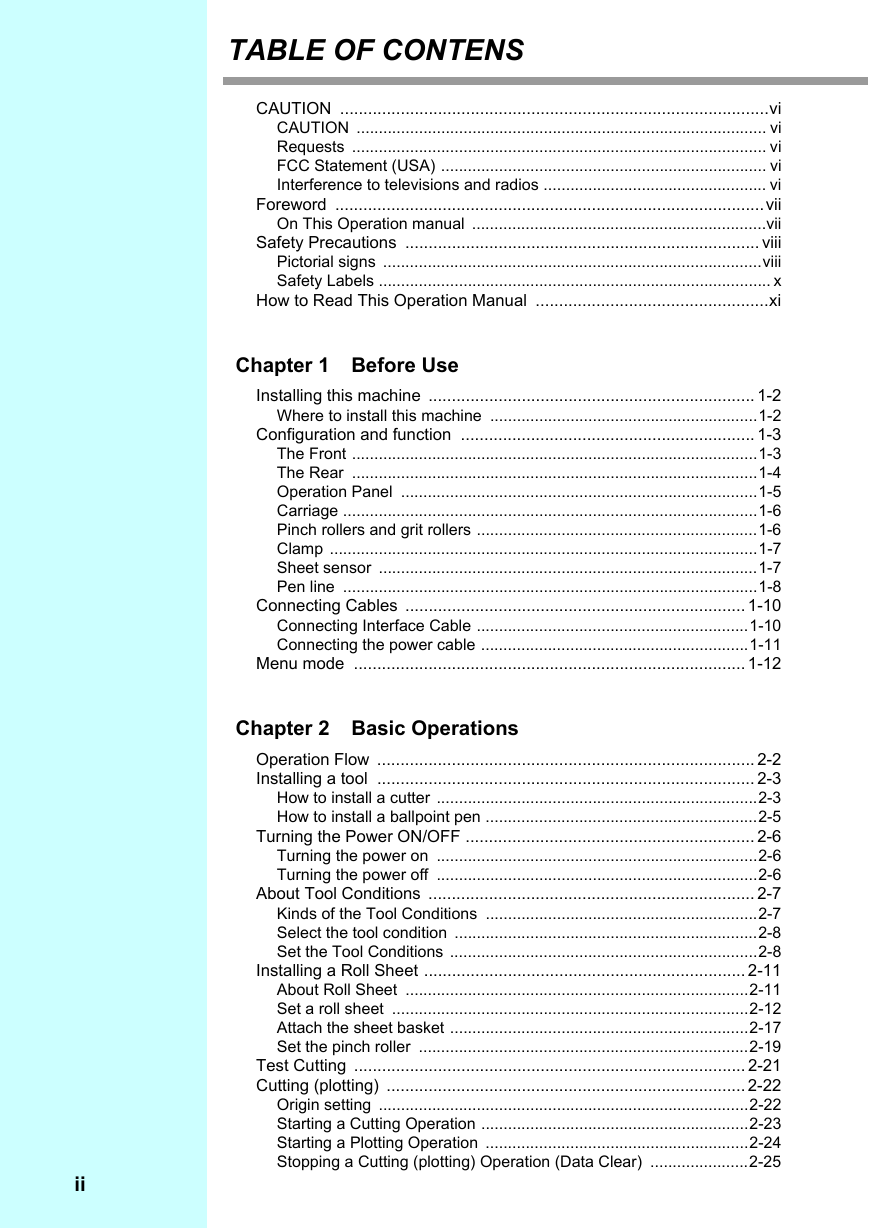
TABLE OF CONTENS
CAUTION
CAUTION
Requests
FCC Statement (USA)
Interference to televisions and radios
Foreword
On This Operation manual
Safety Precautions
Pictorial signs
Example of pictorial signs
Warning for Use
Precaution for Use
Cautions on Installation
Safety Labels
How to Read This Operation Manual
Chapter 1 Before Use
Installing this machine
Where to install this machine
Configuration and function
The Front
The Rear
Operation Panel
Jog keys
Carriage
Pinch rollers and grit rollers
Clamp
Sheet sensor
Pen line
Replacing method of pen line
Connecting Cables
Connecting Interface Cable
Connecting USB Interface Cable
Connecting RS-232C Interface Cable
Connecting the power cable
Menu mode
Chapter 2 Basic Operations
Operation Flow
Installing a tool
How to install a cutter
Mounting a Cutter Blade
Adjusting the protrusion of the cutter blade
How to install the cutter holder
How to install a ballpoint pen
Turning the Power ON/OFF
Turning the power on
Turning the power off
About Tool Conditions
Kinds of the Tool Conditions
Select the tool condition
Set the Tool Conditions
Reference for cutting condition
Installing a Roll Sheet
About Roll Sheet
Usable Sizes of Sheet
Caution in Handling of Sheet
Set a roll sheet
About sheet detection
Attach the sheet basket
Set the pinch roller
About available area for cutting
Test Cutting
Cutting (plotting)
Origin setting
Starting a Cutting Operation
Starting a Plotting Operation
Suspension of cutting (plotting)
Stopping a Cutting (plotting) Operation (Data Clear)
Chapter 3 Extended Functions
Function by jog mode
Paper cut
Axial correction of two positions
Setting cut area
Digitizing operation
Perform Multiple Cutting (plotting)
Investigate the causes of cutting abnormality
About the Result of Sample Cutting
Cut the sample data “Cut”
Cut the sample data “LOGO”
Cut the sample data “RECTANGLE”
Distance correction
Sheet feed
Hold
Setting function
Setting the COMMAND
Setting the INTERFACE
Setting the Device No.
Setting the ORIGIN SELECT
Setting the AUTO CUT
Setting the ROTATION
Setting the BUZZER
Setting the PRIORITY
Setting the SHEET SENSOR
Setting the UP SPEED
Setting the JOG STEP
Setting the MM/INCH
Setting the PRE FEED
Setting the FEED OFFSET
Setting the DUMMY CUT
Setting the SHEET TYPE
Setting the SORTING
Setting the SORTING
Cancelling the Setting of the SORTING
Procedure for SORTING
Setting the OVER CUT
Setting the START MODE
Setting the IP x Distance
Setting the NRg!PG CHANGE
Setting the PEN No. ASSIGN
Setting the Tool Change
Initializing the Settings
Output the setting list
Output the received data in the ASCII code
Switch the language display on the screen
Chapter 4 Troubleshooting
Troubleshooting
Warning/Error Messages
Error Messages
Warning Messages
Chapter 5 Appendix
Specification
Maintenance
Cleaning the Exterior Surfaces
Cleaning the Platen
Function Flowchart
Function by the dedicated key
Function by the jog mode
Functions

MIMAKI ENGINEERING CO., LTD. URL: http: // www.mimaki. co. jp/ D202229-11 Original instructions
TABLE OF CONTENS CAUTION ............................................................................................vi CAUTION ............................................................................................ vi Requests ............................................................................................. vi FCC Statement (USA) ......................................................................... vi Interference to televisions and radios .................................................. vi Foreword ............................................................................................vii On This Operation manual ..................................................................vii Safety Precautions ............................................................................ viii Pictorial signs .....................................................................................viii Safety Labels ........................................................................................ x How to Read This Operation Manual ..................................................xi Chapter 1 Before Use Installing this machine ...................................................................... 1-2 Where to install this machine ............................................................1-2 Configuration and function ............................................................... 1-3 The Front ...........................................................................................1-3 The Rear ...........................................................................................1-4 Operation Panel ................................................................................1-5 Carriage .............................................................................................1-6 Pinch rollers and grit rollers ...............................................................1-6 Clamp ................................................................................................1-7 Sheet sensor .....................................................................................1-7 Pen line .............................................................................................1-8 Connecting Cables ......................................................................... 1-10 Connecting Interface Cable .............................................................1-10 Connecting the power cable ............................................................1-11 Menu mode .................................................................................... 1-12 Chapter 2 Basic Operations Operation Flow ................................................................................. 2-2 Installing a tool ................................................................................. 2-3 How to install a cutter ........................................................................2-3 How to install a ballpoint pen .............................................................2-5 Turning the Power ON/OFF .............................................................. 2-6 Turning the power on ........................................................................2-6 Turning the power off ........................................................................2-6 About Tool Conditions ...................................................................... 2-7 Kinds of the Tool Conditions .............................................................2-7 Select the tool condition ....................................................................2-8 Set the Tool Conditions .....................................................................2-8 Installing a Roll Sheet ..................................................................... 2-11 About Roll Sheet .............................................................................2-11 Set a roll sheet ................................................................................2-12 Attach the sheet basket ...................................................................2-17 Set the pinch roller ..........................................................................2-19 Test Cutting .................................................................................... 2-21 Cutting (plotting) ............................................................................. 2-22 Origin setting ...................................................................................2-22 Starting a Cutting Operation ............................................................2-23 Starting a Plotting Operation ...........................................................2-24 Stopping a Cutting (plotting) Operation (Data Clear) ......................2-25 ii
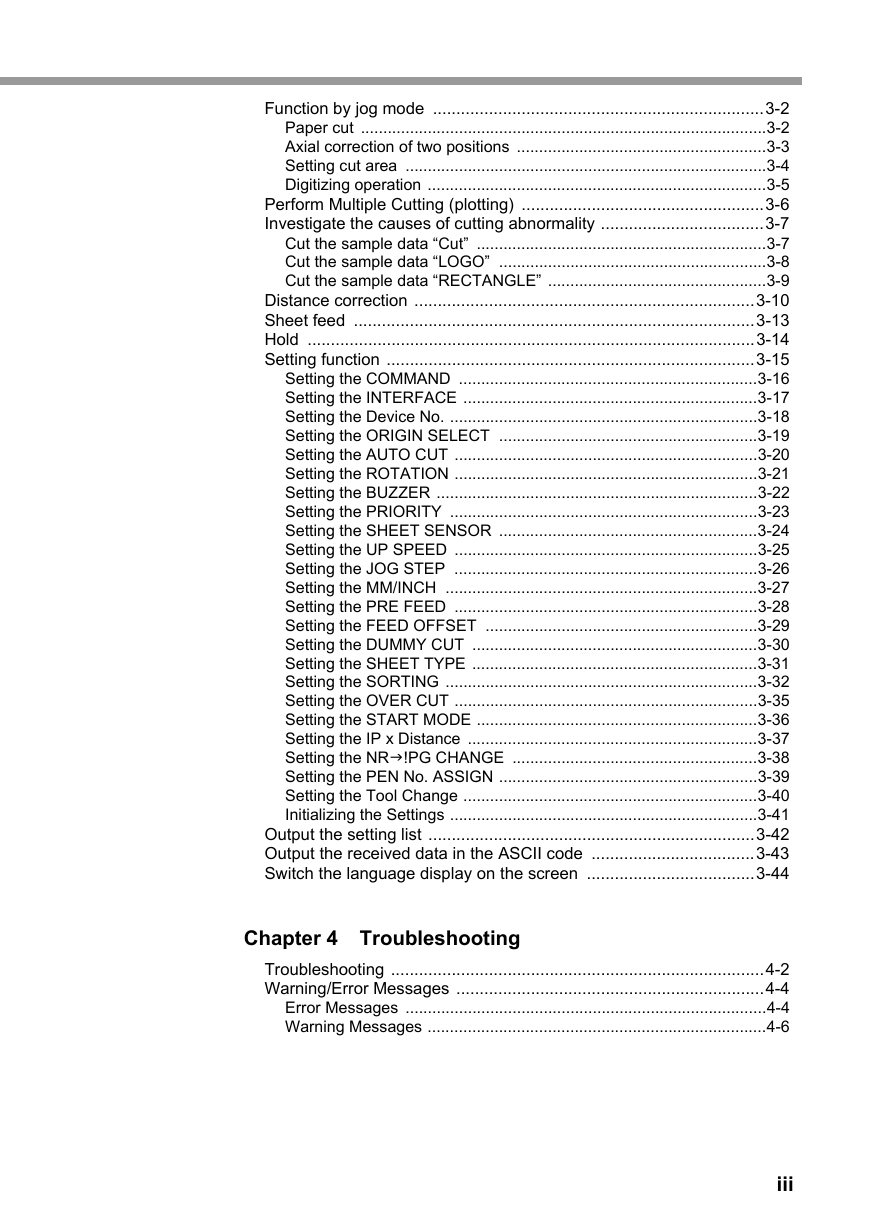
Function by jog mode .......................................................................3-2 Paper cut ...........................................................................................3-2 Axial correction of two positions ........................................................3-3 Setting cut area .................................................................................3-4 Digitizing operation ............................................................................3-5 Perform Multiple Cutting (plotting) ....................................................3-6 Investigate the causes of cutting abnormality ...................................3-7 Cut the sample data “Cut” .................................................................3-7 Cut the sample data “LOGO” ............................................................3-8 Cut the sample data “RECTANGLE” .................................................3-9 Distance correction .........................................................................3-10 Sheet feed ......................................................................................3-13 Hold ................................................................................................3-14 Setting function ...............................................................................3-15 Setting the COMMAND ...................................................................3-16 Setting the INTERFACE ..................................................................3-17 Setting the Device No. .....................................................................3-18 Setting the ORIGIN SELECT ..........................................................3-19 Setting the AUTO CUT ....................................................................3-20 Setting the ROTATION ....................................................................3-21 Setting the BUZZER ........................................................................3-22 Setting the PRIORITY .....................................................................3-23 Setting the SHEET SENSOR ..........................................................3-24 Setting the UP SPEED ....................................................................3-25 Setting the JOG STEP ....................................................................3-26 Setting the MM/INCH ......................................................................3-27 Setting the PRE FEED ....................................................................3-28 Setting the FEED OFFSET .............................................................3-29 Setting the DUMMY CUT ................................................................3-30 Setting the SHEET TYPE ................................................................3-31 Setting the SORTING ......................................................................3-32 Setting the OVER CUT ....................................................................3-35 Setting the START MODE ...............................................................3-36 Setting the IP x Distance .................................................................3-37 Setting the NR!PG CHANGE .......................................................3-38 Setting the PEN No. ASSIGN ..........................................................3-39 Setting the Tool Change ..................................................................3-40 Initializing the Settings .....................................................................3-41 Output the setting list ......................................................................3-42 Output the received data in the ASCII code ...................................3-43 Switch the language display on the screen ....................................3-44 Chapter 4 Troubleshooting Troubleshooting ................................................................................4-2 Warning/Error Messages ..................................................................4-4 Error Messages .................................................................................4-4 Warning Messages ............................................................................4-6 iii
Chapter 5 Appendix Specification ..................................................................................... 5-2 Maintenance ..................................................................................... 5-3 Cleaning the Exterior Surfaces ..........................................................5-3 Cleaning the Platen ...........................................................................5-3 Function Flowchart ........................................................................... 5-4 Function by the dedicated key ...........................................................5-4 Function by the jog mode ..................................................................5-5 Functions ...........................................................................................5-6 iv
v
CAUTION CAUTION DISCLAIMER OF WARRANTY : THIS LIMITED WARRANTY OF MIMAKI SHALL BE THE SOLE AND EXCLUSIVE WARRANTY AND IS IN LIEU OF ALL OTHER WARRANTIES,EXPRESS OR IMPLIED, INCLUDING, BUT NOT LIMITED TO, ANY IMPLIED WARRANTY OF MERCHANTABILITY OR FITNESS, AND MIMAKI NEITHER ASSUMES NOR AUTHORIZES DEALER TO ASSUME FOR IT ANY OTHER OBLIGATION OR LIABILITY OR MAKE ANY OTHER WARRANTY OR MAKE ANY OTHER WARRANTY IN CONNECTION WITH ANY PRODUCT WITHOUT MIMAKI’S PRIOR WRITTEN CONSENT. IN NO EVENT SHALL MIMAKI BE LIABLE FOR SPECIAL, INCIDENTAL OR CONSEQUENTIAL DAMAGES OR FOR LOSS OF PROFITS OF DEALER OR CUSTOMERS OF ANY PRODUCT. Requests • This Operation manual has been carefully prepared for your easy understanding.However, please do not hesitate to contact a distributor in your district or our office if you have any inquiry. • Description contained in this Operation manual are subject to change without notice for improvement. • Generally, names and designations referred to in this Operation manual are trade marks or registered trade marks of the manufacturers or suppliers. FCC Statement (USA) This equipment has been tested and found to comply with the limits for a Class A digital device, pursuant to Part 15 of the FCC Rules. These limits are designed to provide reasonable protection against harmful interference when the equipment is operated in a commercial environment. This equipment generates, uses and can radiate radio frequency energy and, if not installed and used in accordance with the Operation manual, may cause harmful interference to radio communications. Operation of this equipment in a residential area is likely to cause harmful interference in which cause the user will be required to correct the interference at his own expense. • In the case where MIMAKI-recommended cable is not used for connection of this device, limits provided by FCC rules can be exceeded.To prevent this, use of MIMAKI-recommended cable is essential for the connection of this plotter. Interference to televisions and radios The product described in this manual generates high frequency when operating. The product can interfere with radios and televisions if set up or commissioned under improper conditions. The product is not guaranteed against any damage to specific-purpose radio and televisions. The product’s interference with your radio or television will be checked by turning on/off the power switch of the product. In the event that the product is the cause of interference, try to eliminate it by taking one of the following corrective measures or taking some of them in combination. • Change the orientation of the antenna of the television set or radio to find a position without reception difficulty. • Separate the television set or radio from this product. • Plug the power cord of this product into an outlet which is isolated from power circuits connected to the television set or radio. vi
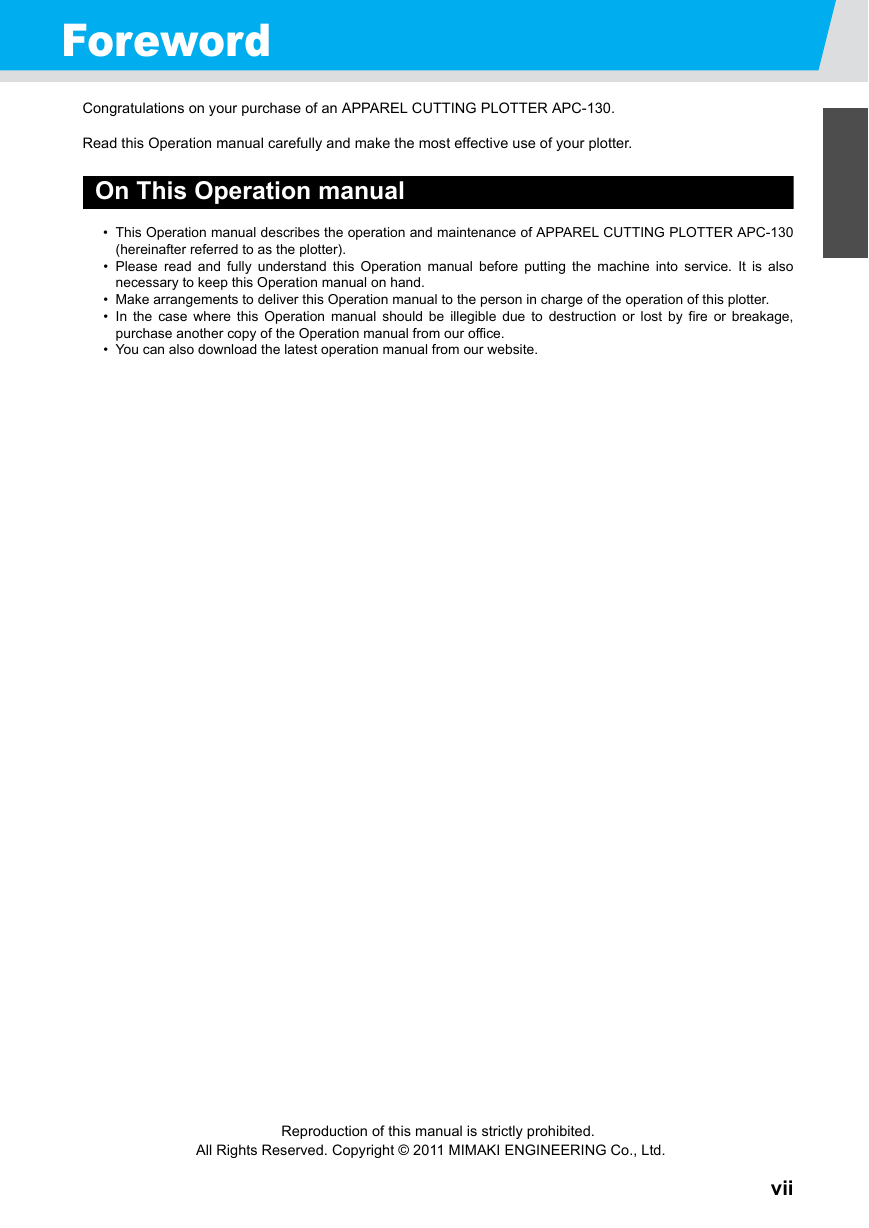
Foreword Congratulations on your purchase of an APPAREL CUTTING PLOTTER APC-130. Read this Operation manual carefully and make the most effective use of your plotter. On This Operation manual • This Operation manual describes the operation and maintenance of APPAREL CUTTING PLOTTER APC-130 (hereinafter referred to as the plotter). • Please read and fully understand this Operation manual before putting the machine into service. It is also necessary to keep this Operation manual on hand. • Make arrangements to deliver this Operation manual to the person in charge of the operation of this plotter. • In the case where this Operation manual should be illegible due to destruction or lost by fire or breakage, purchase another copy of the Operation manual from our office. • You can also download the latest operation manual from our website. Reproduction of this manual is strictly prohibited. All Rights Reserved. Copyright © 2011 MIMAKI ENGINEERING Co., Ltd.  vii 1 2 3 4 5 6
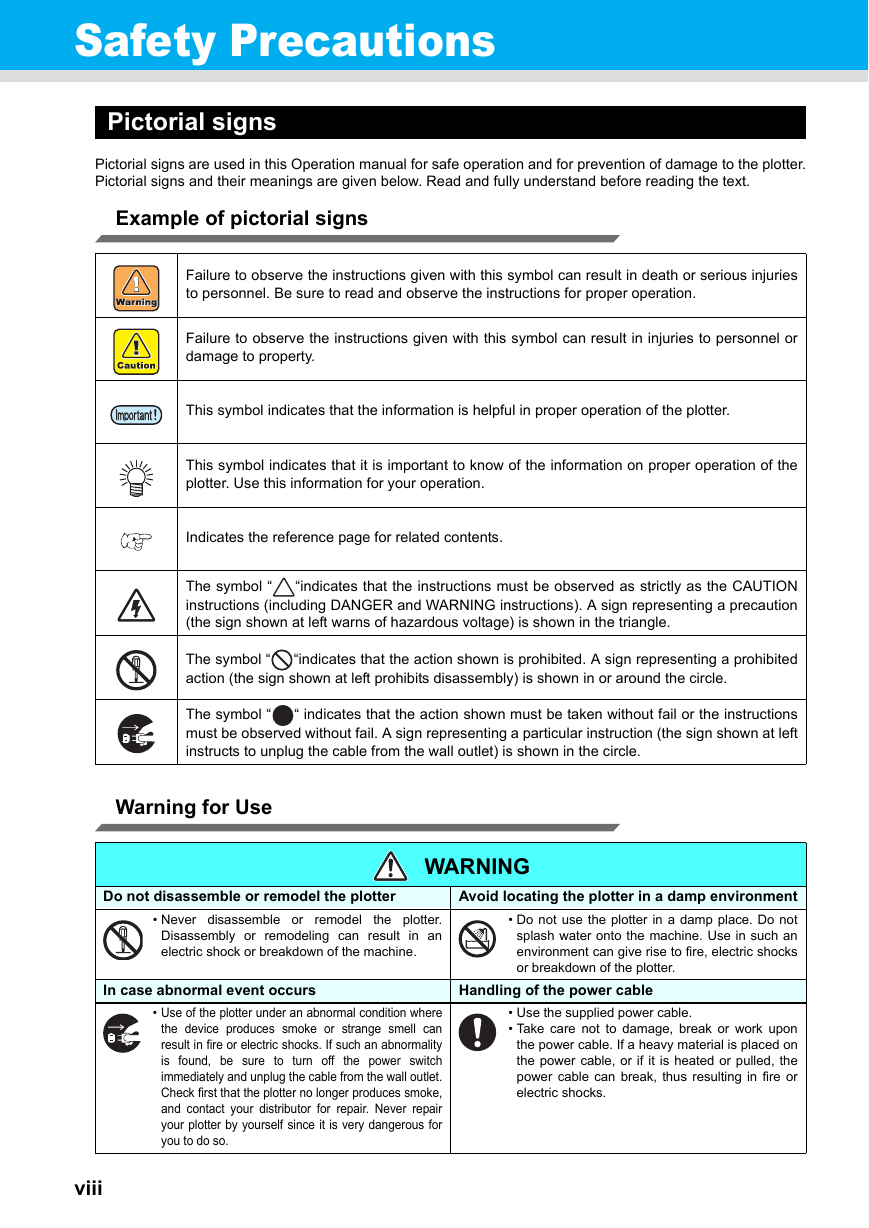
Safety Precautions Pictorial signs Pictorial signs are used in this Operation manual for safe operation and for prevention of damage to the plotter. Pictorial signs and their meanings are given below. Read and fully understand before reading the text. Example of pictorial signs Failure to observe the instructions given with this symbol can result in death or serious injuries to personnel. Be sure to read and observe the instructions for proper operation. Failure to observe the instructions given with this symbol can result in injuries to personnel or damage to property. This symbol indicates that the information is helpful in proper operation of the plotter. This symbol indicates that it is important to know of the information on proper operation of the plotter. Use this information for your operation. Indicates the reference page for related contents. The symbol “ “indicates that the instructions must be observed as strictly as the CAUTION instructions (including DANGER and WARNING instructions). A sign representing a precaution (the sign shown at left warns of hazardous voltage) is shown in the triangle. The symbol “ action (the sign shown at left prohibits disassembly) is shown in or around the circle. “indicates that the action shown is prohibited. A sign representing a prohibited The symbol “ “ indicates that the action shown must be taken without fail or the instructions must be observed without fail. A sign representing a particular instruction (the sign shown at left instructs to unplug the cable from the wall outlet) is shown in the circle. Warning for Use WARNING Do not disassemble or remodel the plotter the plotter. • Never disassemble or remodel Disassembly or remodeling can result in an electric shock or breakdown of the machine. Avoid locating the plotter in a damp environment • Do not use the plotter in a damp place. Do not splash water onto the machine. Use in such an environment can give rise to fire, electric shocks or breakdown of the plotter. In case abnormal event occurs Handling of the power cable • Use of the plotter under an abnormal condition where the device produces smoke or strange smell can result in fire or electric shocks. If such an abnormality is found, be sure to turn off the power switch immediately and unplug the cable from the wall outlet. Check first that the plotter no longer produces smoke, and contact your distributor for repair. Never repair your plotter by yourself since it is very dangerous for you to do so. • Use the supplied power cable. • Take care not to damage, break or work upon the power cable. If a heavy material is placed on the power cable, or if it is heated or pulled, the power cable can break, thus resulting in fire or electric shocks. viii
分享到:
收藏