QT5-0832-V01 ©CANON INC. 2007 PRINTED IN CHINA
English
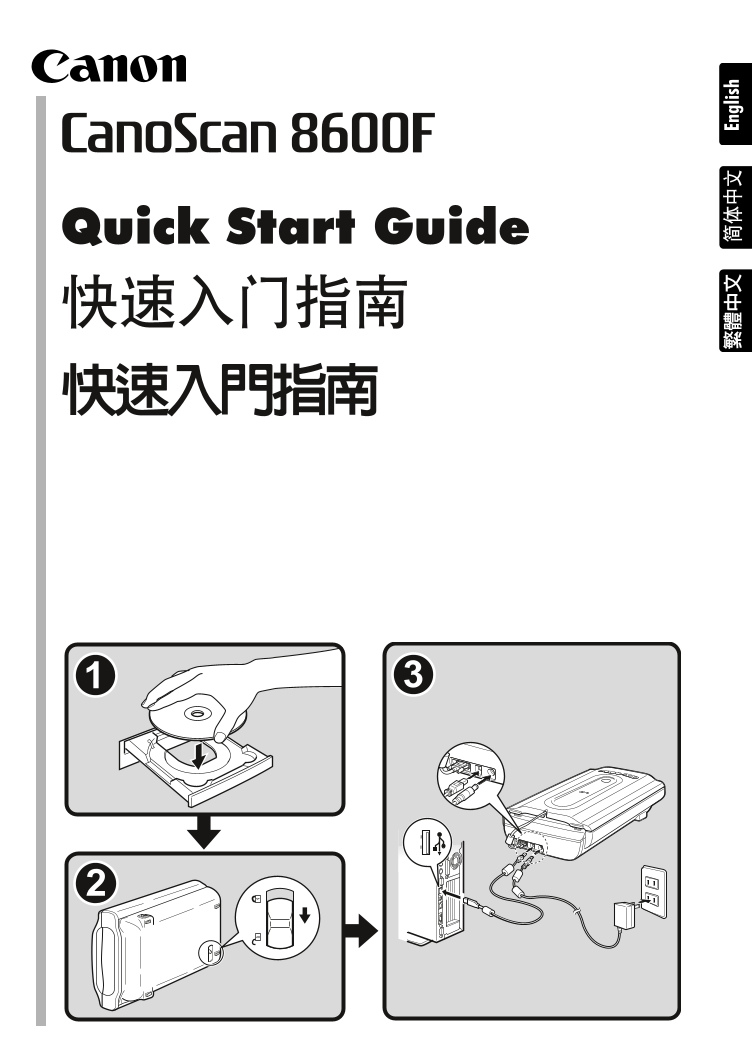
Quick Start Guide
Please read this guide before operating this scanner. After you finish reading this guide, store it in
a safe place for future reference.
Table of Contents
Package Contents ........................................ 1 Using the Scanner Buttons .......................... 5
Installing the Software ................................ 2 Scanning Film ............................................... 6
Preparing the Scanner ................................. 3 Specifications ............................................... 9
Try Scanning ................................................. 4
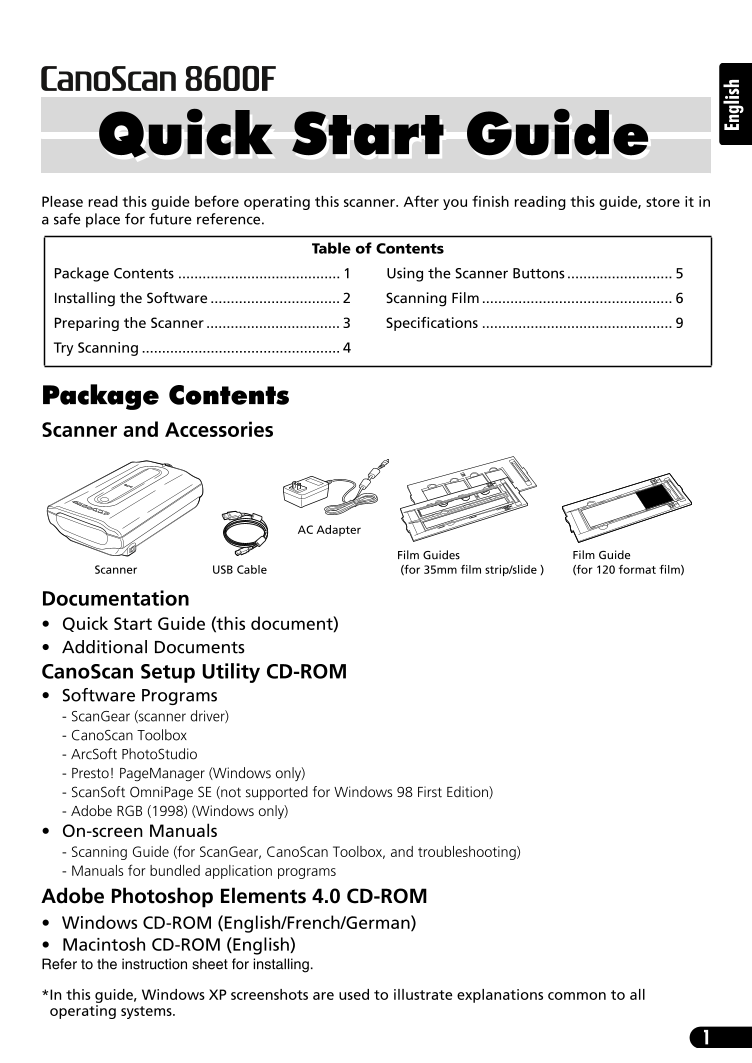
Package Contents
Scanner and Accessories
AC Adapter
Film Guides Film Guide
Scanner USB Cable (for 35mm film strip/slide ) (for 120 format film)
Documentation
• Quick Start Guide (this document)
• Additional Documents
CanoScan Setup Utility CD-ROM
• Software Programs
- ScanGear (scanner driver)
- CanoScan Toolbox
- ArcSoft PhotoStudio
- Presto! PageManager (Windows only)
- ScanSoft OmniPage SE (not supported for Windows 98 First Edition)
- Adobe RGB (1998) (Windows only)
• On-screen Manuals
- Scanning Guide (for ScanGear, CanoScan Toolbox, and troubleshooting)
- Manuals for bundled application programs
Adobe Photoshop Elements 4.0 CD-ROM
• Windows CD-ROM (English/French/German)
• Macintosh CD-ROM (English)
Refer to the instruction sheet for installing.
*In this guide, Windows XP screenshots are used to illustrate explanations common to all
operating systems.
1
English
Installing the Software
Installing the Software
• Do NOT connect the scanner to a computer before installing the software. If you
connect the scanner and the Found New Hardware Wizard appears, click [Cancel].
• Quit all running applications before installation, including anti-virus software.
• For Windows 2000/XP, log in as an administrator to install the software.
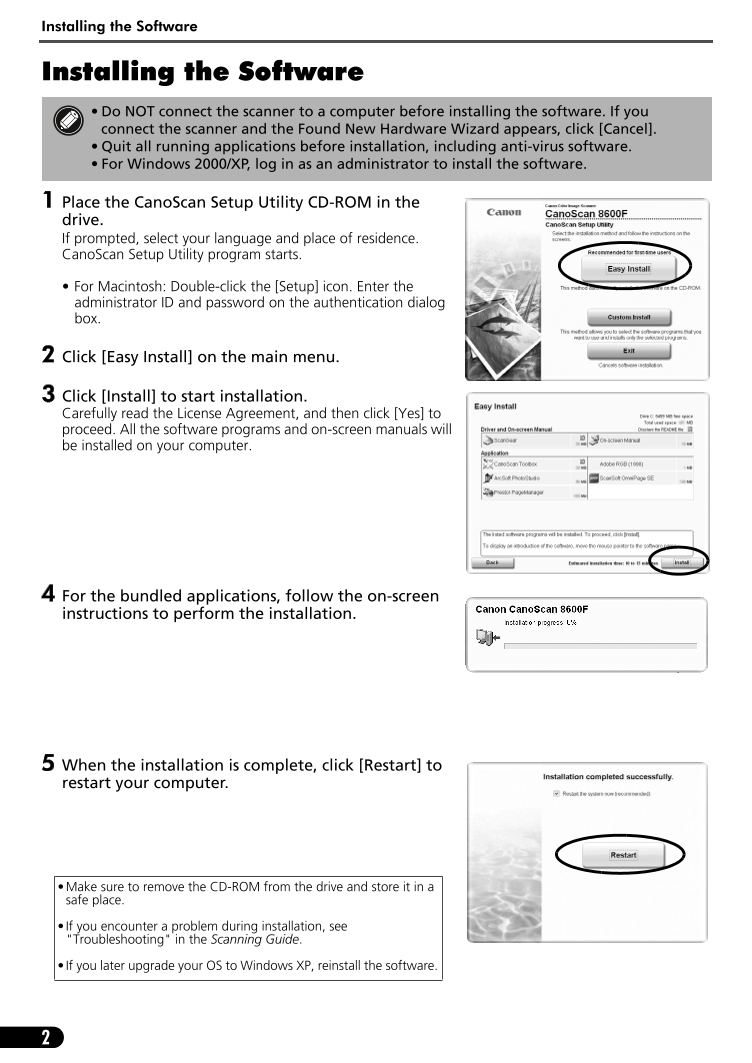
1 Place the CanoScan Setup Utility CD-ROM in the
drive.
If prompted, select your language and place of residence.
CanoScan Setup Utility program starts.
• For Macintosh: Double-click the [Setup] icon. Enter the
administrator ID and password on the authentication dialog
box.
2 Click [Easy Install] on the main menu.
3 Click [Install] to start installation.
Carefully read the License Agreement, and then click [Yes] to
proceed. All the software programs and on-screen manuals will
be installed on your computer.
4 For the bundled applications, follow the on-screen
instructions to perform the installation.
5 When the installation is complete, click [Restart] to
restart your computer.
•Make sure to remove the CD-ROM from the drive and store it in a
safe place.
• If you encounter a problem during installation, see
"Troubleshooting" in the Scanning Guide.
• If you later upgrade your OS to Windows XP, reinstall the software.
2
Preparing the Scanner
Preparing the Scanner
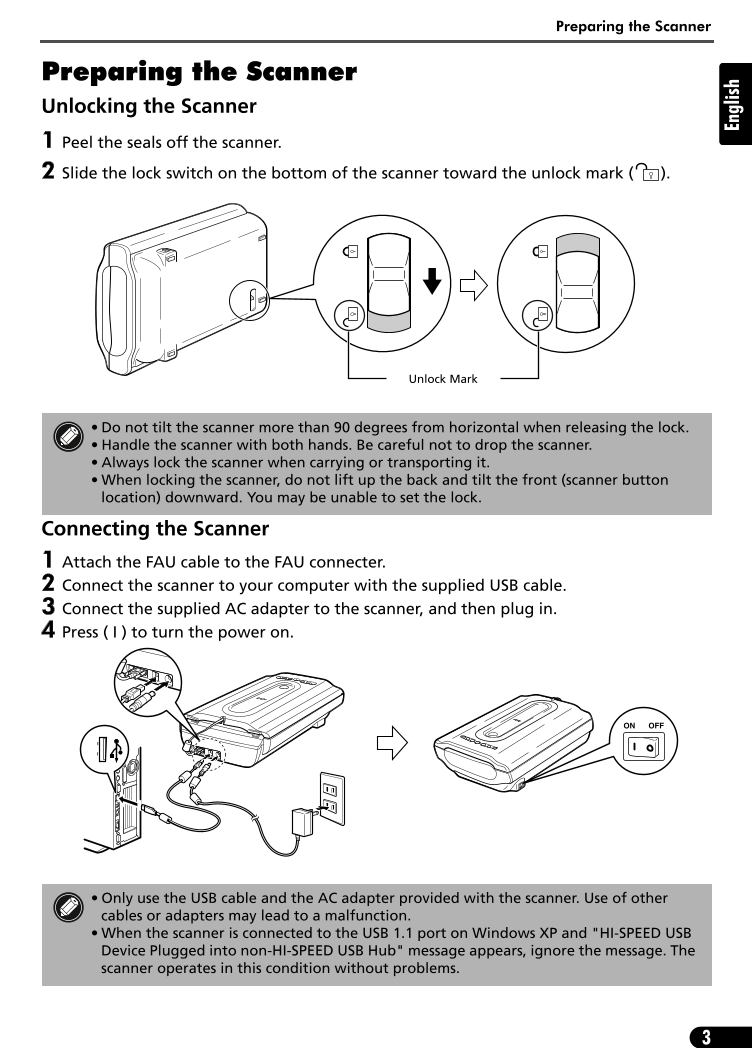
Unlocking the Scanner
1 Peel the seals off the scanner.
2 Slide the lock switch on the bottom of the scanner toward the unlock mark ( ).
Unlock Mark
• Do not tilt the scanner more than 90 degrees from horizontal when releasing the lock.
• Handle the scanner with both hands. Be careful not to drop the scanner.
• Always lock the scanner when carrying or transporting it.
• When locking the scanner, do not lift up the back and tilt the front (scanner button
location) downward. You may be unable to set the lock.
Connecting the Scanner
1 Attach the FAU cable to the FAU connecter.
2 Connect the scanner to your computer with the supplied USB cable.
3 Connect the supplied AC adapter to the scanner, and then plug in.
4 Press ( I ) to turn the power on.
• Only use the USB cable and the AC adapter provided with the scanner. Use of other
cables or adapters may lead to a malfunction.
• When the scanner is connected to the USB 1.1 port on Windows XP and "HI-SPEED USB
Device Plugged into non-HI-SPEED USB Hub" message appears, ignore the message. The
scanner operates in this condition without problems.
3
English
Try Scanning
Try Scanning
This section explains the basic scanning procedures using the image editing program, ArcSoft PhotoStudio,
and the scanner driver, ScanGear.
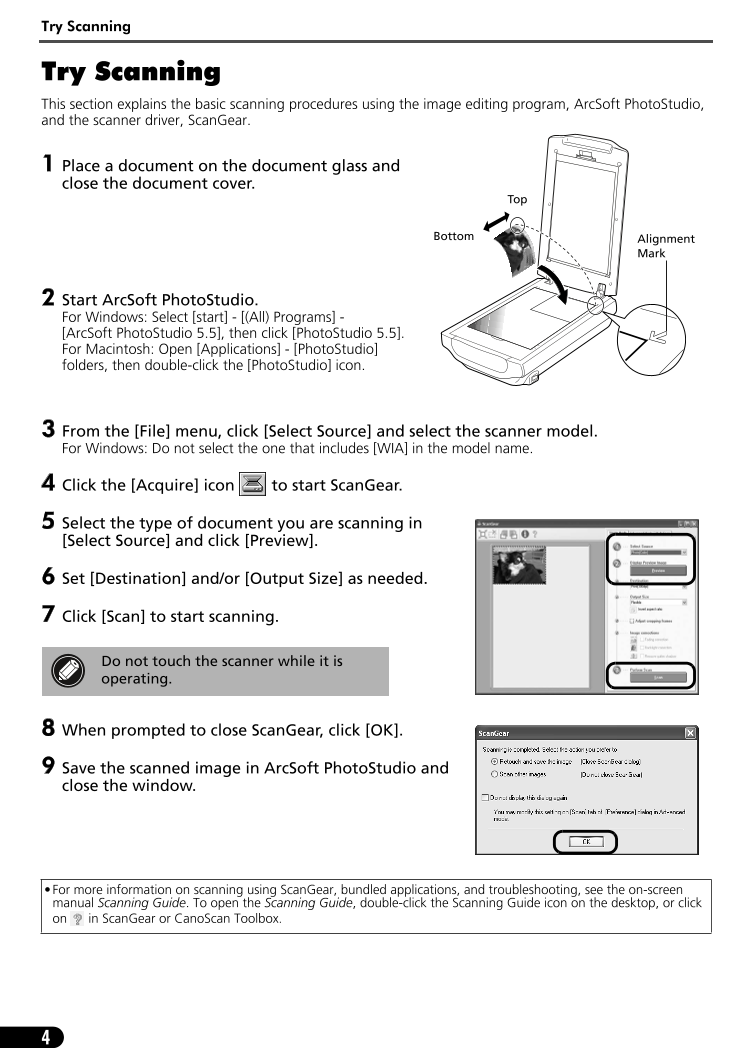
1 Place a document on the document glass and
close the document cover.
Top
Bottom Alignment
Mark
2 Start ArcSoft PhotoStudio.
For Windows: Select [start] - [(All) Programs] -
[ArcSoft PhotoStudio 5.5], then click [PhotoStudio 5.5].
For Macintosh: Open [Applications] - [PhotoStudio]
folders, then double-click the [PhotoStudio] icon.
3 From the [File] menu, click [Select Source] and select the scanner model.
For Windows: Do not select the one that includes [WIA] in the model name.
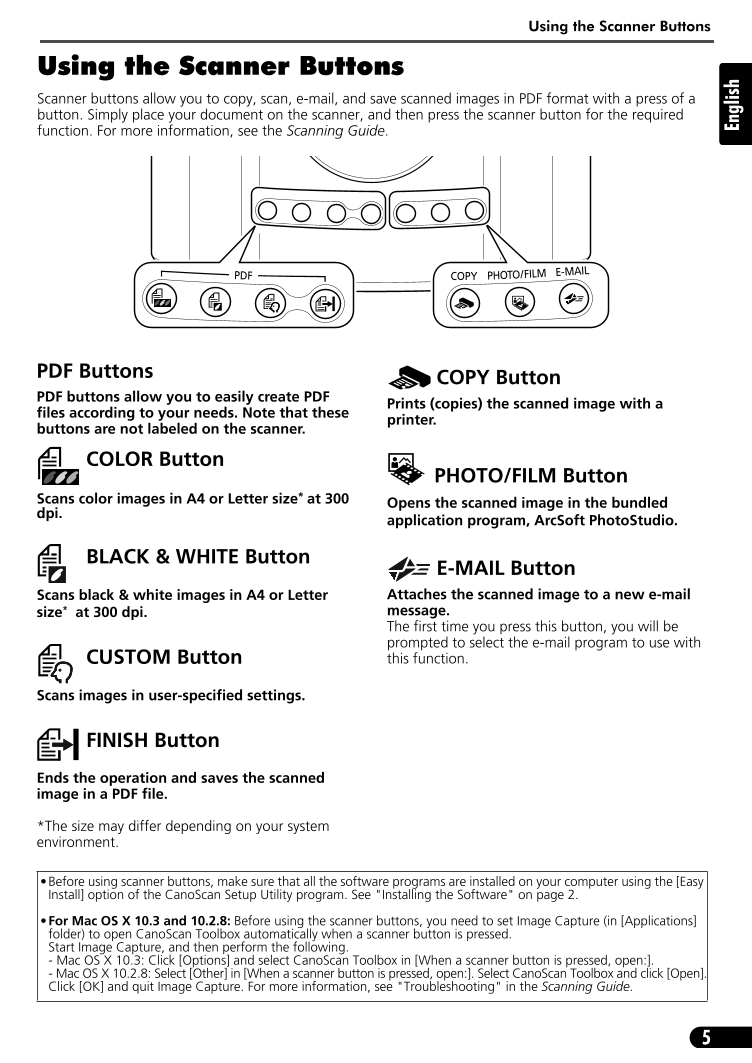
4 Click the [Acquire] icon to start ScanGear.
5 Select the type of document you are scanning in
[Select Source] and click [Preview].
6 Set [Destination] and/or [Output Size] as needed.
7 Click [Scan] to start scanning.
Do not touch the scanner while it is
operating.
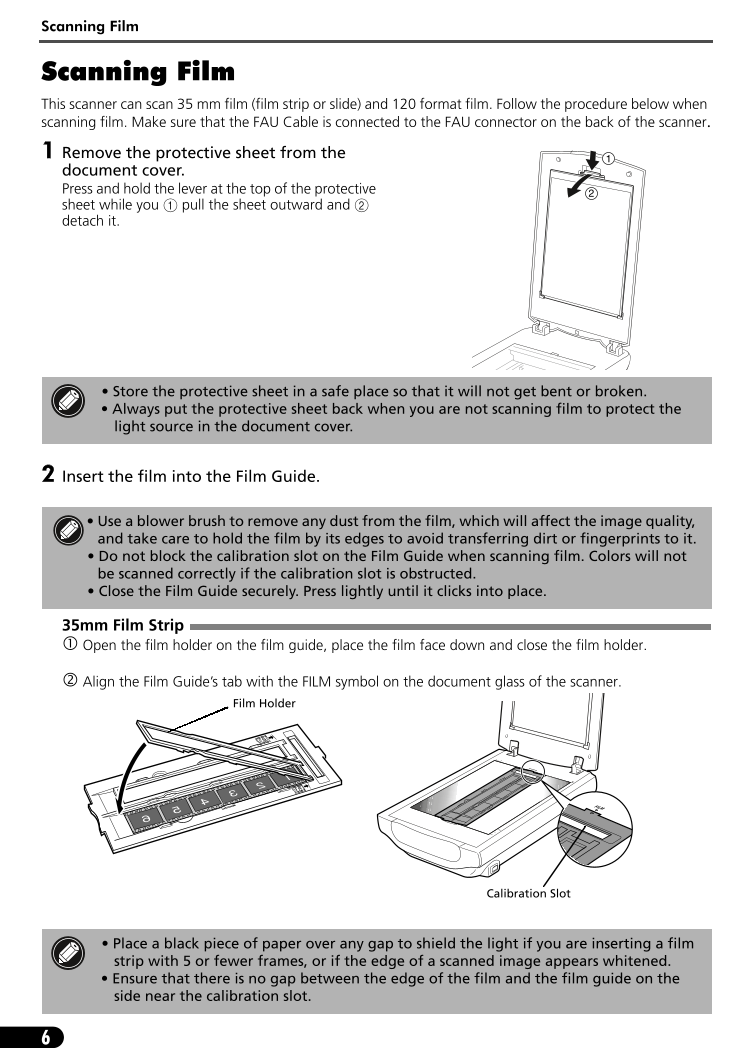
8 When prompted to close ScanGear, click [OK].
9 Save the scanned image in ArcSoft PhotoStudio and
close the window.
•For more information on scanning using ScanGear, bundled applications, and troubleshooting, see the on-screen
manual Scanning Guide. To open the Scanning Guide, double-click the Scanning Guide icon on the desktop, or click
on in ScanGear or CanoScan Toolbox.
4
Using the Scanner Buttons
Using the Scanner Buttons
Scanner buttons allow you to copy, scan, e-mail, and save scanned images in PDF format with a press of a
button. Simply place your document on the scanner, and then press the scanner button for the required
function. For more information, see the Scanning Guide.
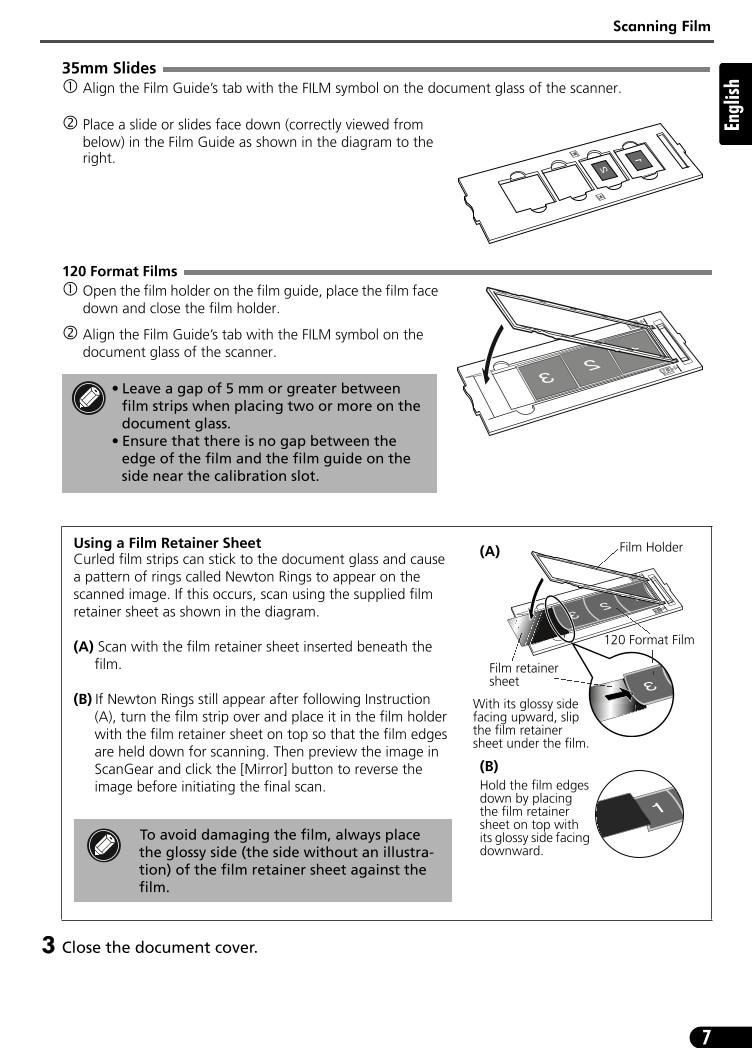
PDF Buttons COPY Button
PDF buttons allow you to easily create PDF Prints (copies) the scanned image with a
files according to your needs. Note that these printer.
buttons are not labeled on the scanner.
COLOR Button
PHOTO/FILM Button
Scans color images in A4 or Letter size* at 300 Opens the scanned image in the bundled
dpi. application program, ArcSoft PhotoStudio.
BLACK & WHITE Button E-MAIL Button
Scans black & white images in A4 or Letter Attaches the scanned image to a new e-mail
size* at 300 dpi. message.
The first time you press this button, you will be
prompted to select the e-mail program to use with
CUSTOM Button this function.
Scans images in user-specified settings.
FINISH Button
Ends the operation and saves the scanned
image in a PDF file.
*The size may differ depending on your system
environment.
•Before using scanner buttons, make sure that all the software programs are installed on your computer using the [Easy
Install] option of the CanoScan Setup Utility program. See "Installing the Software" on page 2.
•For Mac OS X 10.3 and 10.2.8: Before using the scanner buttons, you need to set Image Capture (in [Applications]
folder) to open CanoScan Toolbox automatically when a scanner button is pressed.
Start Image Capture, and then perform the following.
- Mac OS X 10.3: Click [Options] and select CanoScan Toolbox in [When a scanner button is pressed, open:].
- Mac OS X 10.2.8: Select [Other] in [When a scanner button is pressed, open:]. Select CanoScan Toolbox and click [Open].
Click [OK] and quit Image Capture. For more information, see "Troubleshooting" in the Scanning Guide.
5
English
Scanning Film
Scanning Film
This scanner can scan 35 mm film (film strip or slide) and 120 format film. Follow the procedure below when
scanning film. Make sure that the FAU Cable is connected to the FAU connector on the back of the scanner.
1 Remove the protective sheet from the 1
document cover.
Press and hold the lever at the top of the protective 2
sheet while you a pull the sheet outward and b
detach it.
• Store the protective sheet in a safe place so that it will not get bent or broken.
• Always put the protective sheet back when you are not scanning film to protect the
light source in the document cover.
2 Insert the film into the Film Guide.
• Use a blower brush to remove any dust from the film, which will affect the image quality,
and take care to hold the film by its edges to avoid transferring dirt or fingerprints to it.
• Do not block the calibration slot on the Film Guide when scanning film. Colors will not
be scanned correctly if the calibration slot is obstructed.
• Close the Film Guide securely. Press lightly until it clicks into place.
35mm Film Strip
Open the film holder on the film guide, place the film face down and close the film holder.
Align the Film Guide’s tab with the FILM symbol on the document glass of the scanner.
Film Holder
Calibration Slot
• Place a black piece of paper over any gap to shield the light if you are inserting a film
strip with 5 or fewer frames, or if the edge of a scanned image appears whitened.
• Ensure that there is no gap between the edge of the film and the film guide on the
side near the calibration slot.
6
Scanning Film
35mm Slides
Align the Film Guide’s tab with the FILM symbol on the document glass of the scanner.
Place a slide or slides face down (correctly viewed from
below) in the Film Guide as shown in the diagram to the
right.
120 Format Films
Open the film holder on the film guide, place the film face
down and close the film holder.
Align the Film Guide’s tab with the FILM symbol on the
document glass of the scanner.
• Leave a gap of 5 mm or greater between
film strips when placing two or more on the
document glass.
• Ensure that there is no gap between the
edge of the film and the film guide on the
side near the calibration slot.
Using a Film Retainer Sheet Film Holder
Curled film strips can stick to the document glass and cause (A)
a pattern of rings called Newton Rings to appear on the
scanned image. If this occurs, scan using the supplied film
retainer sheet as shown in the diagram.
(A) Scan with the film retainer sheet inserted beneath the 120 Format Film
film. Film retainer
sheet
(B) If Newton Rings still appear after following Instruction With its glossy side
(A), turn the film strip over and place it in the film holder facing upward, slip
with the film retainer sheet on top so that the film edges the film retainer
sheet under the film.
are held down for scanning. Then preview the image in
ScanGear and click the [Mirror] button to reverse the (B)
image before initiating the final scan. Hold the film edges
down by placing
the film retainer
sheet on top with
To avoid damaging the film, always place its glossy side facing
the glossy side (the side without an illustra- downward.
tion) of the film retainer sheet against the
film.
3 Close the document cover.
7
English


 V2版本原理图(Capacitive-Fingerprint-Reader-Schematic_V2).pdf
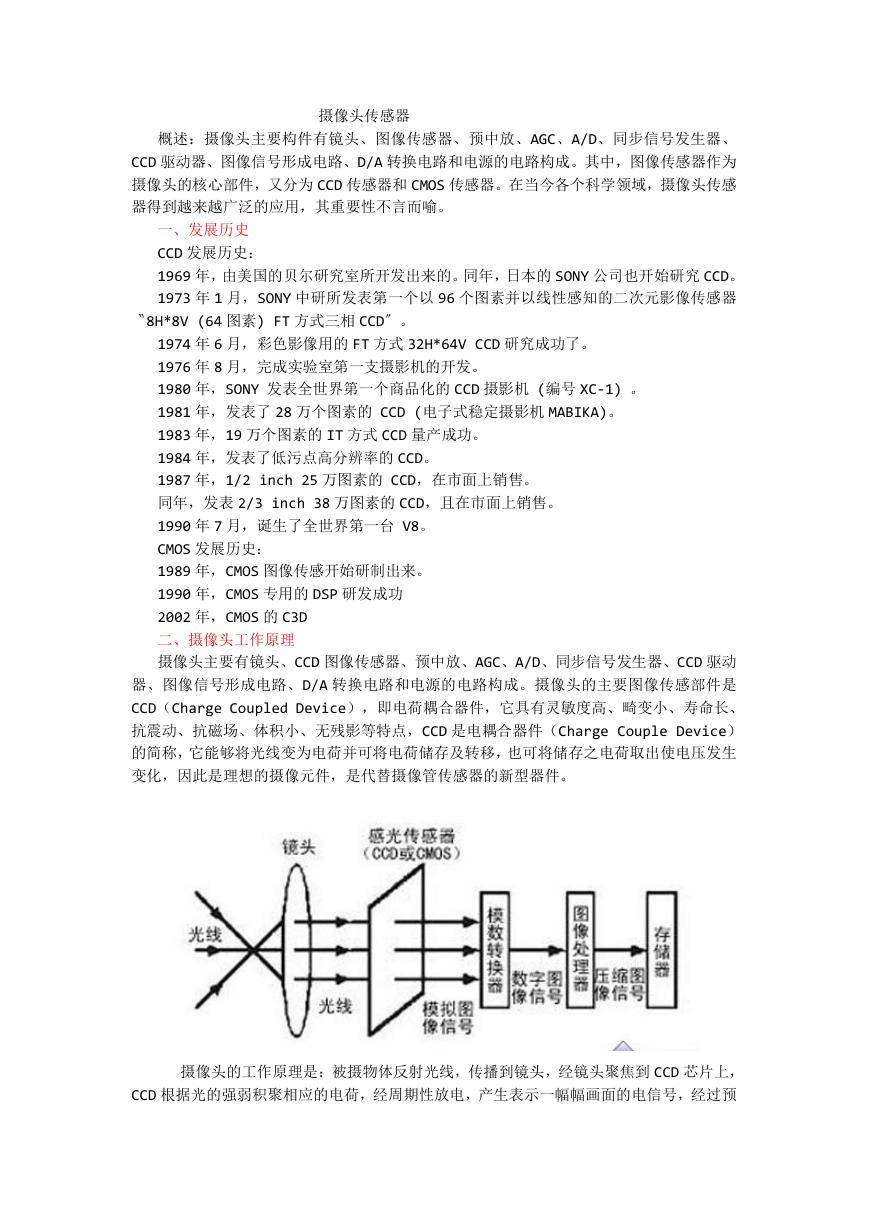 摄像头工作原理.doc
 VL53L0X简要说明(En.FLVL53L00216).pdf
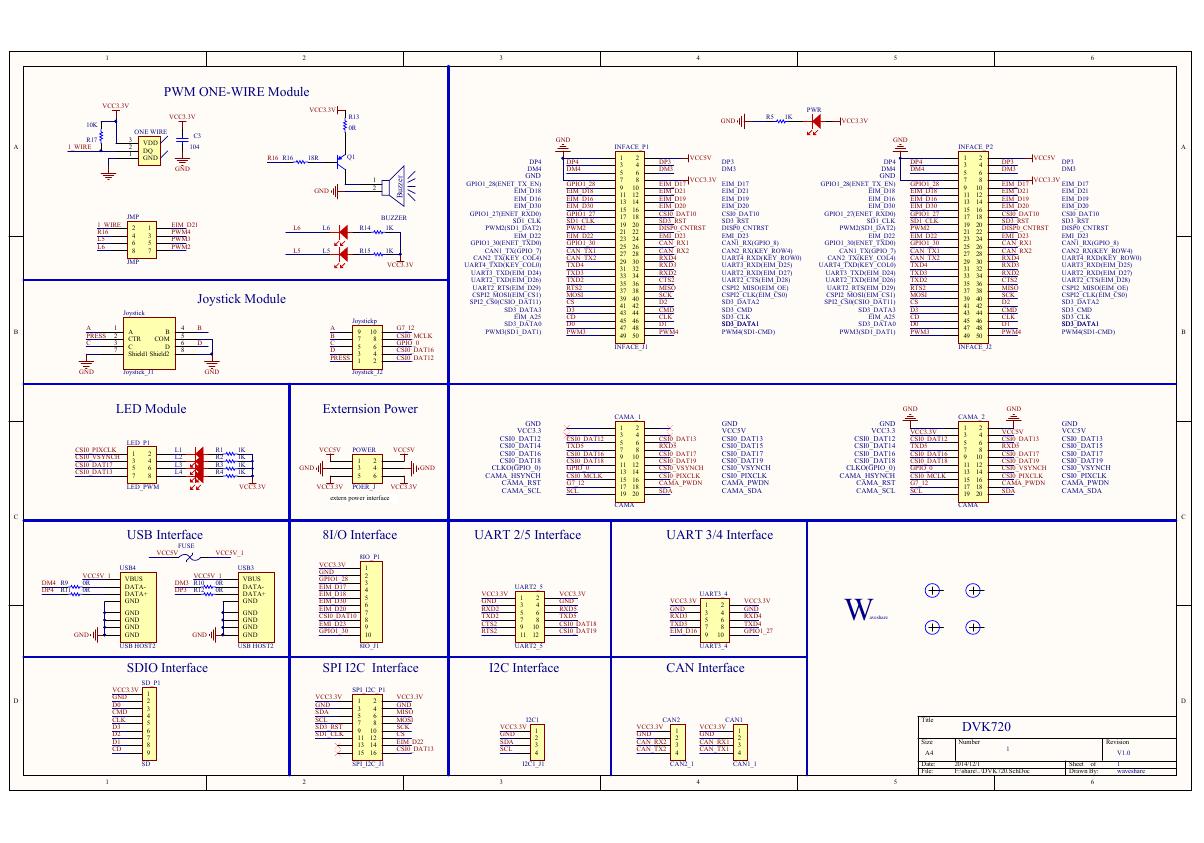 原理图(DVK720-Schematic).pdf
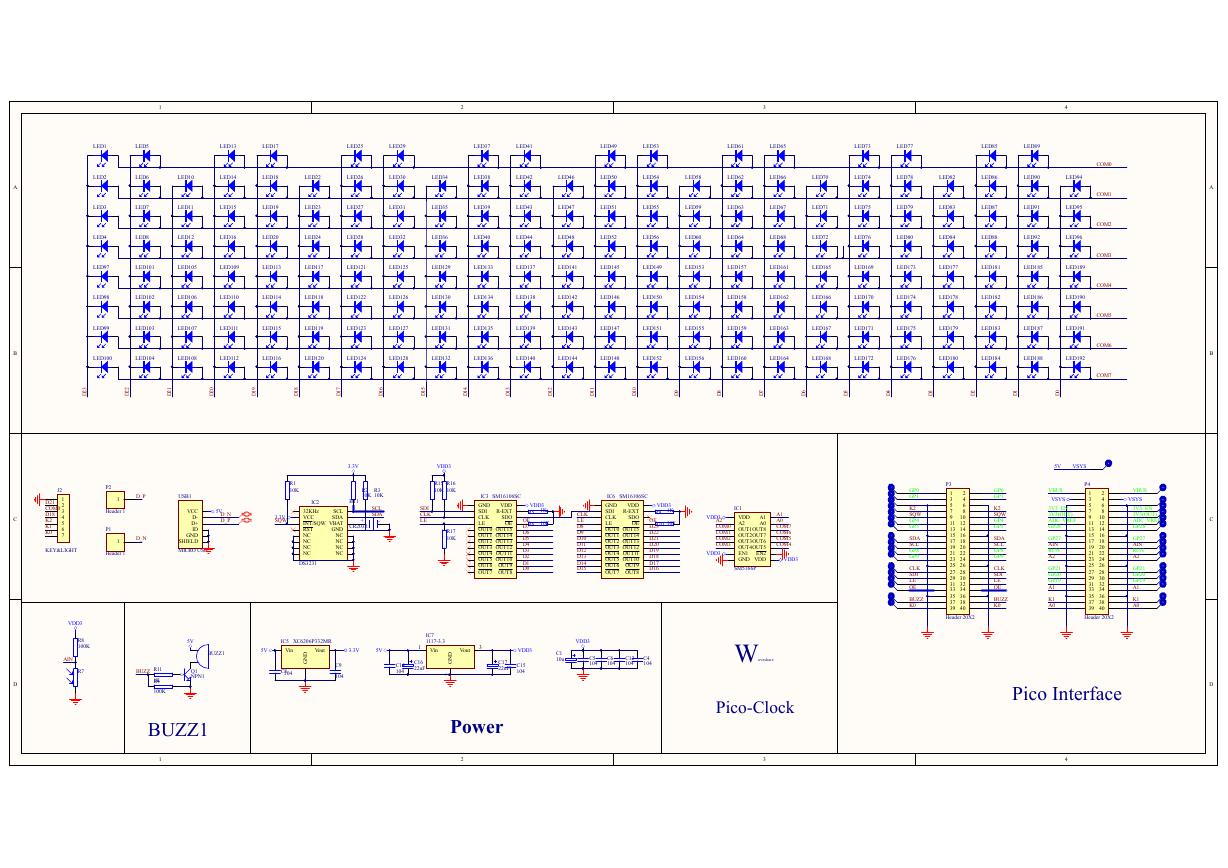 原理图(Pico-Clock-Green-Schdoc).pdf
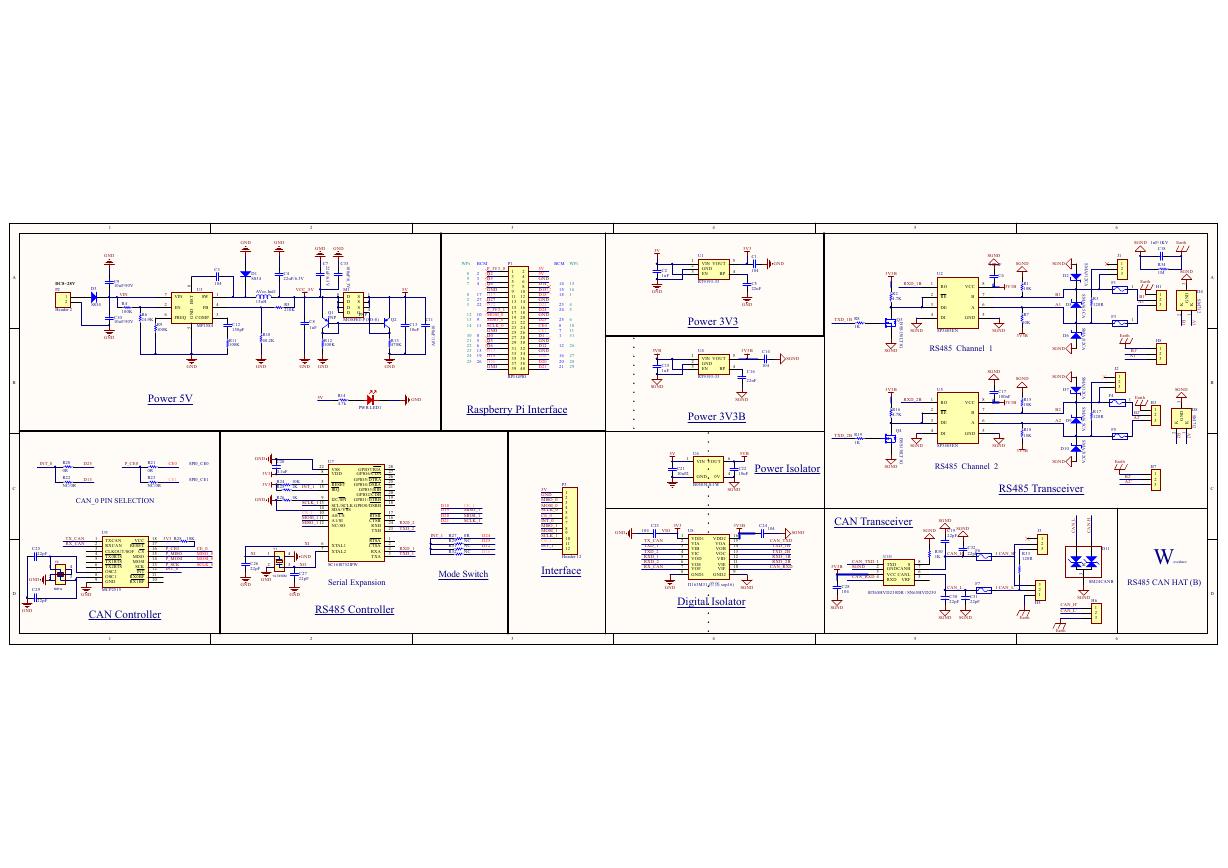 原理图(RS485-CAN-HAT-B-schematic).pdf
 File:SIM7500_SIM7600_SIM7800 Series_SSL_Application Note_V2.00.pdf
 ADS1263(Ads1262).pdf
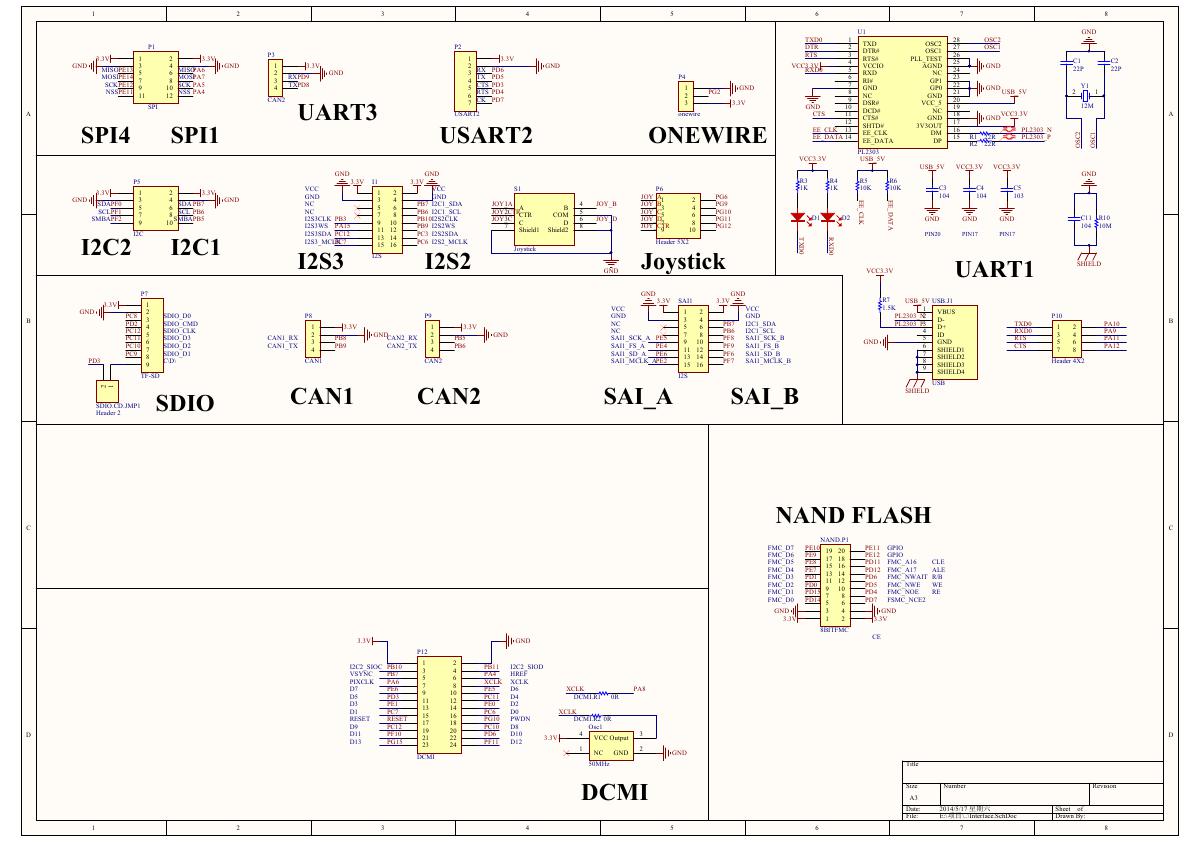 原理图(Open429Z-D-Schematic).pdf
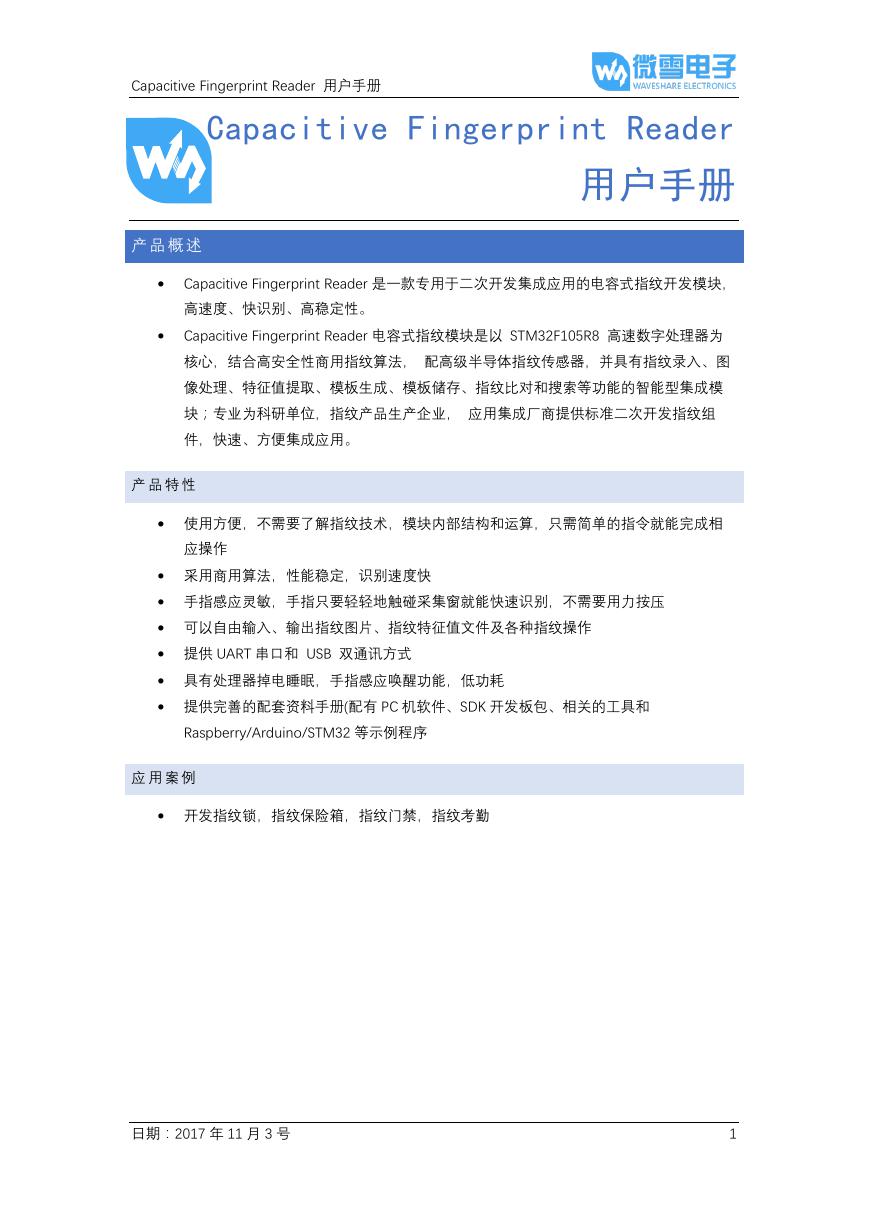 用户手册(Capacitive_Fingerprint_Reader_User_Manual_CN).pdf
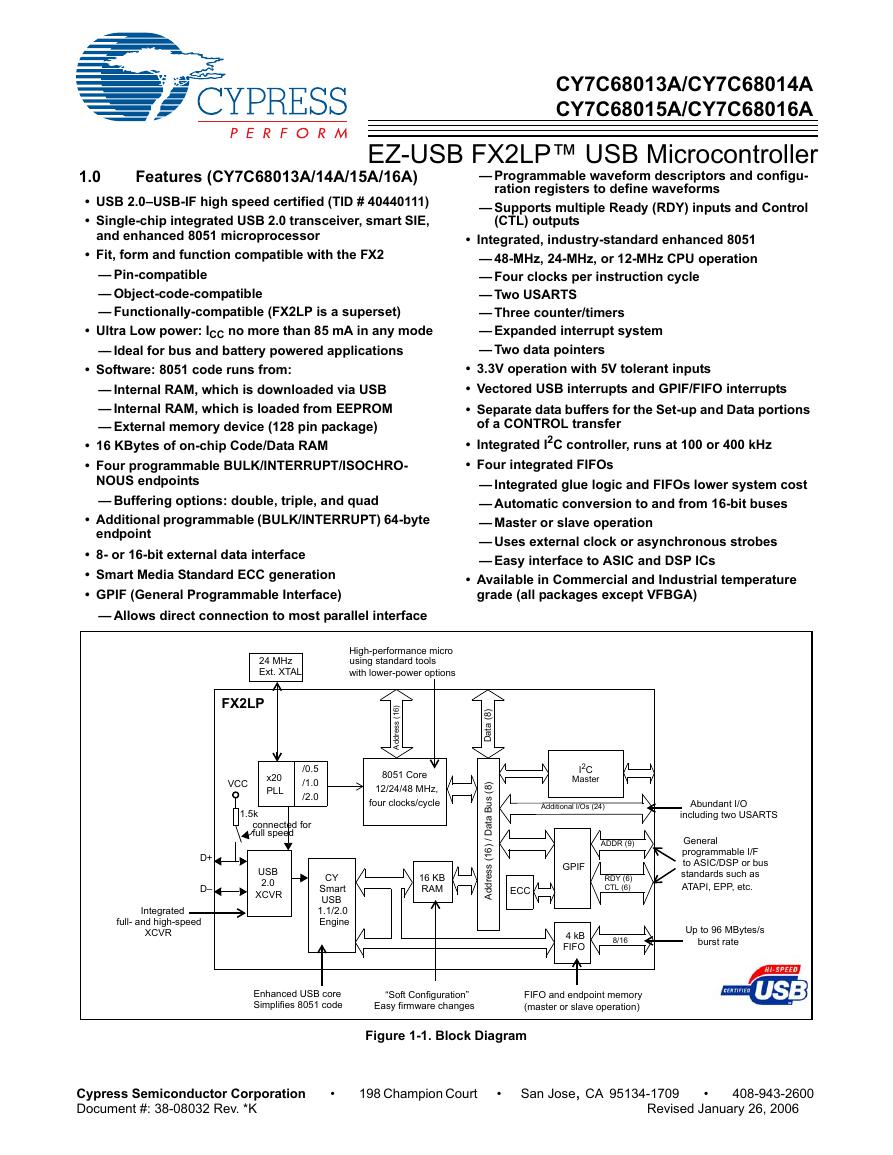 CY7C68013A(英文版)(CY7C68013A).pdf
 TechnicalReference_Dem.pdf