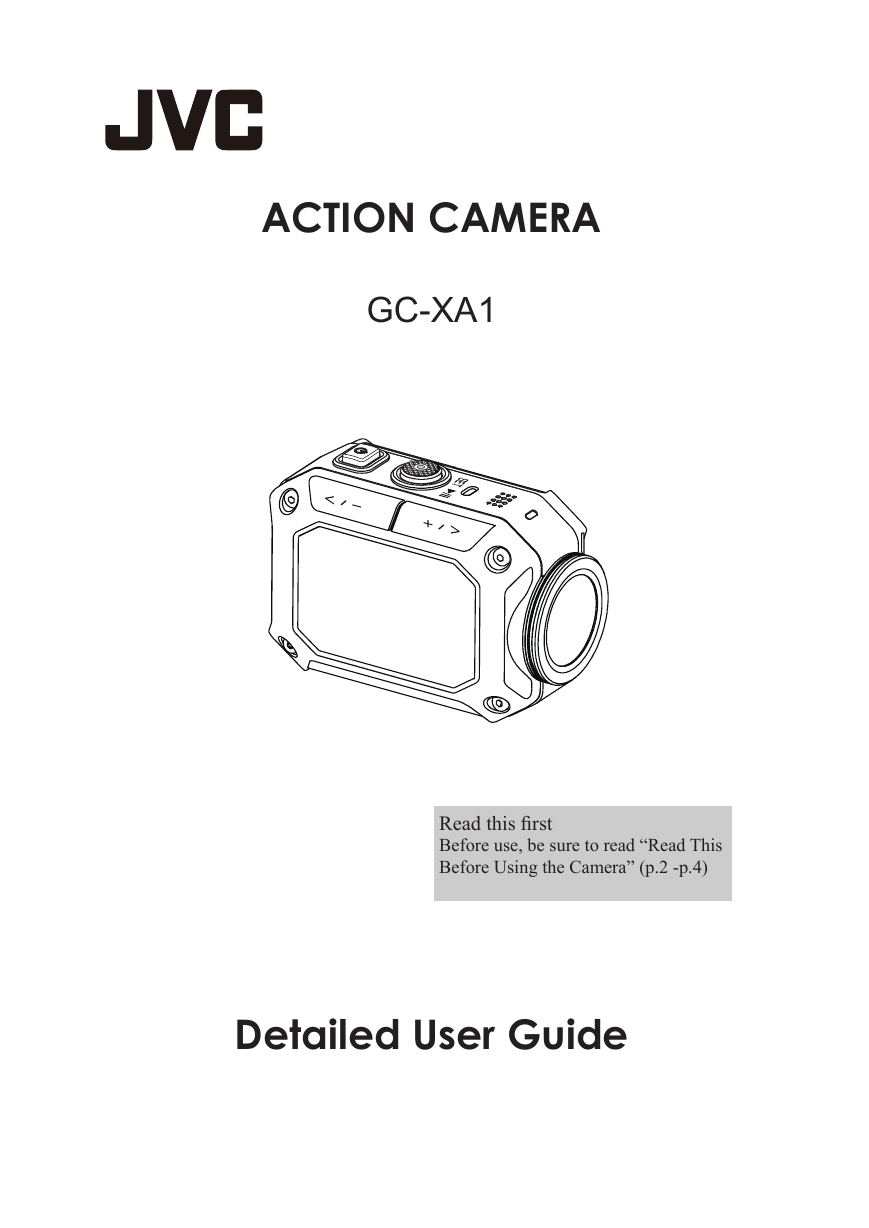
ACTION CAMERA
GC-XA1
Read this first
Before use, be sure to read “Read This
Before Using the Camera” (p.2 -p.4)
Detailed User Guide
�
Read This Before Using the Camera
Safety Instructions
• Before using the product in water, be sure to read p.3 and to use the product correctly.
• Malfunction due to misuse by the customer is not covered by warranty.
• Do not use this product in water deeper than 5 m (16.4 ft) or for longer than 30 minutes.
• Do not drop, puncture or disassemble the camera.
• Use the camera with care. Rough handling may damage the internal components.
• Do not expose the camera to high temperature.
• Please notice that the camera body may become warm when operating it for an extended period.
• Test for proper operation before using the camera.
• Only use accessories supplied by the manufacturer, such as adapter and battery.
• In order to prevent the External Short Circuit of battery, please use the battery bag.
• Remove the battery if the camera is not going to be used for long periods.
• When temperature of the camera reaches to 67°C (152°F), an alarm icon will pop out (
). Once it
reaches to 70°C (158°F), the camera will turn off automatically for safety concern.
Product Information
• Designs and specifications of the camera are subject to change without notice. This includes primary
product specifications, software, and this user’s manual.
• This User’s Manual is a general reference guide for the camera.
• The illustrations in this manual may not be the same as the actual design of your camera and those
you see on the LCD screen.
Using at low temperatures
On ski slopes, at high elevations, and in other cold areas where the temperature drops below freezing
0°C (32°F), keep the camera warm inside clothing or other insulating material.
• Prolonged contact with the metallic portions of the exposed can trigger frostbite and other
damage to the skin.
• Temperatures between 0 and -10°C (32 and 14°F) temporarily lower battery performance,
reducing the time available for photography.
• Charging is not possible at temperatures below freezing 0°C (32 °F).
• Turning on the thoroughly chilled camera can result in lower LCD monitor performance,
producing a slightly darker screen, afterimages, and other temporary issues.
• Leaving snow and water droplets on the camera in a freezing environment can produce ice
crystals inside the gaps surrounding the power button, control buttons, speaker, microphone,
etc., interfering with button operation and reducing sound levels.
2
EN�
IMPORTANT: Water, dust, and shock resistance
• Water resistance
The camera operates for 30 minutes at depths up to 5 m (16.4 ft). This is equivalent to the
IEC Standard publication 529 IPX8.
• Dust resistance
This is equivalent to the IEC Standard publication 529 IP6X.
• Shock resistance
This camera clears company testing compliant with MIL-STD-810F Method 516.5 Shock:
dropping onto plywood 3 cm (1-3/16”) thick from a height of 2 m (6.5 ft).
Note
• Do not immerse the camera in hot springs or other water with temperatures of 40°C (104°F)
or above.
• Do not expose the camera to high pressures or shocks associated with swift currents,
waterfalls, diving into water, etc.
• Dropping or otherwise exposing the camera to shocks voids the waterproof warranty. Contact
your JVC Service representative.
• This camera does not float. Use a strap or other measure to prevent losing it in the water.
• Before opening or closing the cover, wipe off any moisture and move to a low-humidity
environment.
• Immediately wipe off any detergent, soap, hot spring, bath additive, oil, sunscreen, or other
chemicals coming into contact with the camera.
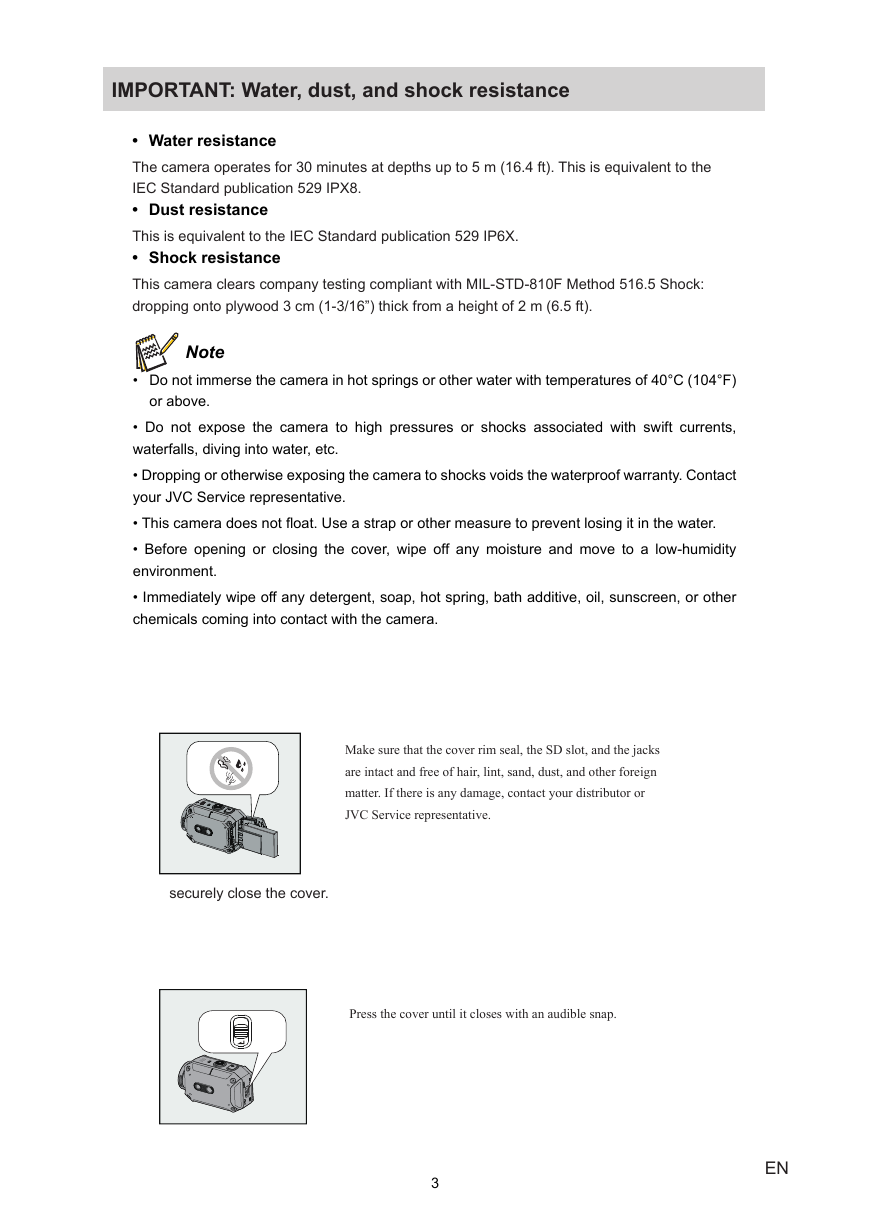
Make sure that the cover rim seal, the SD slot, and the jacks
are intact and free of hair, lint, sand, dust, and other foreign
matter. If there is any damage, contact your distributor or
JVC Service representative.
securely close the cover.
Press the cover until it closes with an audible snap.
3
EN�
IMPORTANT: Water, dust, and shock resistance
After Using
After underwater use or exposure to dusty conditions, promptly rinse the camera with fresh
water and thoroughly dry.
1. Hold down the power button for a second to turn off the camera.
Make sure that the cover is securely closed.
2. Rinse with fresh water.
Immerse the camera in a container with enough fresh water to cover completely it.
Operate the buttons to force out any material caught in the gaps around them.
Do not clean with soap, detergent, alcohol, or other chemicals.
Do not rinse the camera under taps or other powerful water sources
3. Dry.
Thoroughly wipe with a dry, soft cloth and dry in a well ventilated location out of direct sunlight.
Face the microphone opening downward or take other measures to eliminate any water trapped
inside.
Allowing sand to dry on the camera risks scratching. Wash it off and wipe the camera dry.
Thoroughly wipe off any foreign matter or water droplets inside the bottom cover.
Notes
• Do not dry with a hair dryer or other heat source. Degraded water resistance can result.
• Do not leave the camera for extended periods in freezing temperatures or at temperatures of
40°C (104°F) or above: under direct sunlight, in a parked car in the hot sun, or near a heater,
for example. Degraded water resistance can result.
• After using the camera in or near the ocean, first soak it for ten minutes in abundant fresh
water to dissolve the salt and then rinse it with more fresh water.
• Do not leave the camera in salt water or with salt water droplets on it. Corrosion, discoloration,
and degraded water resistance can result.
• Detach the strap before rinsing the camera in fresh water.
• Remove all water droplets before connecting cables or charging the camera.
• We shall bear no responsibility for data lost due to water immersion.
• We recommend replacing the seal annually to maintain water resistance. Contact your JVC
Service representative. (Charges apply.)
• Always keep the battery cover closed before use.
• Attach with proper tripod and install with the product with good care in case of slipping off.
• Do not contact with any metal material to the metal parts of the product when operate in case
of breakdown.
4
EN�
Contents
Read This Before Using the Camera ................................................... 2
Section 1 Getting to Know Your Camera ........................................... 6
Section 2 Getting Started .................................................................... 9
Section 3 Enjoying the Record Mode .............................................. 12
Section 4 Enjoying the Playback Mode ........................................... 18
Section 5 Setting Your Camera ....................................................... 21
Section 6 WiFi to PC-WiVideo Program ......................................... 25
Section 7 WiFi to Mobile-WiVideo Program .................................... 29
Section 8 WiFi to Cloud-Ustream ..................................................... 37
Section 9 Viewing Photos and Videos on TV .................................. 40
Section 10 Viewing Video & Photo on PC ......................................... 41
Section 11 Specifications and System Requirements ..................... 42
Section 12 Troubleshooting ............................................................... 44
Section 13 Wi-Fi Warning ................................................................... 46
Cautions
Remember that this unit is intended for private consumer use only.
Any commercial use without proper permission is prohibited. (Even if you record an event such as a
show, performance or exhibition for personal enjoyment, it is strongly recommended that youobtain
permission beforehand.)
Trademarks
• HDMI is a trademark of HDMILicensing, LLC.
TM
• Windows® is either registered trademark or trademark of Microsoft Corporation in the United States
and/or other countries.
• Macintosh is a registered trademark of Apple Inc.
• iMovie, iPhone and iPhoto are trademarks of Apple Inc., registered in the U.S. and other countries.
• YouTube™, the YouTube logo and Android™ are trademarks and/or registered trademarksof Google
Inc.
• Intel, Intel Core, and Pentium are trademarks or registered trademarks of Intel Corporation or its
subsidiaries in the United States and other countries.
• Wi-Fi, Wi-Fi logo, Wi-Fi CERTIFIED, Wi-Fi CERTIFIED logo, WPA, and WPA2 are trademarks or
registered trademarks of Wi-Fi Alliance.
• Other product and company names included in this instruction manual are trademarks and/or
registered trademarks of their respective holders.
• Marks such as ™ and ® have been omitted in this manual.
5
EN�
Section 1
Getting to Know Your Camera
Overview
This camera with a 5 Mega Pixel sensor can take H.264 format videos. The H.264 technology allows
for extended video recording with less memory. High quality images 5 mega-pixels can also be
delivered smoothly. With a color LCD monitor, you can view and examine the video and photo easily.
The camera also features video recording at an HD resolution of 1920x1080. You can also connect
it to an HDTV via an HDMI cable, and easily playback the recorded high-definition videos on the
wide screen HDTV.
Moreover, the camera is equipped with WiFi module and the exclusive application. You can broadcast
live streaming of the camera on Ustream website via WiFi. Your family and friends can watch the live
video streaming of the camera on their smart phones, tablets, or computers.
The camera can also connect with your computer via WiFi. It can be a wireless webcam for your
on-line video chatting. Through WiFi connecting, you can transfer the videos and photos on your
computer, and monitor live video from your camera.
White balance can either be adjusted automatically or changed manually. A 5x digital zoom helps
you to control over the video and photo you take. The varied effect options, such as Time Lapse,
make recording more fun.
Note
• Partial memory of the built-in memory is used for the camera’s Firmware code and software.
• For the WiFi connectivity working correctly, make sure the bundled WiVideo program (for
Windows® based systems only) is installed and the wireless LAN module of your computer is
activated.
Standard Accessories
Unpack the package and make sure all standard accessories listed are included:
• Battery Pack
• USB Cable
• Flexible Mount
• Flexible Mount Base
• Goggle Mount
• Lens Protector Cover
• LCD Protector Film
6
EN�
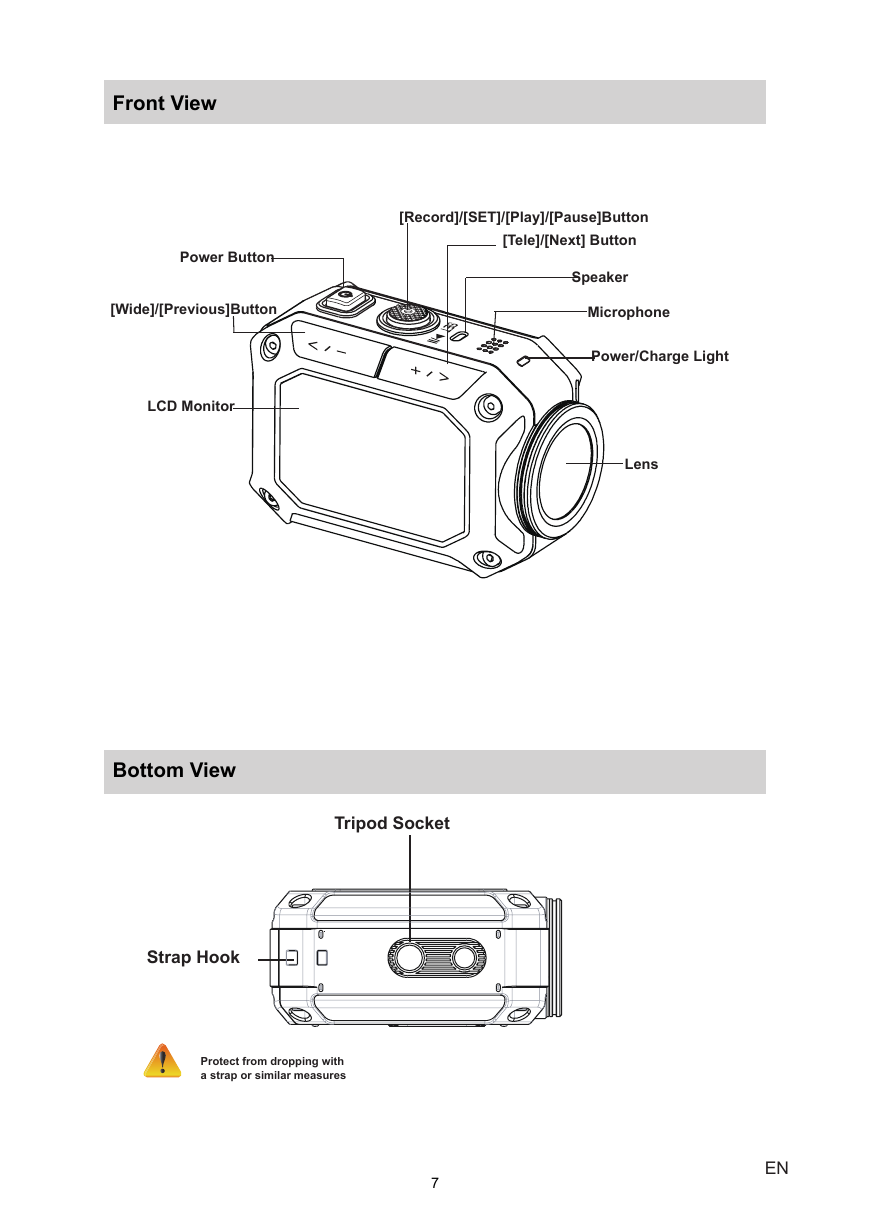
Front View
Power Button
[Wide]/[Previous]Button
LCD Monitor
[Record]/[SET]/[Play]/[Pause]Button
[Tele]/[Next] Button
Speaker
Microphone
Power/Charge Light
Lens
Bottom View
Tripod Socket
Strap Hook
Protect from dropping with
a strap or similar measures
7
EN�
Side/Rear View
[MENU]/[Delete] Button
[Playback]/[Exit] Button
Battery Slot (inside)
HDMI Mini Connector (inside)
Port/Slot Cover Latch
SD Slot (inside)
Mini USB 2.0 Port (Inside)
Tripod Mounting Socket
8
EN�



 2023年江西萍乡中考道德与法治真题及答案.doc
 2012年重庆南川中考生物真题及答案.doc
 2013年江西师范大学地理学综合及文艺理论基础考研真题.doc
 2020年四川甘孜小升初语文真题及答案I卷.doc
 2020年注册岩土工程师专业基础考试真题及答案.doc
 2023-2024学年福建省厦门市九年级上学期数学月考试题及答案.doc
 2021-2022学年辽宁省沈阳市大东区九年级上学期语文期末试题及答案.doc
 2022-2023学年北京东城区初三第一学期物理期末试卷及答案.doc
 2018上半年江西教师资格初中地理学科知识与教学能力真题及答案.doc
 2012年河北国家公务员申论考试真题及答案-省级.doc
 2020-2021学年江苏省扬州市江都区邵樊片九年级上学期数学第一次质量检测试题及答案.doc
 2022下半年黑龙江教师资格证中学综合素质真题及答案.doc