Contents
Introduction
Overview
Product Package Contents
System Requirements
Getting to Know Your Digital Camera
Battery Installation
Software Installation
Taking Photos
Camera Function Control
Starting Your Camera 8
Deleting Photo 9
Flash 10
Photo Storage Capacity 12
Downloading Photos
Using Your Digital Camera as a PC Camera
1
1
1
1
1
2
3
7
8
12
13
13
14
Live Browse
Video Conference
Appendix 1: Specifications
Appendix 2: Answers to Frequently Asked Questions 15
15
“PhotoImpression ” User’s Manual 18
�
Introduction
Thank you for purchasing the DC1730 digital camera. It can take photos
and it also has built-in PC camera functions. This camera is equipped with a
8MB SDRAM memory. Connect with USB cable and you can download
photos in the camera to your computer. Using the built-in PC camera
functions, you can have a videoconference over the Internet to have face-to-
face online chatting with friends
Product Package Contents
_Digital camera
_USB cable
_CD - ROM ( User manual and software)
_Quick user guide
Processor: PII 200 MHz or higher
System Requirements
1.
2. Memory: 32MB or higher
3.
4.
Color Monitor: (recommended to use 800*600 24 or higher)
Operation System: MS Windows 98(Second Edition)\MS Windows Me\
Ms Windows 2000\MS Windows XP
5. Available USB cable and CD-ROM
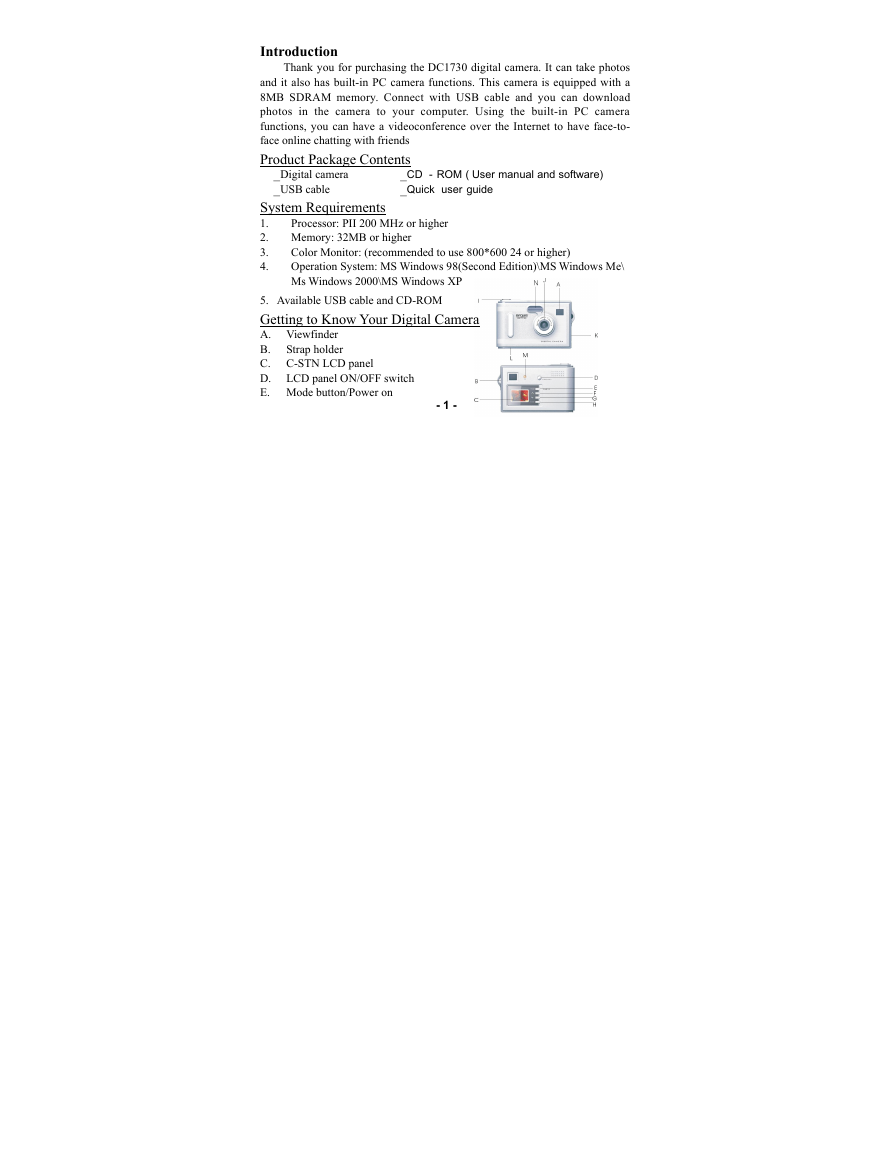
Getting to Know Your Digital Camera
A. Viewfinder
B. Strap holder
C. C-STN LCD panel
D. LCD panel ON/OFF switch
E. Mode button/Power on
- 1 -
�
_ (UP) Photo select button
Shutter button
Lens
F.
G. V (Down) Photo select button
H. Play back auto view
I.
J.
K. USB port
L. Battery door
M. LED light
N. Flash
Battery Installation
1. Open battery door.
2. Load two AA alkaline batteries according to the electrode directions
indicated on the battery compartment.
3. Cover battery door.
Note: When you use the USB cable to connect the camera with a computer, it is not
necessary to use batteries ,because the camera uses the power supplied by the
computer.
Warning:
1. To avoid loss of photos in the camera due to power loss, please don’t
open the battery compartment unless necessary.
2. If the camera is idle for a long period of time, please remove the
batteries to avoid battery leakage and corrosion.
3. To avoid explosion and hazard to environment, please don’t put the
battery into fire.
4. To avoid photo loss, please download photos to your computer as soon
- 2 -
�
as possible.
Automatically enter energy saving status
If it is not operated in 60 seconds, the camera will automatically enter
energy saving status.
Software Installation
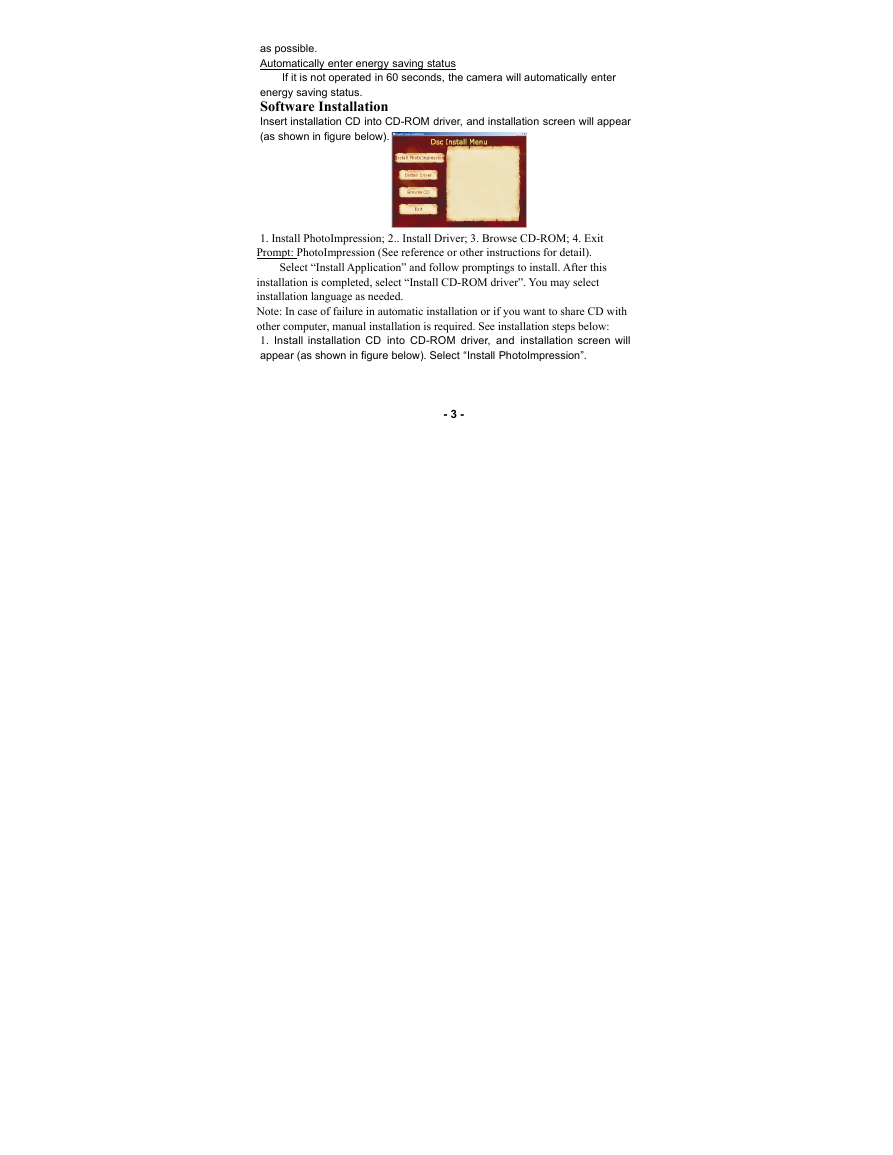
Insert installation CD into CD-ROM driver, and installation screen will appear
(as shown in figure below).
1. Install PhotoImpression; 2.. Install Driver; 3. Browse CD-ROM; 4. Exit
Prompt: PhotoImpression (See reference or other instructions for detail).
Select “Install Application” and follow promptings to install. After this
installation is completed, select “Install CD-ROM driver”. You may select
installation language as needed.
Note: In case of failure in automatic installation or if you want to share CD with
other computer, manual installation is required. See installation steps below:
1. Install installation CD into CD-ROM driver, and installation screen will
appear (as shown in figure below). Select “Install PhotoImpression”.
- 3 -
�
2. You will be prompted to select an installation language. You may select
“English”.
3. Click “Next” button on “Welcome” screen.
4. Please read and accept the end user agreement.
- 4 -
�
5. Select installation destination and click “Next” button.
6. Select “PhotoImpression 4” to install.
- 5 -
�
7. Please select program folder. Then click “Next” to continue.
8. This will start the installation. Please do not click any button until it is
completed.
9. Click “Complete” to complete ArcSoft software installation.
(Note: You must select “Loading Camera Driver”.)
- 6 -
�
10. Installation screen will appear. Click “Install Driver” to install camera
driver:
11. After the installation of driver is completed, it will activate the computer.
Taking Photos
Before using your digital camera, please check if the battery is low. To
take photos, please follow the following steps:
1. Press Shutter button and then press Mode button to start the camera. In
about 3 second, LCD on the back of your camera will display and buzzer
will give off a “Beep”. This means startup is completed.
2. Find objects to take via Viewfinder.
3. Hold the camera steadily, and press Shutter button to take photos.
4. You will hear one beep, indicating your photo has been taken. You may
continue taking photos.
5. When the camera is full of photos, the display will read “000”. When you
press Shutter, it will give off continuous “Beep” prompting.
Prompt:
1. Hold camera steadily while taking photos.
2. Insufficient light may affect the quality of photos. (In case of failure in
- 7 -
�


 2023年江西萍乡中考道德与法治真题及答案.doc
 2012年重庆南川中考生物真题及答案.doc
 2013年江西师范大学地理学综合及文艺理论基础考研真题.doc
 2020年四川甘孜小升初语文真题及答案I卷.doc
 2020年注册岩土工程师专业基础考试真题及答案.doc
 2023-2024学年福建省厦门市九年级上学期数学月考试题及答案.doc
 2021-2022学年辽宁省沈阳市大东区九年级上学期语文期末试题及答案.doc
 2022-2023学年北京东城区初三第一学期物理期末试卷及答案.doc
 2018上半年江西教师资格初中地理学科知识与教学能力真题及答案.doc
 2012年河北国家公务员申论考试真题及答案-省级.doc
 2020-2021学年江苏省扬州市江都区邵樊片九年级上学期数学第一次质量检测试题及答案.doc
 2022下半年黑龙江教师资格证中学综合素质真题及答案.doc