logo资料库

JVC数码摄像机-GY-HMZ1E说明书.pdf

第1页 / 共146页
第2页 / 共146页
第3页 / 共146页
第4页 / 共146页
第5页 / 共146页
第6页 / 共146页
第7页 / 共146页
第8页 / 共146页
资料共146页,剩余部分请下载后查看
Safety Precautions
Getting Started
Precautions on Recording and Playing Back 3D Images
Verifying the Accessories
Attaching the Audio Unit
Attaching an External Microphone
Charging the Battery Pack
Grip Adjustment
Using the Touch Screen
Inserting an SD card
Types of Usable SD Card
Names of Buttons and Functions on the LCD Monitor
Clock Setting
Resetting the Clock
Changing the Display Language
Holding this Unit
Tripod Mounting
Attaching Headphones
Using the Remote Control
Using this Unit Overseas
Charging the Battery Pack Overseas
Setting the Clock to Local Time when Traveling
Setting Daylight Saving Time
Optional Accessories
Recording
Taking Videos in 3D Mode
Taking Still Images in 3D Mode
Taking Videos in Intelligent Auto Mode
Zooming
Taking Still Images in Intelligent Auto Mode
Zooming
Adjusting Parallax During Recording
Manual Recording
Scene Selection
Adjusting Focus Manually
Using Focus Assist
Adjusting Brightness
Setting Shutter Speed
Setting Aperture
Setting White Balance
Setting Backlight Compensation
Displaying the Zebra Pattern
Taking Close-up Shots
Setting the USER Button
Using the Control Dial for Recording
Reducing Camera Shake
Capturing Subjects Clearly (TOUCH PRIORITY AE/AF)
Capturing Smiles Automatically (SMILE SHOT)
Recording at Intervals (TIME-LAPSE RECORDING)
Taking Group Shots (Self-timer)
Remaining Recording Time/Battery Power
Playback
Playing Back Videos
Playing a Video with Defective Management Information
Playing Back Still Images
Adjusting Parallax During Playback
Slideshow Playback
Searching for a Specific Video/Still Image
Date Search
Connecting to and Viewing on TV
Playing Back 3D Images
Playing Back 2D Images
Editing
Deleting Unwanted Files
Deleting the Currently Displayed File
Deleting Selected Files
Protecting Files
Protecting/Releasing Protection of the Currently Displayed File
Protecting/Releasing Protection of Selected Files
Capturing a Still Image in the Video during Playback
Copying
Creating a Disc Using a Connected Blu-ray Recorder
Dubbing Files by Connecting to a DVD Recorder
Dubbing Files to a VHS Tape Using a VCR
Copying Files to an SD Card
Moving Files to an SD Card
Copying to Computer
Installing the Provided Software
Verifying System Requirements (Guideline)
Installing the Provided Software
Menu Settings
Operating the Menu
Operating the Main Menu
Operating the Common Menu
Recording Menu (Video)
SCENE SELECT
FOCUS
FOCUS ASSIST
FOCUS ASSIST COLOR
BRIGHTNESS ADJUST
SHUTTER SPEED
APERTURE PRIORITY
WHITE BALANCE
BACKLIGHT COMP.
ZEBRA
TELE MACRO (2D mode only)
CINEMA
TOUCH PRIORITY AE/AF
DIS
GAIN UP
WIND CUT
GRID
TIME-LAPSE RECORDING
SYSTEM SELECT
3D VIDEO REC FORMAT (3D mode only)
VIDEO QUALITY
ZOOM (2D mode only)
x.v.Color (2D mode only)
USER BUTTON SETTING
3D SOUND
MIC LEVEL
MIC LEVEL SETTING
HEADPHONE VOL. ADJ.
Recording Menu (Still Image)
SCENE SELECT
FOCUS
FOCUS ASSIST
FOCUS ASSIST COLOR
BRIGHTNESS ADJUST
SHUTTER SPEED
APERTURE PRIORITY
WHITE BALANCE
BACKLIGHT COMP.
TELE MACRO (2D mode only)
TOUCH PRIORITY AE/AF
SMILE SHOT
SMILE LEVEL
SELF-TIMER
GAIN UP
GRID
SHUTTER MODE
CONT. SHOOTING SPEED
IMAGE SIZE
USER BUTTON SETTING
Playback Menu (Video)
SEARCH DATE
PROTECT/CANCEL
COPY
MOVE
PLAYBACK OTHER FILE
Playback Menu (Still Image)
SEARCH DATE
PROTECT/CANCEL
COPY
MOVE
Common Menu
CLOCK ADJUST
DATE DISPLAY STYLE
LANGUAGE
MONITOR BRIGHTNESS
REC MEDIA FOR VIDEO
REC MEDIA FOR IMAGE
OPERATION SOUND
AUTO POWER OFF
QUICK RESTART
REMOTE
TOUCH SCREEN ADJUST
3D DISPLAY WARNING (3D mode only)
VIDEO OUTPUT (2D mode only)
HDMI OUTPUT
HDMI CONTROL
AUTO FINALIZE
FACTORY PRESET
UPDATE
FORMAT BUILT-IN MEM.
FORMAT SD CARD
ERASE ALL DATA
Names of Parts
Front
Rear
Bottom
Interior
Indications on the LCD monitor
Common Recording Indications
Video Recording
Snapshot
Video Playback
Still Image Playback
Troubleshooting
Battery Pack
Unable to turn on the power when using the battery pack.
Short usage time even after charging.
Unable to charge the battery pack.
The remaining battery display is not correct.
The battery depletes even when the AC adapter is connected.
Recording
Recording cannot be performed.
Recording stops automatically.
The continuous shooting speed of still images is slow.
The focus is not adjusted automatically.
Zoom does not work.
Mosaic-type noise occurs when recording scenes with fast movements or extreme changes in brightness.
Vertical lines appear on recorded images.
Card
Cannot insert the SD card.
Unable to copy to SD card.
Playback
Sound or video is interrupted.
The same image is displayed for a long time.
The motion is choppy.
Cannot find a recorded file.
No date/time display.
Images do not appear on the TV properly.
Images are projected vertically on the TV.
The image displayed on TV is too small.
Unable to delete file.
When connected to the TV via the HDMI mini cable, proper images and sounds are not output.
3D images cannot be seen on a 3D compatible TV properly.
Editing/Copying
Unable to delete file.
Unable to copy/move files to SD card.
Computer
Unable to copy files to DVD with a PC.
Screen/Image
The LCD monitor is difficult to see.
A band or a ball of bright light appears on the LCD monitor.
The recorded subject is too dark.
The recorded subject is too bright.
The color looks strange. (Too bluish, too reddish, etc.)
The color looks different.
Other Problems
The buttons on the touch screen do not work.
The unit operates slowly when switching between video mode and still image mode, or when switching the power on or off.
The image is grainy.
This unit heats up.
Make a backup of important recorded data.
When connected to the TV via the HDMI mini cable, proper images and sounds are not output.
The language on the display changed.
HDMI-CEC functions do not work properly, and the TV does not work in conjunction with this unit.
Error Message?
CHECK LENS COVER
SET DATE/TIME!
COMMUNICATION ERROR
FORMAT ERROR!
DATA DELETION ERROR
ERROR IN BUILT-IN MEMORY!
MEMORY CARD ERROR!
NOT FORMATTED
RECORDING FAILURE
PLAYBACK FAILED
VIDEO MANAGEMENT FILE IS DAMAGED, RECOVERY IS REQUIRED TO RECORD/PLAYBACK, RECOVER?
UNSUPPORTED SCENE!
UNSUPPORTED FILE!
THIS FILE IS PROTECTED
CHECK CARD'S WRITE PROTECTION SWITCH
INSUFFICIENT AVAILABLE SPACE
SCENE QUANTITY EXCEEDED LIMIT
NUMBER OF FOLDERS OVERFLOW
FILE QUANTITY LIMIT EXCEEDED
CAMERA TEMPERATURE IS TOO COLD KEEP CAMERA POWER ON PLEASE WAIT
RECORDING CANCELLED
UNABLE TO RECORD PROPERLY IN 3D PLEASE SWITCH TO 2D FOR RECORDING
TOO MUCH PARALLAX BETWEEN LEFT & RIGHT IMAGES. YOU MAY NOT BE ABLE TO VIEW THE 3D IMAGES
Maintenance
Cautions
Specifications
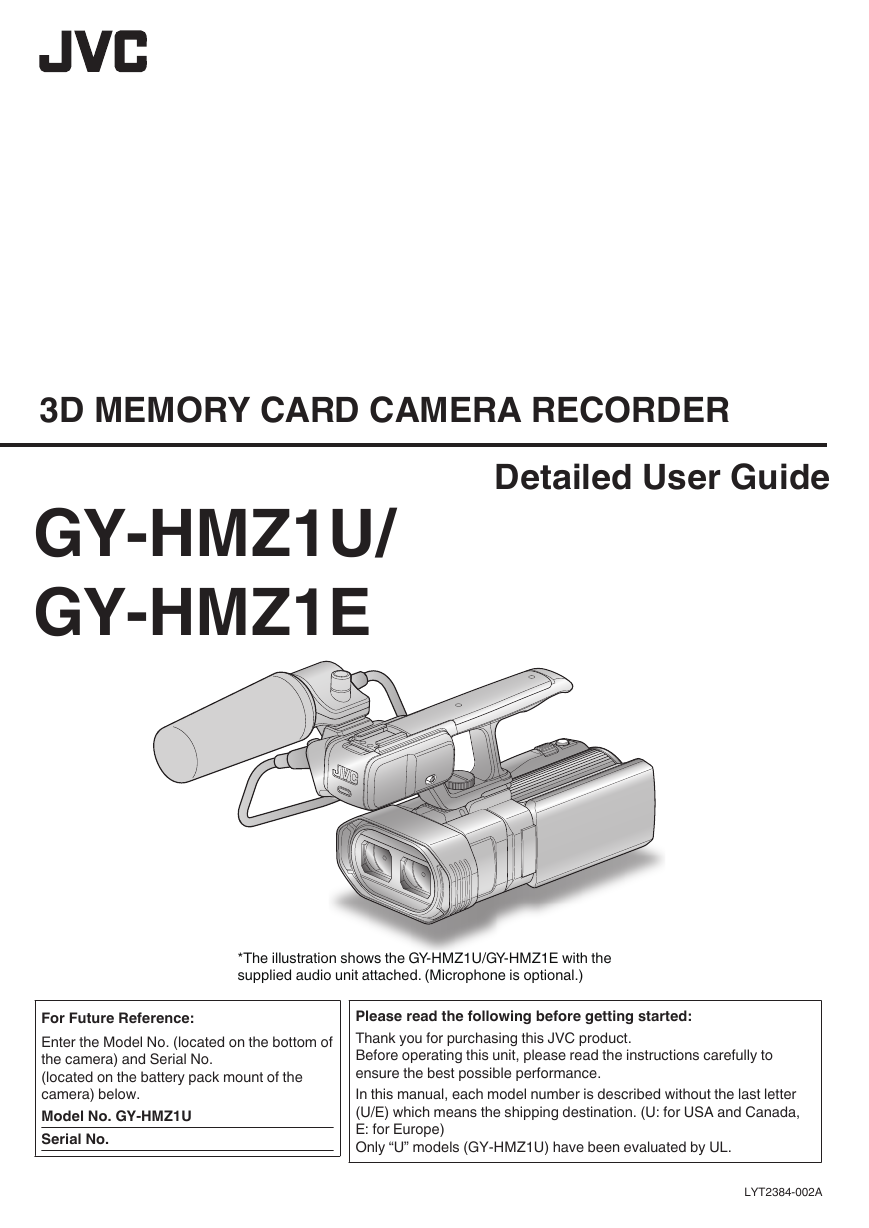
3D MEMORY CARD CAMERA RECORDER GY-HMZ1U/ GY-HMZ1E Detailed User Guide For Future Reference: Enter the Model No. (located on the bottom of the camera) and Serial No. (located on the battery pack mount of the camera) below. Model No. GY-HMZ1U Serial No. Please read the following before getting started: Thank you for purchasing this JVC product. Before operating this unit, please read the instructions carefully to ensure the best possible performance. In this manual, each model number is described without the last letter (U/E) which means the shipping destination. (U: for USA and Canada, E: for Europe) Only “U” models (GY-HMZ1U) have been evaluated by UL. LYT2384-002A *The illustration shows the GY-HMZ1U/GY-HMZ1E with the supplied audio unit attached. (Microphone is optional.)
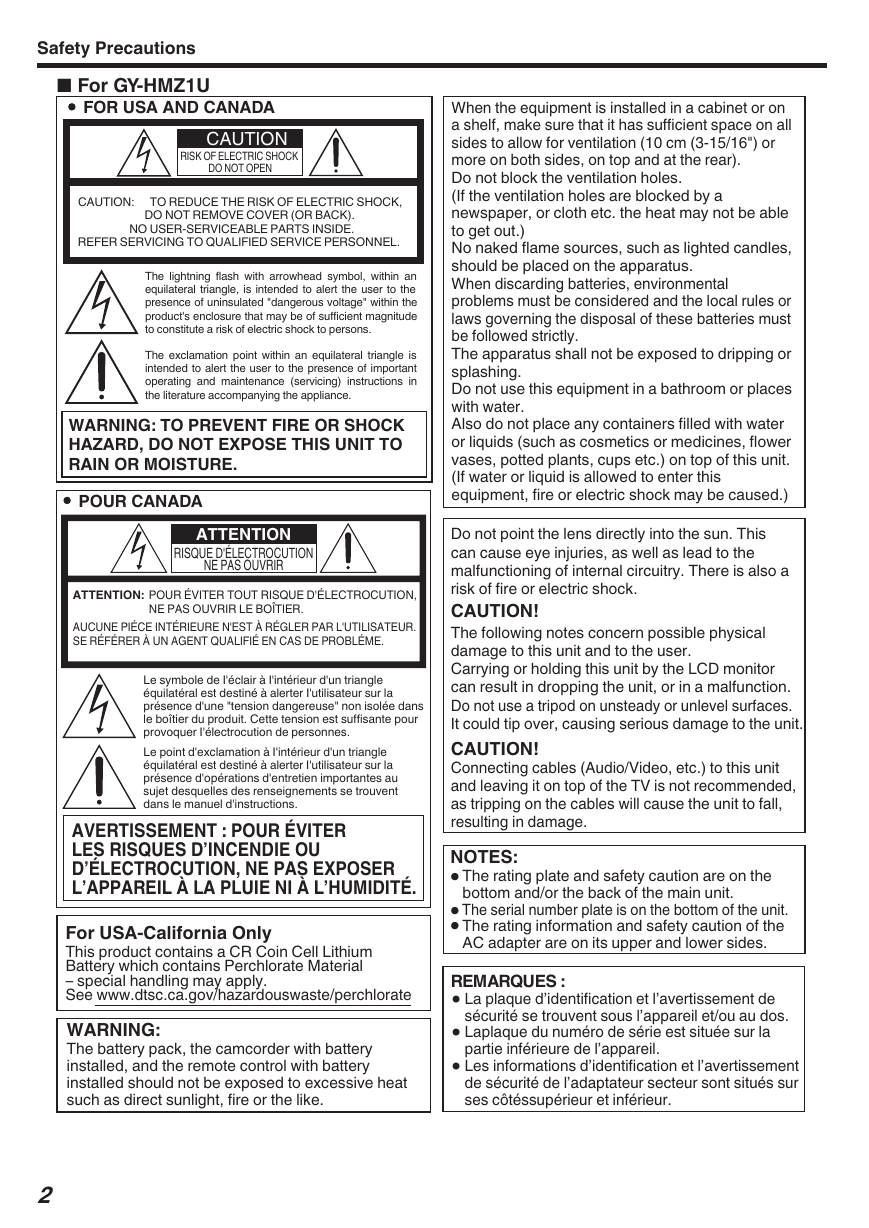
Safety Precautions 2 NOTES:• The rating plate and safety caution are on the bottom and/or the back of the main unit. The serial number plate is on the bottom of the unit. The rating information and safety caution of the AC adapter are on its upper and lower sides. ••This product contains a CR Coin Cell LithiumBattery which contains Perchlorate Material– special handling may apply.See www.dtsc.ca.gov/hazardouswaste/perchlorate For USA-California OnlyWhen the equipment is installed in a cabinet or on a shelf, make sure that it has sufficient space on all sides to allow for ventilation (10 cm (3-15/16") or more on both sides, on top and at the rear).Do not block the ventilation holes.(If the ventilation holes are blocked by a newspaper, or cloth etc. the heat may not be able to get out.)No naked flame sources, such as lighted candles, should be placed on the apparatus.When discarding batteries, environmental problems must be considered and the local rules or laws governing the disposal of these batteries must be followed strictly.The apparatus shall not be exposed to dripping or splashing.Do not use this equipment in a bathroom or places with water.Also do not place any containers filled with water or liquids (such as cosmetics or medicines, flower vases, potted plants, cups etc.) on top of this unit.(If water or liquid is allowed to enter this equipment, fire or electric shock may be caused.)Do not point the lens directly into the sun. This can cause eye injuries, as well as lead to the malfunctioning of internal circuitry. There is also a risk of fire or electric shock.CAUTION!The following notes concern possible physical damage to this unit and to the user.Carrying or holding this unit by the LCD monitor can result in dropping the unit, or in a malfunction. Do not use a tripod on unsteady or unlevel surfaces. It could tip over, causing serious damage to the unit.CAUTION!Connecting cables (Audio/Video, etc.) to this unit and leaving it on top of the TV is not recommended, as tripping on the cables will cause the unit to fall, resulting in damage.■ For GY-HMZ1UWARNING:The battery pack, the camcorder with batteryinstalled, and the remote control with batteryinstalled should not be exposed to excessive heat such as direct sunlight, fire or the like. REMARQUES :•La plaque d’identification et l’avertissement desécurité se trouvent sous l’appareil et/ou au dos.Laplaque du numéro de série est située sur la partie inférieure de l’appareil.Les informations d’identification et l’avertissement de sécurité de l’adaptateur secteur sont situés sur ses côtéssupérieur et inférieur. ••CAUTIONRISK OF ELECTRIC SHOCKDO NOT OPENCAUTION: TO REDUCE THE RISK OF ELECTRIC SHOCK, DO NOT REMOVE COVER (OR BACK).NO USER-SERVICEABLE PARTS INSIDE.REFER SERVICING TO QUALIFIED SERVICE PERSONNEL. The lightning flash with arrowhead symbol, within an equilateral triangle, is intended to alert the user to the presence of uninsulated "dangerous voltage" within the product's enclosure that may be of sufficient magnitude to constitute a risk of electric shock to persons.The exclamation point within an equilateral triangle is intended to alert the user to the presence of important operating and maintenance (servicing) instructions in the literature accompanying the appliance.WARNING: TO PREVENT FIRE OR SHOCK HAZARD, DO NOT EXPOSE THIS UNIT TO RAIN OR MOISTURE.FOR USA AND CANADAPOUR CANADAAVERTISSEMENT : POUR ÉVITERLES RISQUES D’INCENDIE OUD’ÉLECTROCUTION, NE PAS EXPOSERL’APPAREIL À LA PLUIE NI À L’HUMIDITÉ.ATTENTIONRISQUE D'ÉLECTROCUTIONNE PAS OUVRIRATTENTION:POUR ÉVITER TOUT RISQUE D'ÉLECTROCUTION,NE PAS OUVRIR LE BOÎTIER.AUCUNE PIÉCE INTÉRIEURE N'EST À RÉGLER PAR L'UTILISATEUR.SE RÉFÉRER À UN AGENT QUALIFIÉ EN CAS DE PROBLÉME.Le symbole de I'éclair à I'intérieur d'un triangleéquilatéral est destiné à alerter I'utilisateur sur laprésence d'une "tension dangereuse" non isolée dansle boîtier du produit. Cette tension est suffisante pourprovoquer I'électrocution de personnes.Le point d'exclamation à I'intérieur d'un triangleéquilatéral est destiné à alerter I'utilisateur sur laprésence d'opérations d'entretien importantes ausujet desquelles des renseignements se trouventdans le manuel d'instructions..
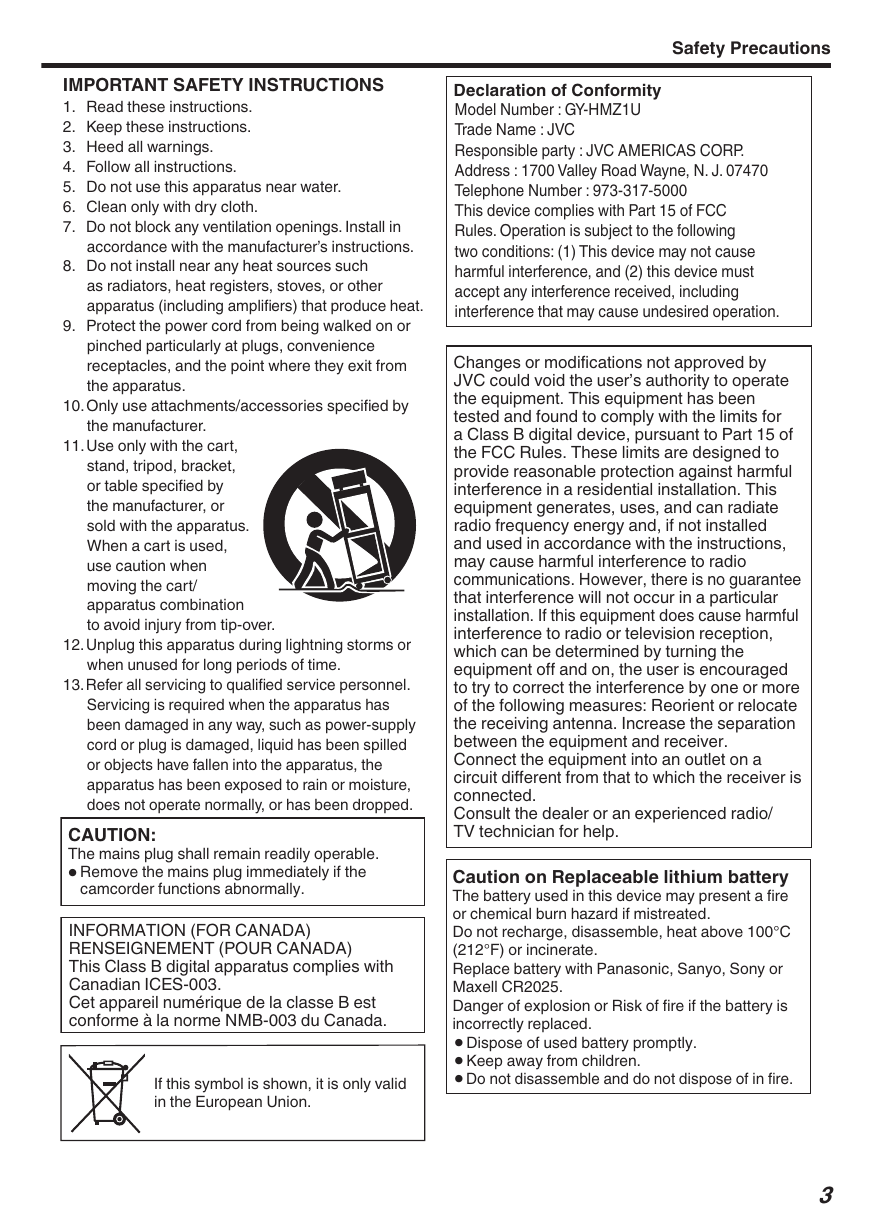
Safety Precautions 3 IMPORTANT SAFETY INSTRUCTIONS1. Read these instructions.2. Keep these instructions.3. Heed all warnings.4. Follow all instructions.5. Do not use this apparatus near water.6. Clean only with dry cloth.7. Do not block any ventilation openings. Install in accordance with the manufacturer’s instructions.8. Do not install near any heat sources such as radiators, heat registers, stoves, or other apparatus (including amplifi ers) that produce heat.9. Protect the power cord from being walked on orpinched particularly at plugs, conveniencereceptacles, and the point where they exit fromthe apparatus.10. Only use attachments/accessories specifi ed bythe manufacturer.11. Use only with the cart, stand, tripod, bracket, or table specifi ed by the manufacturer, or sold with the apparatus. When a cart is used, use caution when moving the cart/apparatus combination to avoid injury from tip-over.12. Unplug this apparatus during lightning storms or when unused for long periods of time.13. Refer all servicing to qualifi ed service personnel. Servicing is required when the apparatus has been damaged in any way, such as power-supply cord or plug is damaged, liquid has been spilled or objects have fallen into the apparatus, the apparatus has been exposed to rain or moisture, does not operate normally, or has been dropped.If this symbol is shown, it is only valid in the European Union.Declaration of ConformityChanges or modifications not approved by JVC could void the user’s authority to operate the equipment. This equipment has been tested and found to comply with the limits for a Class B digital device, pursuant to Part 15 of the FCC Rules. These limits are designed to provide reasonable protection against harmful interference in a residential installation. This equipment generates, uses, and can radiate radio frequency energy and, if not installed and used in accordance with the instructions, may cause harmful interference to radio communications. However, there is no guarantee that interference will not occur in a particular installation. If this equipment does cause harmful interference to radio or television reception, which can be determined by turning the equipment off and on, the user is encouraged to try to correct the interference by one or more of the following measures: Reorient or relocate the receiving antenna. Increase the separation between the equipment and receiver.Connect the equipment into an outlet on a circuit different from that to which the receiver is connected.Consult the dealer or an experienced radio/TV technician for help.INFORMATION (FOR CANADA)RENSEIGNEMENT (POUR CANADA)This Class B digital apparatus complies withCanadian ICES-003.Cet appareil numérique de la classe B estconforme à la norme NMB-003 du Canada.Model Number : GY-HMZ1UTrade Name : JVCResponsible party : JVC AMERICAS CORP.Address : 1700 Valley Road Wayne, N. J. 07470Telephone Number : 973-317-5000This device complies with Part 15 of FCCRules. Operation is subject to the followingtwo conditions: (1) This device may not causeharmful interference, and (2) this device mustaccept any interference received, includinginterference that may cause undesired operation.Caution on Replaceable lithium batteryThe battery used in this device may present a fire or chemical burn hazard if mistreated.Do not recharge, disassemble, heat above 100°C (212°F) or incinerate.Replace battery with Panasonic, Sanyo, Sony or Maxell CR2025.Danger of explosion or Risk of fire if the battery is incorrectly replaced.• Dispose of used battery promptly.• Keep away from children.• Do not disassemble and do not dispose of in fire.CAUTION:The mains plug shall remain readily operable.• Remove the mains plug immediately if the camcorder functions abnormally..
Safety Precautions 4 When the equipment is installed in a cabinet or ona shelf, make sure that it has sufficient space onall sides to allow for ventilation (10 cm or more onboth sides, on top and at the rear).Do not block the ventilation holes.(If the ventilation holes are blocked by a newspaper, or cloth etc. the heat may not be able to get out.)No naked flame sources, such as lighted candles,should be placed on the apparatus.When discarding batteries, environmentalproblems must be considered and the local rulesor laws governing the disposal of these batteriesmust be followed strictly.The apparatus shall not be exposed to drippingor splashing.Do not use this equipment in a bathroom orplaces with water.Also do not place any containers filled with wateror liquids (such as cosmetics or medicines, flowervases, potted plants, cups etc.) on top of this unit.(If water or liquid is allowed to enter thisequipment, fire or electric shock may be caused.) Do not point the lens directly into the sun. Thiscan cause eye injuries, as well as lead to themalfunctioning of internal circuitry. There is also arisk of fire or electric shock.CAUTION!The following notes concern possible physicaldamage to the unit and to the user.Carrying or holding the unit by the LCD monitorcan result in dropping the unit, or in a malfunction.Do not use a tripod on unsteady or unlevelsurfaces. It could tip over, causing serious damage to the unit. CAUTION!Connecting cables (Audio/Video, etc.)to the unit and leaving it on top of the TV is notrecommended, as tripping on the cables will causethe unit to fall, resulting in damage. CAUTION:To avoid electric shockor damage to the unit, first firmly insert the small end of the power cord into the AC Adapter until it is no longer wobbly, and then plug the largerend of the power cord into an AC outlet.IMPORTANT (for owners in the U.K.)Connection to the mains supply in the UnitedKingdom.DO NOT cut off the mains plug from this equipment.If the plug fitted is not suitable for the power pointsin your home or the cable is too short to reacha power point, then obtain an appropriate safetyapproved extension lead or consult your dealer.BE SURE to replace the fuse only with anidentical approved type, as originally fitted,and to replace the fuse cover.If nonetheless the mains plug is cut off be sureto remove the fuse and dispose of the plugimmediately, to avoid possible shock hazard byinadvertent connection to the mains supply.If this product is not supplied fitted with a mainsplug then follow the instructions given below:DO NOT make any connection to the LargerTerminal coded E or Green.The wires in the mains lead are coloured inaccordance with the following code:Blue to N(Neutral) or BlackBrown to L (Live)or RedIf these colours do not correspond with the terminalidentifications of your plug, connect as follows:Blue wire to terminal coded N (Neutral) or colouredblack.Brown wire to terminal coded L (Live) or coloured Red.If in doubt — consult a competent electrician.WARNING: TO PREVENT FIRE OR SHOCKHAZARD, DO NOT EXPOSE THIS UNIT TO RAINOR MOISTURE.CAUTIONS:•To prevent shock, do not open the cabinet. Nouser serviceable parts inside. Refer servicing toqualified personnel.When you are not using the AC adapter for along period of time, it is recommended that youdisconnect the power cord from AC outlet.•NOTES:•The rating plate and safety caution are on the bottom and/or the back of the main unit.The serial number plate is on the bottom of the unit.The rating information and safety caution of theAC adapter are on its upper and lower sides.••WARNING:The battery pack, the camcorder with batteryinstalled, and the remote control with batteryinstalled should not be exposed to excessive heatsuch as direct sunlight, fire or the Iike.CAUTION:The mains plug shall remain readily operable.• Remove the mains plug immediately if the camcorder functions abnormally.■ For GY-HMZ1E Caution on Replaceable lithium batteryThe battery used in this device may present a fireor chemical burn hazard if mistreated.Do not recharge, disassemble, heat above 100°Cor incinerate.Replace battery with Panasonic, Sanyo, Sony orMaxell CR2025.Danger of explosion or Risk of fire if the battery isincorrectly replaced.• Dispose of used battery promptly.• Keep away from children.• Do not disassemble and do not dispose of in fire..
Safety Precautions 5 Information for Users on Disposal of OldEquipment and BatteriesProductsBatteryNotice:The sign Pb below the symbolfor batteries indicates that thisbattery contains lead.[European Union]These symbols indicate that the electrical andelectronic equipment and the battery with this symbolshould not be disposed of as general householdwaste at its end-of-life. Instead, the products shouldbe handed over to the applicable collection points forthe recycling of electrical and electronic equipment aswell as batteries for proper treatment, recovery andrecycling in accordance with your national legislationand the Directive 2002/96/EC and 2006/66/EC.By disposing of these products correctly, you will helpto conserve natural resources and will help to preventpotential negative effects on the environment andhuman health which could otherwise be caused byinappropriate waste handling of these products.For more information about collection points andrecycling of these products, please contact yourlocal municipal office, your household waste disposalservice or the shop where you purchased the product.Penalties may be applicable for incorrect disposal ofthis waste, in accordance with national legislation.[Business users]If you wish to dispose of this product, please visitour web page http://www.jvc.eu to obtaininformation about the take-back of the product.[Other Countries outside the European Union]These symbols are only valid in the European Union.If you wish to dispose of these items, please do soin accordance with applicable national legislation orother rules in your country for the treatment of oldelectrical and electronic equipment and batteries.SOME DO’S AND DON’TS ON THE SAFEUSE OF EQUIPMENTThis equipment has been designed and manufacturedto meet international safety standards but, like anyelectrical equipment, care must be taken if you are toobtain the best results and safety is to be assured.DO read the operating instructions before you attemptto use the equipment.DO ensure that all electrical connections (including themains plug, extension leads and interconnections betweenpieces of equipment) are properly made and in accordancewith the manufacturer’s instructions. Switch off and withdrawthe mains plug when making or changing connections.DO consult your dealer if you are ever in doubt aboutthe installation, operation or safety of your equipment.DO be careful with glass panels or doors on equipment.DON’T continue to operate the equipment if you are inany doubt about it working normally, or if it is damagedin any way — switch off, withdraw the mains plug andconsult your dealer.DON’T remove any fixed cover as this may exposedangerous voltages.DON’T leave equipment switched on when it isunattended unless it is specifically stated that it isdesigned for unattended operation or has a standbymode. Switch off using the switch on the equipmentand make sure that your family knows how to do this.Special arrangements may need to be made for infirmor handicapped people.DON’T use equipment such as personal stereosor radios so that you are distracted from therequirements of road safety. It is illegal to watchtelevision whilst driving.DON’T listen to headphones at high volume, as suchuse can permanently damage your hearing.DON’T obstruct the ventilation of the equipment, forexample with curtains or soft furnishings. Overheatingwill cause damage and shorten the life of the equipment.DON’T use makeshift stands and NEVER fix legs withwood screws — to ensure complete safety always fitthe manufacturer’s approved stand or legs with thefixings provided according to the instructions.DON’T allow electrical equipment to be exposed torain or moisture.ABOVE ALL•NEVER let anyone especially children pushanything into holes, slots or any other opening in thecase — this could result in a fatal electrical shock;•NEVER guess or take chances with electrical equipmentof any kind — it is better to be safe than sorry!Dear Customer, [European Union]This apparatus is in conformance with the validEuropean directives and standards regardingelectromagnetic compatibility and electricalsafety.European representative of Victor Company ofJapan, Limited is:JVC Technical Services Europe GmbHPostfach 10 05 0461145 FriedbergGermany.
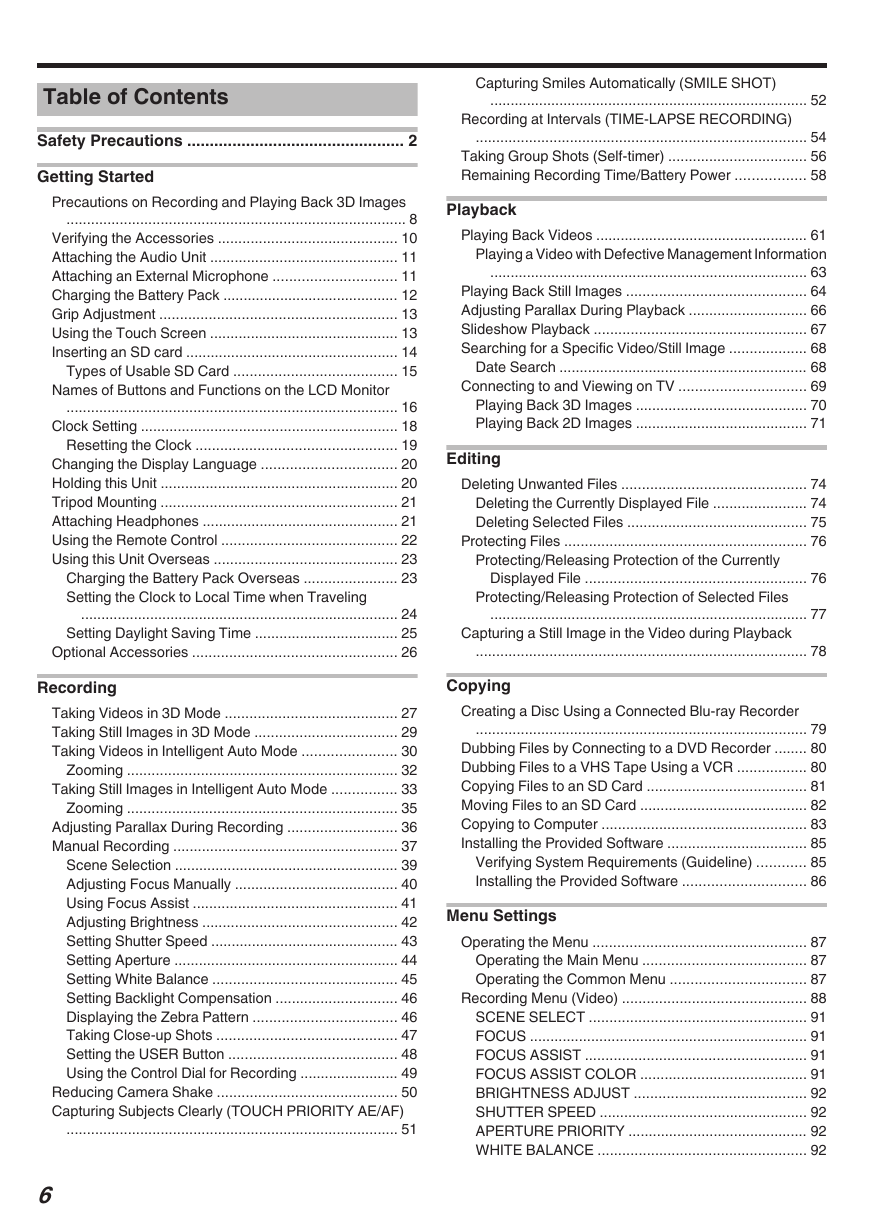
Table of Contents Table of Contents Safety Precautions ................................................ 2 Getting Started Precautions on Recording and Playing Back 3D Images ................................................................................... 8 Verifying the Accessories ............................................ 10 Attaching the Audio Unit .............................................. 11 Attaching an External Microphone .............................. 11 Charging the Battery Pack ........................................... 12 Grip Adjustment .......................................................... 13 Using the Touch Screen .............................................. 13 Inserting an SD card .................................................... 14 Types of Usable SD Card ........................................ 15 Names of Buttons and Functions on the LCD Monitor ................................................................................. 16 Clock Setting ............................................................... 18 Resetting the Clock ................................................. 19 Changing the Display Language ................................. 20 Holding this Unit .......................................................... 20 Tripod Mounting .......................................................... 21 Attaching Headphones ................................................ 21 Using the Remote Control ........................................... 22 Using this Unit Overseas ............................................. 23 Charging the Battery Pack Overseas ....................... 23 Setting the Clock to Local Time when Traveling .............................................................................. 24 Setting Daylight Saving Time ................................... 25 Optional Accessories .................................................. 26 Recording Taking Videos in 3D Mode .......................................... 27 Taking Still Images in 3D Mode ................................... 29 Taking Videos in Intelligent Auto Mode ....................... 30 Zooming .................................................................. 32 Taking Still Images in Intelligent Auto Mode ................ 33 Zooming .................................................................. 35 Adjusting Parallax During Recording ........................... 36 Manual Recording ....................................................... 37 Scene Selection ....................................................... 39 Adjusting Focus Manually ........................................ 40 Using Focus Assist .................................................. 41 Adjusting Brightness ................................................ 42 Setting Shutter Speed .............................................. 43 Setting Aperture ....................................................... 44 Setting White Balance ............................................. 45 Setting Backlight Compensation .............................. 46 Displaying the Zebra Pattern ................................... 46 Taking Close-up Shots ............................................ 47 Setting the USER Button ......................................... 48 Using the Control Dial for Recording ........................ 49 Reducing Camera Shake ............................................ 50 Capturing Subjects Clearly (TOUCH PRIORITY AE/AF) ................................................................................. 51 6 Capturing Smiles Automatically (SMILE SHOT) .............................................................................. 52 Recording at Intervals (TIME-LAPSE RECORDING) ................................................................................. 54 Taking Group Shots (Self-timer) .................................. 56 Remaining Recording Time/Battery Power ................. 58 Playback Playing Back Videos .................................................... 61 Playing a Video with Defective Management Information .............................................................................. 63 Playing Back Still Images ............................................ 64 Adjusting Parallax During Playback ............................. 66 Slideshow Playback .................................................... 67 Searching for a Specific Video/Still Image ................... 68 Date Search ............................................................. 68 Connecting to and Viewing on TV ............................... 69 Playing Back 3D Images .......................................... 70 Playing Back 2D Images .......................................... 71 Editing Deleting Unwanted Files ............................................. 74 Deleting the Currently Displayed File ....................... 74 Deleting Selected Files ............................................ 75 Protecting Files ........................................................... 76 Protecting/Releasing Protection of the Currently Displayed File ...................................................... 76 Protecting/Releasing Protection of Selected Files .............................................................................. 77 Capturing a Still Image in the Video during Playback ................................................................................. 78 Copying Creating a Disc Using a Connected Blu-ray Recorder ................................................................................. 79 Dubbing Files by Connecting to a DVD Recorder ........ 80 Dubbing Files to a VHS Tape Using a VCR ................. 80 Copying Files to an SD Card ....................................... 81 Moving Files to an SD Card ......................................... 82 Copying to Computer .................................................. 83 Installing the Provided Software .................................. 85 Verifying System Requirements (Guideline) ............ 85 Installing the Provided Software .............................. 86 Menu Settings Operating the Menu .................................................... 87 Operating the Main Menu ........................................ 87 Operating the Common Menu ................................. 87 Recording Menu (Video) ............................................. 88 SCENE SELECT ..................................................... 91 FOCUS .................................................................... 91 FOCUS ASSIST ...................................................... 91 FOCUS ASSIST COLOR ......................................... 91 BRIGHTNESS ADJUST .......................................... 92 SHUTTER SPEED ................................................... 92 APERTURE PRIORITY ............................................ 92 WHITE BALANCE ................................................... 92
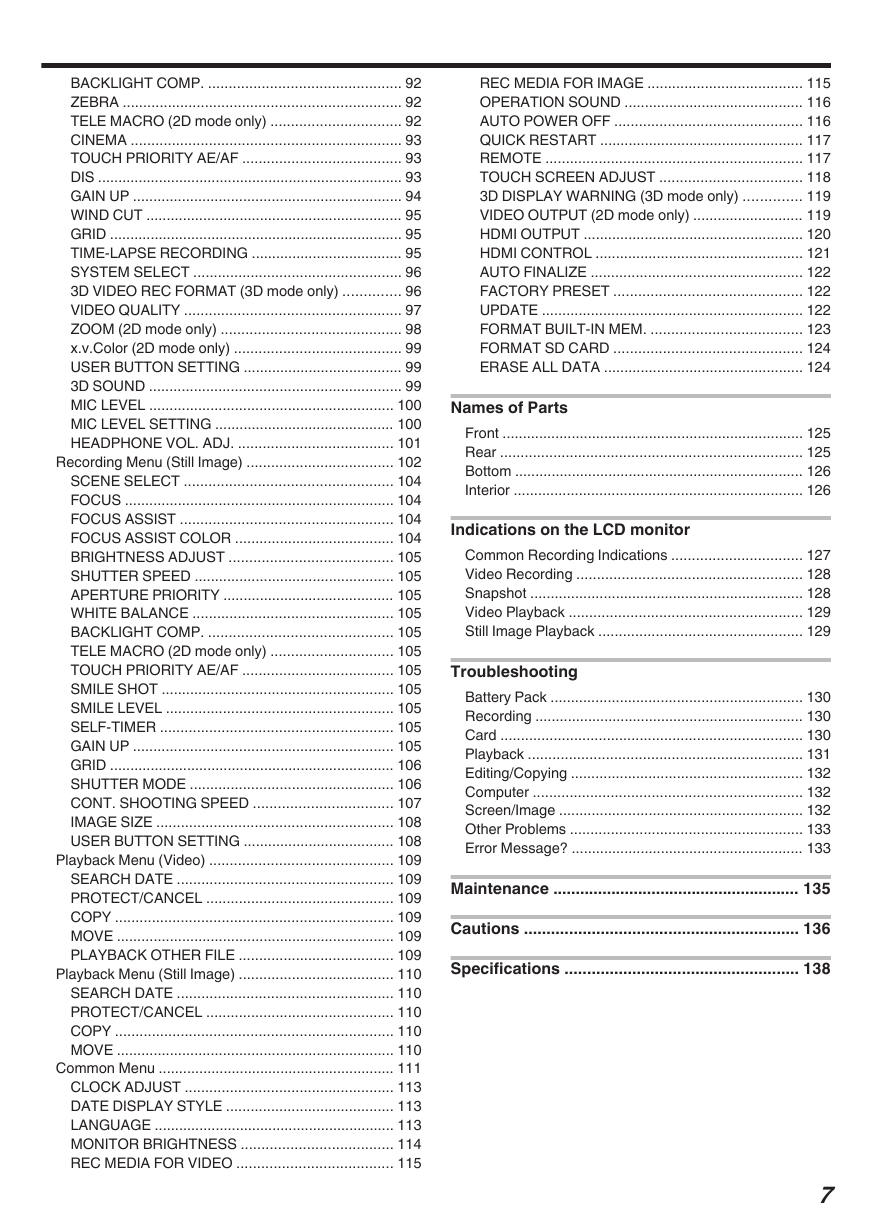
BACKLIGHT COMP. ............................................... 92 ZEBRA .................................................................... 92 TELE MACRO (2D mode only) ................................ 92 CINEMA .................................................................. 93 TOUCH PRIORITY AE/AF ....................................... 93 DIS ........................................................................... 93 GAIN UP .................................................................. 94 WIND CUT ............................................................... 95 GRID ........................................................................ 95 TIME-LAPSE RECORDING ..................................... 95 SYSTEM SELECT ................................................... 96 3D VIDEO REC FORMAT (3D mode only) .............. 96 VIDEO QUALITY ..................................................... 97 ZOOM (2D mode only) ............................................ 98 x.v.Color (2D mode only) ......................................... 99 USER BUTTON SETTING ....................................... 99 3D SOUND .............................................................. 99 MIC LEVEL ............................................................ 100 MIC LEVEL SETTING ............................................ 100 HEADPHONE VOL. ADJ. ...................................... 101 Recording Menu (Still Image) .................................... 102 SCENE SELECT ................................................... 104 FOCUS .................................................................. 104 FOCUS ASSIST .................................................... 104 FOCUS ASSIST COLOR ....................................... 104 BRIGHTNESS ADJUST ........................................ 105 SHUTTER SPEED ................................................. 105 APERTURE PRIORITY .......................................... 105 WHITE BALANCE ................................................. 105 BACKLIGHT COMP. ............................................. 105 TELE MACRO (2D mode only) .............................. 105 TOUCH PRIORITY AE/AF ..................................... 105 SMILE SHOT ......................................................... 105 SMILE LEVEL ........................................................ 105 SELF-TIMER ......................................................... 105 GAIN UP ................................................................ 105 GRID ...................................................................... 106 SHUTTER MODE .................................................. 106 CONT. SHOOTING SPEED .................................. 107 IMAGE SIZE .......................................................... 108 USER BUTTON SETTING ..................................... 108 Playback Menu (Video) ............................................. 109 SEARCH DATE ..................................................... 109 PROTECT/CANCEL .............................................. 109 COPY .................................................................... 109 MOVE .................................................................... 109 PLAYBACK OTHER FILE ...................................... 109 Playback Menu (Still Image) ...................................... 110 SEARCH DATE ..................................................... 110 PROTECT/CANCEL .............................................. 110 COPY .................................................................... 110 MOVE .................................................................... 110 Common Menu .......................................................... 111 CLOCK ADJUST ................................................... 113 DATE DISPLAY STYLE ......................................... 113 LANGUAGE ........................................................... 113 MONITOR BRIGHTNESS ..................................... 114 REC MEDIA FOR VIDEO ...................................... 115 Table of Contents REC MEDIA FOR IMAGE ...................................... 115 OPERATION SOUND ............................................ 116 AUTO POWER OFF .............................................. 116 QUICK RESTART .................................................. 117 REMOTE ............................................................... 117 TOUCH SCREEN ADJUST ................................... 118 3D DISPLAY WARNING (3D mode only) .............. 119 VIDEO OUTPUT (2D mode only) ........................... 119 HDMI OUTPUT ...................................................... 120 HDMI CONTROL ................................................... 121 AUTO FINALIZE .................................................... 122 FACTORY PRESET .............................................. 122 UPDATE ................................................................ 122 FORMAT BUILT-IN MEM. ..................................... 123 FORMAT SD CARD .............................................. 124 ERASE ALL DATA ................................................. 124 Names of Parts Front .......................................................................... 125 Rear .......................................................................... 125 Bottom ....................................................................... 126 Interior ....................................................................... 126 Indications on the LCD monitor Common Recording Indications ................................ 127 Video Recording ....................................................... 128 Snapshot ................................................................... 128 Video Playback ......................................................... 129 Still Image Playback .................................................. 129 Troubleshooting Battery Pack .............................................................. 130 Recording .................................................................. 130 Card .......................................................................... 130 Playback ................................................................... 131 Editing/Copying ......................................................... 132 Computer .................................................................. 132 Screen/Image ............................................................ 132 Other Problems ......................................................... 133 Error Message? ......................................................... 133 Maintenance ....................................................... 135 Cautions ............................................................. 136 Specifications .................................................... 138 7
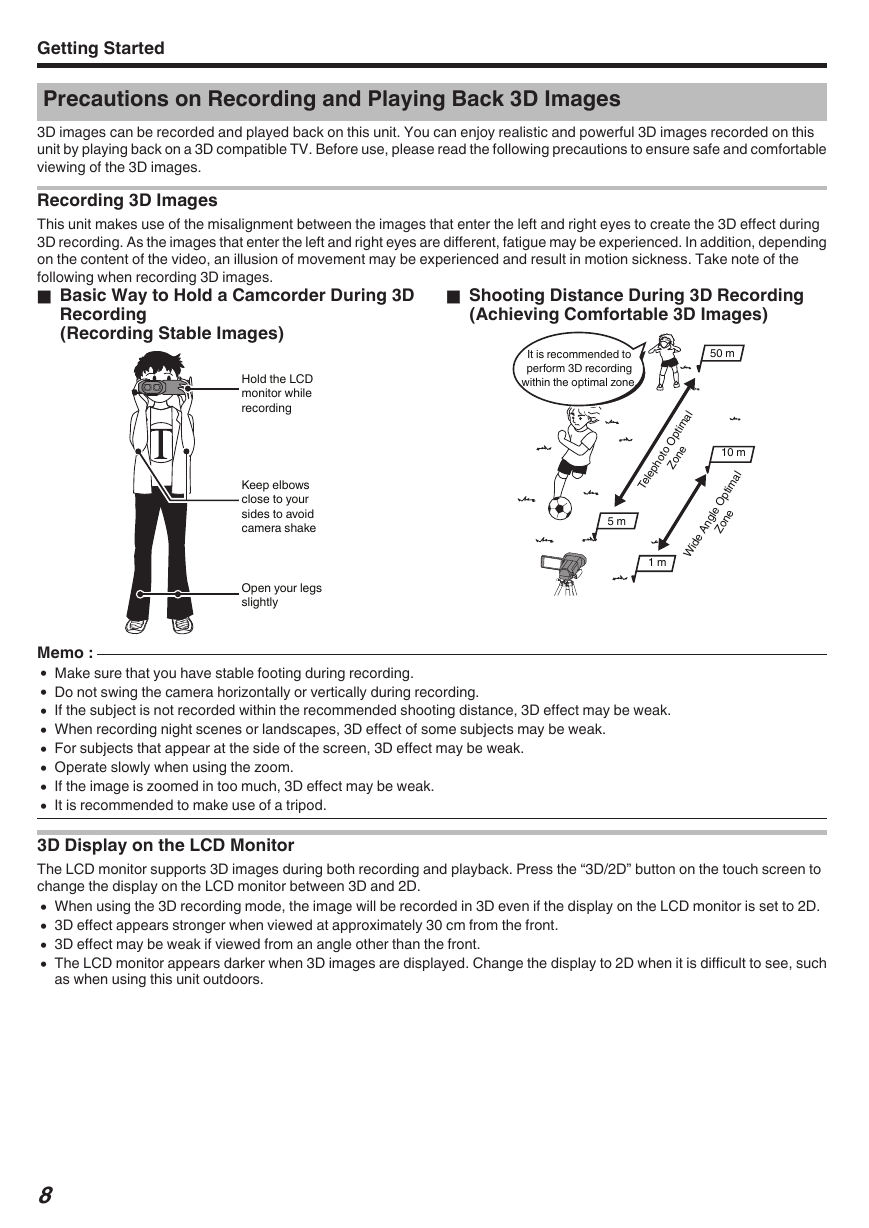
Getting Started Precautions on Recording and Playing Back 3D Images 3D images can be recorded and played back on this unit. You can enjoy realistic and powerful 3D images recorded on this unit by playing back on a 3D compatible TV. Before use, please read the following precautions to ensure safe and comfortable viewing of the 3D images. Recording 3D Images This unit makes use of the misalignment between the images that enter the left and right eyes to create the 3D effect during 3D recording. As the images that enter the left and right eyes are different, fatigue may be experienced. In addition, depending on the content of the video, an illusion of movement may be experienced and result in motion sickness. Take note of the following when recording 3D images. o Shooting Distance During 3D Recording o Basic Way to Hold a Camcorder During 3D (Achieving Comfortable 3D Images) Recording (Recording Stable Images) Memo : 0 Make sure that you have stable footing during recording. 0 Do not swing the camera horizontally or vertically during recording. 0 If the subject is not recorded within the recommended shooting distance, 3D effect may be weak. 0 When recording night scenes or landscapes, 3D effect of some subjects may be weak. 0 For subjects that appear at the side of the screen, 3D effect may be weak. 0 Operate slowly when using the zoom. 0 If the image is zoomed in too much, 3D effect may be weak. 0 It is recommended to make use of a tripod. 3D Display on the LCD Monitor The LCD monitor supports 3D images during both recording and playback. Press the “3D/2D” button on the touch screen to change the display on the LCD monitor between 3D and 2D. 0 When using the 3D recording mode, the image will be recorded in 3D even if the display on the LCD monitor is set to 2D. 0 3D effect appears stronger when viewed at approximately 30 cm from the front. 0 3D effect may be weak if viewed from an angle other than the front. 0 The LCD monitor appears darker when 3D images are displayed. Change the display to 2D when it is difficult to see, such as when using this unit outdoors. 8 Open your legs slightlyKeep elbows close to your sides to avoid camera shakeHold the LCD monitor while recordingIt is recommended to perform 3D recording within the optimal zone.Telephoto Optimal ZoneWide Angle Optimal Zone50 m5 m10 m1 m. .
分享到:
收藏