M9H7_EU.book Page 1 Thursday, March 26, 2009 2:11 PM
EN
HD MEMORY CARD CAMERA RECORDER
GY-HM100E
INSTRUCTIONS
イラストは GY-HM100 に付属のマイクを取り付けた例です。
The illustration shows the GY-HM100E
with the provided microphone attached.
LYT2090-001B
�
M9H7_EU.book Page 2 Thursday, March 26, 2009 2:11 PM
Getting Started
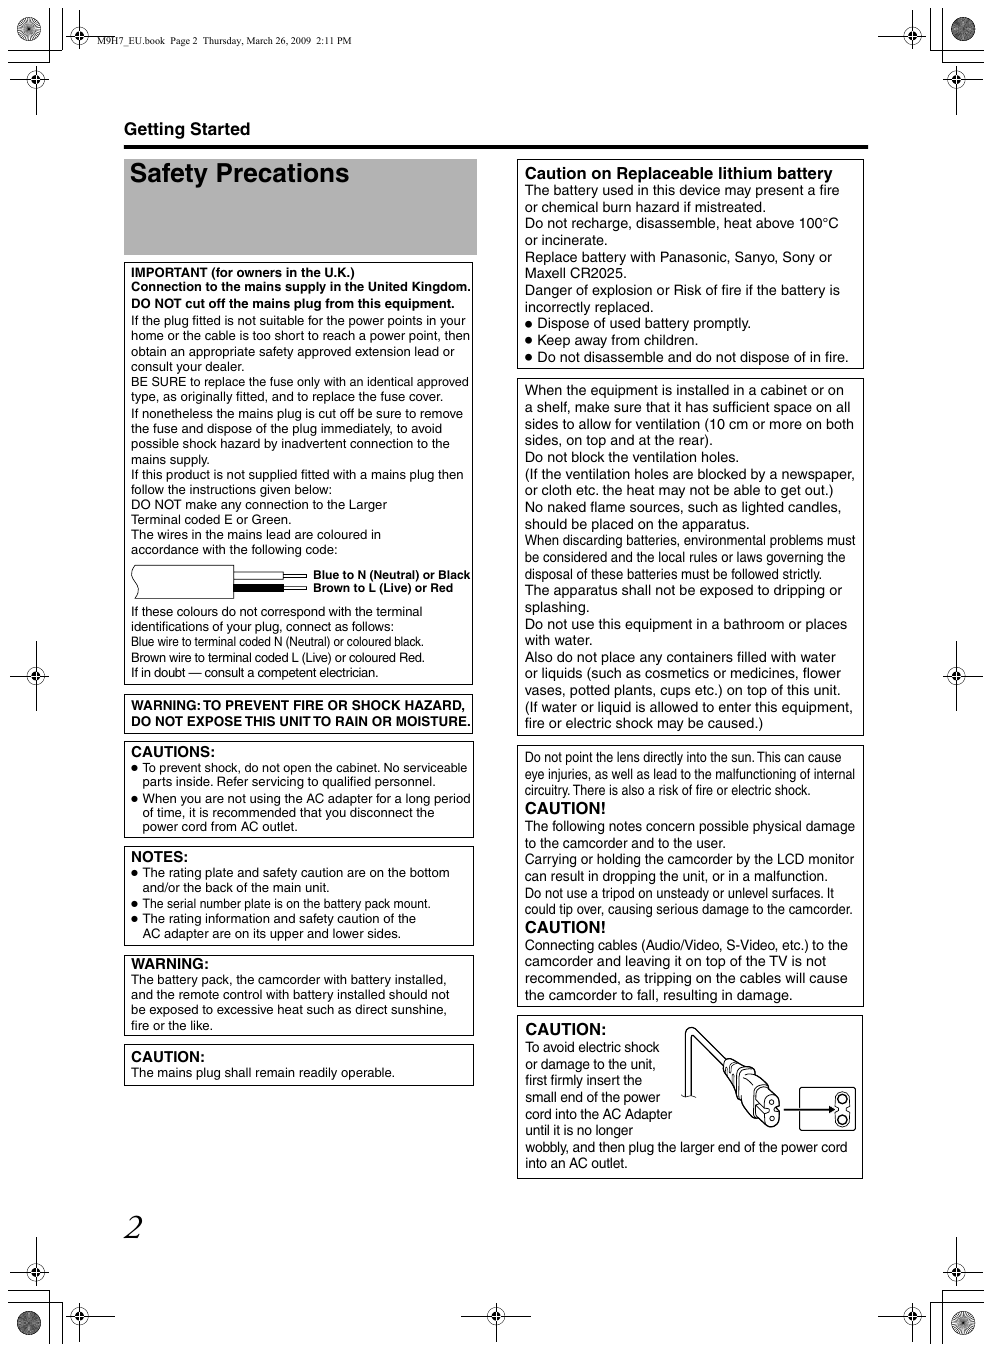
Safety Precations
IMPORTANT (for owners in the U.K.)
Connection to the mains supply in the United Kingdom.
DO NOT cut off the mains plug from this equipment.
If the plug fitted is not suitable for the power points in your
home or the cable is too short to reach a power point, then
obtain an appropriate safety approved extension lead or
consult your dealer.
BE SURE to replace the fuse only with an identical approved
type, as originally fitted, and to replace the fuse cover.
If nonetheless the mains plug is cut off be sure to remove
the fuse and dispose of the plug immediately, to avoid
possible shock hazard by inadvertent connection to the
mains supply.
If this product is not supplied fitted with a mains plug then
follow the instructions given below:
DO NOT make any connection to the Larger
Terminal coded E or Green.
The wires in the mains lead are coloured in
accordance with the following code:
Blue to N (Neutral) or Black
Brown to L (Live) or Red
If these colours do not correspond with the terminal
identifications of your plug, connect as follows:
Blue wire to terminal coded N (Neutral) or coloured black.
Brown wire to terminal coded L (Live) or coloured Red.
If in doubt — consult a competent electrician.
WARNING: TO PREVENT FIRE OR SHOCK HAZARD,
DO NOT EXPOSE THIS UNIT TO RAIN OR MOISTURE.
CAUTIONS:
• To prevent shock, do not open the cabinet. No serviceable
• When you are not using the AC adapter for a long period
parts inside. Refer servicing to qualified personnel.
of time, it is recommended that you disconnect the
power cord from AC outlet.
NOTES:
• The rating plate and safety caution are on the bottom
• The serial number plate is on the battery pack mount.
• The rating information and safety caution of the
and/or the back of the main unit.
AC adapter are on its upper and lower sides.
WARNING:
The battery pack, the camcorder with battery installed,
and the remote control with battery installed should not
be exposed to excessive heat such as direct sunshine,
fire or the like.
CAUTION:
The mains plug shall remain readily operable.
2
Caution on Replaceable lithium battery
The battery used in this device may present a fire
or chemical burn hazard if mistreated.
Do not recharge, disassemble, heat above 100°C
or incinerate.
Replace battery with Panasonic, Sanyo, Sony or
Maxell CR2025.
Danger of explosion or Risk of fire if the battery is
incorrectly replaced.
• Dispose of used battery promptly.
• Keep away from children.
• Do not disassemble and do not dispose of in fire.
When the equipment is installed in a cabinet or on
a shelf, make sure that it has sufficient space on all
sides to allow for ventilation (10 cm or more on both
sides, on top and at the rear).
Do not block the ventilation holes.
(If the ventilation holes are blocked by a newspaper,
or cloth etc. the heat may not be able to get out.)
No naked flame sources, such as lighted candles,
should be placed on the apparatus.
When discarding batteries, environmental problems must
be considered and the local rules or laws governing the
disposal of these batteries must be followed strictly.
The apparatus shall not be exposed to dripping or
splashing.
Do not use this equipment in a bathroom or places
with water.
Also do not place any containers filled with water
or liquids (such as cosmetics or medicines, flower
vases, potted plants, cups etc.) on top of this unit.
(If water or liquid is allowed to enter this equipment,
fire or electric shock may be caused.)
Do not point the lens directly into the sun. This can cause
eye injuries, as well as lead to the malfunctioning of internal
circuitry. There is also a risk of fire or electric shock.
CAUTION!
The following notes concern possible physical damage
to the camcorder and to the user.
Carrying or holding the camcorder by the LCD monitor
can result in dropping the unit, or in a malfunction.
Do not use a tripod on unsteady or unlevel surfaces. It
could tip over, causing serious damage to the camcorder.
CAUTION!
Connecting cables (Audio/Video, S-Video, etc.) to the
camcorder and leaving it on top of the TV is not
recommended, as tripping on the cables will cause
the camcorder to fall, resulting in damage.
CAUTION:
To avoid electric shock
or damage to the unit,
first firmly insert the
small end of the power
cord into the AC Adapter
until it is no longer
wobbly, and then plug the larger end of the power cord
into an AC outlet.
�
M9H7_EU.book Page 3 Thursday, March 26, 2009 2:11 PM
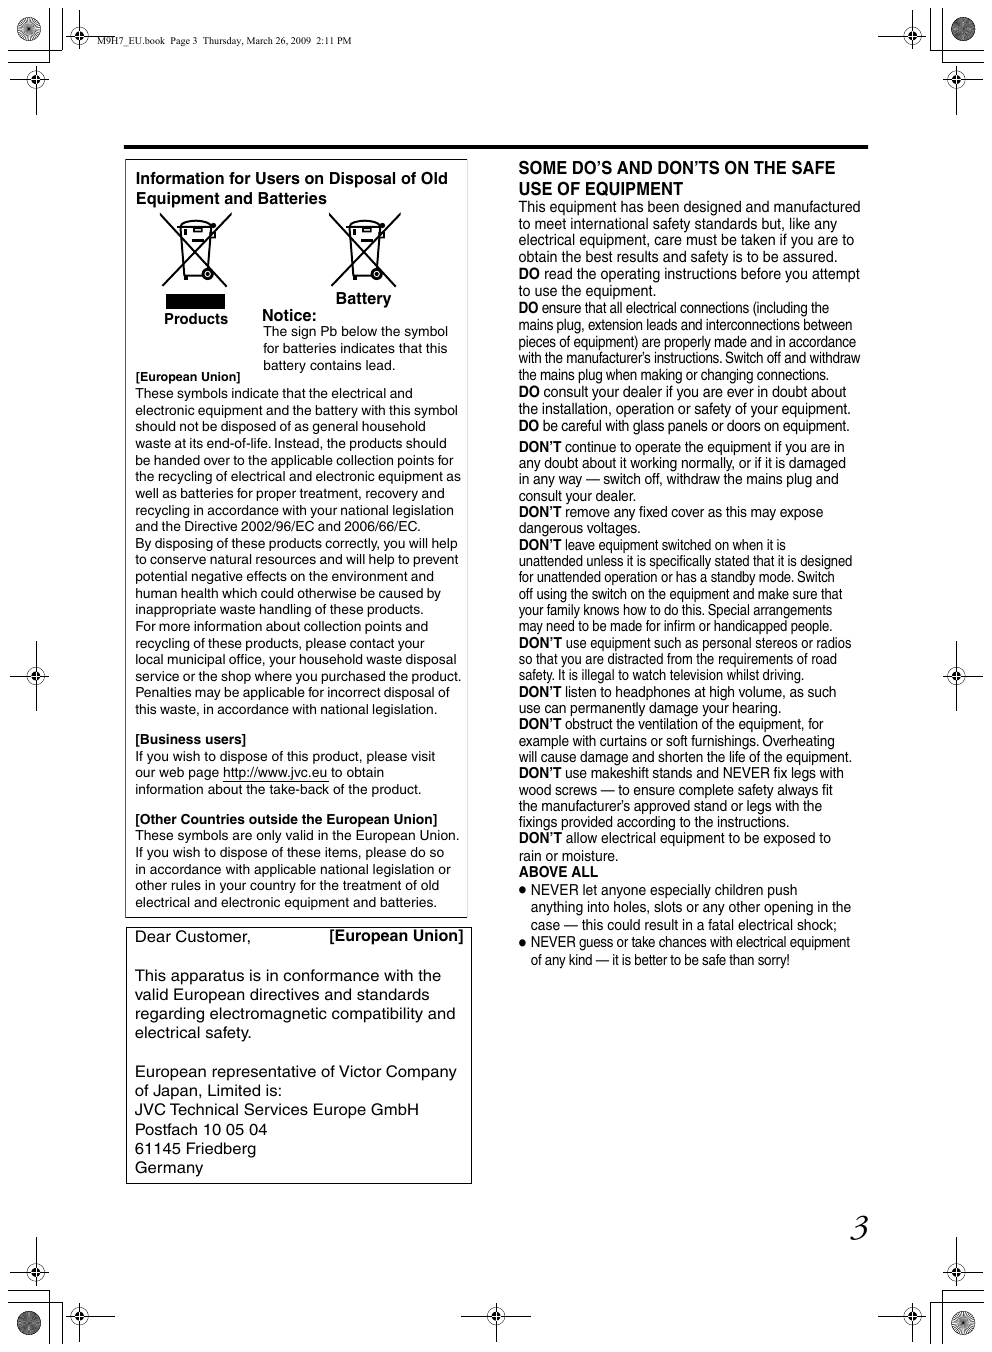
Information for Users on Disposal of Old
Equipment and Batteries
Products
Battery
Notice:
The sign Pb below the symbol
for batteries indicates that this
battery contains lead.
[European Union]
These symbols indicate that the electrical and
electronic equipment and the battery with this symbol
should not be disposed of as general household
waste at its end-of-life. Instead, the products should
be handed over to the applicable collection points for
the recycling of electrical and electronic equipment as
well as batteries for proper treatment, recovery and
recycling in accordance with your national legislation
and the Directive 2002/96/EC and 2006/66/EC.
By disposing of these products correctly, you will help
to conserve natural resources and will help to prevent
potential negative effects on the environment and
human health which could otherwise be caused by
inappropriate waste handling of these products.
For more information about collection points and
recycling of these products, please contact your
local municipal office, your household waste disposal
service or the shop where you purchased the product.
Penalties may be applicable for incorrect disposal of
this waste, in accordance with national legislation.
[Business users]
If you wish to dispose of this product, please visit
our web page http://www.jvc.eu to obtain
information about the take-back of the product.
[Other Countries outside the European Union]
These symbols are only valid in the European Union.
If you wish to dispose of these items, please do so
in accordance with applicable national legislation or
other rules in your country for the treatment of old
electrical and electronic equipment and batteries.
Dear Customer,
[European Union]
This apparatus is in conformance with the
valid European directives and standards
regarding electromagnetic compatibility and
electrical safety.
European representative of Victor Company
of Japan, Limited is:
JVC Technical Services Europe GmbH
Postfach 10 05 04
61145 Friedberg
Germany
SOME DO’S AND DON’TS ON THE SAFE
USE OF EQUIPMENT
This equipment has been designed and manufactured
to meet international safety standards but, like any
electrical equipment, care must be taken if you are to
obtain the best results and safety is to be assured.
DO read the operating instructions before you attempt
to use the equipment.
DO ensure that all electrical connections (including the
mains plug, extension leads and interconnections between
pieces of equipment) are properly made and in accordance
with the manufacturer’s instructions. Switch off and withdraw
the mains plug when making or changing connections.
DO consult your dealer if you are ever in doubt about
the installation, operation or safety of your equipment.
DO be careful with glass panels or doors on equipment.
DON’T continue to operate the equipment if you are in
any doubt about it working normally, or if it is damaged
in any way — switch off, withdraw the mains plug and
consult your dealer.
DON’T remove any fixed cover as this may expose
dangerous voltages.
DON’T leave equipment switched on when it is
unattended unless it is specifically stated that it is designed
for unattended operation or has a standby mode. Switch
off using the switch on the equipment and make sure that
your family knows how to do this. Special arrangements
may need to be made for infirm or handicapped people.
DON’T use equipment such as personal stereos or radios
so that you are distracted from the requirements of road
safety. It is illegal to watch television whilst driving.
DON’T listen to headphones at high volume, as such
use can permanently damage your hearing.
DON’T obstruct the ventilation of the equipment, for
example with curtains or soft furnishings. Overheating
will cause damage and shorten the life of the equipment.
DON’T use makeshift stands and NEVER fix legs with
wood screws — to ensure complete safety always fit
the manufacturer’s approved stand or legs with the
fixings provided according to the instructions.
DON’T allow electrical equipment to be exposed to
rain or moisture.
ABOVE ALL
• NEVER let anyone especially children push
anything into holes, slots or any other opening in the
case — this could result in a fatal electrical shock;
• NEVER guess or take chances with electrical equipment
of any kind — it is better to be safe than sorry!
3
�
䡵 Camera designed with 3-CCD system for high-
quality picture
䡵 Zebra pattern video level indication
䡵 Full Auto shooting mode
Eliminates the need for troublesome switch operations by
automatically providing a wide range of compatibility with
shooting conditions that change as you move between
indoors and outdoors or between bright and dark
locations.
䡵 Image Stabilizer feature
Reduces blurring of images due to camera shake.
䡵 ND filters provided
䡵 Program AE function
Enables selection of shooting conditions according to the
scenes of your preference.
䡵 White balance adjustment feature
Enables white balance to be adjusted automatically or
manually.
䡵 Built-in color bars (multi-format color bars)
䡵 Slow shutter
Makes it possible to brightly shoot video of dark subjects
with little motion by accumulating the images.
䡵 Three audio input terminals
This camcorder comes with two XLR terminals and one
mini-jack terminal, which can be used as audio input
terminals for the built-in or external microphone.
䡵 Three video output terminals
This camcorder comes with an HDMI terminal, a
component terminal, and an A/V OUT (video/audio
output) terminal, which support a wide variety of TV
monitor types.
䡵 Connection to PCs via USB port
Video or still picture files stored on an SD card can be
retrieved to a PC.
䡵 Saving and loading of setting files
The current menu and camcorder settings can be saved
to an SD card. (Up to four files) In addition, settings files
stored on the SD card can also be loaded onto the
camcorder according to the shooting scene to reproduce
the most suitable settings.
M9H7_EU.book Page 4 Thursday, March 26, 2009 2:11 PM
Getting Started
Main Features
This camcorder enables recording of HD format images as
videos or still pictures on an SD card, and also playback of
these videos or still pictures.
䡵 Supports various HD video recording formats
(1080i, 1080p, and 720p)
Shooting can be performed in different HD recording
modes, thus supporting a wide variety of content
production.
䡵 QuickTime(MOV)/MP4 format for video files
Enables direct recording in the QuickTime file format used
by Apple Inc.ís Final Cut Pro. The recorded clips can be
edited directly using Final Cut Pro. In addition, the support
for MP4 file format enables the video files to be used
widely in different environments.
䡵 SD card recording
This camcorder comes with two SD card slots, and
enables continuous recordingT to two SD cards by
switching automatically between the slots. In addition,
recorded files can also be moved or copied between the
two SD cards. However, video files can only be copied.
T When the slots are switched automatically, it takes a few
seconds for recording to resume. Recording of images
is not possible during switching of slots.
䡵 Supports both video recording and still picture
recording modes
You can select a mode from video recording and still
picture recording. During playback of a file, you can select
a video or still picture from the thumbnail display on the
index screen or date search screen.
䡵 Supports 60 Hz/50 Hz HD signals
䡵 Focus Assist function
Enables easy and accurate focusing during shooting.
䡵 User buttons added
Enables you to switch camera settings instantly to suit the
shooting conditions.
䡵 Time code reader/generator
The built-in time code reader/generator can be used to
record and play back the time code and user’s bit.
䡵 Built-in viewfinder and color LCD display
Displays the status screens, menu screens for settings,
and alarm indications, in addition to the camera image
and playback image.
䡵 Built-in monitor speaker for audio checking
䡵 Recording check function for convenient
recording review
4
�
M9H7_EU.book Page 5 Thursday, March 26, 2009 2:11 PM
Contents
Getting Started
Safety Precations . . . . . . . . . . . . . . . . . . . . . . . . . . . . . . . 2
Main Features . . . . . . . . . . . . . . . . . . . . . . . . . . . . . . . . . . 4
Accessories . . . . . . . . . . . . . . . . . . . . . . . . . . . . . . . . . . . . 7
Attaching the Audio Unit . . . . . . . . . . . . . . . . . . . . . . . . 7
SD Cards . . . . . . . . . . . . . . . . . . . . . . . . . . . . . . . . . . . . . . 7
Precautions for Proper Use . . . . . . . . . . . . . . . . . . . . . . . . 8
Names of Parts and Functions . . . . . . . . . . . . . . . . . . . . 10
Names of Remote Control Parts and Functions . . . . . . . 14
Indications on the LCD Screen and in the Viewfinder . . . 15
Displaying the Status Screen . . . . . . . . . . . . . . . . . . . . 15
Items Displayed During Video and
Still Picture Shooting . . . . . . . . . . . . . . . . . . . . . . . . . . 16
Items Displayed During Video Shooting Only . . . . . . . 16
Items Displayed During Still Picture Shooting Only . . . 17
Items Displayed During Video Playback . . . . . . . . . . . 17
Items Displayed During Still Picture Playback . . . . . . . 17
Preparations
Settings and Adjustments Before Use . . . . . . . . . . . . . . . 18
Adjusting the Grip Belt . . . . . . . . . . . . . . . . . . . . . . . . . 18
Setting up the Remote Control . . . . . . . . . . . . . . . . . . 18
Attaching an External Microphone . . . . . . . . . . . . . . . . 18
Attaching the Tripod . . . . . . . . . . . . . . . . . . . . . . . . . . . 18
Removing the Hood . . . . . . . . . . . . . . . . . . . . . . . . . . . 19
Charging the Battery . . . . . . . . . . . . . . . . . . . . . . . . . . 19
Checking the Remaining Battery Power . . . . . . . . . . . 20
Turning On the Power . . . . . . . . . . . . . . . . . . . . . . . . . 20
Lens Cover . . . . . . . . . . . . . . . . . . . . . . . . . . . . . . . . . . 20
Setting the Date . . . . . . . . . . . . . . . . . . . . . . . . . . . . . . 21
Setting the Language . . . . . . . . . . . . . . . . . . . . . . . . . . 21
Assigning Functions to the USER Buttons . . . . . . . . . 21
Viewing the Viewfinder/LCD Screen . . . . . . . . . . . . . . 22
Inserting an SD Card . . . . . . . . . . . . . . . . . . . . . . . . . . 23
Formatting the SD Card . . . . . . . . . . . . . . . . . . . . . . . . 24
Resetting the File Number . . . . . . . . . . . . . . . . . . . . . . 24
Shooting
Selecting a Shooting Mode . . . . . . . . . . . . . . . . . . . . . . . 25
Selecting the Video/Still Picture Shooting Mode . . . . . 25
Selecting the Full Auto/Manual Shooting Mode . . . . . . 25
Selecting a Focusing Mode . . . . . . . . . . . . . . . . . . . . . 26
Using the Camcorder in the Video Shooting Mode . . . . . 26
Setting the Video Format . . . . . . . . . . . . . . . . . . . . . . . 26
Displaying the Remaining Space on the SD Card . . . . 27
Shooting Videos . . . . . . . . . . . . . . . . . . . . . . . . . . . . . . 27
Capturing Still Pictures in the Video
Shooting Mode . . . . . . . . . . . . . . . . . . . . . . . . . . . . . . .28
Recording Multiple Clips as a Continuous File . . . . . .28
Using the Camcorder in the Still Picture
Shooting Mode . . . . . . . . . . . . . . . . . . . . . . . . . . . . . . . .29
Setting the Picture Quality, Recording Size,
and Sensitivity . . . . . . . . . . . . . . . . . . . . . . . . . . . . . . .29
Capturing Still Pictures . . . . . . . . . . . . . . . . . . . . . . . . .29
Zoom Operation . . . . . . . . . . . . . . . . . . . . . . . . . . . . . . .30
Adjusting the Focus Manually . . . . . . . . . . . . . . . . . . . . .31
Using the Focus Assist Function . . . . . . . . . . . . . . . . .31
Shooting Different Scenes and Conditions
(Program AE) . . . . . . . . . . . . . . . . . . . . . . . . . . . . . . . . . .32
Enabling Lolux Mode with the USER Button . . . . . . . .32
Using the Built-in ND Filter . . . . . . . . . . . . . . . . . . . . . . .32
Adjusting the Exposure Manually . . . . . . . . . . . . . . . . . .33
Using the Tele Macro Feature . . . . . . . . . . . . . . . . . . . . .33
Displaying the Zebra Pattern . . . . . . . . . . . . . . . . . . . . . .34
Displaying the Zebra Pattern . . . . . . . . . . . . . . . . . . . .34
Specifying the Luminance Level Range for
Displaying Zebra Pattern . . . . . . . . . . . . . . . . . . . . . . .34
Adjusting the White Balance . . . . . . . . . . . . . . . . . . . . . .35
Adjusting Automatic White Balance . . . . . . . . . . . . . . .35
Using the Full Auto White Balance (FAW) Function . . .36
Adjusting White Paint . . . . . . . . . . . . . . . . . . . . . . . . . .36
Adjusting Manual Gain . . . . . . . . . . . . . . . . . . . . . . . . . .37
Adjusting the Shutter Speed . . . . . . . . . . . . . . . . . . . . . .37
Adjusting the Aperture . . . . . . . . . . . . . . . . . . . . . . . . . . .38
Setting the Photometry Area . . . . . . . . . . . . . . . . . . . . . .38
Displaying the Color Bar . . . . . . . . . . . . . . . . . . . . . . . . .39
Adjusting the Camera Image . . . . . . . . . . . . . . . . . . . . . .39
Audio Recording . . . . . . . . . . . . . . . . . . . . . . . . . . . . . . .40
Setting the Reference Audio Recording Level . . . . . . .40
Using the Built-in Microphone . . . . . . . . . . . . . . . . . . .40
Using an External Microphone Connected to the
MIC Terminal . . . . . . . . . . . . . . . . . . . . . . . . . . . . . . . .40
Using an External Microphone Connected to the
INPUT1/INPUT2 Terminal . . . . . . . . . . . . . . . . . . . . . .40
Reducing Wind Noise . . . . . . . . . . . . . . . . . . . . . . . . .40
Monitoring Audio Sound Using a Headphone . . . . . . . . .41
Time Code Recording Setting . . . . . . . . . . . . . . . . . . . . .41
Displaying the Time Code/User’s Bit . . . . . . . . . . . . . .41
Recording the Time Code . . . . . . . . . . . . . . . . . . . . . .41
Presetting the Time Code/User’s Bit . . . . . . . . . . . . . .42
Playback
Selecting the Video/Still Picture Playback Mode . . . . . . .43
Playing Videos on the SD Card . . . . . . . . . . . . . . . . . . . .43
Playing Back Videos from the Playback
Index Screen . . . . . . . . . . . . . . . . . . . . . . . . . . . . . . . .43
Selecting a File on the Date Search Screen . . . . . . . .45
Viewing Video File Information . . . . . . . . . . . . . . . . . . .46
Capturing a Still Picture in the Still Mode . . . . . . . . . . .46
Enlarging a Still Image . . . . . . . . . . . . . . . . . . . . . . . . .47
Adjusting the Volume of the Built-In Speaker
or Headphone . . . . . . . . . . . . . . . . . . . . . . . . . . . . . . .47
5
�
How to use this manual
䡵 Symbols used
Caution
: Describes precautions concerning the
operation of this product.
Memo
: Describes reference information, such as
A
functions and usage restrictions of this
product.
Indicates the reference page numbers and
reference items.
䡵 Content of this manual
● All rights reserved by JVC. Unauthorized duplication or
:
reprinting of this manual, in whole or in part, is strictly
prohibited.
● All other product names used in this manual are
trademarks or registered trademarks of their respective
companies. Marks such as ™, 姞 and 姝 have been
omitted in this manual.
● Illustrated designs, specifications and other contents of
this manual are subject to changes for improvement
without prior notice.
Remember that this camcorder is intended for
private consumer use only.
Any commercial use without proper permission
is prohibited. (Even if you record an event such
as a show, performance or exhibition for personal
enjoyment, it is strongly recommended that you
obtain permission beforehand.)
Trademarks
• HDMI is a trademark of HDMI
• QuickTime and Final Cut Pro are trademarks
• Other product and company names included in
this instruction manual are trademarks and/or
registered trademarks of their respective holders.
Licensing, LLC.
of Apple Inc.
M9H7_EU.book Page 6 Thursday, March 26, 2009 2:11 PM
Getting Started
Contents (continued)
Playing Still Pictures on the SD Card . . . . . . . . . . . . . . . 48
Viewing Still Pictures in a Slideshow . . . . . . . . . . . . . . 48
Returning to the Still Picture Index Screen . . . . . . . . . 48
Selecting a File on the Date Search Screen . . . . . . . . 48
Viewing Still Picture File Information . . . . . . . . . . . . . . 49
Enlarging a Still Picture . . . . . . . . . . . . . . . . . . . . . . . . 49
Viewing Videos on a Monitor . . . . . . . . . . . . . . . . . . . . . . 49
Editing Files
Enabling/Disabling File Protection . . . . . . . . . . . . . . . . . . 50
Specifying Files Individually . . . . . . . . . . . . . . . . . . . . . 50
Specifying Selected Files . . . . . . . . . . . . . . . . . . . . . . . 50
Appending To or Deleting From All Files . . . . . . . . . . . 51
Deleting Files . . . . . . . . . . . . . . . . . . . . . . . . . . . . . . . . . 51
Deleting Files Individually . . . . . . . . . . . . . . . . . . . . . . 51
Deleting Selected Files . . . . . . . . . . . . . . . . . . . . . . . . 51
Deleting All Files . . . . . . . . . . . . . . . . . . . . . . . . . . . . . 52
Copying/Moving Files . . . . . . . . . . . . . . . . . . . . . . . . . . . 52
Copying Files . . . . . . . . . . . . . . . . . . . . . . . . . . . . . . . . 52
Moving Files . . . . . . . . . . . . . . . . . . . . . . . . . . . . . . . . . 53
Other Features
Connecting to a Computer . . . . . . . . . . . . . . . . . . . . . . . 54
Saving/Loading Settings . . . . . . . . . . . . . . . . . . . . . . . . . 54
Saving Settings to an SD Card . . . . . . . . . . . . . . . . . . 54
Loading Settings from an SD Card . . . . . . . . . . . . . . . 55
Operation Sound and Tally Settings . . . . . . . . . . . . . . . . 56
Displaying the Hour Meter . . . . . . . . . . . . . . . . . . . . . . . . 56
Restoring the Default Settings . . . . . . . . . . . . . . . . . . . . 56
Menu Screens
Setting Menu Screens . . . . . . . . . . . . . . . . . . . . . . . . . . . 57
List of Valid Menu Items for Each Operation Mode . . . . . 58
Menu Screens of the Video Shooting Mode . . . . . . . . . . 59
Menu Screens of the Still Picture Shooting Mode . . . . . . 67
Menu Screens of Video/Still Picture Playback Modes . . . 69
Others
Troubleshooting . . . . . . . . . . . . . . . . . . . . . . . . . . . . . . . . 70
Warning Displays . . . . . . . . . . . . . . . . . . . . . . . . . . . . . . 72
Estimated Recordable Time/Number . . . . . . . . . . . . . . . 73
Estimated Video Recording Time . . . . . . . . . . . . . . . . 73
Estimated Number of Still Picture Shots . . . . . . . . . . . 73
Specifications . . . . . . . . . . . . . . . . . . . . . . . . . . . . . . . . . 74
Dimensional Outline Drawing . . . . . . . . . . . . . . . . . . . . 75
6
�
M9H7_EU.book Page 7 Thursday, March 26, 2009 2:11 PM
Accessories
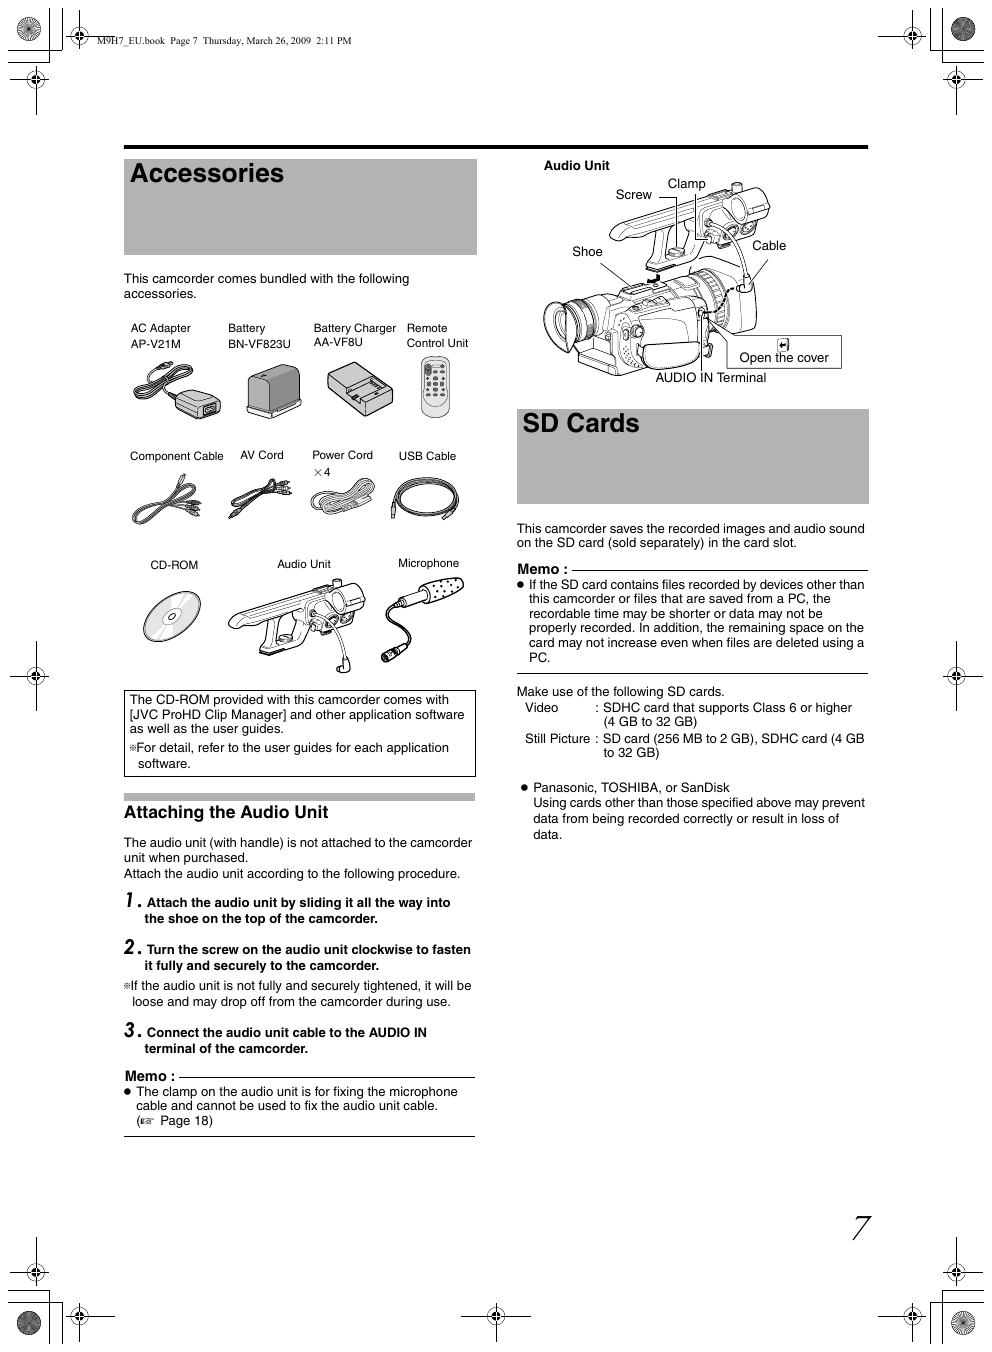
This camcorder comes bundled with the following
accessories.
AC Adapter
AP-V21M
Battery
BN-VF823U
Battery Charger
AA-VF8U
Remote
Control Unit
Component Cable
AV Cord
Power Cord
⳯4
USB Cable
CD-ROM
Audio Unit
Microphone
The CD-ROM provided with this camcorder comes with
[JVC ProHD Clip Manager] and other application software
as well as the user guides.
TFor detail, refer to the user guides for each application
software.
Attaching the Audio Unit
The audio unit (with handle) is not attached to the camcorder
unit when purchased.
Attach the audio unit according to the following procedure.
1 . Attach the audio unit by sliding it all the way into
the shoe on the top of the camcorder.
2 . Turn the screw on the audio unit clockwise to fasten
it fully and securely to the camcorder.
TIf the audio unit is not fully and securely tightened, it will be
loose and may drop off from the camcorder during use.
3 . Connect the audio unit cable to the AUDIO IN
terminal of the camcorder.
Memo :
● The clamp on the audio unit is for fixing the microphone
cable and cannot be used to fix the audio unit cable.
(A Page 18)
Audio Unit
Clamp
Screw
Shoe
Cable
Open the cover
AUDIO IN Terminal
SD Cards
This camcorder saves the recorded images and audio sound
on the SD card (sold separately) in the card slot.
Memo :
● If the SD card contains files recorded by devices other than
this camcorder or files that are saved from a PC, the
recordable time may be shorter or data may not be
properly recorded. In addition, the remaining space on the
card may not increase even when files are deleted using a
PC.
Make use of the following SD cards.
Video
: SDHC card that supports Class 6 or higher
(4 GB to 32 GB)
Still Picture : SD card (256 MB to 2 GB), SDHC card (4 GB
to 32 GB)
● Panasonic, TOSHIBA, or SanDisk
Using cards other than those specified above may prevent
data from being recorded correctly or result in loss of
data.
7
�
M9H7_EU.book Page 8 Thursday, March 26, 2009 2:11 PM
Getting Started
Precautions for Proper Use
䡵 Allowable ambient temperature and humidity
Be sure to use this device within the allowable temperature range
of 0°C to 40°C and a relative humidity of 35 % to 80 %. Using this
device at a temperature or humidity outside the allowable ranges
could result not only in malfunction but the impact on the CCD
elements could be serious as small white spots may be generated.
䡵 Strong electromagnetic waves or magnetism
Noise may appear in the picture or audio and/or the colors may
be incorrect if the camera is used near a radio or television
transmitting antenna, in places where strong magnetic fields are
generated by transformers, motors, etc., or near devices emitting
radio waves, such as transceivers or cellular phones.
䡵 Use of wireless microphone near the camera
When a wireless microphone or wireless microphone tuner is used
near the camera during recording, the tuner could pick up noise.
䡵 Avoid using or placing this device in the
following places.
● Places subject to extreme heat or cold
● Places with excessive dirt or dust
● Places with high humidity or moisture
● Places subject to smoke or vapor such as near a cooking stove
● Places subject to strong vibrations or unstable surfaces
● In a parked car under direct sunlight or near a heater for long
hours
● Places subject to radiation or X-rays, or where corrosive gases
occur
䡵 Protect this device from being splashed with water.
(Especially when shooting in the rain)
䡵 Protect this device from getting wet when
shooting on a beach. In addition, salt and sand
may adhere to the camera body. Be sure to clean
the camera after use.
䡵 Protect this device against penetration of dust
when using it in a place subject to sandy dust.
䡵 Do not expose this device and the remote
control to excessive heat, such as direct
sunlight or fire. The built-in battery may explode
if it gets heated up.
䡵 Optical performance of lens
Due to the optical performance of the lens, color divergence
phenomena (magnification chromatic aberration) may occur. This
is not a camera malfunction.
䡵 Noise may appear in the image when switching
between the playback picture and the EE picture.
䡵 If placed on its side, heat release efficiency will
deteriorate.
䡵 Precautions for transportation
● When carrying the camcorder, be sure to hold the carrying
handle. Holding the lens or viewfinder may result in damage.
● Do not drop or hit this device against a hard object.
䡵 Do not insert objects other than the memory
card into the card slot.
8
䡵 Do not leave the card slot cover open for a long
period of time. Dirt entering the interior of the
slot may cause it to malfunction.
䡵 Do not turn off the [POWER] switch or remove
the power cord during recording or playback.
䡵 The camera may not show stable pictures for a
few seconds immediately after the power is
turned on, but this is not a malfunction.
䡵 Do not turn off the [POWER] switch when the
camera reboots due to the following operations.
● Rebooting when the video/still picture mode is switched while
the [SYSTEM SELECT] menu is set to [720-**]
● Rebooting when the [SYSTEM SELECT] menu is set
● Rebooting after a setting file stored on the SD card is loaded
● Rebooting when the [SYSTEM SELECT] menu is changed
with the default value settings
䡵 Use the supplied AC adapter as the power
supply. Do not use the supplied AC adapter on
other devices.
䡵 When the connectors that come with connector
covers are not in use, put on the covers to
prevent damage to the connectors.
䡵 When this device is not in use, be sure to set the
[POWER] switch to AOFFB in order to reduce
power consumption.
䡵 Wipe the external cabinet of the device with a
soft cloth. Do not wipe the body with benzene or
thinner. Doing so may cause the surface to melt
or turn cloudy. When it is extremely dirty, soak
the cloth in a solution of neutral detergent, wipe
the body with it, and then use a clean cloth to
remove the detergent.
LCD Screen and Viewfinder
䡵 The LCD and viewfinder screens are
manufactured using high-precision technology.
Black spots may appear on the LCD and
viewfinder screens, or red, blue, and/or white
spots may not turn off. However, this is not a
malfunction and these spots are not recorded
on the SD card.
䡵 If you use this device continuously for a long
period of time, the characters displayed in the
viewfinder may temporarily remain on the
screen. This is not recorded on the SD card.
They will not appear after you turn the power off
and then on again.
䡵 If you use this device in a cold place, the images
may appear to lag on the screen, but this is not a
malfunction. This is not recorded on the SD
card.
䡵 Do not press against the surface with force or
subject it to strong impact. Doing so may
damage or break the screens.
�



 2023年江西萍乡中考道德与法治真题及答案.doc
 2012年重庆南川中考生物真题及答案.doc
 2013年江西师范大学地理学综合及文艺理论基础考研真题.doc
 2020年四川甘孜小升初语文真题及答案I卷.doc
 2020年注册岩土工程师专业基础考试真题及答案.doc
 2023-2024学年福建省厦门市九年级上学期数学月考试题及答案.doc
 2021-2022学年辽宁省沈阳市大东区九年级上学期语文期末试题及答案.doc
 2022-2023学年北京东城区初三第一学期物理期末试卷及答案.doc
 2018上半年江西教师资格初中地理学科知识与教学能力真题及答案.doc
 2012年河北国家公务员申论考试真题及答案-省级.doc
 2020-2021学年江苏省扬州市江都区邵樊片九年级上学期数学第一次质量检测试题及答案.doc
 2022下半年黑龙江教师资格证中学综合素质真题及答案.doc