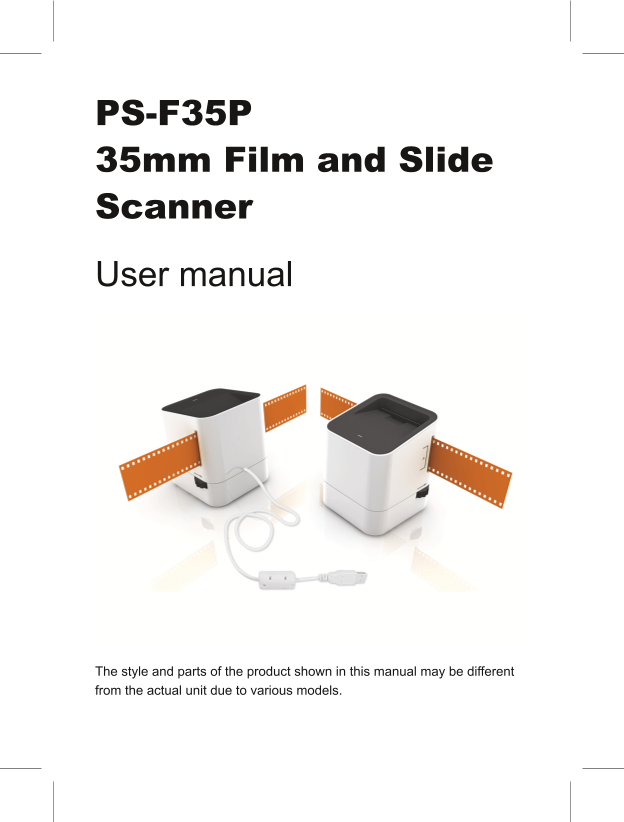
PS-F35P
35mm Film and Slide
Scanner
User manual
The style and parts of the product shown in this manual may be different
from the actual unit due to various models.
Contents
Important Safety Instructions ................................................... 3
Package Contents ..................................................................... 3
Product Overview ...................................................................... 4
Installing Software. .................................................................... 5
Connect the scanner to PC by USB cable............................... 6
Inserting Slides and Negatives ................................................ 7
Inserting Slides .......................................................................... 7
Inserting Negatives .................................................................... 7
Scanning the Slides and Negatives ........................................ 8
Learning about the scanning program ....................................... 8
Color correction ......................................................................... 9
Begin to scan .............................................................................10
Editing photos ............................................................................10
Helpful Tips ................................................................................13
Specifi cations ............................................................................13
2
Important Safety Instructions
• Keep away from water or moisture and dusty areas.
• Never store in hot and very cold areas.
• Only use attachments/accessories specifi ed by the manufacturer.
• Avoid using the scanner in a dusty environment. Dust particles
and other foreign objects may damage the unit.
• Operate the scanner on a level, well-grounded work surface,
free of excessive vibration.
• Do not attempt to disassemble the scanner as internal
components may create a risk of electric shock.
• Do not move or disconnect the scanner from the computer while
in use. This may cause the data lost.
• The scanner may become slightly warm during use. This is not a
defect.
• Use the soft, and dry cloth to clean the unit.
Warning: To reduce the risk of fi re or electric shock, do not expose
to rain, moisture, dripping or splashing.
Package Contents
• Scanner • User Manual
• Installation CD
3
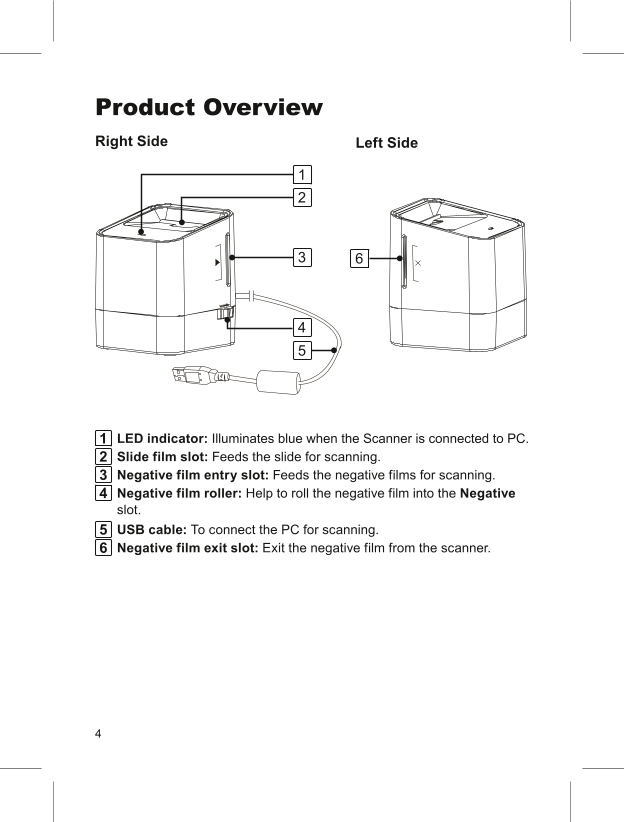
Product Overview
Right Side Left Side
1
2
3 6
4
5
1 LED indicator: Illuminates blue when the Scanner is connected to PC.
2 Slide film slot: Feeds the slide for scanning.
3 Negative film entry slot: Feeds the negative films for scanning.
4 Negative film roller: Help to roll the negative film into the Negative
slot.
5 USB cable: To connect the PC for scanning.
6 Negative film exit slot: Exit the negative film from the scanner.
4
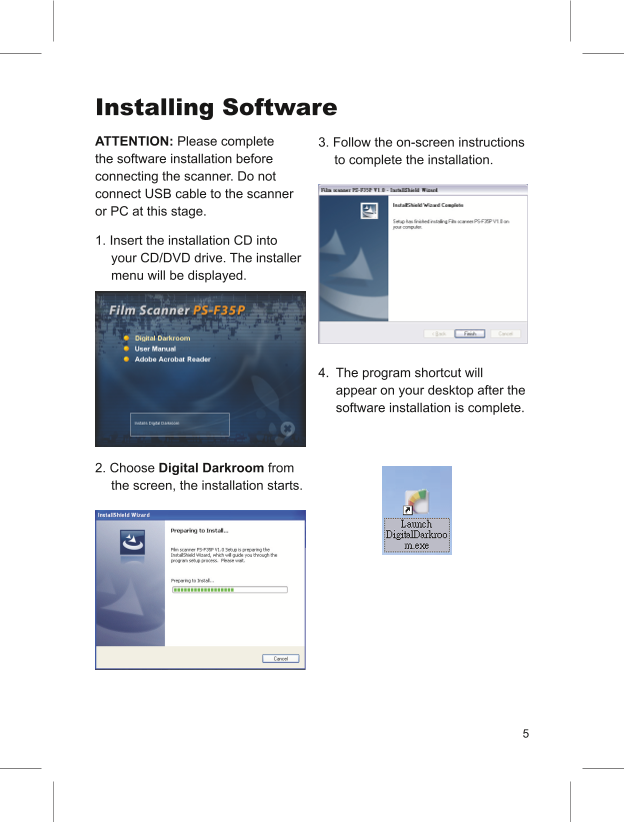
Installing Software
ATTENTION: Please complete 3. Follow the on-screen instructions
the software installation before to complete the installation.
connecting the scanner. Do not
connect USB cable to the scanner
or PC at this stage.
1. Insert the installation CD into
your CD/DVD drive. The installer
menu will be displayed.
4. The program shortcut will
appear on your desktop after the
software installation is complete.
2. Choose Digital Darkroom from
the screen, the installation starts.
5
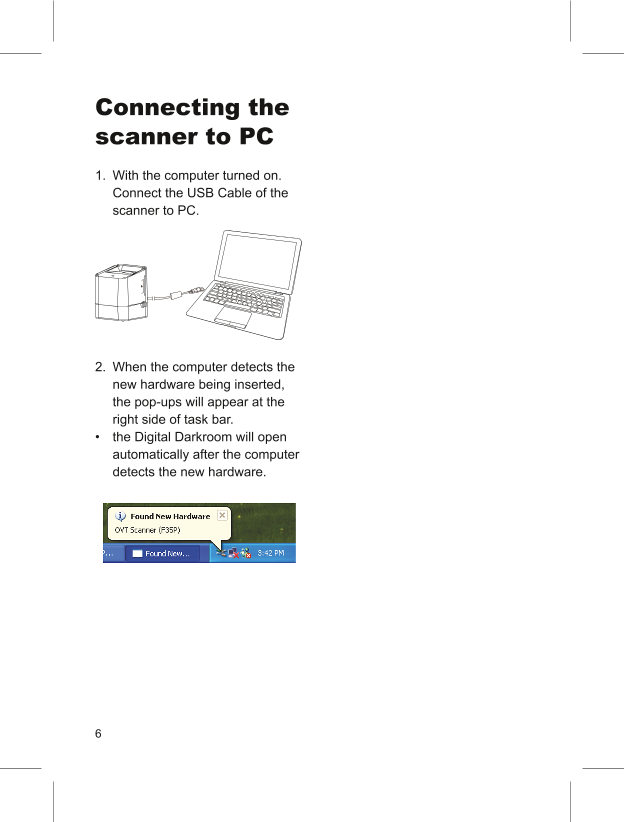
Connecting the
scanner to PC
1. With the computer turned on.
Connect the USB Cable of the
scanner to PC.
2. When the computer detects the
new hardware being inserted,
the pop-ups will appear at the
right side of task bar.
• the Digital Darkroom will open
automatically after the computer
detects the new hardware.
6
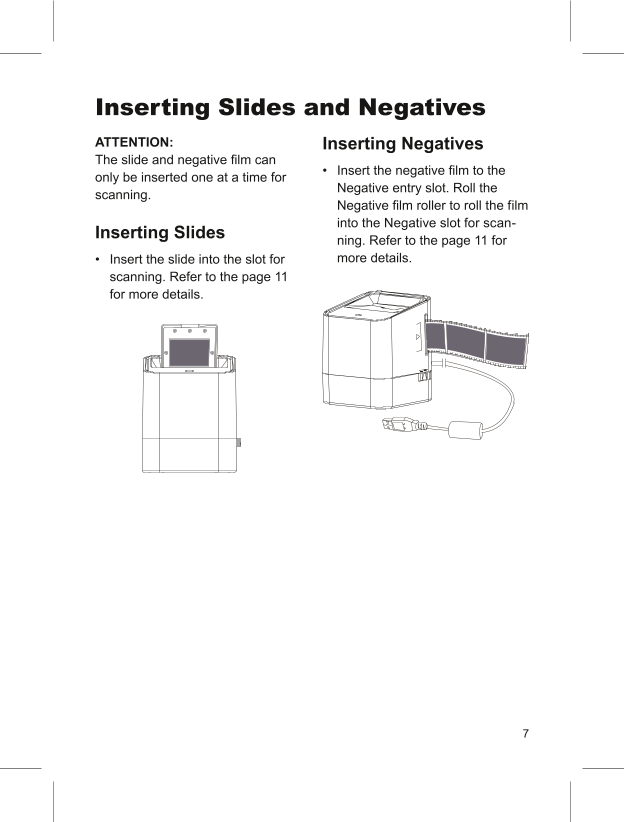
Inserting Slides and Negatives
ATTENTION: Inserting Negatives
The slide and negative fi lm can
only be inserted one at a time for • Insert the negative fi lm to the
scanning. Negative entry slot. Roll the
Negative fi lm roller to roll the film
Inserting Slides into the Negative slot for scan-
ning. Refer to the page 11 for
• Insert the slide into the slot for more details.
scanning. Refer to the page 11
for more details.
7
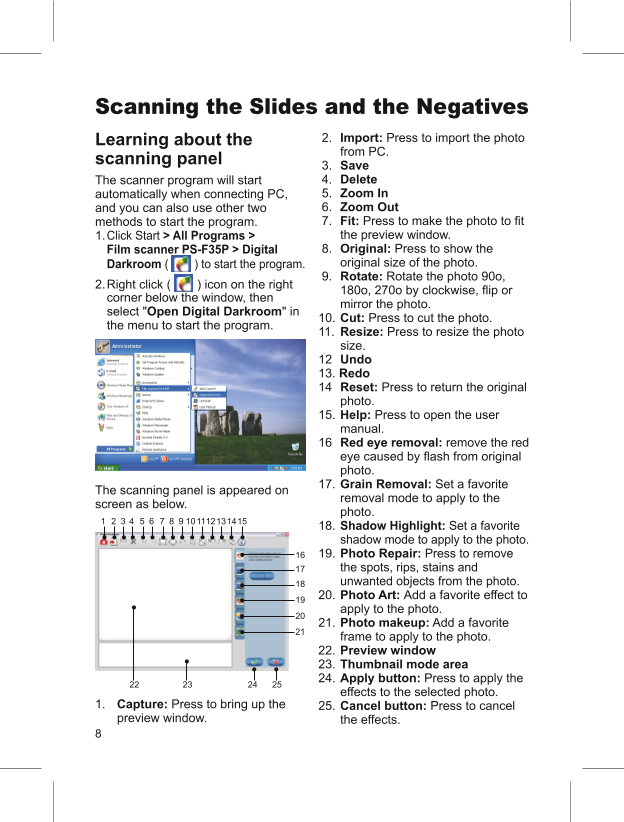
Scanning the Slides and the Negatives
Learning about the 2. Import: Press to import the photo
scanning panel from PC.
3. Save
The scanner program will start 4. Delete
automatically when connecting PC, 5. Zoom In
and you can also use other two 6. Zoom Out
methods to start the program. 7. Fit: Press to make the photo to fi t
1. Click Start > All Programs > the preview window.
Film scanner PS-F35P > Digital 8. Original: Press to show the
Darkroom ( ) to start the program. original size of the photo.
2. Right click ( ) icon on the right 9. Rotate: Rotate the photo 90o,
corner below the window, then 180o, 270o by clockwise, fl ip or
select "Open Digital Darkroom" in mirror the photo.
the menu to start the program. 10. Cut: Press to cut the photo.
11. Resize: Press to resize the photo
size.
12 Undo
13. Redo
14 Reset: Press to return the original
photo.
15. Help: Press to open the user
manual.
16 Red eye removal: remove the red
eye caused by fl ash from original
photo.
The scanning panel is appeared on 17. Grain Removal: Set a favorite
screen as below. removal mode to apply to the
photo.
1 2 3 4 5 6 7 8 9 101112131415 18. Shadow Highlight: Set a favorite
shadow mode to apply to the photo.
16 19. Photo Repair: Press to remove
17 the spots, rips, stains and
18 unwanted objects from the photo.
19 20. Photo Art: Add a favorite effect to
apply to the photo.
20 21. Photo makeup: Add a favorite
21 frame to apply to the photo.
22. Preview window
23. Thumbnail mode area
22 23 24 25 24. Apply button: Press to apply the
effects to the selected photo.
1. Capture: Press to bring up the 25. Cancel button: Press to cancel
preview window. the effects.
8


 V2版本原理图(Capacitive-Fingerprint-Reader-Schematic_V2).pdf
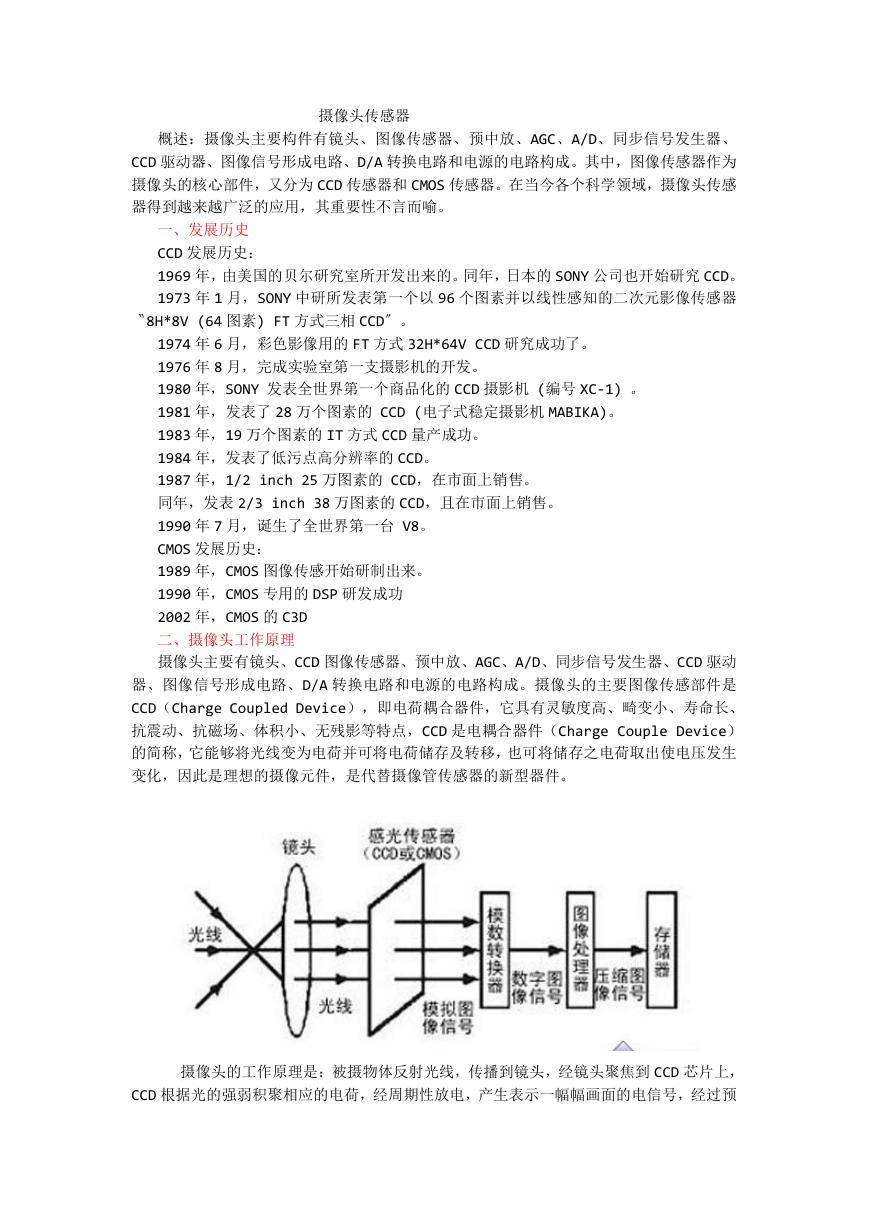 摄像头工作原理.doc
 VL53L0X简要说明(En.FLVL53L00216).pdf
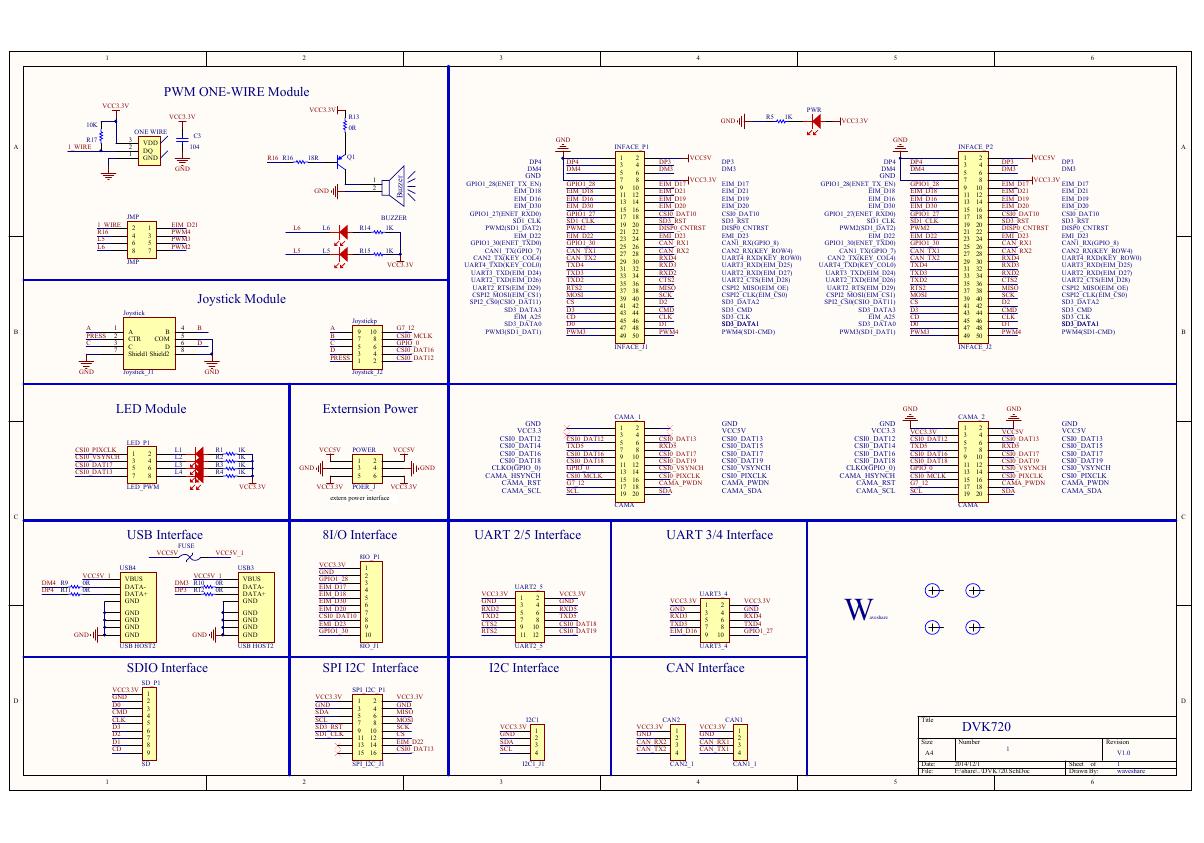 原理图(DVK720-Schematic).pdf
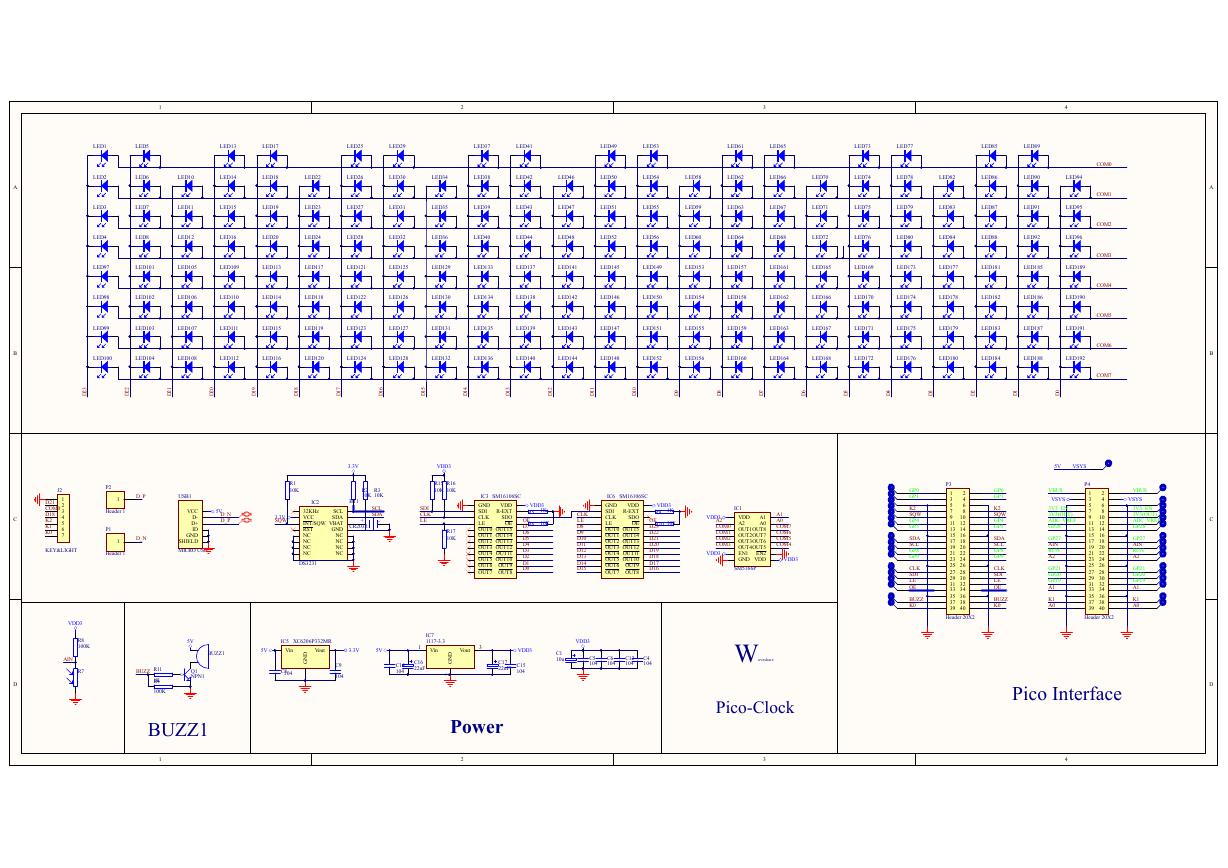 原理图(Pico-Clock-Green-Schdoc).pdf
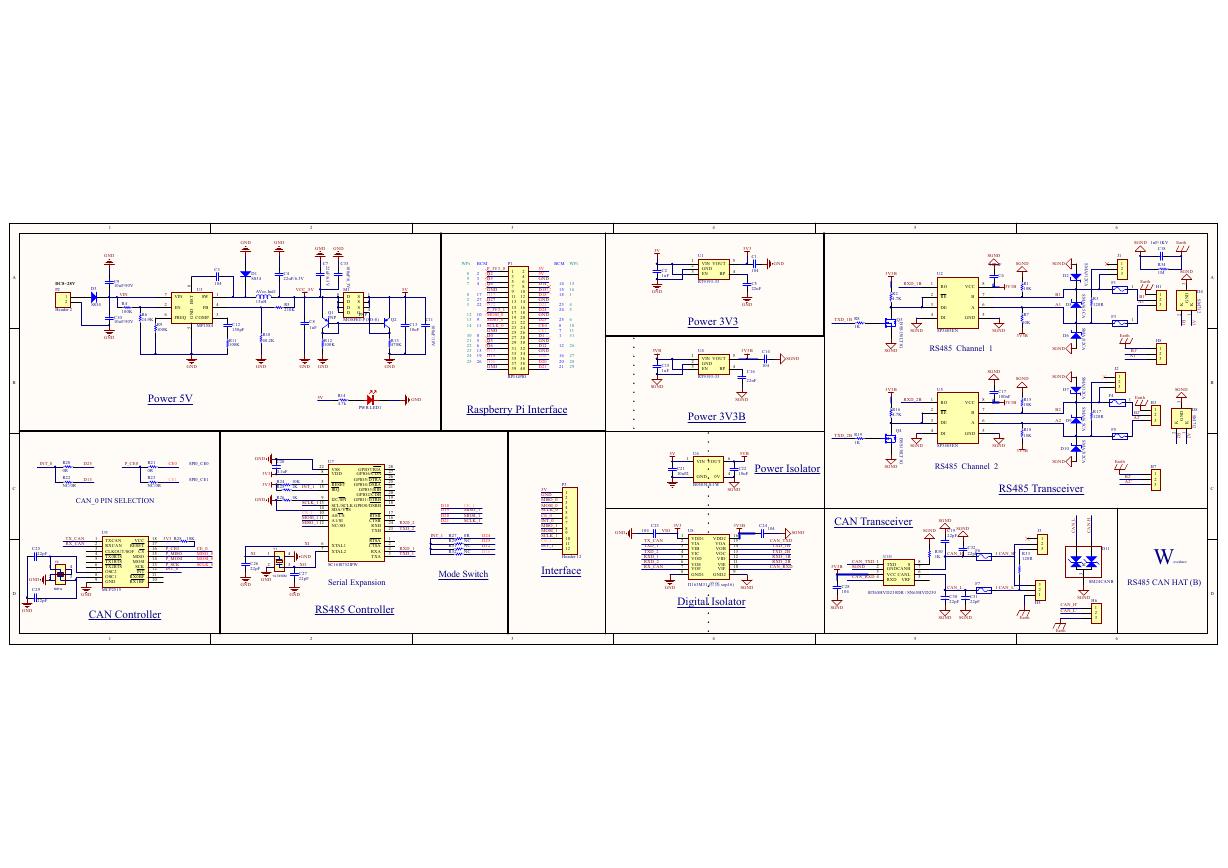 原理图(RS485-CAN-HAT-B-schematic).pdf
 File:SIM7500_SIM7600_SIM7800 Series_SSL_Application Note_V2.00.pdf
 ADS1263(Ads1262).pdf
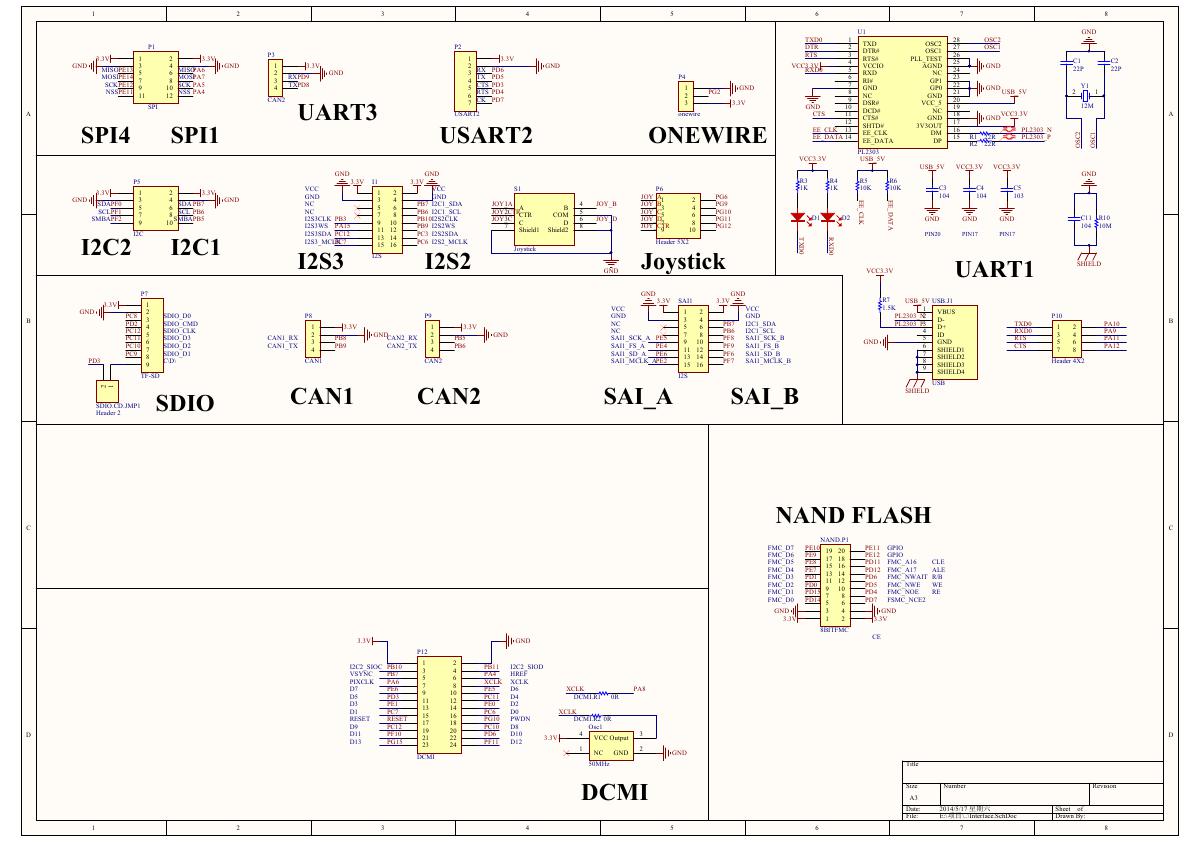 原理图(Open429Z-D-Schematic).pdf
 用户手册(Capacitive_Fingerprint_Reader_User_Manual_CN).pdf
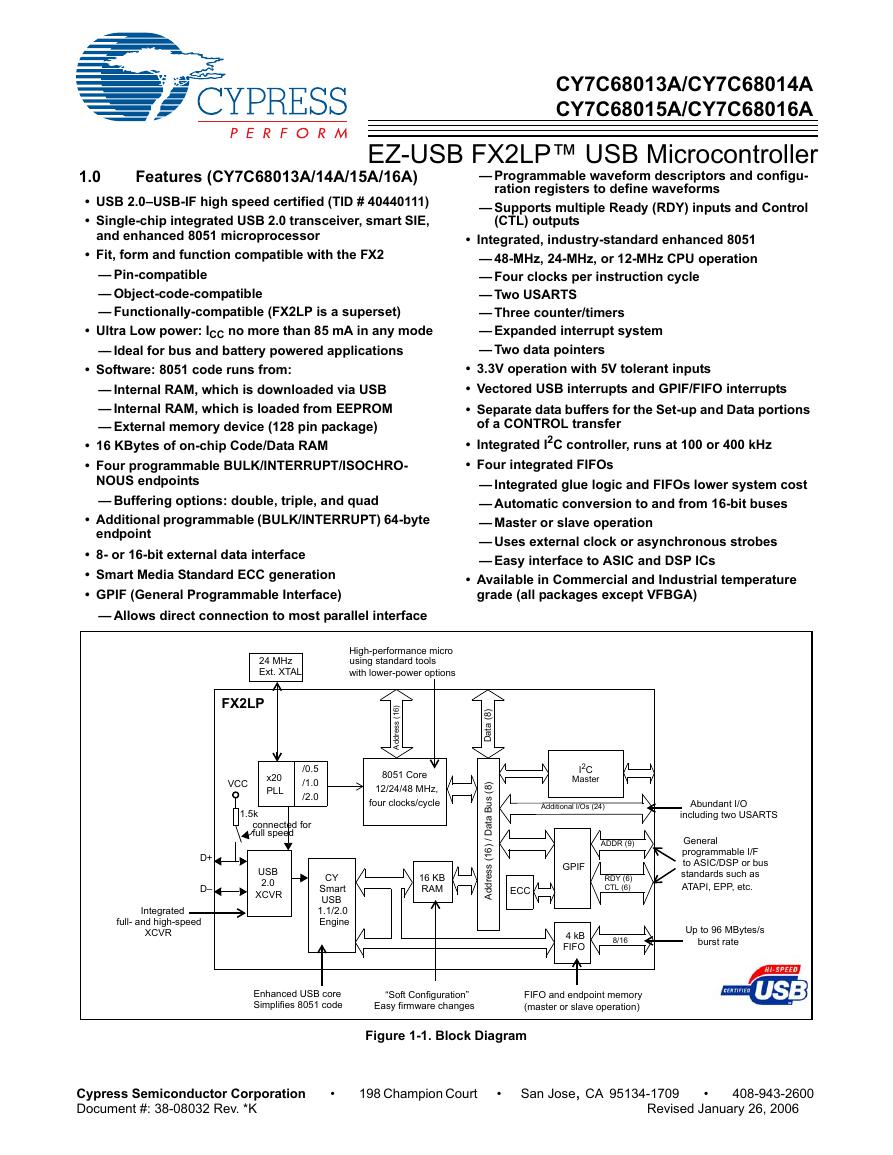 CY7C68013A(英文版)(CY7C68013A).pdf
 TechnicalReference_Dem.pdf