logo资料库

Muratec村田传真机-F-112P说明书.pdf

第1页 / 共214页
第2页 / 共214页
第3页 / 共214页
第4页 / 共214页
第5页 / 共214页
第6页 / 共214页
第7页 / 共214页
第8页 / 共214页
资料共214页,剩余部分请下载后查看
F-112 Series
Contents
Getting Started
Unpacking
Selecting a Location
Understanding the Component Location
Front View
Rear View
Control Panel Functions
Attaching Accessories
Document Output Support
Handset and Handset Cradle
Installing the Toner Cartridge
Loading Paper
Making Connections
Turning the Machine On
About Samsung Software
Printer Driver Features
Installing Samsung Software in Windows
System Requirements
Installing Samsung Software
Installing Samsung SmarThru
Repairing Software
Removing Software
Uninstalling the MFP Driver
Uninstalling Samsung SmarThru
Changing the Display Language
Setting the Machine ID
Entering Characters Using the Number Keypad
Setting the Date and Time
Changing the Clock Mode
Setting the Paper Type and Size
Setting Sounds
Speaker, Ringer, Key Sound and Alarm Sound
Speaker Volume
Using the Save Modes
Toner Save Mode
Toll Save Mode
Power Save Mode
Paper Handling
Selecting Print Materials
Type, Input Sources and Capacities
Guidelines for Paper and Special Materials
Selecting an Output Location
Printing to the Front Output Tray (Face down)
Printing to the Rear Output Slot (Face up)
Loading Paper in the Paper Tray
Using the Manual Feeder
Setting the Paper Type and Size for the Manual Feeder
Printing
Printing a Document in Windows
Canceling a Print Job
Using a Favorite Setting
Using Help
Setting Paper Properties
Setting Graphic Properties
Printing Multiple Pages on One Sheet of the Paper
Printing a Reduced or Enlarged Document
Fitting Your Document to a Selected Paper Size
Printing Posters
Using Watermarks
Using an Existing Watermark
Creating a Watermark
Editing a Watermark
Deleting a Watermark
Using Overlays
What is an Overlay?
Creating a New Page Overlay
Using a Page Overlay
Deleting a Page Overlay
Setting Up the Locally Shared Printer
In Windows 9x/Me
In Windows NT 4.0/2000/XP
Copying
Loading Paper for Copying
Preparing a Document
Making a Copy
Setting Copy Options
Darkness
Original Type
Number of Copies
Reduced/Enlarged Copying
Changing the Default Settings
Setting the Time Out Option
Collation Copying
Scanning
Scanning Basics
Scanning Using Samsung SmarThru
Scanning Process with TWAIN-enabled Software
Faxing
Changing the Fax Setup options
Available Fax Setup Options
Loading a Document
Adjusting the Document Resolution
Sending a Fax Automatically
Sending a Fax Manually
Redialing the Last Number
Confirming Transmission
Automatic Redialing
About Receiving Modes
Loading Paper for Receiving Faxes
Receiving Automatically in Fax Mode
Receiving Manually in Tel Mode
Receiving Automatically in Ans/Fax Mode
Receiving Manually Using an Extension Telephone
Receiving Faxes Using the DRPD Mode
Receiving Faxes in the Memory
One-touch Dialing
Storing a Number for One-touch Dialing
Sending a Fax using a One-touch Number
Speed Dialing
Storing a Number for Speed Dialing
Sending a Fax using a Speed Number
Group Dialing
Setting a Group Dial Number
Editing Group Dial Numbers
Sending a Fax Using Group Dialing (Multi-address Transmission)
Searching for a Number in the Memory
Searching Sequentially through the Memory
Searching with a Particular First Letter
Printing a Phonebook List
Sending Broadcasting Faxes
Sending a Delayed Fax
Sending a Priority Fax
Polling a Remote Machine
Adding Documents to a Scheduled Fax
Canceling a Scheduled Fax
Using Secure Receiving Mode
Printing Reports
Using Advanced Fax Settings
Changing Setting Options
Advanced Fax Setting Options
Using the Remote Control Panel
Using Your Printer in Linux
Getting Started
Installing the MFP Driver
System Requirements
Installing the MFP Driver
Uninstalling the MFP Driver
Using the MFP Configurator
Opening the MFP Configurator
Printers Configuration
Scanners Configuration
MFP Ports Configuration
Configuring Printer Properties
Printing a Document
Printing from Applications
Printing Files
Scanning a Document
Using the Image Editor
Maintenance
Clearing the Memory
Adjusting Shading
Cleaning Your Machine
Cleaning the Outside
Cleaning the Inside
Cleaning the Scan Unit
Maintaining the Toner Cartridge
Redistributing Toner
Replacing the Toner Cartridge
Setting the Notify Toner Option
Cleaning the Drum
Ignoring the Toner Empty Message
Consumables and Replacement Parts
Replacing the ADF Rubber Pad
Troubleshooting
Clearing Document Jams
Input Misfeed
Exit Misfeed
Clearing Paper Jams
In the Paper Tray
In the Paper Exit Area
In the Fuser Area or Around the Toner Cartridge
In the Manual Feeder
Tips for Avoiding Paper Jams
Clearing LCD Error Messages
Solving Problems
Paper Feeding Problems
Printing Problems
Printing Quality Problems
Copying Problems
Scanning Problems
Faxing Problems
Common Linux Problems
Specifications
General Specifications
Scanner and Copier Specifications
Printer Specifications
Facsimile Specifications
Paper Specifications
Overview
Supported Sizes of Paper
Guidelines for Using Paper
Paper Specifications
Paper Output Capacity
Paper Storage Environment
Envelopes
Labels
Transparencies
Index
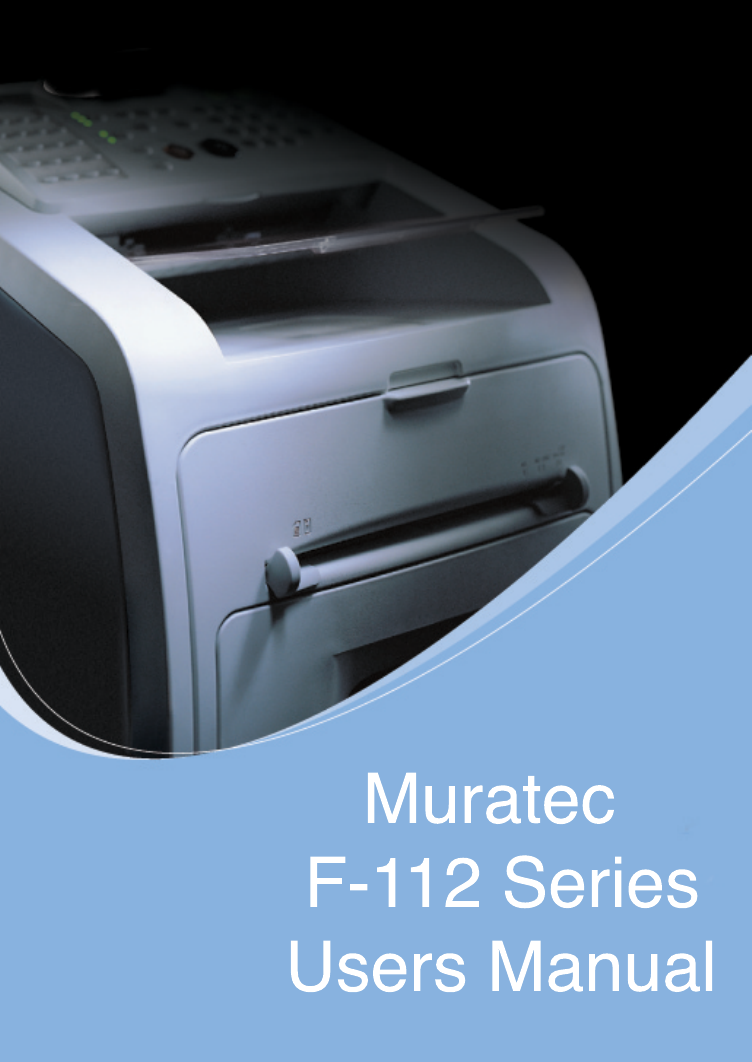
Muratec F-112 Series Users Manual
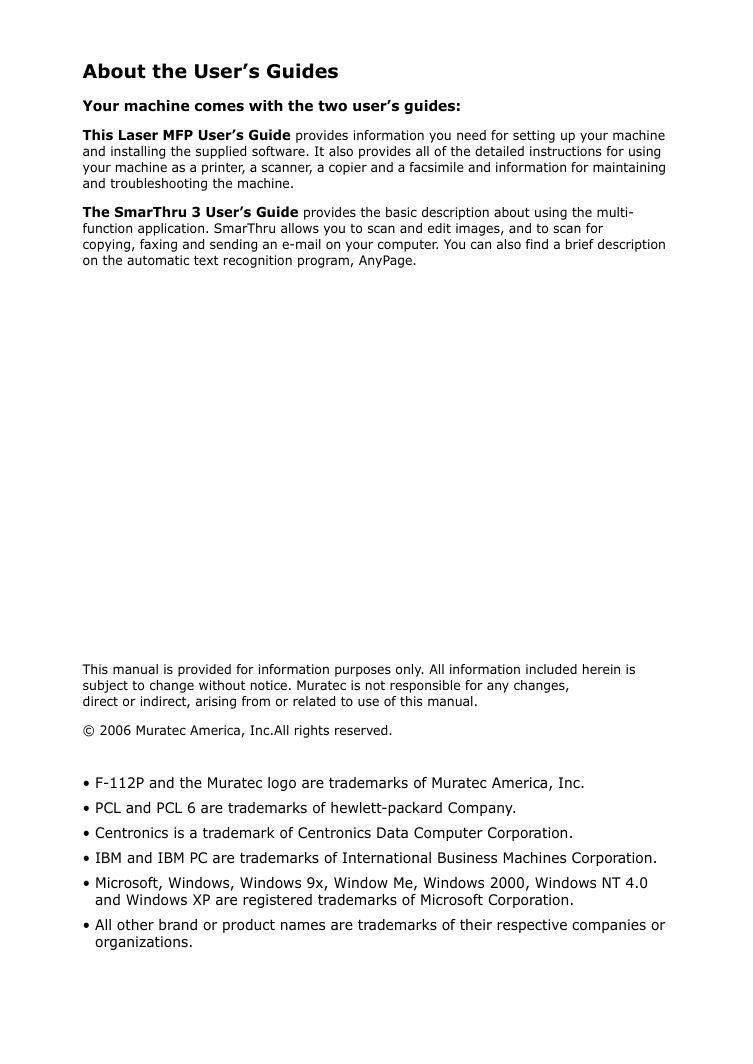
About the User’s Guides Your machine comes with the two user’s guides: This Laser MFP User’s Guide provides information you need for setting up your machine and installing the supplied software. It also provides all of the detailed instructions for using your machine as a printer, a scanner, a copier and a facsimile and information for maintaining and troubleshooting the machine. The SmarThru 3 User’s Guide function application. SmarThru allows you to scan and edit images, and to scan for copying, faxing and sending an e-mail on your computer. You can also find a brief description on the automatic text recognition program, AnyPage. provides the basic description about using the multi- This manual is provided for information purposes only. All information included herein is subject to change without notice. Muratec is not responsible for any changes, direct or indirect, arising from or related to use of this manual. © 2006 Muratec America, Inc.All rights reserved. • F-112P and the Muratec logo are trademarks of Muratec America, Inc. • PCL and PCL 6 are trademarks of hewlett-packard Company. • Centronics is a trademark of Centronics Data Computer Corporation. • IBM and IBM PC are trademarks of International Business Machines Corporation. • Microsoft, Windows, Windows 9x, Window Me, Windows 2000, Windows NT 4.0 and Windows XP are registered trademarks of Microsoft Corporation. • All other brand or product names are trademarks of their respective companies or organizations.
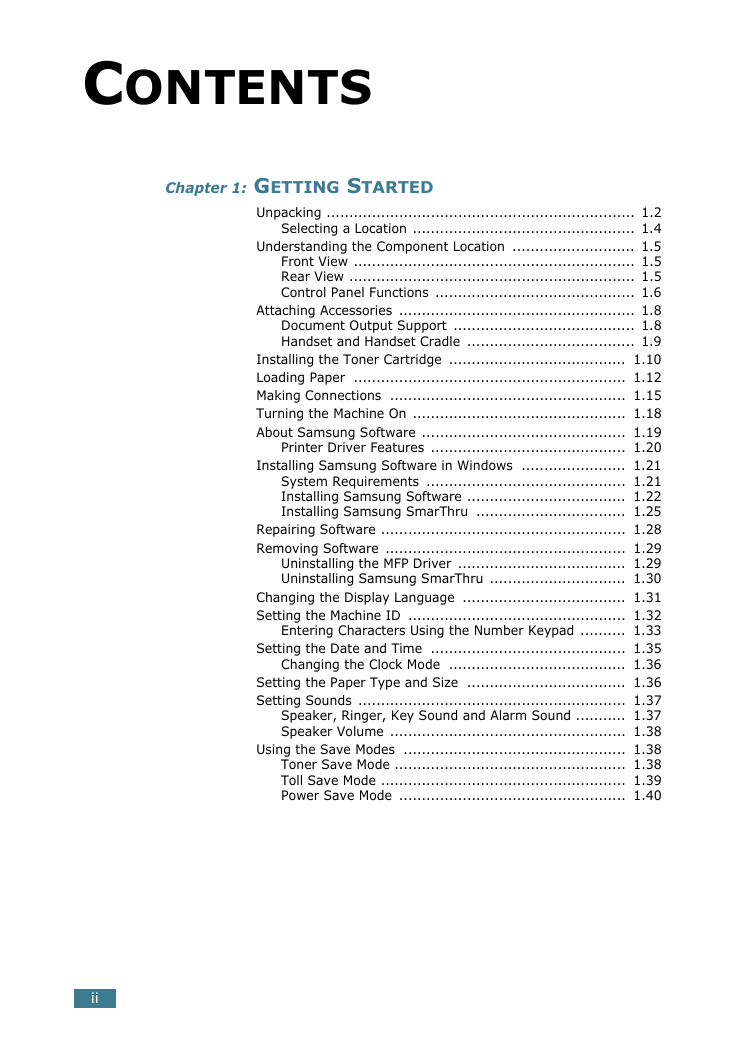
C ONTENTS Chapter 1: ETTING S TARTED G Unpacking .................................................................... 1.2 Selecting a Location ................................................. 1.4 Understanding the Component Location ........................... 1.5 Front View .............................................................. 1.5 Rear View ............................................................... 1.5 Control Panel Functions ............................................ 1.6 Attaching Accessories .................................................... 1.8 Document Output Support ........................................ 1.8 Handset and Handset Cradle ..................................... 1.9 Installing the Toner Cartridge ....................................... 1.10 Loading Paper ............................................................ 1.12 Making Connections .................................................... 1.15 Turning the Machine On ............................................... 1.18 About Samsung Software ............................................. 1.19 Printer Driver Features ........................................... 1.20 Installing Samsung Software in Windows ....................... 1.21 System Requirements ............................................ 1.21 Installing Samsung Software ................................... 1.22 Installing Samsung SmarThru ................................. 1.25 Repairing Software ...................................................... 1.28 Removing Software ..................................................... 1.29 Uninstalling the MFP Driver ..................................... 1.29 Uninstalling Samsung SmarThru .............................. 1.30 Changing the Display Language .................................... 1.31 Setting the Machine ID ................................................ 1.32 Entering Characters Using the Number Keypad .......... 1.33 Setting the Date and Time ........................................... 1.35 Changing the Clock Mode ....................................... 1.36 Setting the Paper Type and Size ................................... 1.36 Setting Sounds ........................................................... 1.37 Speaker, Ringer, Key Sound and Alarm Sound ........... 1.37 Speaker Volume .................................................... 1.38 Using the Save Modes ................................................. 1.38 Toner Save Mode ................................................... 1.38 Toll Save Mode ...................................................... 1.39 Power Save Mode .................................................. 1.40 ii
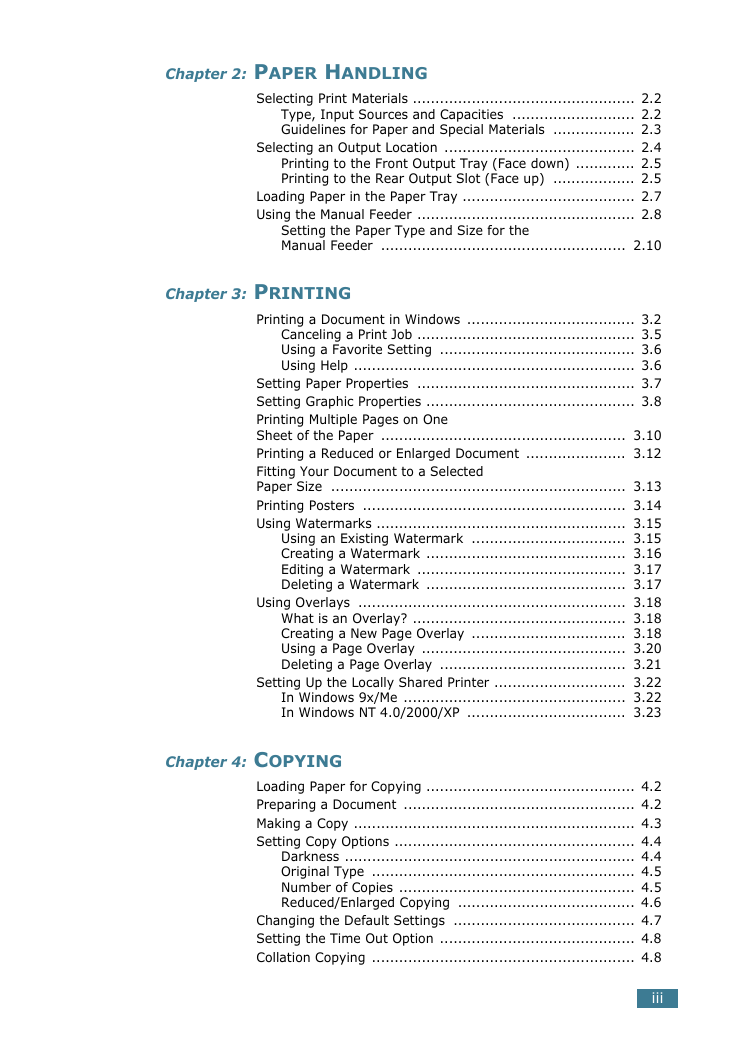
Chapter 2: H APER ANDLING P Selecting Print Materials ................................................. 2.2 Type, Input Sources and Capacities ........................... 2.2 Guidelines for Paper and Special Materials .................. 2.3 Selecting an Output Location .......................................... 2.4 Printing to the Front Output Tray (Face down) ............. 2.5 Printing to the Rear Output Slot (Face up) .................. 2.5 Loading Paper in the Paper Tray ...................................... 2.7 Using the Manual Feeder ................................................ 2.8 Setting the Paper Type and Size for the Manual Feeder ...................................................... 2.10 Chapter 3: RINTING P Printing a Document in Windows ..................................... 3.2 Canceling a Print Job ................................................ 3.5 Using a Favorite Setting ........................................... 3.6 Using Help .............................................................. 3.6 Setting Paper Properties ................................................ 3.7 Setting Graphic Properties .............................................. 3.8 Printing Multiple Pages on One Sheet of the Paper ...................................................... 3.10 Printing a Reduced or Enlarged Document ...................... 3.12 Fitting Your Document to a Selected Paper Size ................................................................. 3.13 Printing Posters .......................................................... 3.14 Using Watermarks ....................................................... 3.15 Using an Existing Watermark .................................. 3.15 Creating a Watermark ............................................ 3.16 Editing a Watermark .............................................. 3.17 Deleting a Watermark ............................................ 3.17 Using Overlays ........................................................... 3.18 What is an Overlay? ............................................... 3.18 Creating a New Page Overlay .................................. 3.18 Using a Page Overlay ............................................. 3.20 Deleting a Page Overlay ......................................... 3.21 Setting Up the Locally Shared Printer ............................. 3.22 In Windows 9x/Me ................................................. 3.22 In Windows NT 4.0/2000/XP ................................... 3.23 Chapter 4: OPYING C Loading Paper for Copying .............................................. 4.2 Preparing a Document ................................................... 4.2 Making a Copy .............................................................. 4.3 Setting Copy Options ..................................................... 4.4 Darkness ................................................................ 4.4 Original Type .......................................................... 4.5 Number of Copies .................................................... 4.5 Reduced/Enlarged Copying ....................................... 4.6 Changing the Default Settings ........................................ 4.7 Setting the Time Out Option ........................................... 4.8 Collation Copying .......................................................... 4.8 iii
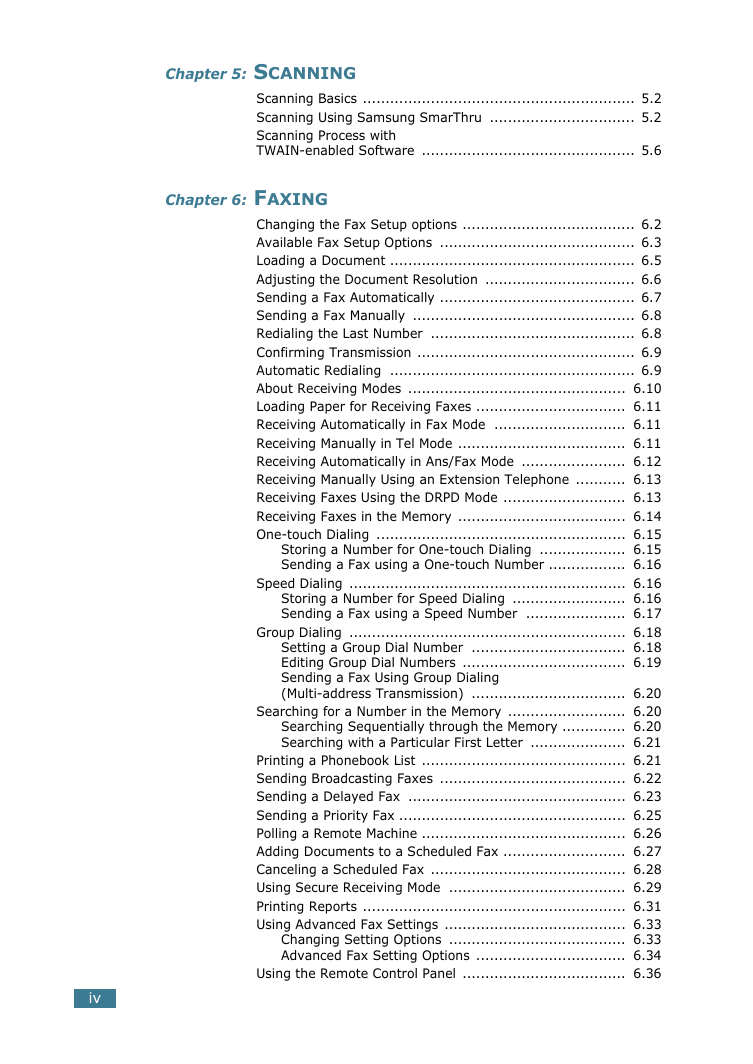
Chapter 5: CANNING S Scanning Basics ............................................................ 5.2 Scanning Using Samsung SmarThru ................................ 5.2 Scanning Process with TWAIN-enabled Software ............................................... 5.6 Chapter 6: AXING F Changing the Fax Setup options ...................................... 6.2 Available Fax Setup Options ........................................... 6.3 Loading a Document ...................................................... 6.5 Adjusting the Document Resolution ................................. 6.6 Sending a Fax Automatically ........................................... 6.7 Sending a Fax Manually ................................................. 6.8 Redialing the Last Number ............................................. 6.8 Confirming Transmission ................................................ 6.9 Automatic Redialing ...................................................... 6.9 About Receiving Modes ................................................ 6.10 Loading Paper for Receiving Faxes ................................. 6.11 Receiving Automatically in Fax Mode ............................. 6.11 Receiving Manually in Tel Mode ..................................... 6.11 Receiving Automatically in Ans/Fax Mode ....................... 6.12 Receiving Manually Using an Extension Telephone ........... 6.13 Receiving Faxes Using the DRPD Mode ........................... 6.13 Receiving Faxes in the Memory ..................................... 6.14 One-touch Dialing ....................................................... 6.15 Storing a Number for One-touch Dialing ................... 6.15 Sending a Fax using a One-touch Number ................. 6.16 Speed Dialing ............................................................. 6.16 Storing a Number for Speed Dialing ......................... 6.16 Sending a Fax using a Speed Number ...................... 6.17 Group Dialing ............................................................. 6.18 Setting a Group Dial Number .................................. 6.18 Editing Group Dial Numbers .................................... 6.19 Sending a Fax Using Group Dialing (Multi-address Transmission) .................................. 6.20 Searching for a Number in the Memory .......................... 6.20 Searching Sequentially through the Memory .............. 6.20 Searching with a Particular First Letter ..................... 6.21 Printing a Phonebook List ............................................. 6.21 Sending Broadcasting Faxes ......................................... 6.22 Sending a Delayed Fax ................................................ 6.23 Sending a Priority Fax .................................................. 6.25 Polling a Remote Machine ............................................. 6.26 Adding Documents to a Scheduled Fax ........................... 6.27 Canceling a Scheduled Fax ........................................... 6.28 Using Secure Receiving Mode ....................................... 6.29 Printing Reports .......................................................... 6.31 Using Advanced Fax Settings ........................................ 6.33 Changing Setting Options ....................................... 6.33 Advanced Fax Setting Options ................................. 6.34 Using the Remote Control Panel .................................... 6.36 iv
Chapter 7: Y OUR P SING IN L INUX RINTER U Getting Started ............................................................. 7.2 Installing the MFP Driver ................................................ 7.3 System Requirements .............................................. 7.3 Installing the MFP Driver .......................................... 7.4 Uninstalling the MFP Driver ....................................... 7.5 Using the MFP Configurator ............................................ 7.6 Opening the MFP Configurator ................................... 7.6 Printers Configuration .............................................. 7.7 Scanners Configuration ............................................ 7.8 MFP Ports Configuration ........................................... 7.9 Configuring Printer Properties ....................................... 7.10 Printing a Document .................................................... 7.11 Printing from Applications ....................................... 7.11 Printing Files ......................................................... 7.12 Scanning a Document .................................................. 7.13 Using the Image Editor ........................................... 7.17 Chapter 8: AINTENANCE M Clearing the Memory ..................................................... 8.2 Adjusting Shading ......................................................... 8.3 Cleaning Your Machine ................................................... 8.3 Cleaning the Outside ................................................ 8.3 Cleaning the Inside .................................................. 8.4 Cleaning the Scan Unit ............................................. 8.5 Maintaining the Toner Cartridge ...................................... 8.7 Redistributing Toner ................................................ 8.8 Replacing the Toner Cartridge ................................... 8.9 Setting the Notify Toner Option ............................... 8.10 Cleaning the Drum ................................................. 8.11 Ignoring the Toner Empty Message .......................... 8.11 Consumables and Replacement Parts ............................. 8.12 Replacing the ADF Rubber Pad ...................................... 8.13 Chapter 9: ROUBLESHOOTING T Clearing Document Jams ................................................ 9.2 Input Misfeed .......................................................... 9.2 Exit Misfeed ............................................................ 9.2 Clearing Paper Jams ...................................................... 9.3 In the Paper Tray .................................................... 9.4 In the Paper Exit Area .............................................. 9.5 In the Fuser Area or Around the Toner Cartridge .......... 9.6 In the Manual Feeder ............................................... 9.6 Tips for Avoiding Paper Jams ..................................... 9.7 Clearing LCD Error Messages .......................................... 9.8 Solving Problems ........................................................ 9.11 Paper Feeding Problems ......................................... 9.11 Printing Problems .................................................. 9.12 Printing Quality Problems ....................................... 9.15 Copying Problems .................................................. 9.19 Scanning Problems ................................................ 9.20 Faxing Problems .................................................... 9.21 Common Linux Problems ........................................ 9.23 v
Appendix A: PECIFICATIONS S General Specifications ................................................... A.2 Scanner Specifications ................................................... A.3 Copier Specifications ..................................................... A.4 Printer Specifications ..................................................... A.5 Facsimile Specifications ................................................. A.6 Paper Specifications ...................................................... A.7 Overview ................................................................ A.7 Supported Sizes of Paper .......................................... A.7 Guidelines for Using Paper ........................................ A.8 Paper Specifications ................................................. A.9 Paper Output Capacity ............................................. A.9 Paper Storage Environment .................................... A.10 Envelopes ............................................................. A.10 Labels .................................................................. A.12 Transparencies ...................................................... A.12 vi
Important Precautions and Safety Information When using this machine, these basic safety precautions should always be followed to reduce risk of fire, electric shock, and injury to people: 1. Read and understand all instructions. 2. Use common sense whenever operating electrical appliances. 3. Follow all warnings and instructions marked on the machine and in the literature accompanying the machine. 4. If an operating instruction appears to conflict with safety information, heed the safety information. You may have misunderstood the operating instruction. If you cannot resolve the conflict, contact your sales or service representative for assistance. 5. Unplug the machine from the AC wall socket and/or telephone jack before cleaning. Do not use liquid or aerosol cleaners. Use only a damp cloth for cleaning. 6. Do not place the machine on an unstable cart, stand or table. It may fall, causing serious damage. 7. Your machine should never be placed on, near or over a radiator, heater, air conditioner or ventilation duct. 8. Do not allow anything to rest on the power cable. Do not locate your machine where the cords will be abused by persons walking on them. 9. Do not overload wall outlets and extension cords. This can diminish performance, and may result in the risk of fire or electric shock. 10. Do not allow pets to chew on the AC power, telephone or PC interface cords. 11. Never push objects of any kind into the machine through case or cabinet openings. They may touch dangerous voltage points, creating a risk of fire or shock. Never spill liquid of any kind onto or into the machine. 12. You machine may have a heavy cover for optimal pressure on the document for the best scanning and/or faxing. In this case, replace the cover after placing document on the scan glass, by holding and moving it down slowly until it seats on its location. 13. To reduce the risk of electric shock, do not disassemble the machine. Take it to a qualified service technician when repair work is required. Opening or removing covers may expose you to dangerous voltages or other risks. Incorrect reassembly could cause electric shock when the unit is subsequently used. 14. Unplug the machine from the telephone jack, PC and AC wall outlet, and refer servicing to qualified service personnel under the following conditions: • When any part of the power cord, plug, or connecting cable is damaged or frayed. • If liquid has been spilled into the machine. • If the machine has been exposed to rain or water. • If the machine does not operate properly after instructions have been followed. • If the machine has been dropped, or the cabinet appears damaged. • If the machine exhibits a sudden and distinct change in performance. vii
分享到:
收藏