DATA PROJECTOR
V-332
User’s Manual
2
3
3
-
V
* DLP™ (Digital Light Processing) and DMD (Digital Micromirror Device) are registered trademarks of Texas Instru-
ments Incorporated (U.S.A.).
IMPORTANT
* VGA and XGA are trademarks or registered trademarks of International Business Machines Corporation (U.S.A.).
* S-VGA is a registered trademark of Video Electronics Standards Association.
* Microsoft, Windows, and PowerPoint are registered trademarks of Microsoft Corporation (U.S.A. and other countries).
* Macintosh is a trademark of Apple Computer Inc. (U.S.A.).
Note that even in the absence of explanatory notes, serious attention is paid to the trademarks of the various companies
and to the product trademarks.
�
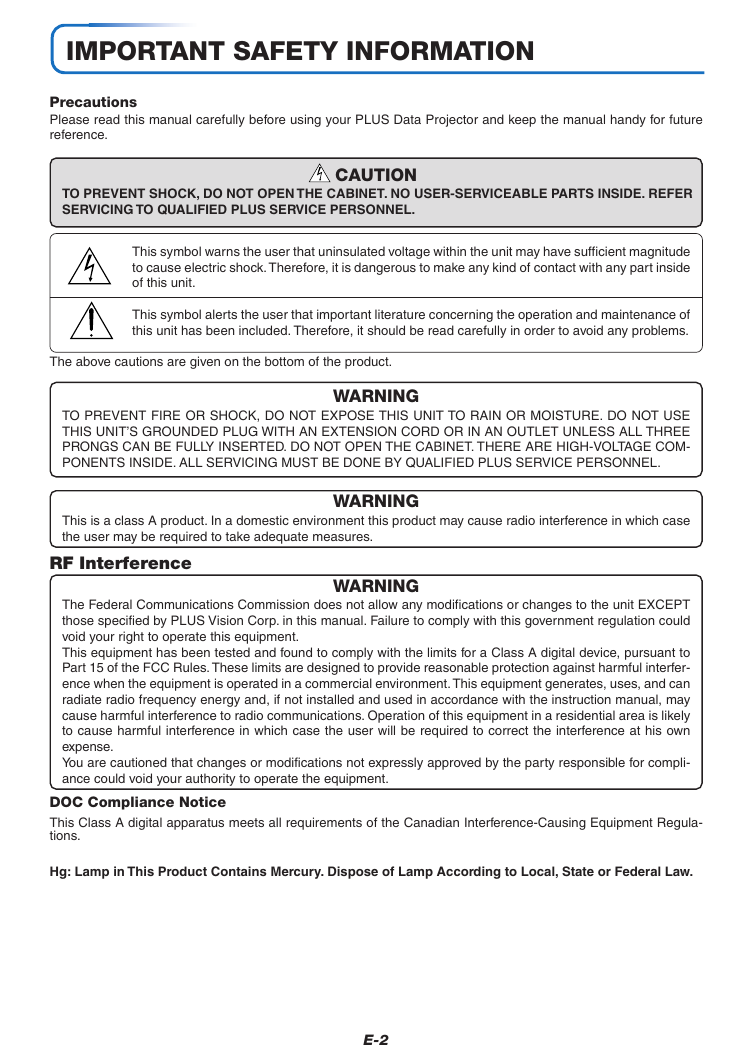
IMPORTANT SAFETY INFORMATION
Precautions
Please read this manual carefully before using your PLUS Data Projector and keep the manual handy for future
reference.
TO PREVENT SHOCK, DO NOT OPEN THE CABINET. NO USER-SERVICEABLE PARTS INSIDE. REFER
SERVICING TO QUALIFIED PLUS SERVICE PERSONNEL.
CAUTION
This symbol warns the user that uninsulated voltage within the unit may have sufficient magnitude
to cause electric shock. Therefore, it is dangerous to make any kind of contact with any part inside
of this unit.
This symbol alerts the user that important literature concerning the operation and maintenance of
this unit has been included. Therefore, it should be read carefully in order to avoid any problems.
The above cautions are given on the bottom of the product.
WARNING
TO PREVENT FIRE OR SHOCK, DO NOT EXPOSE THIS UNIT TO RAIN OR MOISTURE. DO NOT USE
THIS UNIT’S GROUNDED PLUG WITH AN EXTENSION CORD OR IN AN OUTLET UNLESS ALL THREE
PRONGS CAN BE FULLY INSERTED. DO NOT OPEN THE CABINET. THERE ARE HIGH-VOLTAGE COM-
PONENTS INSIDE. ALL SERVICING MUST BE DONE BY QUALIFIED PLUS SERVICE PERSONNEL.
This is a class A product. In a domestic environment this product may cause radio interference in which case
the user may be required to take adequate measures.
WARNING
RF Interference
WARNING
The Federal Communications Commission does not allow any modifications or changes to the unit EXCEPT
those specified by PLUS Vision Corp. in this manual. Failure to comply with this government regulation could
void your right to operate this equipment.
This equipment has been tested and found to comply with the limits for a Class A digital device, pursuant to
Part 15 of the FCC Rules. These limits are designed to provide reasonable protection against harmful interfer-
ence when the equipment is operated in a commercial environment. This equipment generates, uses, and can
radiate radio frequency energy and, if not installed and used in accordance with the instruction manual, may
cause harmful interference to radio communications. Operation of this equipment in a residential area is likely
to cause harmful interference in which case the user will be required to correct the interference at his own
expense.
You are cautioned that changes or modifications not expressly approved by the party responsible for compli-
ance could void your authority to operate the equipment.
DOC Compliance Notice
This Class A digital apparatus meets all requirements of the Canadian Interference-Causing Equipment Regula-
tions.
Hg: Lamp in This Product Contains Mercury. Dispose of Lamp According to Local, State or Federal Law.
E-2
�
IMPORTANT SAFETY INFORMATION
Important Safeguards
These safety instructions are to ensure the long life of the unit and to prevent fire and shock. Please read them
carefully and heed all warnings.
Installation
• For best results, use the unit in a darkened room.
• Place the unit on a flat, level surface in a dry area away from dust and moisture.
• Do not place the unit in direct sunlight, near heaters or heat radiating appliances.
• Exposure to direct sunlight, smoke or steam can harm internal components.
• Handle the unit carefully. Dropping or jarring can damage internal components.
• Do not place heavy objects on top of the unit.
Power Supply
• The unit is designed to operate on a power supply of 100 - 240 V 50/60 Hz AC. Ensure that your power supply
fits these requirements before attempting to use the unit.
• Handle the power cable carefully and avoid excessive bending. A damaged cord can cause electric shock or
• Disconnect the power cable (main’s lead) from the power outlet after using the unit.
Before disconnecting the power cable, make sure that the STANDBY indicator lights in amber (not blinking or
in green).
fire.
Cleaning
• Disconnect the power cable (main’s lead) from the unit.
• Clean the cabinet of the unit periodically with a damp cloth. If heavily soiled, use a mild detergent. Never use
strong detergents or solvents such as alcohol or thinner.
• Use a blower or lens paper to clean the lens, and be careful not to scratch or mar the lens.
• Clean the ventilation slots and speaker grills on the unit periodically using a vacuum cleaner. If accumulated
dust blocks the ventilation slots, the unit will overheat, which may cause the unit to malfunction.
Use a soft brush attachment when using the vacuum cleaner. Do not use a hard attachment, such as a crevice
tool, to prevent the damage to the unit.
Lamp Replacement
• Be sure to replace the lamp when the Status indicator comes on. If you continue to use the lamp after 2000
hours of usage, the lamp will turn off.
Fire and Shock Precautions
• Ensure that there is sufficient ventilation and that vents are unobstructed to prevent the buildup of heat inside
the unit. Allow at least 10 cm (4 inches) of space between the unit and walls.
• Prevent foreign objects such as paper clips and bits of paper from falling into the unit. Do not attempt to retrieve
any objects that fell into the unit. Do not insert any metal objects such as a wire or screwdriver into the unit. If
something should fall into the unit, immediately disconnect the power cable from the unit and have the object
removed by a qualified PLUS service person.
• Do not place any liquids on top of the unit.
Carrying around
When carrying the unit around, please use the storage case that comes with it and, to protect the lens from
scratches, always shut the Iris Lens Cover. Also, do not subject the unit to strong mechanical shock.
CAUTION – HOT!
The area around the exhaust vents is hot during and immediately after image projection.
To avoid burns, keep your hands away from this area.
Wait until the exhaust vents area cools off before touching it.
Do not look into the lens while the unit is on. Serious damage to your eyes could result.
E-3
�
Major Features
䡵 Evolution of the Best Seller Mobile Projector
The ease of use of this take anywhere, anytime, mobile projector has been improved and despite its small size and light
weight, it produces a high brightness of 1200 lm and a high contrast ratio of 2000:1. The newly developed Iris Lens Cover and
the Unplug & Go function permit speedy setup, and after the presentation is finished, just switch off the power of the projector
and it can soon be moved to another location.
䡵 Sharp, clear picture
The DLP™ display system affords RGB color fidelity and inconspicuous gaps between the individual dots, thereby permitting
the display of small characters and diagrams with distinct clarity.
䡵 High contrast ration of 2000:1
Use of a new generation of DMD devices has given birth to an amazing 2000:1 high contrast ratio.
By widening the difference of brightness between black and white, you can see a degree of sharpness that is greater than just
the brightness based on specifications.
䡵 Powerful functions for presentations
A wide variety of easy-to-set functions have been built into the projector, from a digital keystone correction function (used
when making settings) that corrects picture distortion, to an auto adjustment function that automatically identifies the PC
signal.
There is also a built-in “Presentation Timer” function for further presentation convenience.
䡵 Great moving image playback capabilities using the same principles as DLP Cinema
technology
Plus DLP type projectors have the same makings as the DLP Cinema technology used in movie theaters. Because of their
extremely fast response, even images with much movement – sports, movies – play smoothly without blurring.
䡵 Security lock function
The lock can be set so that a password must be input when the projector is started up. Without the correct password, no
operations other than turning the power on and off can be performed. This function effectively protects the projector from
unauthorized use.
䡵 Eco-mode switch function for the lamp output
Using the lamp Eco-mode will extend the life of the lamp and lower the power consumption.
By switching the lamp mode to suit your operating environment, you will save on lamp cost as well as contribute to energy
conservation and ecology.
E-4
�
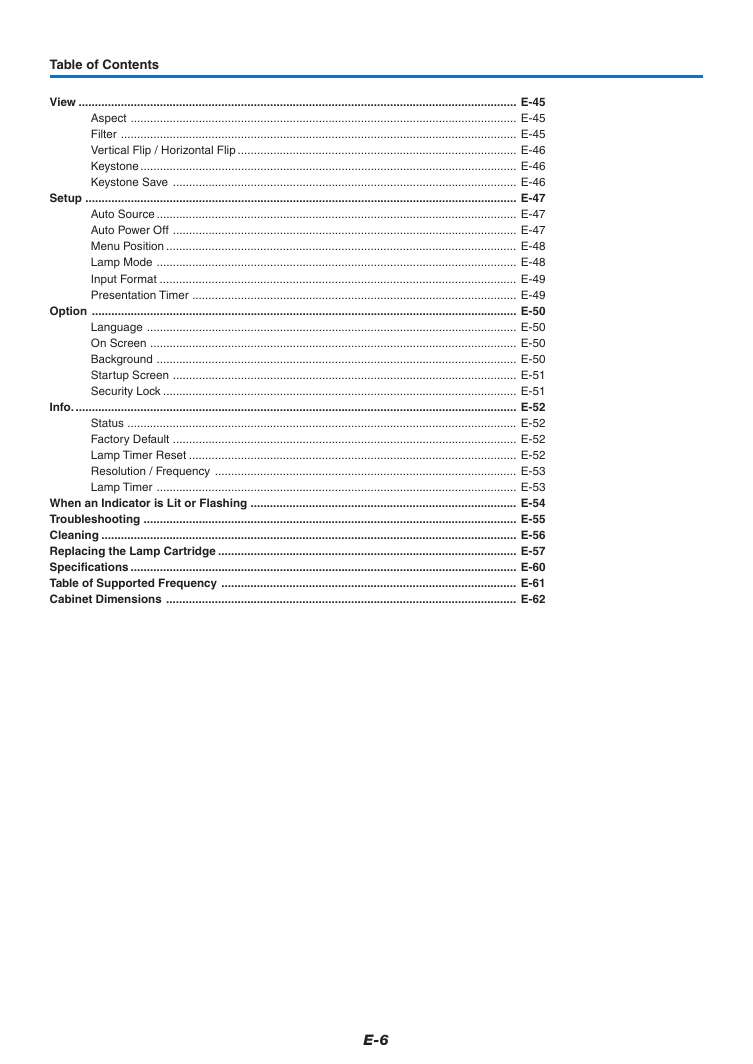
Table of Contents
IMPORTANT SAFETY INFORMATION ................................................................................... E-2
Major Features ....................................................................................................................... E-4
Table of Contents ................................................................................................................... E-5
Checking the Supplied Accessories .................................................................................... E-7
Names of the Main Unit Parts ............................................................................................... E-8
Names of the Remote Control Parts ................................................................................... E-10
Preparing the Remote Control ............................................................................................ E-11
Button Battery Replacement ..................................................................................... E-11
Remote Control Range ............................................................................................. E-11
The Procedure Up to Projecting to the Screen ................................................................. E-12
Placement Guide .................................................................................................................. E-13
Screen Size and Projection Distance ........................................................................ E-13
Connecting Personal Computers and Video Equipment .................................................. E-14
Connections with Personal Computer ....................................................................... E-14
Connect the projector’s RBG connector using the included RGB signal cable. .. E-14
To Output the External Output Signal of a Notebook Computer ......................... E-15
Connections with Composite Signals ........................................................................ E-16
Video Equipment with VIDEO Connectors .......................................................... E-16
Video Equipment with S-VIDEO Connectors ...................................................... E-16
Connections with Component Signals ....................................................................... E-17
When the Video Equipment Has a YCbCr Connector or YPbPr Connector ........ E-17
Connections with the AUDIO Jack ............................................................................ E-18
Power Cable Connections and Switching the Power On/Off ........................................... E-19
Operating ................................................................................................................... E-19
Finishing .................................................................................................................... E-21
Adjustment of the Projection Screen ................................................................................. E-22
Adjustment of the Projection Screen ......................................................................... E-22
Making Adjustments with the Adjusters .............................................................. E-23
General Operation ................................................................................................................ E-24
Input Selection .......................................................................................................... E-24
Automatic Adjustment ............................................................................................... E-24
Selection of Aspect Ratio .......................................................................................... E-25
Freezing a Moving Picture ......................................................................................... E-26
Cancelling Video and Audio Temporarily ................................................................... E-26
Lamp Mode ............................................................................................................... E-26
Keystone .................................................................................................................... E-27
Adjustment of the Volume .......................................................................................... E-27
Enlargement of the Image and Video Movement ...................................................... E-28
Using the Presentation Timer .................................................................................... E-29
Protecting the Projector with the Security Lock ......................................................... E-30
Using the Quick Menu ............................................................................................... E-32
Menu Operation Method ...................................................................................................... E-33
Performing Menu Operations .................................................................................... E-35
List of Item Names Offering Input Selection and Adjustments/Settings .................... E-38
Image ..................................................................................................................................... E-40
Brightness / Contrast / Color / Tint / Sharpness ........................................................ E-40
Picture Adj. / Fine Picture / H Position / V Position .................................................... E-40
Reset ......................................................................................................................... E-41
Color ...................................................................................................................................... E-42
Quick Color Adj. ........................................................................................................ E-42
Gamma ..................................................................................................................... E-42
Color Temp. ............................................................................................................... E-43
White ......................................................................................................................... E-43
Color Space .............................................................................................................. E-43
White Balance ........................................................................................................... E-44
E-5
�
Table of Contents
View ....................................................................................................................................... E-45
Aspect ....................................................................................................................... E-45
Filter .......................................................................................................................... E-45
Vertical Flip / Horizontal Flip ...................................................................................... E-46
Keystone .................................................................................................................... E-46
Keystone Save .......................................................................................................... E-46
Setup ..................................................................................................................................... E-47
Auto Source ............................................................................................................... E-47
Auto Power Off .......................................................................................................... E-47
Menu Position ............................................................................................................ E-48
Lamp Mode ............................................................................................................... E-48
Input Format .............................................................................................................. E-49
Presentation Timer .................................................................................................... E-49
Option ................................................................................................................................... E-50
Language .................................................................................................................. E-50
On Screen ................................................................................................................. E-50
Background ............................................................................................................... E-50
Startup Screen .......................................................................................................... E-51
Security Lock ............................................................................................................. E-51
Info. ........................................................................................................................................ E-52
Status ........................................................................................................................ E-52
Factory Default .......................................................................................................... E-52
Lamp Timer Reset ..................................................................................................... E-52
Resolution / Frequency ............................................................................................. E-53
Lamp Timer ............................................................................................................... E-53
When an Indicator is Lit or Flashing .................................................................................. E-54
Troubleshooting ................................................................................................................... E-55
Cleaning ................................................................................................................................ E-56
Replacing the Lamp Cartridge ............................................................................................ E-57
Specifications ....................................................................................................................... E-60
Table of Supported Frequency ........................................................................................... E-61
Cabinet Dimensions ............................................................................................................ E-62
E-6
�
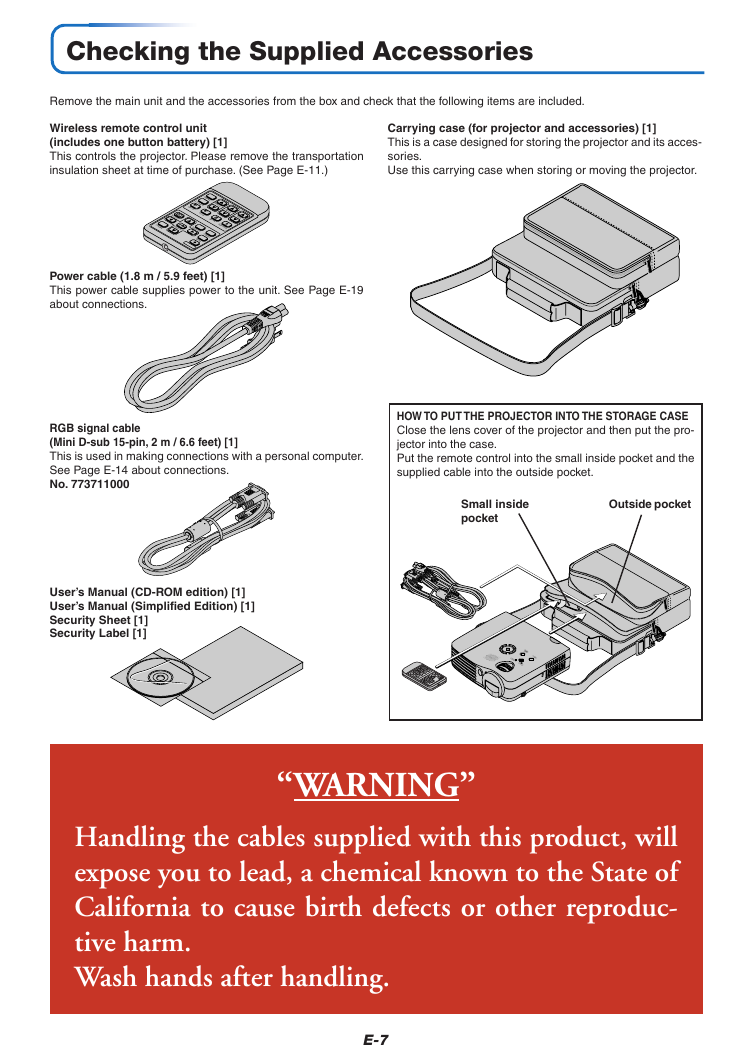
Checking the Supplied Accessories
Remove the main unit and the accessories from the box and check that the following items are included.
Wireless remote control unit
(includes one button battery) [1]
This controls the projector. Please remove the transportation
insulation sheet at time of purchase. (See Page E-11.)
Carrying case (for projector and accessories) [1]
This is a case designed for storing the projector and its acces-
sories.
Use this carrying case when storing or moving the projector.
R
E
M
I
T
T
C
E
P
S
4
A
O
T
U
A
M
O
O
Z
K
Q
3
O
C
E
C
I
U
U
N
E
M
Q
R
E
T
N
E
N
T
S
K
L
O
V
2
E
T
U
M
E
1
Z
E
E
R
F
L
E
C
N
A
C
O
E
D
I
V
B
G
R
Y
B
D
N
A
T
S
Power cable (1.8 m / 5.9 feet) [1]
This power cable supplies power to the unit. See Page E-19
about connections.
RGB signal cable
(Mini D-sub 15-pin, 2 m / 6.6 feet) [1]
This is used in making connections with a personal computer.
See Page E-14 about connections.
No. 773711000
HOW TO PUT THE PROJECTOR INTO THE STORAGE CASE
Close the lens cover of the projector and then put the pro-
jector into the case.
Put the remote control into the small inside pocket and the
supplied cable into the outside pocket.
Small inside
pocket
Outside pocket
User’s Manual (CD-ROM edition) [1]
User’s Manual (Simplified Edition) [1]
Security Sheet [1]
Security Label [1]
U
K
N
E
UIC
M
Q
U
N
E
M
Y
B
D
N
A
T
S
S
U
T
A
T
S
VOL
KSTN
2
MUTE
3
ECO
TIMER
ZOOM
ASPECT
4
AUTO
1
FREEZE
VIDEO
RGB
CANCEL
Q
QUICK
ENTER
MENU
“WARNING”
Handling the cables supplied with this product, will
expose you to lead, a chemical known to the State of
California to cause birth defects or other reproduc-
tive harm.
Wash hands after handling.
E-7
�
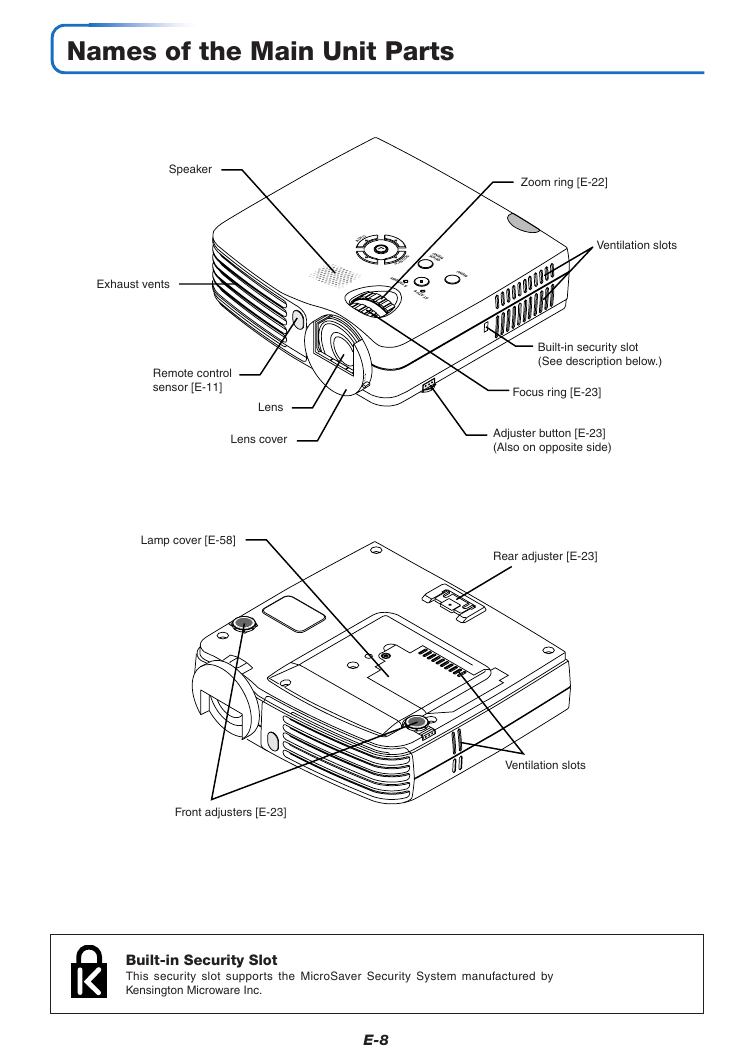
Names of the Main Unit Parts
Speaker
Zoom ring [E-22]
S
O
URC
E
Y
B
D
N
A
T
S
AUT O
C
L
O
Z
E
Exhaust vents
Remote control
sensor [E-11]
Lens
Lens cover
U
Ventilation slots
K
N
M
E
UIC
Q
U
N
E
M
S
U
T
A
T
S
Built-in security slot
(See description below.)
Focus ring [E-23]
Adjuster button [E-23]
(Also on opposite side)
Lamp cover [E-58]
Rear adjuster [E-23]
Front adjusters [E-23]
Ventilation slots
Built-in Security Slot
This security slot supports the MicroSaver Security System manufactured by
Kensington Microware Inc.
E-8
�



 2023年江西萍乡中考道德与法治真题及答案.doc
 2012年重庆南川中考生物真题及答案.doc
 2013年江西师范大学地理学综合及文艺理论基础考研真题.doc
 2020年四川甘孜小升初语文真题及答案I卷.doc
 2020年注册岩土工程师专业基础考试真题及答案.doc
 2023-2024学年福建省厦门市九年级上学期数学月考试题及答案.doc
 2021-2022学年辽宁省沈阳市大东区九年级上学期语文期末试题及答案.doc
 2022-2023学年北京东城区初三第一学期物理期末试卷及答案.doc
 2018上半年江西教师资格初中地理学科知识与教学能力真题及答案.doc
 2012年河北国家公务员申论考试真题及答案-省级.doc
 2020-2021学年江苏省扬州市江都区邵樊片九年级上学期数学第一次质量检测试题及答案.doc
 2022下半年黑龙江教师资格证中学综合素质真题及答案.doc