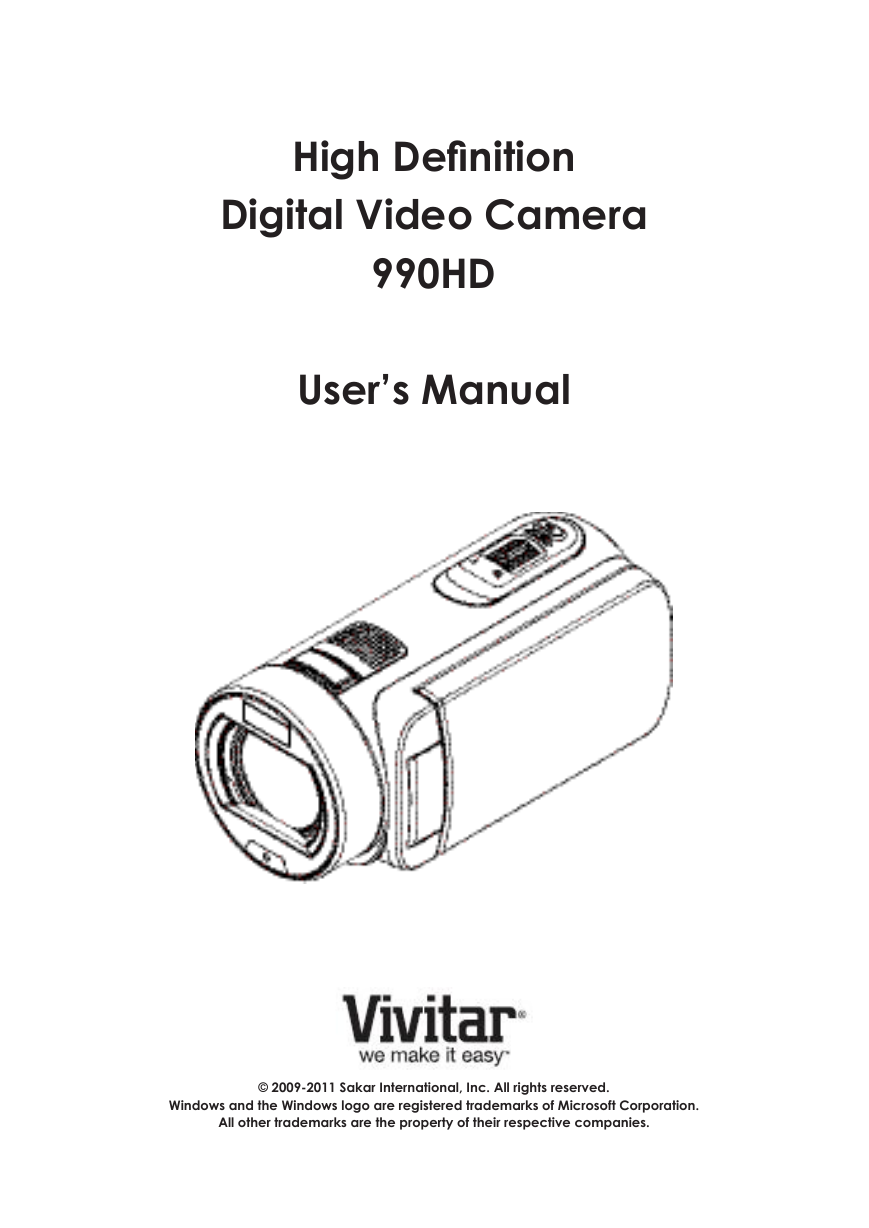
High Definition
Digital Video Camera
990HD
User’s Manual
© 2009-2011 Sakar International, Inc. All rights reserved.
Windows and the Windows logo are registered trademarks of Microsoft Corporation.
All other trademarks are the property of their respective companies.
�
Read This Before Using the Camera
SAFETY INSTRUCTIONS
• Do not drop, puncture or disassemble the camera.
• Use the camera with care. Rough handling may damage the internal components.
• Do not expose the camera to high temperature. Avoid contact with water.
• Please notice that the camera body may become warm when operating it for an extended period.
• Test for proper operation before using the camera.
• Only use accessories supplied by the manufacturer.
• Use only the type of battery that came with your camera.
• Remove the battery if the camera is not going to be used for long periods.
Product Information
• Designs and specifications of the camera are subject to change without notice. This includes primary
product specifications, software, and this User’s Manual.
• This User’s Manual is a general reference guide for the camera.
• The illustrations in this manual may not be the same as the actual design of your camera and those
you see on the LCD screen.
2
EN
�
Contents
Read This Before Using the Camera ................................................... 2
Section 1 Getting to Know Your Camera ........................................... 4
Section 2 Getting Started .................................................................... 7
Section 3 Enjoying the Record Mode ................................................ 9
Section 4 Enjoying the Playback Mode ........................................... 21
Section 5 Setting Your Camera ....................................................... 26
Section 6 Viewing Photos and Videos on TV .................................. 30
Section 7 Using the Software ........................................................... 31
Section 8 Transferring Media ........................................................... 34
Section 9 Sakar Warranty Card ........................................................ 35
Section 10 Technical Support ............................................................ 37
Section 11 Specifications and System Requirements ..................... 36
Section 12 Troubleshooting ............................................................... 38
�
Section 1
Getting to Know Your Camera
Overview
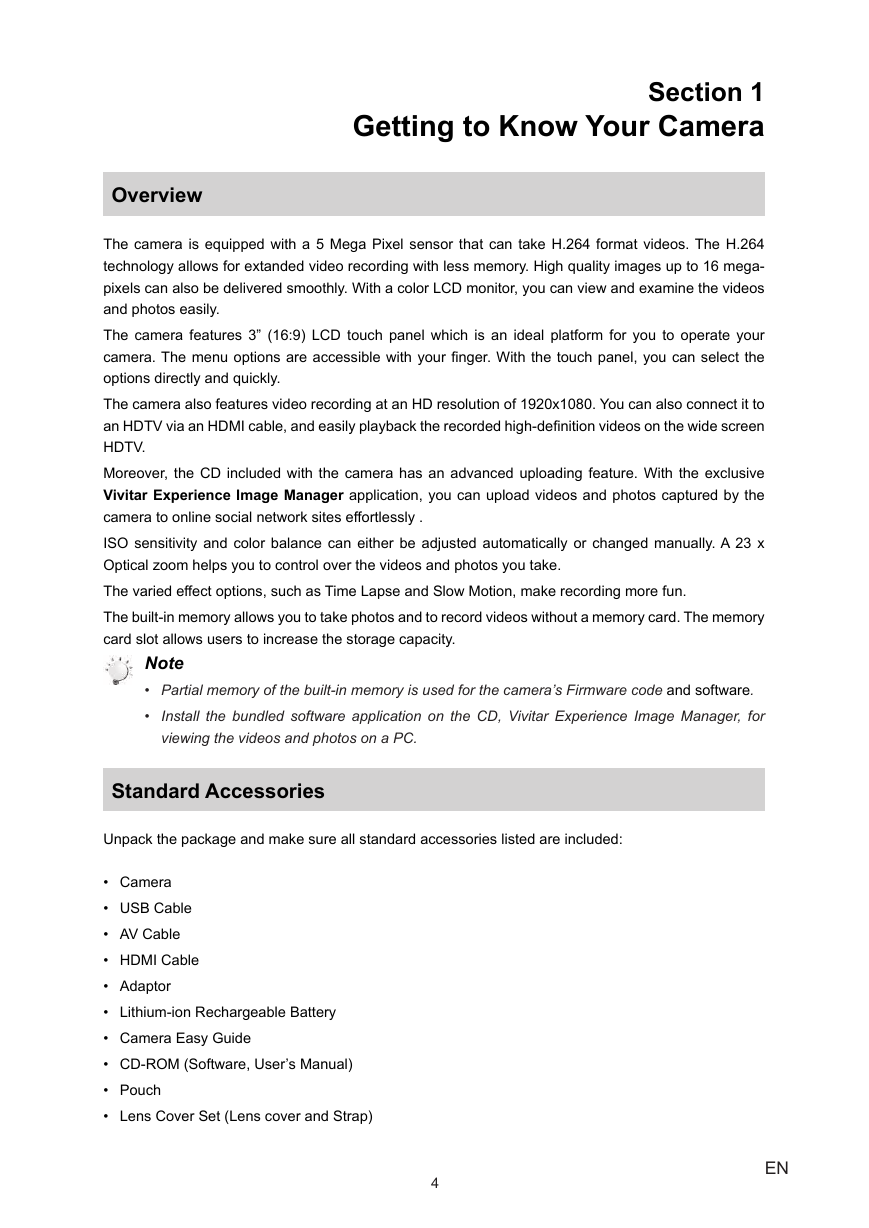
The camera is equipped with a 5 Mega Pixel sensor that can take H.264 format videos. The H.264
technology allows for extanded video recording with less memory. High quality images up to 16 mega-
pixels can also be delivered smoothly. With a color LCD monitor, you can view and examine the videos
and photos easily.
The camera features 3” (16:9) LCD touch panel which is an ideal platform for you to operate your
camera. The menu options are accessible with your finger. With the touch panel, you can select the
options directly and quickly.
The camera also features video recording at an HD resolution of 1920x1080. You can also connect it to
an HDTV via an HDMI cable, and easily playback the recorded high-definition videos on the wide screen
HDTV.
Moreover, the CD included with the camera has an advanced uploading feature. With the exclusive
Vivitar Experience Image Manager application, you can upload videos and photos captured by the
camera to online social network sites effortlessly .
ISO sensitivity and color balance can either be adjusted automatically or changed manually. A 23 x
Optical zoom helps you to control over the videos and photos you take.
The varied effect options, such as Time Lapse and Slow Motion, make recording more fun.
The built-in memory allows you to take photos and to record videos without a memory card. The memory
card slot allows users to increase the storage capacity.
Note
• Partial memory of the built-in memory is used for the camera’s Firmware code and software.
• Install the bundled software application on the CD, Vivitar Experience Image Manager, for
viewing the videos and photos on a PC.
Standard Accessories
Unpack the package and make sure all standard accessories listed are included:
• Camera
• USB Cable
• AV Cable
• HDMI Cable
• Adaptor
• Lithium-ion Rechargeable Battery
• Camera Easy Guide
• CD-ROM (Software, User’s Manual)
• Pouch
• Lens Cover Set (Lens cover and Strap)
4
EN
�
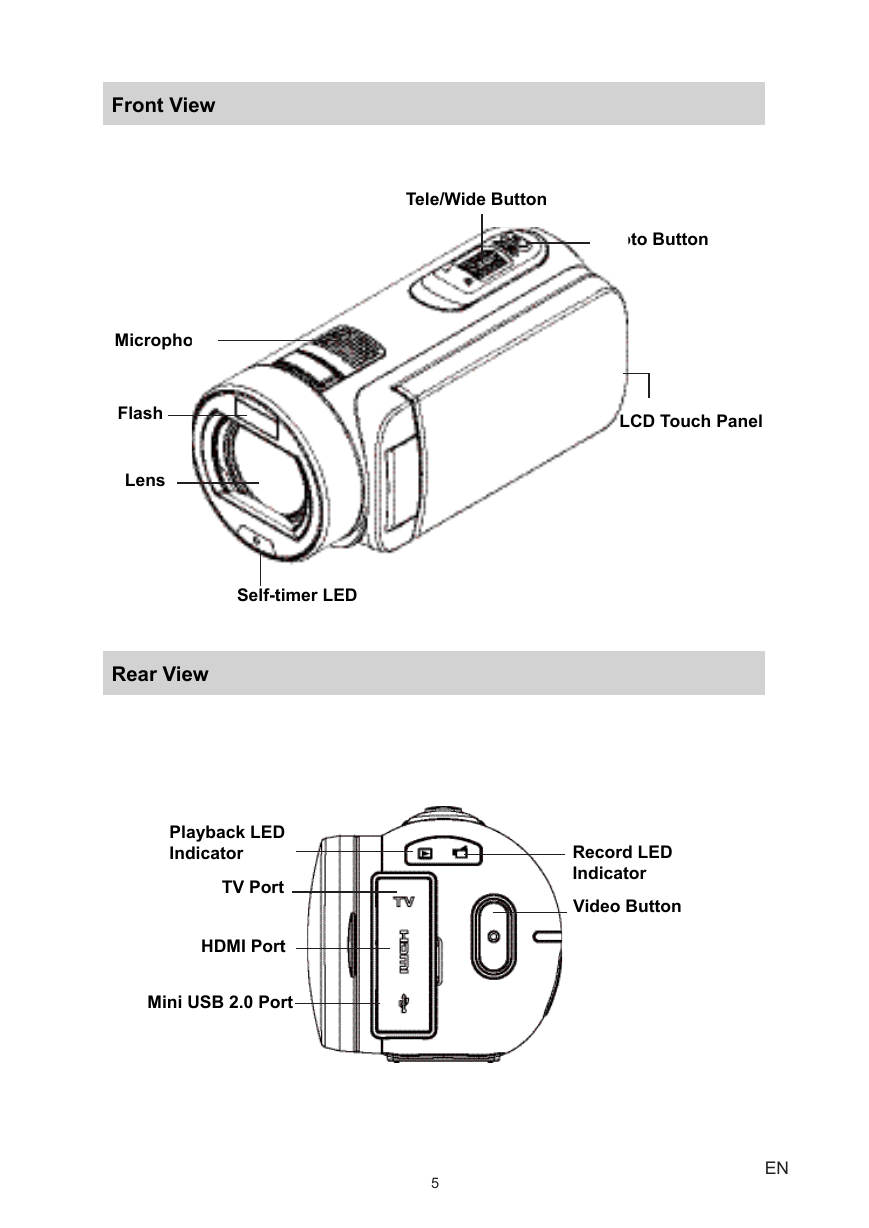
Tele/Wide Button
Photo Button
LCD Touch Panel
Front View
Microphone
Flash
Lens
Rear View
Self-timer LED
Playback LED
Indicator
TV Port
HDMI Port
Mini USB 2.0 Port
Record LED
Indicator
Video Button
5
EN
�
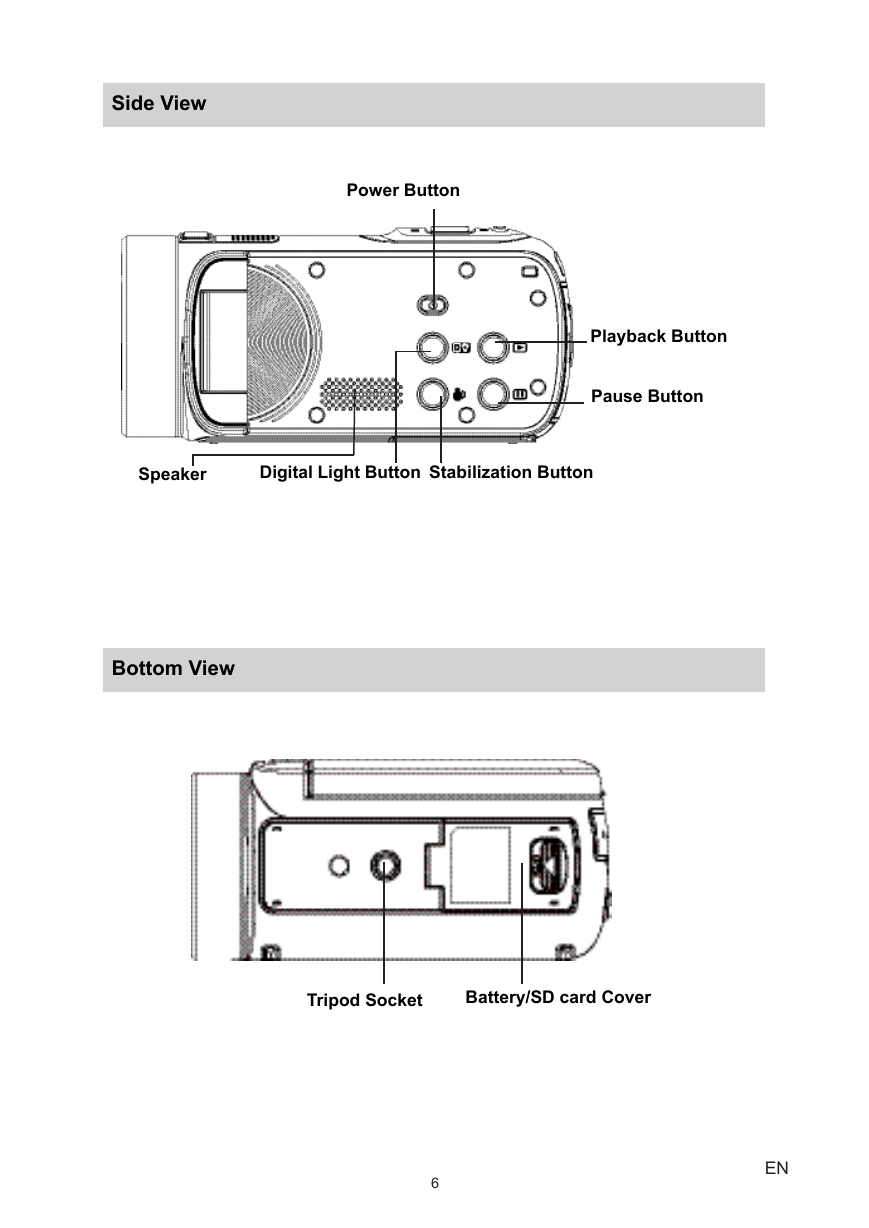
Side View
Power Button
Playback Button
Pause Button
Speaker
Digital Light Button
Stabilization Button
Bottom View
Tripod Socket
Battery/SD card Cover
6
EN
�
Section 2
Getting Started
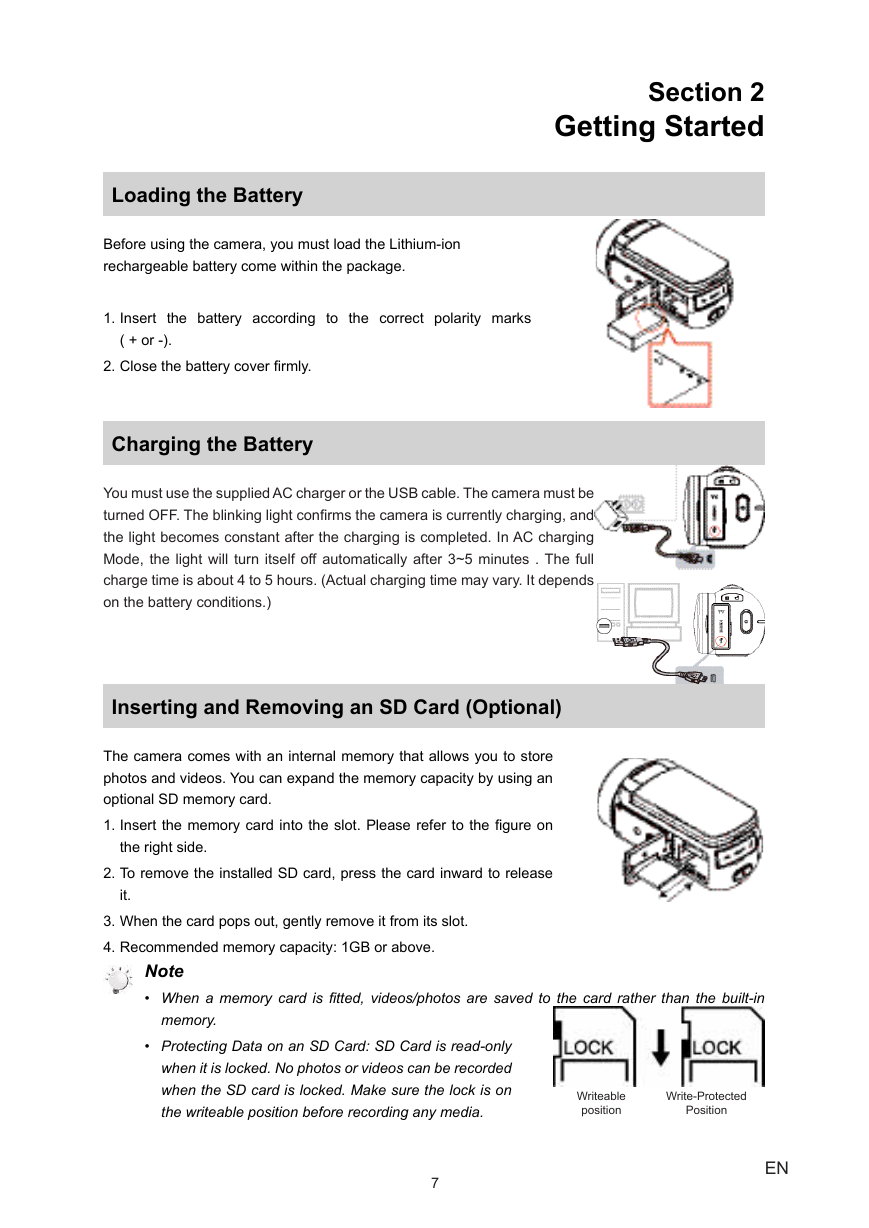
Loading the Battery
Before using the camera, you must load the Lithium-ion
rechargeable battery come within the package.
1. Insert the battery according to the correct polarity marks
( + or -).
2. Close the battery cover firmly.
Charging the Battery
You must use the supplied AC charger or the USB cable. The camera must be
turned OFF. The blinking light confirms the camera is currently charging, and
the light becomes constant after the charging is completed. In AC charging
Mode, the light will turn itself off automatically after 3~5 minutes . The full
charge time is about 4 to 5 hours. (Actual charging time may vary. It depends
on the battery conditions.)
Inserting and Removing an SD Card (Optional)
The camera comes with an internal memory that allows you to store
photos and videos. You can expand the memory capacity by using an
optional SD memory card.
1. Insert the memory card into the slot. Please refer to the figure on
the right side.
2. To remove the installed SD card, press the card inward to release
it.
3. When the card pops out, gently remove it from its slot.
4. Recommended memory capacity: 1GB or above.
Note
• When a memory card is fitted, videos/photos are saved to the card rather than the built-in
memory.
• Protecting Data on an SD Card: SD Card is read-only
when it is locked. No photos or videos can be recorded
when the SD card is locked. Make sure the lock is on
the writeable position before recording any media.
Writeable
position
Write-Protected
Position
7
EN
�
Turning the Camera On
• To turn on the camera:
1. Flip out the LCD panel; the camera will turn on automatically.
2. Or press [Power Button] for approximately one second to turn it on.
Configuring the Initial Date and Time Setup
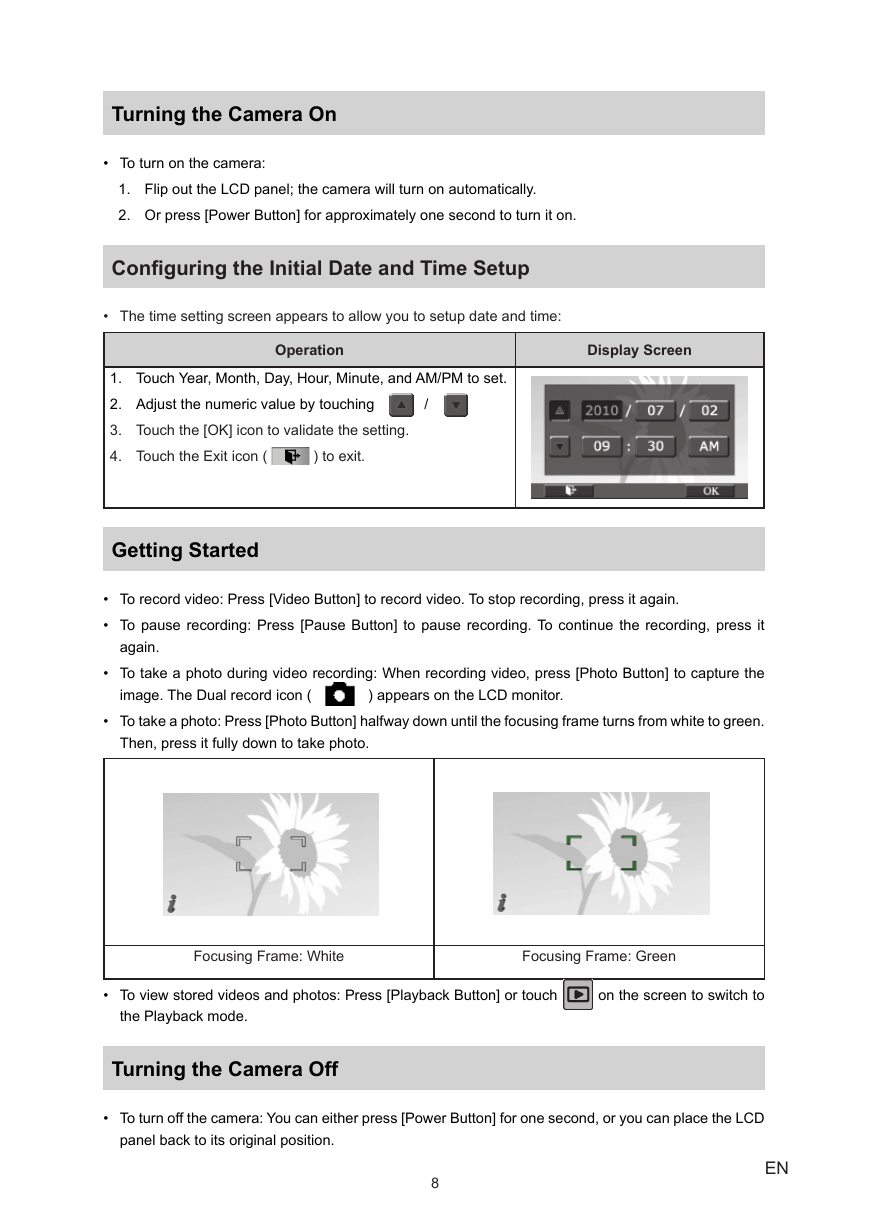
• The time setting screen appears to allow you to setup date and time:
Operation
Display Screen
1. Touch Year, Month, Day, Hour, Minute, and AM/PM to set.
2. Adjust the numeric value by touching
3. Touch the [OK] icon to validate the setting.
4. Touch the Exit icon (
) to exit.
/
Getting Started
• To record video: Press [Video Button] to record video. To stop recording, press it again.
• To pause recording: Press [Pause Button] to pause recording. To continue the recording, press it
again.
• To take a photo during video recording: When recording video, press [Photo Button] to capture the
image. The Dual record icon (
) appears on the LCD monitor.
• To take a photo: Press [Photo Button] halfway down until the focusing frame turns from white to green.
Then, press it fully down to take photo.
Focusing Frame: White
Focusing Frame: Green
• To view stored videos and photos: Press [Playback Button] or touch
on the screen to switch to
the Playback mode.
Turning the Camera Off
• To turn off the camera: You can either press [Power Button] for one second, or you can place the LCD
panel back to its original position.
8
EN
�


 2023年江西萍乡中考道德与法治真题及答案.doc
 2012年重庆南川中考生物真题及答案.doc
 2013年江西师范大学地理学综合及文艺理论基础考研真题.doc
 2020年四川甘孜小升初语文真题及答案I卷.doc
 2020年注册岩土工程师专业基础考试真题及答案.doc
 2023-2024学年福建省厦门市九年级上学期数学月考试题及答案.doc
 2021-2022学年辽宁省沈阳市大东区九年级上学期语文期末试题及答案.doc
 2022-2023学年北京东城区初三第一学期物理期末试卷及答案.doc
 2018上半年江西教师资格初中地理学科知识与教学能力真题及答案.doc
 2012年河北国家公务员申论考试真题及答案-省级.doc
 2020-2021学年江苏省扬州市江都区邵樊片九年级上学期数学第一次质量检测试题及答案.doc
 2022下半年黑龙江教师资格证中学综合素质真题及答案.doc