Digital Camera
GV-20
User’s Guide
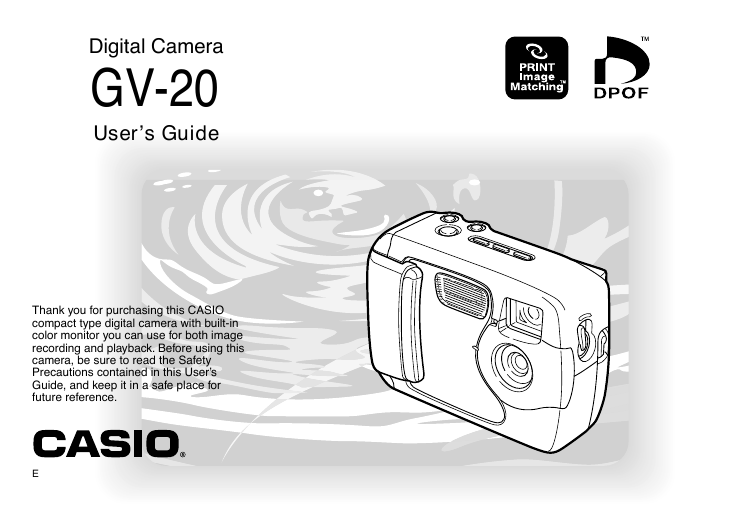
Thank you for purchasing this CASIO
compact type digital camera with built-in
color monitor you can use for both image
recording and playback. Before using this
camera, be sure to read the Safety
Precautions contained in this User’s
Guide, and keep it in a safe place for
future reference.
E
�
INTRODUCTION
INTRODUCTION
Unpacking
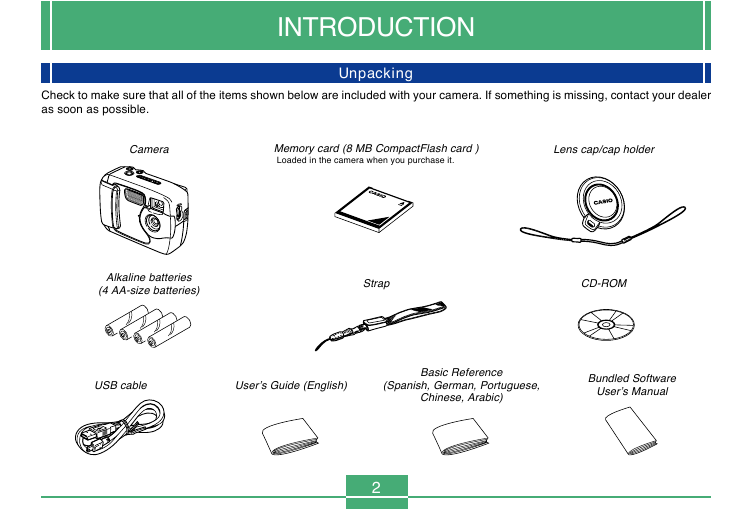
Check to make sure that all of the items shown below are included with your camera. If something is missing, contact your dealer
as soon as possible.
Camera
Memory card (8 MB CompactFlash card )
Loaded in the camera when you purchase it.
Lens cap/cap holder
Alkaline batteries
(4 AA-size batteries)
Strap
CD-ROM
Basic Reference
(Spanish, German, Portuguese,
Chinese, Arabic)
Bundled Software
User’s Manual
USB cable
User’s Guide (English)
2
�
INTRODUCTION
Contents
22 GETTING ACQUAINTED
2
INTRODUCTION
Getting Ready
Recording an Image
Playback
Deleting Images
Unpacking .................................................................... 2
Quick Reference .......................................................... 6
6
7
8
9
Features ...................................................................... 11
Water Resistance and Dust Resistance .................... 12
13
13
14
14
15
16
16
17
Precautions ................................................................ 18
18
19
19
20
20
20
Operating Environment
Operating Precautions
Wipe the camera dry after it becomes wet.
Location Precautions
General Precautions
Inspecting the Cover O-rings
If you find dirt on an O-ring...
Before putting your camera away after using it...
General Precautions
Data Error Precautions
Operating conditions
Condensation
About the camera’s backlight…
Lens Precautions
3
Front
Back
Terminals and Ports
Bottom
Attaching the Strap
Attaching the Lens Cap
Changing the Contents of the Monitor Screen
General Guide ............................................................ 22
22
23
24
24
Monitor Screen Indicators .......................................... 25
27
Indicator Lamps .......................................................... 27
Using the Bundled Accessories ................................. 28
28
29
Power Requirements ................................................. 30
30
34
34
35
37
37
Memory Cards ............................................................ 38
38
39
41
42
Setting the Current Date and Time ............................ 42
43
44
Loading Batteries
Battery Handling Precautions
Low Battery Indicator
Using AC Power
Turning the Camera On and Off
Power Save Settings
Inserting a Memory Card into the Camera
Removing a Memory Card from the Camera
Formatting a Memory Card
Memory Card Precautions
Setting the Date and Time
Selecting the Date Format
�
45 RECORDING IMAGES
61 PLAYBACK
INTRODUCTION
Flash Status Indicators
Precautions when Using Flash
About the REC Mode Monitor Screen
Recording Precautions
Image Recording when Batteries are Low
Recording a Simple Snapshot ................................... 45
46
46
47
Using Zoom ................................................................ 47
Using the Flash .......................................................... 48
49
49
Recording Macro Images ........................................... 50
Using the Optical Viewfinder ...................................... 51
Recording Consecutive Images
(Continuous Shutter Mode) ........................................ 52
Recording with the self-timer ..................................... 53
Recording an Image Using a
Best Shot Mode Scene .............................................. 53
Recording a Movie (Movie Mode) .............................. 55
Specifying Image Size and Quality ............................ 56
Exposure Compensation ............................................ 57
Selecting White Balance ............................................ 58
4
Basic Playback Operation .......................................... 60
Playing a Movie .......................................................... 61
Enlarging the Playback Image ................................... 61
Displaying the 9-image View ..................................... 62
63
Selecting a Specific Image in the 9-image View
65 DELETING IMAGES
Deleting the Displayed Image .................................... 64
Deleting All Images .................................................... 65
67 MANAGING IMAGES
Folders
Files
Folders and Files ........................................................ 66
66
66
DPOF .......................................................................... 67
67
68
PRINT Image Matching .............................................. 69
To configure printing for a particular image
To print all images
�
INTRODUCTION
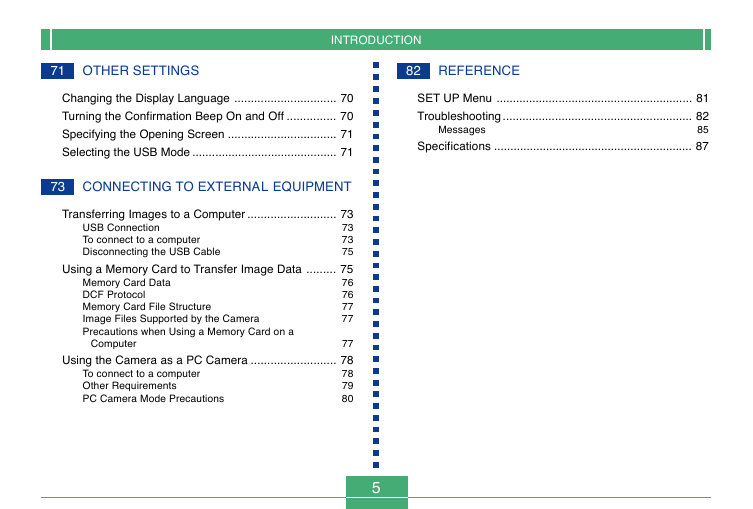
71 OTHER SETTINGS
82 REFERENCE
Changing the Display Language ............................... 70
Turning the Confirmation Beep On and Off ............... 70
Specifying the Opening Screen ................................. 71
Selecting the USB Mode ............................................ 71
SET UP Menu ............................................................ 81
Troubleshooting .......................................................... 82
85
Specifications ............................................................. 87
Messages
73 CONNECTING TO EXTERNAL EQUIPMENT
USB Connection
To connect to a computer
Disconnecting the USB Cable
Transferring Images to a Computer ........................... 73
73
73
75
Using a Memory Card to Transfer Image Data ......... 75
76
76
77
77
Memory Card Data
DCF Protocol
Memory Card File Structure
Image Files Supported by the Camera
Precautions when Using a Memory Card on a
Computer
77
Using the Camera as a PC Camera .......................... 78
78
79
80
To connect to a computer
Other Requirements
PC Camera Mode Precautions
5
�
INTRODUCTION
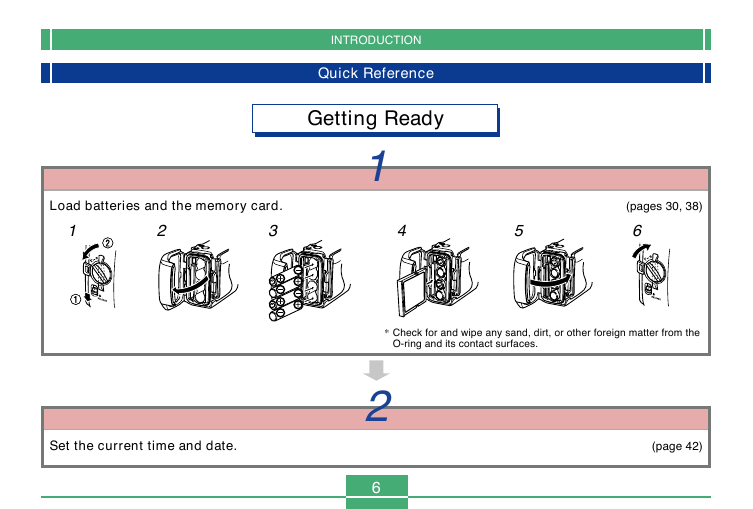
Quick Reference
Getting Ready
1
4
5
(pages 30, 38)
6
* Check for and wipe any sand, dirt, or other foreign matter from the
O-ring and its contact surfaces.
2
6
(page 42)
Load batteries and the memory card.
3
1
2
2
1
Set the current time and date.
�
INTRODUCTION
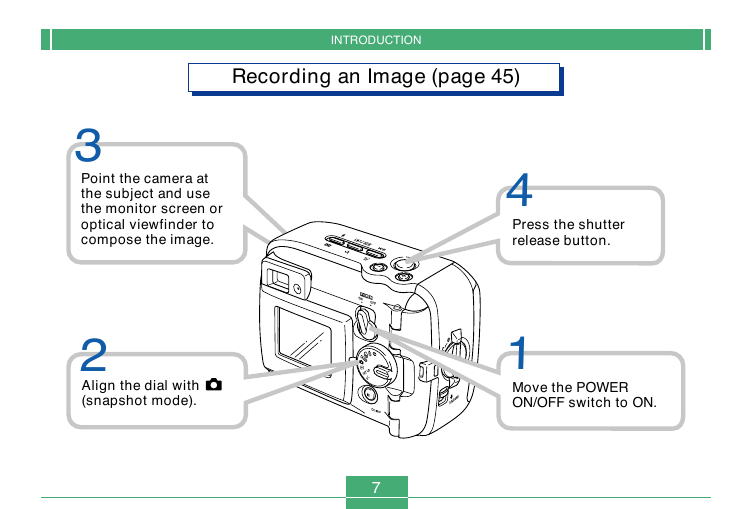
Recording an Image (page 45)
3
Point the camera at
the subject and use
the monitor screen or
optical viewfinder to
compose the image.
2
Align the dial with
(snapshot mode).
4
Press the shutter
release button.
1
Move the POWER
ON/OFF switch to ON.
7
�
INTRODUCTION
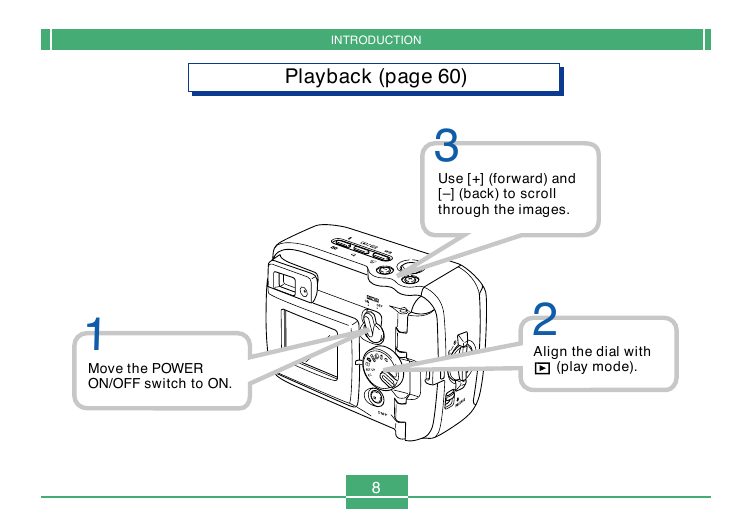
Playback (page 60)
3
Use [+] (forward) and
[–] (back) to scroll
through the images.
1
Move the POWER
ON/OFF switch to ON.
2
Align the dial with
(play mode).
8
�


 2023年江西萍乡中考道德与法治真题及答案.doc
 2012年重庆南川中考生物真题及答案.doc
 2013年江西师范大学地理学综合及文艺理论基础考研真题.doc
 2020年四川甘孜小升初语文真题及答案I卷.doc
 2020年注册岩土工程师专业基础考试真题及答案.doc
 2023-2024学年福建省厦门市九年级上学期数学月考试题及答案.doc
 2021-2022学年辽宁省沈阳市大东区九年级上学期语文期末试题及答案.doc
 2022-2023学年北京东城区初三第一学期物理期末试卷及答案.doc
 2018上半年江西教师资格初中地理学科知识与教学能力真题及答案.doc
 2012年河北国家公务员申论考试真题及答案-省级.doc
 2020-2021学年江苏省扬州市江都区邵樊片九年级上学期数学第一次质量检测试题及答案.doc
 2022下半年黑龙江教师资格证中学综合素质真题及答案.doc