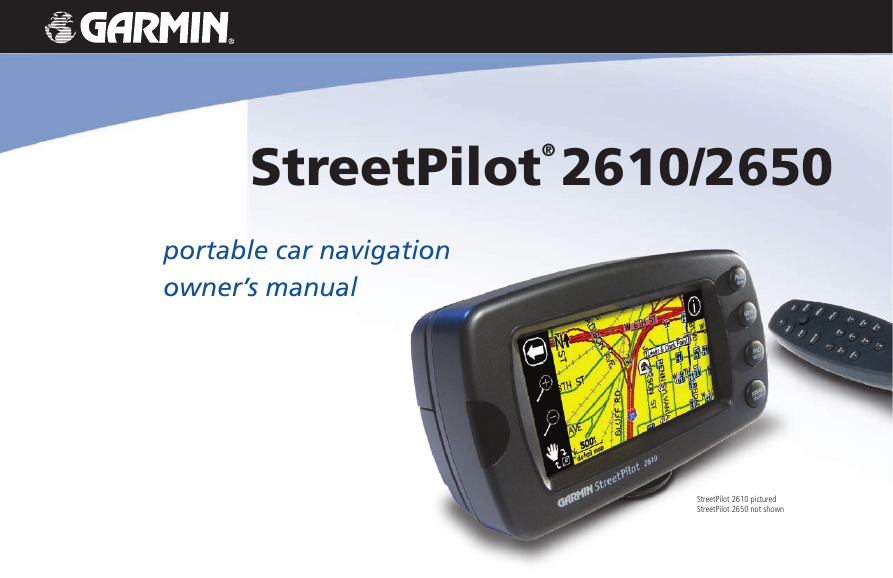
StreetPilot®
2610/2650
portable car navigation
owner’s manual
StreetPilot 2610 pictured
StreetPilot 2650 not shown
�
© Copyright 2004, 2005 Garmin Ltd. or its subsidiaries
Garmin International, Inc.
1200 East 151st Street, Olathe, Kansas 66062, U.S.A.
Tel. 913/397.8200 or 800/800.1020
Fax 913/397.8282
Garmin (Europe) Ltd.
Unit 5, The Quadrangle, Abbey Park Industrial Estate, Romsey, SO51 9DL, U.K.
Tel. 44/1794.519944
Fax 44/1794.519222
Garmin Corporation
No. 68, Jangshu 2nd Road, Shijr, Taipei County, Taiwan
Tel. 886/2.2642.9199
Fax 886/2.2642.9099
All rights reserved. Except as expressly provided herein, no part of this manual may be reproduced, copied, transmitted, disseminated, downloaded or stored in any
storage medium, for any purpose without the express prior written consent of Garmin. Garmin hereby grants permission to download a single copy of this manual
and of any revision to this manual onto a hard drive or other electronic storage medium to be viewed and to print one copy of this manual or of any revision hereto,
provided that such electronic or printed copy of this manual must contain the complete text of this copyright notice and provided further that any unauthorized
commercial distribution of this manual or any revision hereto is strictly prohibited.
Information in this document is subject to change without notice. Garmin reserves the right to change or improve its products and to make changes in the content
without obligation to notify any person or organization of such changes or improvements.
Visit the Garmin web site (www.Garmin.com) for current updates and supplemental information concerning the use and operation of this and other Garmin prod-
ucts.
Garmin®, AutoLocate®, MapSource®, StreetPilot®, and MetroGuide® are registered trademarks of Garmin Ltd. or its subsidiaries and may not be used without the
express permission of Garmin. Garmin Corporation is an authorized licensee of the CompactFlash®and ™ trademarks.
December 2005
190-00257-00 Rev C
Printed in Taiwan
�
Preface
Congratulations on choosing one of the most advanced GPS navigation systems available! The Garmin
StreetPilot 2610/2650 utilizes the proven performance of Garmin GPS and full-featured mapping to create
an unsurpassed mobile navigation system.
This manual covers instructions for the StreetPilot 2610 and Street Pilot 2650. Unit operation and
specifications are the same on both models, unless otherwise specified. To get the most out of your
new navigation system, take the time to go through this owner’s manual and learn the operating procedures
for your unit. This manual is arranged to teach you how to use, customize, and care for your StreetPilot.
• Introduction: The introductory material contains a wealth of information that shows you how to
operate, clean, and store your StreetPilot. Follow the three easy steps on page iv in order to begin
using your StreetPilot quickly and efficiently. If you have never operated a StreetPilot or any type of
GPS navigation unit, try the “Tutorial” on page vi.
• Reference: The reference material begins with introductory mapping basics and then moves toward
learning how to find places and create routes with your StreetPilot. Learn what the Map page looks
like as you are navigating a route or if you are just moving around the Map page for fun. After you
learn the basics, read the sections on customizing your StreetPilot to suit your navigational and
personal needs. Lastly, learn the basics of GPS navigation as well as how to understand the features
on the StreetPilot’s GPS Information Page.
• Appendix: Read the special sections on vehicle installation as well as other important information.
Read the Safety and Regulatory section to learn how to use your StreetPilot responsibly.
• Index: Use the handy Index as a key word search to help you find information more quickly.
Customer Service Product Registration
Help us better support you by completing our online registration today! Have the serial number of
your StreetPilot 2610/2650 handy and connect to our Web site (www.garmin.com). Look for the Product
Registration link on the Home page. Also, be sure to record your serial number in the right-hand column
for a quick reference.
Introduction
Product Registration
Serial Number
Use this area to record the serial number (8-digit number
located on the bottom of the unit) in case it is lost, stolen,
or needs service. Be sure to keep your original sales
receipt in a safe place or attach a photocopy inside the
manual.
Serial Number:
The Garmin StreetPilot 2610/2650 has no user-service-
able parts. Should you ever encounter a problem with
your unit, please take it to an authorized Garmin dealer
for repairs.
The StreetPilot 2610/2650 is fastened shut with screws.
Any attempt to open the case to change or modify the
unit in any way voids your warranty and may result in
permanent damage to the equipment.
i
�
Introduction
Packing List
I just bought a StreetPilot.
What do I do now?
For answers, see page iv.
Before installing and getting started with your unit, please check to see that your package includes the
following items. If any parts are missing, please contact your Garmin dealer immediately.
Standard Package:
• StreetPilot 2610 or 2650
• MapSource City Navigator CD-ROM with Unlock Certificate
• CompactFlash® Memory Card
• Dash Mount
• Portable Bean Bag Mount (Friction Mount)
• External Speaker with 12/24-volt Adapter Cable (vehicle adapter)
• A/C Power Adapter
• PC/USB Interface Cable
• DR (Dead Reckoning) Installation Cable (2650 Only)
• Alphanumeric Remote Control (Requires two alkaline AAA batteries; not included)
• Owner’s Manual
• Quick Reference Guide
• Setup Guide
Optional Accessories:
• Remote GPS Antenna (GA 27C) and antenna mounts
• Deluxe Carrying Case
• 128 and 256 MB CompactFlash® Memory Cards
Visit our Web site at www.garmin.com for a complete list of StreetPilot 2610/2650 accessories.
ii
�
Preface ....................................................................i
Customer Service Product Registration ...................i
Packing List ...........................................................ii
TABLE OF CONTENTS ...............................................iii
GETTING STARTED ...................................................iv
WHERE DO I BEGIN? ..........................................iv
A Tutorial: Finding and Routing to a Restaurant ...vi
Manual Conventions ..........................................viii
INTRODUCING THE STREETPILOT 2610/2650 ............1
Front and Rear View of the StreetPilot ...................1
Caring for your StreetPilot ....................................2
Turning the StreetPilot On and Off ........................3
Using the Keypad ..................................................3
Using the Touchscreen ..........................................4
Calibrating the Touchscreen ..................................4
Using the Remote Control .....................................4
Adjusting the Speaker Volume ...............................5
LEARNING HOW TO USE THE MAP PAGE ...................6
Viewing the Map Page for the First Time ...............6
Using the Map Page Features .................................7
Viewing the Map Page While Driving ..................12
DRIVING WITH DEAD RECKONING (2650 ONLY) .....18
FINDING PLACES ....................................................19
Finding a City .....................................................19
Finding an Address or Intersection ......................21
Finding an Exit ....................................................23
Finding a Waypoint .............................................24
Advanced Find Features ......................................25
Planning a Trip ...................................................26
Finding “Recently-Found” Places .........................27
CREATING YOUR OWN ROUTES .............................28
Creating your First Route ....................................29
Setting a HOME Waypoint ..................................30
Saving a Route .....................................................31
Deleting or Renaming a Saved Route ...................32
Modifying a Route ...............................................32
Measuring Distances Between Two Places ...........36
CUSTOMIZING YOUR STREETPILOT 2610/2650 .......38
Adjusting the Backlight and Contrast ..................38
Turning off Satellite Reception for Indoor Use .....38
Customizing your Map Page ................................39
Hiding/Showing Data Tabs on your Map Page .....41
Customizing the Overall Setup of Your StreetPilot 44
Obtaining the latest Software Upgrades ...............55
UNDERSTANDING THE GPS INFORMATION PAGE ....56
What is GPS? .......................................................56
The GPS Information Page ..................................56
Introduction
Table of Contents
APPENDIX A: VEHICLE INSTALLATION .....................61
APPENDIX B: DR CABLE WIRING (2650 ONLY) ........65
APPENDIX C: USING DIACRITICAL MARKS ..............66
APPENDIX D: COMPACTFLASH® DATA CARDS ........68
APPENDIX E: ADDING MAPS TO YOUR STREETPILOT ..69
APPENDIX F: MESSAGES .........................................71
APPENDIX G: SPECIFICATIONS ................................73
APPENDIX H: SAFETY AND REGULATORY INFORMATION
75
Limited Warranty ................................................79
iii
�
Introduction
Getting Started
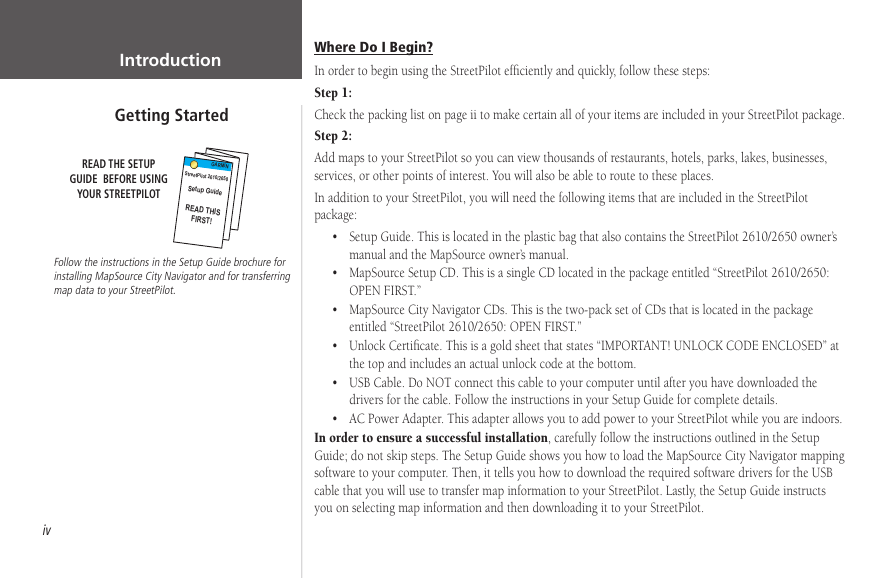
READ THE SETUP
GUIDE BEFORE USING
YOUR STREETPILOT
GARMIN
StreetPilot 2610/2650
Setup Guide
READ THIS
FIRST!
Follow the instructions in the Setup Guide brochure for
installing MapSource City Navigator and for transferring
map data to your StreetPilot.
iv
Where Do I Begin?
In order to begin using the StreetPilot efficiently and quickly, follow these steps:
Step 1:
Check the packing list on page ii to make certain all of your items are included in your StreetPilot package.
Step 2:
Add maps to your StreetPilot so you can view thousands of restaurants, hotels, parks, lakes, businesses,
services, or other points of interest. You will also be able to route to these places.
In addition to your StreetPilot, you will need the following items that are included in the StreetPilot
package:
• Setup Guide. This is located in the plastic bag that also contains the StreetPilot 2610/2650 owner’s
manual and the MapSource owner’s manual.
• MapSource Setup CD. This is a single CD located in the package entitled “StreetPilot 2610/2650:
OPEN FIRST.”
• MapSource City Navigator CDs. This is the two-pack set of CDs that is located in the package
entitled “StreetPilot 2610/2650: OPEN FIRST.”
• Unlock Certificate. This is a gold sheet that states “IMPORTANT! UNLOCK CODE ENCLOSED” at
the top and includes an actual unlock code at the bottom.
• USB Cable. Do NOT connect this cable to your computer until after you have downloaded the
drivers for the cable. Follow the instructions in your Setup Guide for complete details.
• AC Power Adapter. This adapter allows you to add power to your StreetPilot while you are indoors.
In order to ensure a successful installation, carefully follow the instructions outlined in the Setup
Guide; do not skip steps. The Setup Guide shows you how to load the MapSource City Navigator mapping
software to your computer. Then, it tells you how to download the required software drivers for the USB
cable that you will use to transfer map information to your StreetPilot. Lastly, the Setup Guide instructs
you on selecting map information and then downloading it to your StreetPilot.
�
Note:
This manual assumes that you have transfered maps to your StreetPilot. If you do not download City
Navigator maps to your StreetPilot, you will not see some of the information or features described
throughout this manual. Additionally, you will see minimal detail of major roads and highways on your
StreetPilot.
Step 3:
Try out your StreetPilot! Use the Tutorial on page vi to learn how to find a nearby restaurant and create
a route to it. In addition to your StreetPilot, you will need the following items that are included in the
StreetPilot package:
• Vehicle adapter. This is a 12/24 volt DC adapter with an external speaker system that connects
to your vehicle and your StreetPilot.
• Dash mount or portable bean bag mount. If you would like to mount your StreetPilot to your
vehicle right away, see the instructions on page 61.
Once you complete these three steps, you will be set up and ready to enjoy the full operation of the
StreetPilot!
Further Recommendations:
Read the StreetPilot 2610/2650 owner’s manual to learn how to create routes that include multiple
destinations, how to specify areas or road segments to avoid when calculating routes, and how to use a
variety of other exciting features.
Read the MapSource owner’s manual to learn how to create routes and waypoints on your computer
and then transfer this information to your StreetPilot.
Introduction
Getting Started
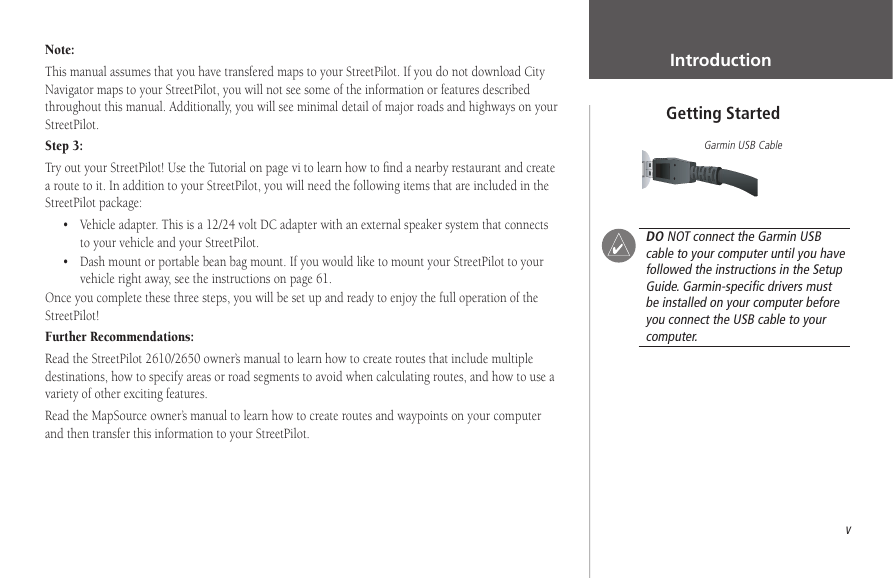
Garmin USB Cable
DO NOT connect the Garmin USB
cable to your computer until you have
followed the instructions in the Setup
Guide. Garmin-specific drivers must
be installed on your computer before
you connect the USB cable to your
computer.
v
�
Introduction
Where to find it
• To learn how to attach your vehicle
adapter to your StreetPilot, see page 64.
• Learn how to create and customize
routes, beginning on page 28.
• Learn more about GPS navigation
beginning on page 56.
• To find a city, address, intersection,
park, or other point of interest, see
Finding Places, beginning on page 19.
• To learn how to use the keypad on your
StreetPilot as well as the remote control
unit, see page 4.
• To change the street detail level on your
•
StreetPilot, see page 39 (map detail).
If you do not want your StreetPilot to
automatically switch to “night” colors at
sunset, see page 39 (color mode).
• Learn about the Map page and its many
features, beginning on page 6.
vi
A Tutorial: Finding and Routing to a Restaurant
The tutorial below guides you through the steps for finding a restaurant in your area and then creating a
route to it. If you have never used a StreetPilot or a GPS navigation unit before, try this simple task. You’ll
see that using your StreetPilot is fast and easy. Make certain you complete Step 2 on page iv before
you begin this tutorial. Otherwise, you will not be able to view restaurant names.
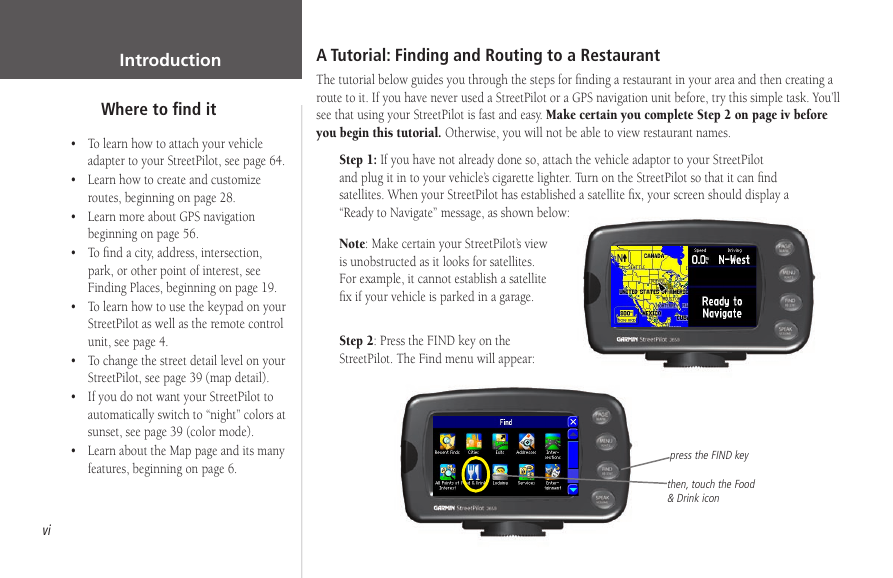
Step 1: If you have not already done so, attach the vehicle adaptor to your StreetPilot
and plug it in to your vehicle’s cigarette lighter. Turn on the StreetPilot so that it can find
satellites. When your StreetPilot has established a satellite fix, your screen should display a
“Ready to Navigate” message, as shown below:
Note: Make certain your StreetPilot’s view
is unobstructed as it looks for satellites.
For example, it cannot establish a satellite
fix if your vehicle is parked in a garage.
Step 2: Press the FIND key on the
StreetPilot. The Find menu will appear:
press the FIND key
then, touch the Food
& Drink icon
�


 2023年江西萍乡中考道德与法治真题及答案.doc
 2012年重庆南川中考生物真题及答案.doc
 2013年江西师范大学地理学综合及文艺理论基础考研真题.doc
 2020年四川甘孜小升初语文真题及答案I卷.doc
 2020年注册岩土工程师专业基础考试真题及答案.doc
 2023-2024学年福建省厦门市九年级上学期数学月考试题及答案.doc
 2021-2022学年辽宁省沈阳市大东区九年级上学期语文期末试题及答案.doc
 2022-2023学年北京东城区初三第一学期物理期末试卷及答案.doc
 2018上半年江西教师资格初中地理学科知识与教学能力真题及答案.doc
 2012年河北国家公务员申论考试真题及答案-省级.doc
 2020-2021学年江苏省扬州市江都区邵樊片九年级上学期数学第一次质量检测试题及答案.doc
 2022下半年黑龙江教师资格证中学综合素质真题及答案.doc