IS536
USER MANUAL
© 2012 All Rights Reserved.
Windows and the Windows logo are registered trademarks of Microsoft Corporation.
All other trademarks are the property of their respective companies.
�
IiS536
User Manual
SER ANUAL
�
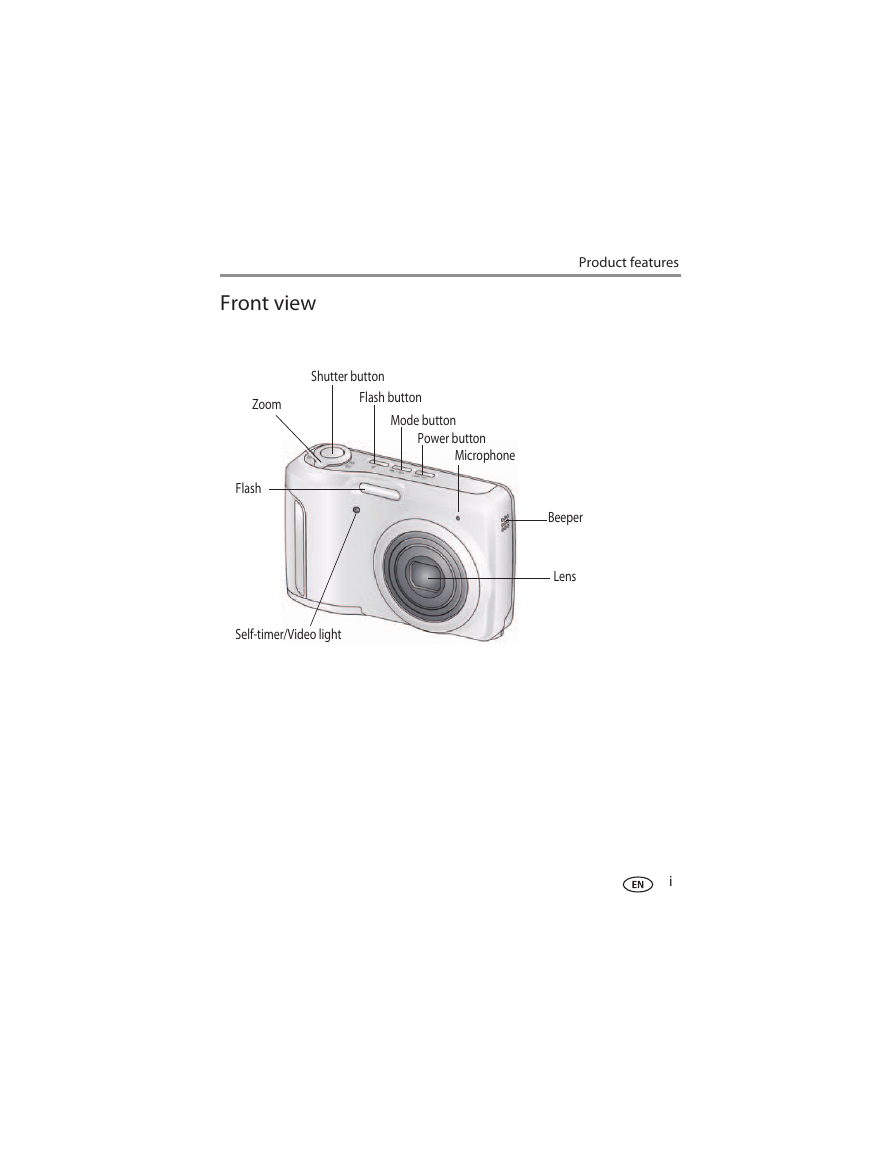
Front view
Product features
Shutter button
Flash button
Mode button
Power button
Microphone
Zoom
Flash
Beeper
Lens
Self-timer/Video light
i
�
Product features
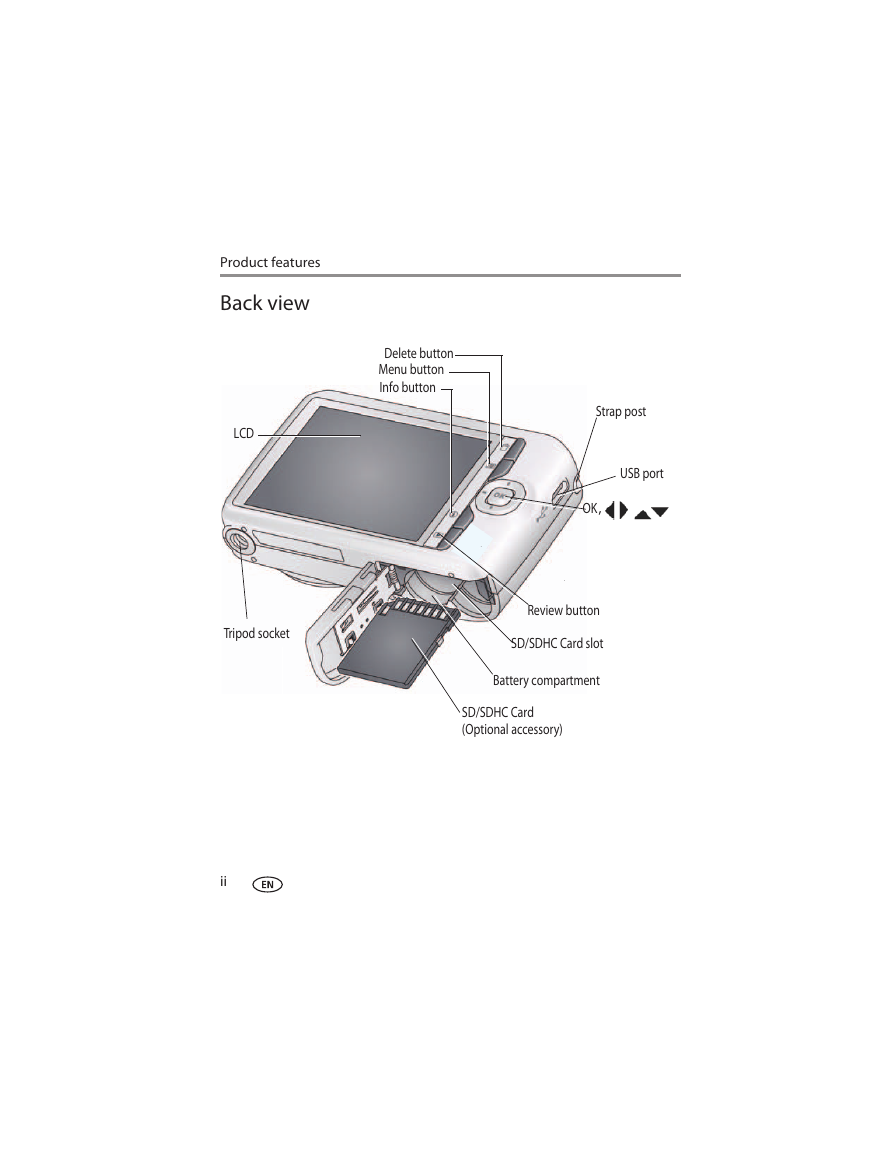
Back view
LCD
Delete button
Menu button
Info button
Tripod socket
ii
Strap post
USB port
OK,
Review button
SD/SDHC Card slot
Battery compartment
SD/SDHC Card
(Optional accessory)
�
1
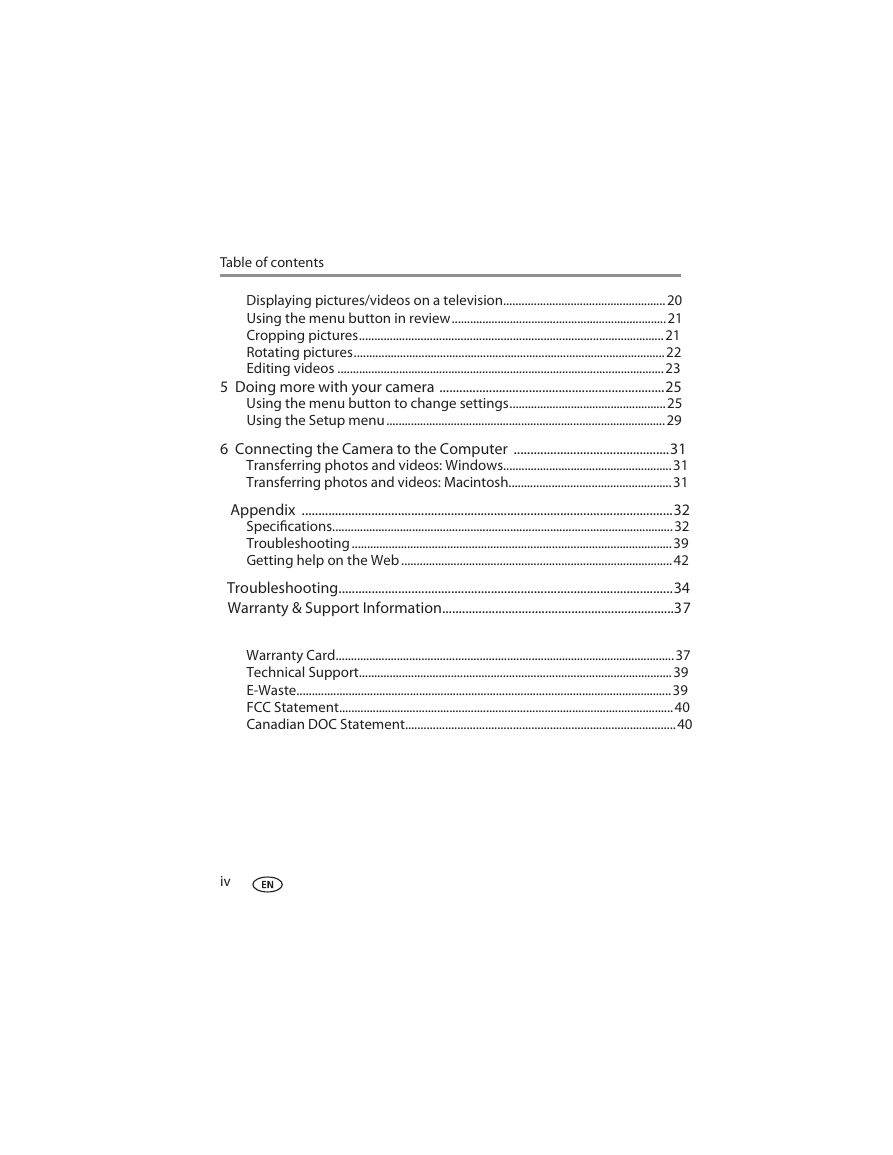
Table of contents
1 Setting up your camera .........................................................................1
Attaching the wrist strap.............................................................................1
Loading the batteries ...................................................................................1
Turning on the camera ..................................................................................2
Setting the language and date/time........................................................2
Storing pictures on an optional SD or SDHC Card...............................3
2 Taking pictures/videos ...........................................................................4
Taking pictures................................................................................ ..............4
Taking a video .................................................................................................5
Adjusting LCD brightness ...........................................................................5
Understanding the picture-taking icons.................................................6
Watch the battery level ................................................................................6
Using the optical zoom.................................................................................7
Using the ash..................................................................................................8
Using dierent modes ..................................................................................9
Using shortcuts ..............................................................................................11
Using the self-timer.......................................................................................12
Using burst ......................................................................................................12
Taking panoramic pictures.........................................................................13
3 Sharing and tagging pictures ............................................................14
Tagging with keywords...............................................................................14
4 Reviewing and editing .........................................................................15
Reviewing pictures/videos .......................................................................15
Deleting pictures/videos ...........................................................................16
Viewing pictures/videos in dierent ways...........................................17
A smarter way to nd and enjoy your pictures..................................18
Understanding the review icons.............................................................19
iii
�
Table of contents
Displaying pictures/videos on a television.....................................................20
Using the menu button in review......................................................................21
Cropping pictures...................................................................................................21
Rotating pictures.....................................................................................................22
Editing videos ..........................................................................................................23
5 Doing more with your camera ....................................................................25
Using the menu button to change settings...................................................25
Using the Setup menu...........................................................................................29
6 Connecting the Camera to the Computer ...............................................31
Transferring photos and videos: Windows.......................................................31
Transferring photos and videos: Macintosh.....................................................31
Appendix ................................................................................................................32
Specications...............................................................................................................32
Troubleshooting........................................................................................................39
Getting help on the Web........................................................................................42
Troubleshooting.....................................................................................................34
Warranty & Support Information......................................................................37
Warranty Card...............................................................................................................37
Technical Support......................................................................................................39
E-Waste..........................................................................................................................39
FCC Statement.............................................................................................................40
Canadian DOC Statement........................................................................................40
iv
�
1 Setting up your camera
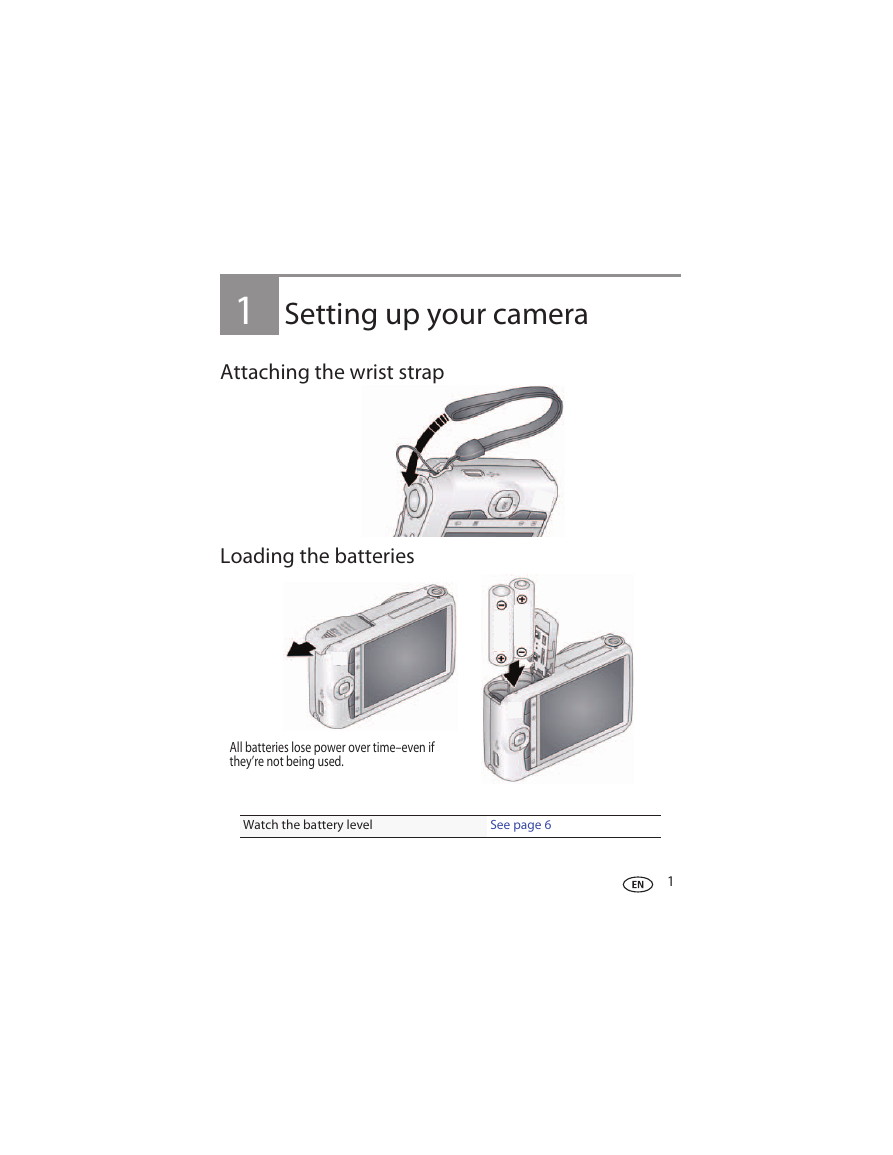
Attaching the wrist strap
Loading the batteries
All batteries lose power over time–even if
they’re not being used.
Watch the battery level
See page 6
1
�
Setting up your camera
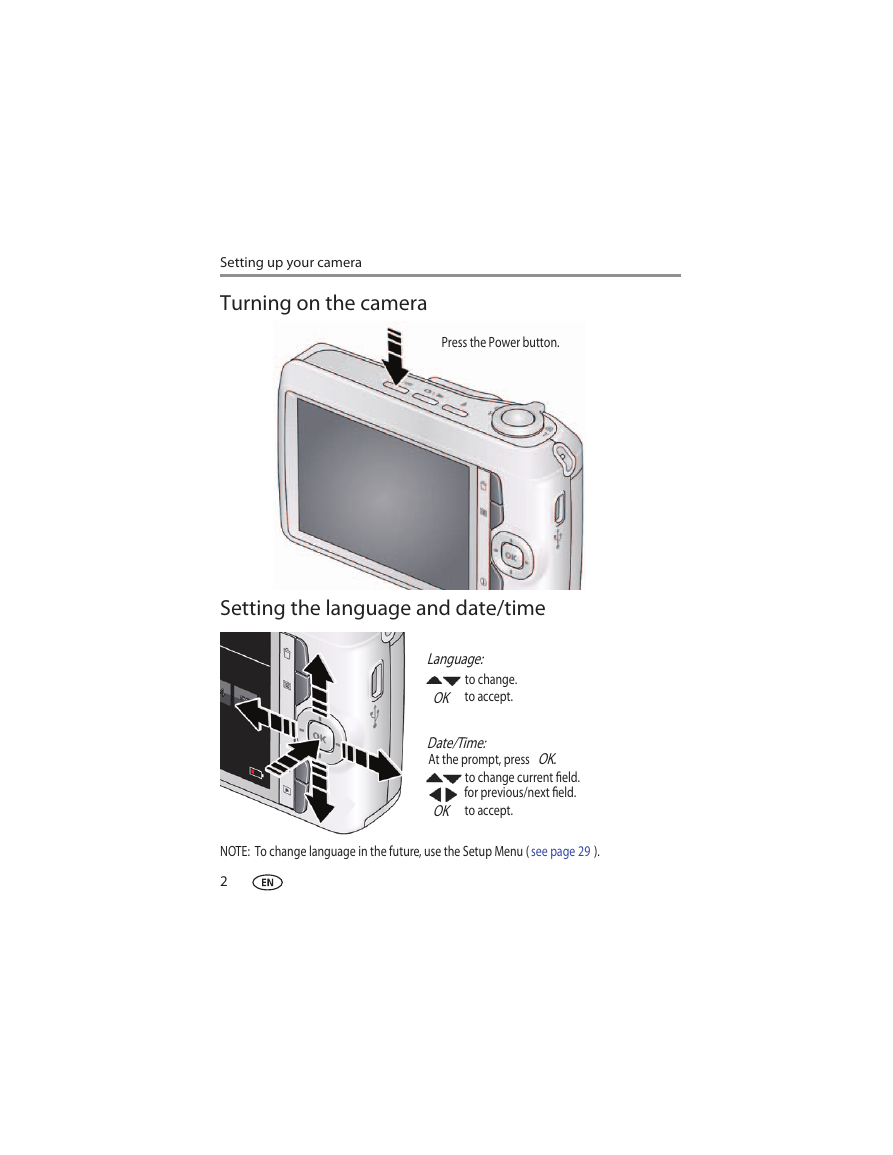
Turning on the camera
Press the Power button.
Setting the language and date/time
Language:
to change.
OK to accept.
Date/Time:
At the prompt, press OK.
to change current eld.
for previous/next eld.
OK to accept.
NOTE: To change language in the future, use the Setup Menu ( see page 29 ).
2
�




 2023年江西萍乡中考道德与法治真题及答案.doc
 2012年重庆南川中考生物真题及答案.doc
 2013年江西师范大学地理学综合及文艺理论基础考研真题.doc
 2020年四川甘孜小升初语文真题及答案I卷.doc
 2020年注册岩土工程师专业基础考试真题及答案.doc
 2023-2024学年福建省厦门市九年级上学期数学月考试题及答案.doc
 2021-2022学年辽宁省沈阳市大东区九年级上学期语文期末试题及答案.doc
 2022-2023学年北京东城区初三第一学期物理期末试卷及答案.doc
 2018上半年江西教师资格初中地理学科知识与教学能力真题及答案.doc
 2012年河北国家公务员申论考试真题及答案-省级.doc
 2020-2021学年江苏省扬州市江都区邵樊片九年级上学期数学第一次质量检测试题及答案.doc
 2022下半年黑龙江教师资格证中学综合素质真题及答案.doc