logo资料库

SONY索尼数码摄像机-HDW-F900R说明书.pdf

第1页 / 共176页
第2页 / 共176页
第3页 / 共176页
第4页 / 共176页
第5页 / 共176页
第6页 / 共176页
第7页 / 共176页
第8页 / 共176页
资料共176页,剩余部分请下载后查看
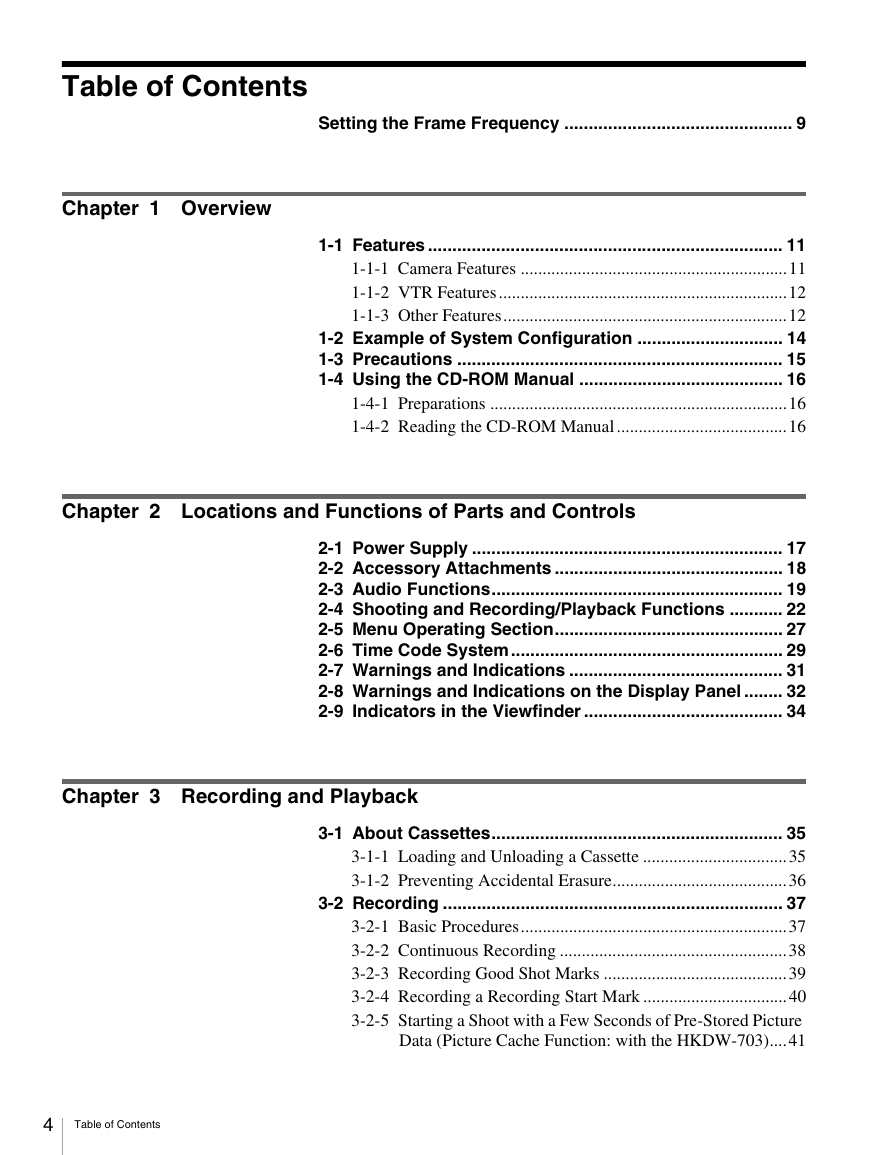
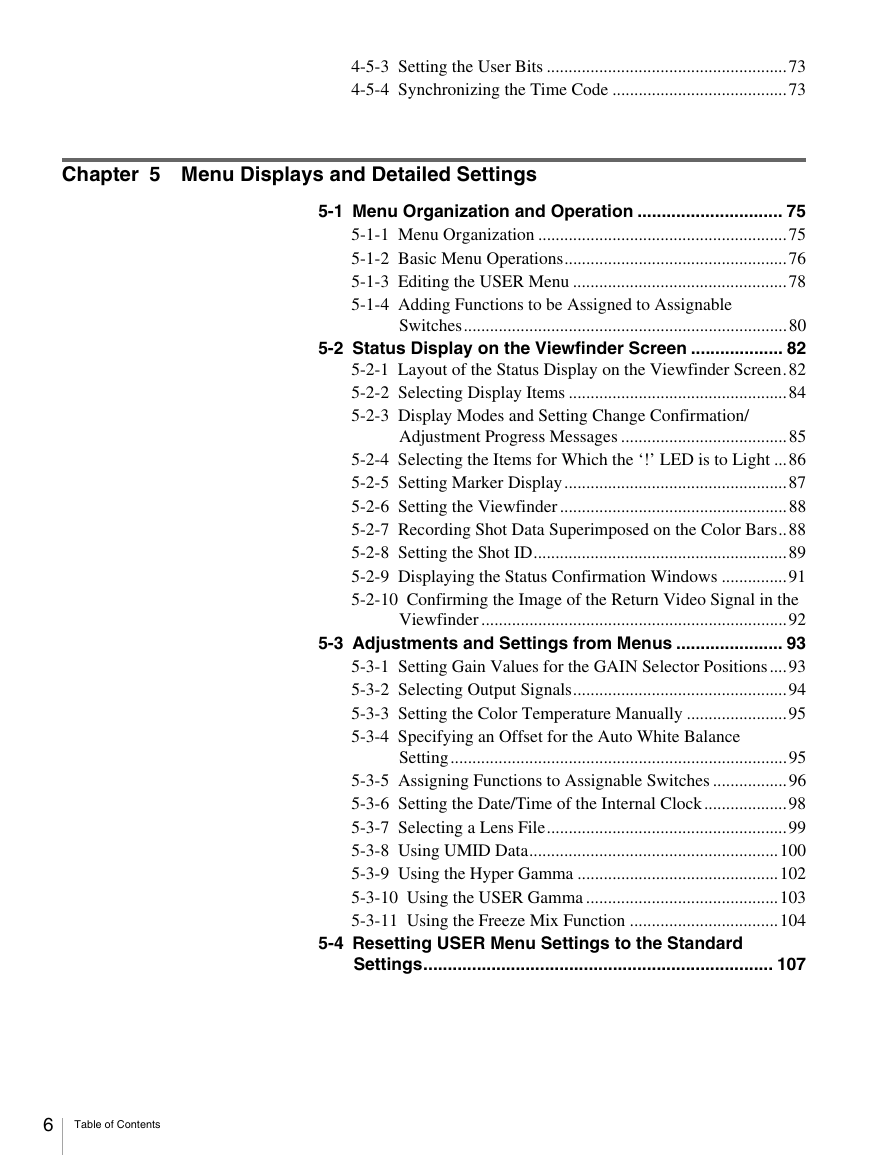
Table of Contents
Setting the Frame Frequency
Chapter 1 Overview
1-1 Features
1-1-1 Camera Features
1-1-2 VTR Features
1-1-3 Other Features
1-2 Example of System Configuration
1-3 Precautions
1-4 Using the CD-ROM Manual
1-4-1 Preparations
1-4-2 Reading the CD-ROM Manual
Chapter 2 Locations and Functions of Parts and Controls
2-1 Power Supply
2-2 Accessory Attachments
2-3 Audio Functions
2-4 Shooting and Recording/Playback Functions
2-5 Menu Operating Section
2-6 Time Code System
2-7 Warnings and Indications
2-8 Warnings and Indications on the Display Panel
2-9 Indicators in the Viewfinder
Chapter 3 Recording and Playback
3-1 About Cassettes
3-1-1 Loading and Unloading a Cassette
3-1-2 Preventing Accidental Erasure
3-2 Recording
3-2-1 Basic Procedures
3-2-2 Continuous Recording
3-2-3 Recording Good Shot Marks
3-2-4 Recording a Recording Start Mark
3-2-5 Starting a Shoot with a Few Seconds of Pre-Stored Picture Data (Picture Cache Function: with the HKDW-703)
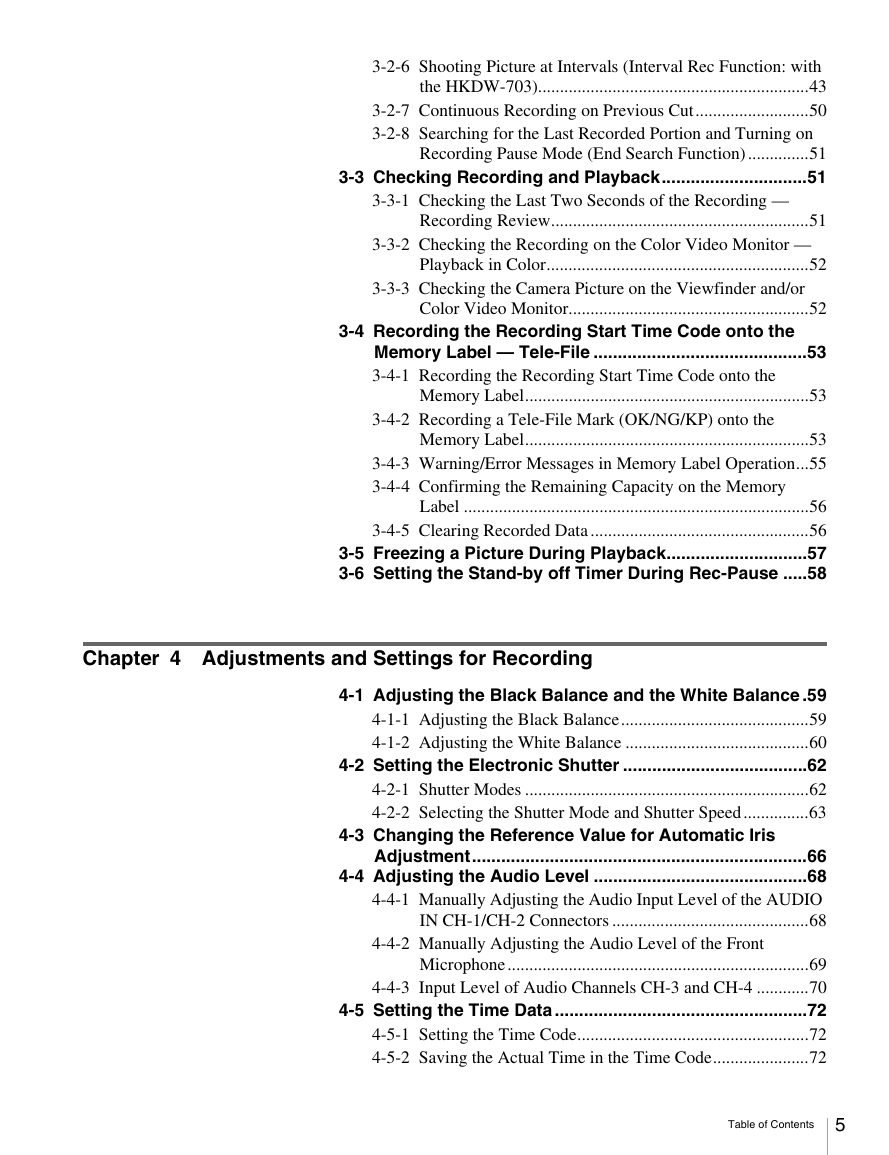
3-2-6 Shooting Picture at Intervals (Interval Rec Function: with the HKDW-703)
3-2-7 Continuous Recording on Previous Cut
3-2-8 Searching for the Last Recorded Portion and Turning on Recording Pause Mode (End Search Function)
3-3 Checking Recording and Playback
3-3-1 Checking the Last Two Seconds of the Recording - Recording Review
3-3-2 Checking the Recording on the Color Video Monitor - Playback in Color
3-3-3 Checking the Camera Picture on the Viewfinder and/or Color Video Monitor
3-4 Recording the Recording Start Time Code onto the Memory Label - Tele-File
3-4-1 Recording the Recording Start Time Code onto the Memory Label
3-4-2 Recording a Tele-File Mark (OK/NG/KP) onto the Memory Label
3-4-3 Warning/Error Messages in Memory Label Operation
3-4-4 Confirming the Remaining Capacity on the Memory Label
3-4-5 Clearing Recorded Data
3-5 Freezing a Picture During Playback
3-6 Setting the Stand-by off Timer During Rec- Pause
Chapter 4 Adjustments and Settings for Recording
4-1 Adjusting the Black Balance and the White Balance
4-1-1 Adjusting the Black Balance
4-1-2 Adjusting the White Balance
4-2 Setting the Electronic Shutter
4-2-1 Shutter Modes
4-2-2 Selecting the Shutter Mode and Shutter Speed
4-3 Changing the Reference Value for Automatic Iris Adjustment
4-4 Adjusting the Audio Level
4-4-1 Manually Adjusting the Audio Input Level of the AUDIO IN CH-1/ CH-2 Connectors
4-4-2 Manually Adjusting the Audio Level of the Front Microphone
4-4-3 Input Level of Audio Channels CH-3 and CH-4
4-5 Setting the Time Data
4-5-1 Setting the Time Code
4-5-2 Saving the Actual Time in the Time Code
4-5-3 Setting the User Bits
4-5-4 Synchronizing the Time Code
Chapter 5 Menu Displays and Detailed Settings
5-1 Menu Organization and Operation
5-1-1 Menu Organization
5-1-2 Basic Menu Operations
5-1-3 Editing the USER Menu
5-1-4 Adding Functions to be Assigned to Assignable Switches
5-2 Status Display on the Viewfinder Screen
5-2-1 Layout of the Status Display on the Viewfinder Screen
5-2-2 Selecting Display Items
5-2-3 Display Modes and Setting Change Confirmation/Adjustment Progress Messages
5-2-4 Selecting the Items for Which the ‘!’ LED is to Light
5-2-5 Setting Marker Display
5-2-6 Setting the Viewfinder
5-2-7 Recording Shot Data Superimposed on the Color Bars
5-2-8 Setting the Shot ID
5-2-9 Displaying the Status Confirmation Windows
5-2-10 Confirming the Image of the Return Video Signal in the Viewfinder
5-3 Adjustments and Settings from Menus
5-3-1 Setting Gain Values for the GAIN Selector Positions
5-3-2 Selecting Output Signals
5-3-3 Setting the Color Temperature Manually
5-3-4 Specifying an Offset for the Auto White Balance Setting
5-3-5 Assigning Functions to Assignable Switches
5-3-6 Setting the Date/Time of the Internal Clock
5-3-7 Selecting a Lens File
5-3-8 Using UMID Data
5-3-9 Using the Hyper Gamma
5-3-10 Using the USER Gamma
5-3-11 Using the Freeze Mix Function
5-4 Resetting USER Menu Settings to the Standard Settings
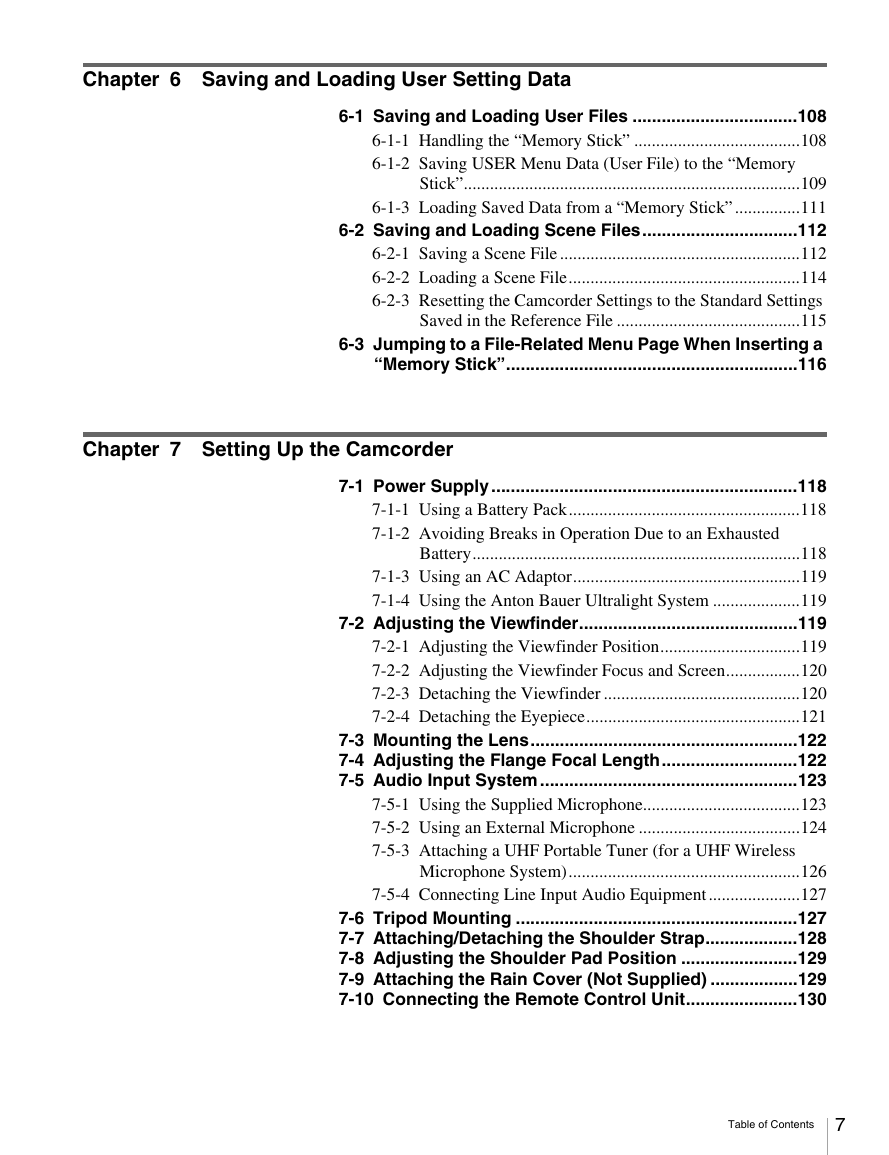
Chapter 6 Saving and Loading User Setting Data
6-1 Saving and Loading User Files
6-1-1 Handling the “Memory Stick”
6-1-2 Saving USER Menu Data (User File) to the “Memory Stick”
6-1-3 Loading Saved Data from a “Memory Stick”
6-2 Saving and Loading Scene Files
6-2-1 Saving a Scene File
6-2-2 Loading a Scene File
6-2-3 Resetting the Camcorder Settings to the Standard Settings Saved in the Reference File
6-3 Jumping to a File- Related Menu Page When Inserting a “Memory Stick”
Chapter 7 Setting Up the Camcorder
7-1 Power Supply
7-1-1 Using a Battery Pack
7-1-2 Avoiding Breaks in Operation Due to an Exhausted Battery
7-1-3 Using an AC Adaptor
7-1-4 Using the Anton Bauer Ultralight System
7-2 Adjusting the Viewfinder
7-2-1 Adjusting the Viewfinder Position
7-2-2 Adjusting the Viewfinder Focus and Screen
7-2-3 Detaching the Viewfinder
7-2-4 Detaching the Eyepiece
7-3 Mounting the Lens
7-4 Adjusting the Flange Focal Length
7-5 Audio Input System
7-5-1 Using the Supplied Microphone
7-5-2 Using an External Microphone
7-5-3 Attaching a UHF Portable Tuner (for a UHF Wireless Microphone System)
7-5-4 Connecting Line Input Audio Equipment
7-6 Tripod Mounting
7-7 Attaching/Detaching the Shoulder Strap
7-8 Adjusting the Shoulder Pad Position
7-9 Attaching the Rain Cover (Not Supplied)
7-10 Connecting the Remote Control Unit
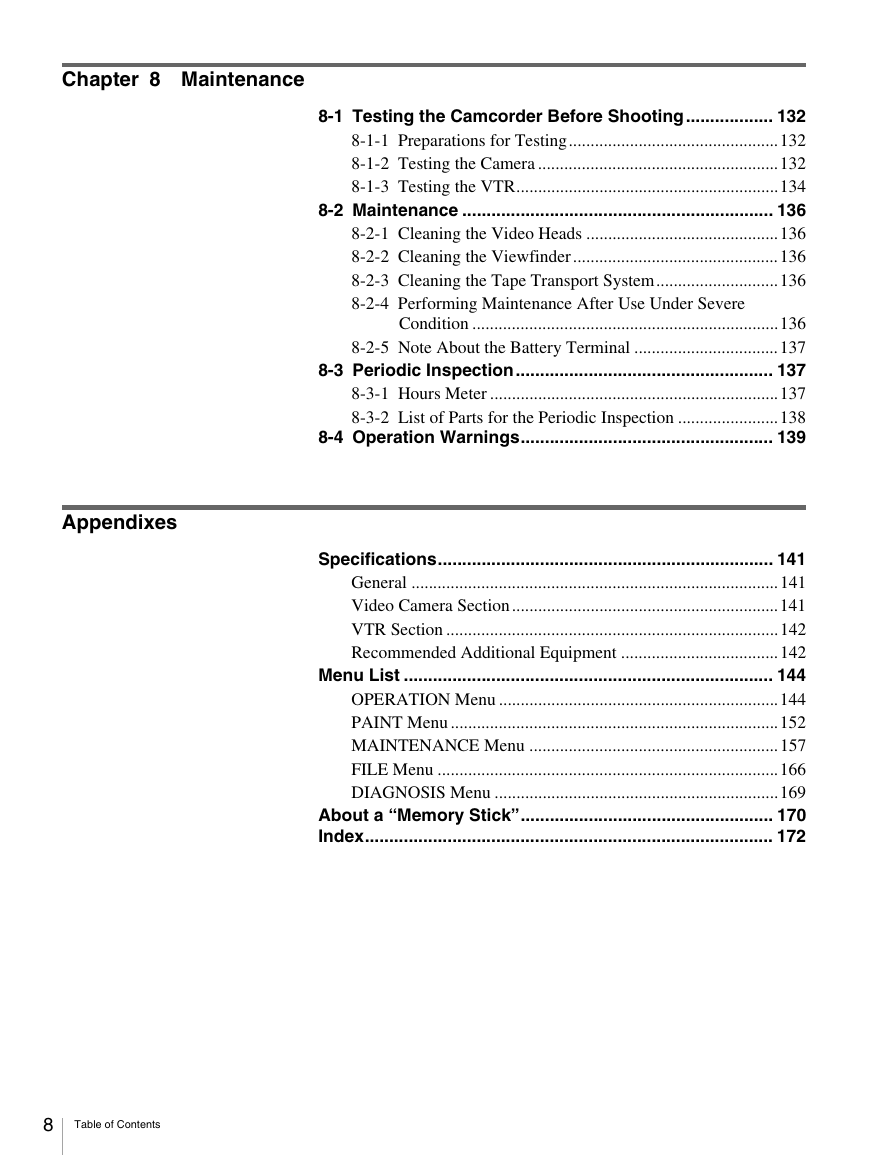
Chapter 8 Maintenance
8-1 Testing the Camcorder Before Shooting
8-1-1 Preparations for Testing
8-1-2 Testing the Camera
8-1-3 Testing the VTR
8-2 Maintenance
8-2-1 Cleaning the Video Heads
8-2-2 Cleaning the Viewfinder
8-2-3 Cleaning the Tape Transport System
8-2-4 Performing Maintenance After Use Under Severe Condition
8-2-5 Note About the Battery Terminal
8-3 Periodic Inspection
8-3-1 Hours Meter
8-3-2 List of Parts for the Periodic Inspection
8-4 Operation Warnings
Appendixes
Specifications
General
Video Camera Section
VTR Section
Recommended Additional Equipment
Menu List
OPERATION Menu
PAINT Menu
MAINTENANCE Menu
FILE Menu
DIAGNOSIS Menu
About a “Memory Stick”
Index
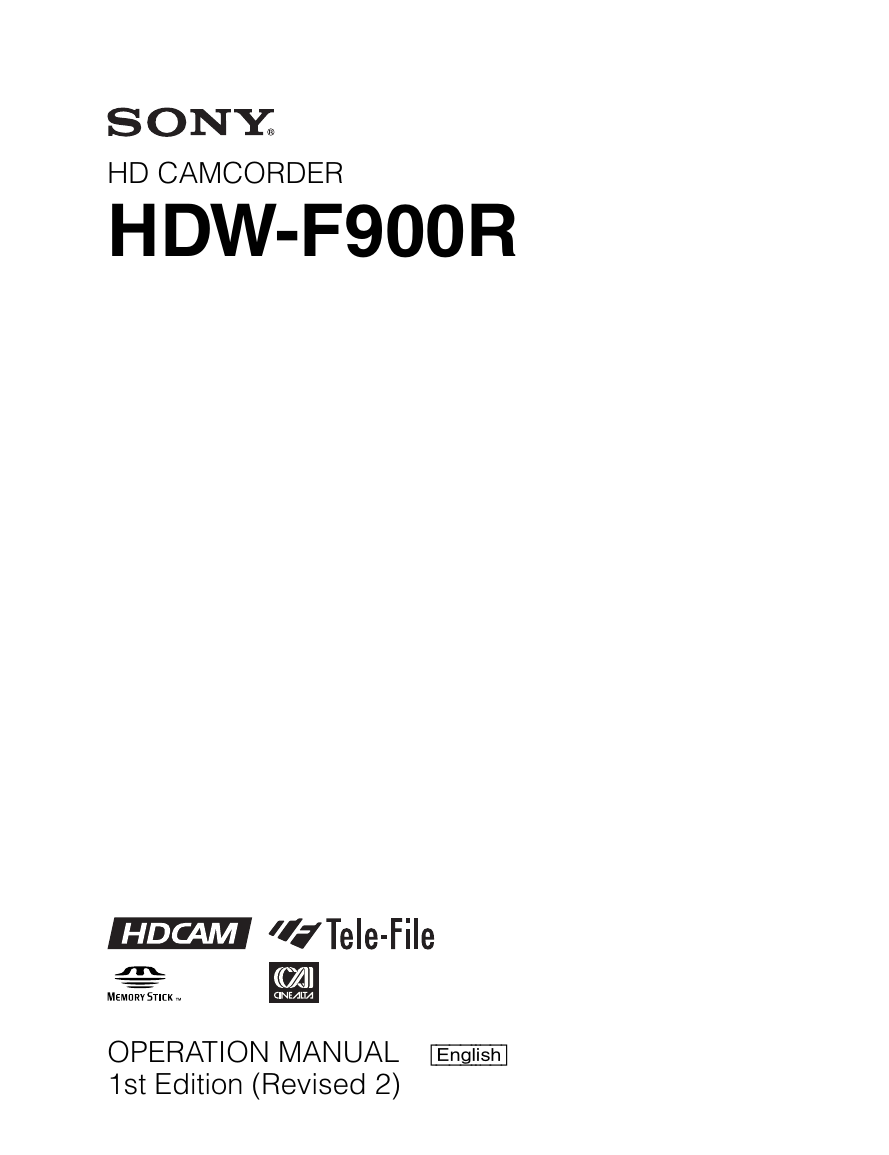
HD CAMCORDER HDW-F900R OPERATION MANUAL [English] 1st Edition (Revised 2)
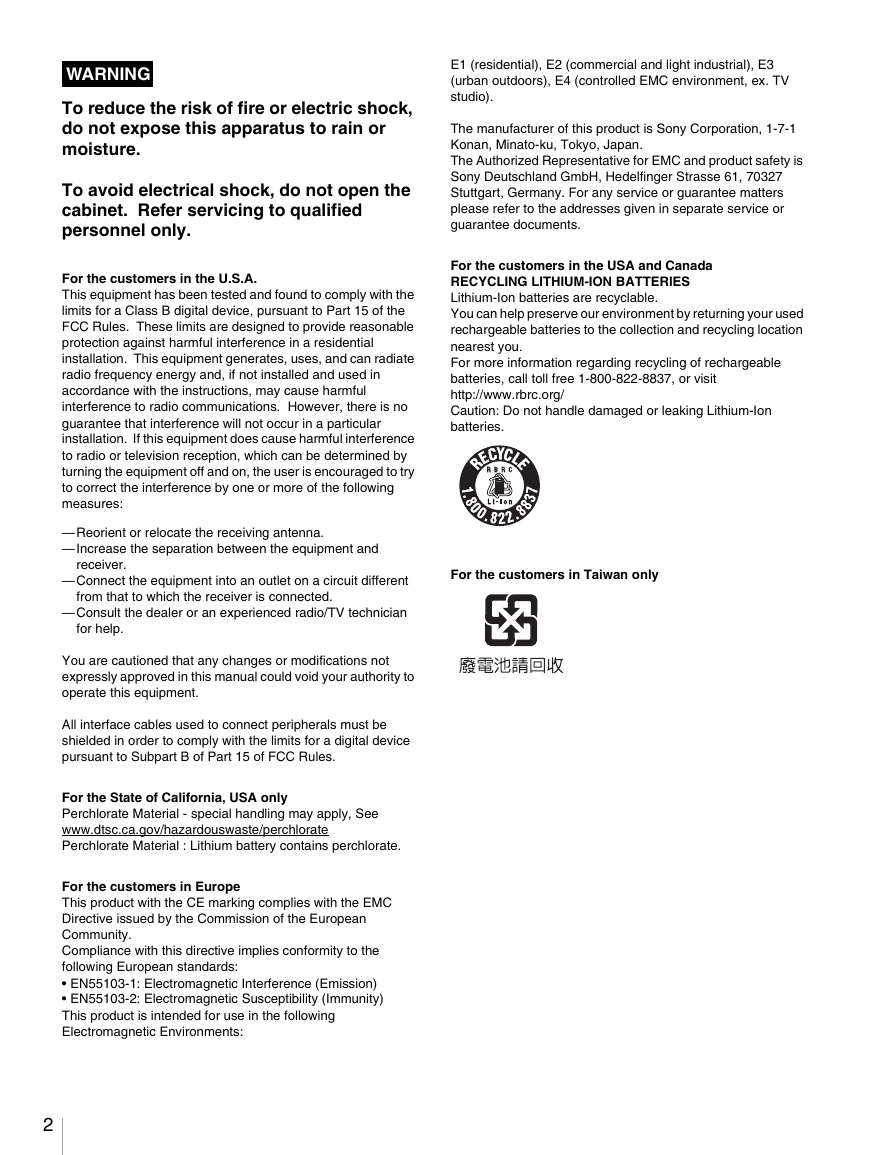
E1 (residential), E2 (commercial and light industrial), E3 (urban outdoors), E4 (controlled EMC environment, ex. TV studio). The manufacturer of this product is Sony Corporation, 1-7-1 Konan, Minato-ku, Tokyo, Japan. The Authorized Representative for EMC and product safety is Sony Deutschland GmbH, Hedelfinger Strasse 61, 70327 Stuttgart, Germany. For any service or guarantee matters please refer to the addresses given in separate service or guarantee documents. For the customers in the USA and Canada RECYCLING LITHIUM-ION BATTERIES Lithium-Ion batteries are recyclable. You can help preserve our environment by returning your used rechargeable batteries to the collection and recycling location nearest you. For more information regarding recycling of rechargeable batteries, call toll free 1-800-822-8837, or visit http://www.rbrc.org/ Caution: Do not handle damaged or leaking Lithium-Ion batteries. For the customers in Taiwan only WARNING To reduce the risk of fire or electric shock, do not expose this apparatus to rain or moisture. To avoid electrical shock, do not open the cabinet. Refer servicing to qualified personnel only. For the customers in the U.S.A. This equipment has been tested and found to comply with the limits for a Class B digital device, pursuant to Part 15 of the FCC Rules. These limits are designed to provide reasonable protection against harmful interference in a residential installation. This equipment generates, uses, and can radiate radio frequency energy and, if not installed and used in accordance with the instructions, may cause harmful interference to radio communications. However, there is no guarantee that interference will not occur in a particular installation. If this equipment does cause harmful interference to radio or television reception, which can be determined by turning the equipment off and on, the user is encouraged to try to correct the interference by one or more of the following measures: —Reorient or relocate the receiving antenna. —Increase the separation between the equipment and receiver. —Connect the equipment into an outlet on a circuit different from that to which the receiver is connected. —Consult the dealer or an experienced radio/TV technician for help. You are cautioned that any changes or modifications not expressly approved in this manual could void your authority to operate this equipment. All interface cables used to connect peripherals must be shielded in order to comply with the limits for a digital device pursuant to Subpart B of Part 15 of FCC Rules. For the State of California, USA only Perchlorate Material - special handling may apply, See www.dtsc.ca.gov/hazardouswaste/perchlorate Perchlorate Material : Lithium battery contains perchlorate. For the customers in Europe This product with the CE marking complies with the EMC Directive issued by the Commission of the European Community. Compliance with this directive implies conformity to the following European standards: EN55103-1: Electromagnetic Interference (Emission) EN55103-2: Electromagnetic Susceptibility (Immunity) This product is intended for use in the following Electromagnetic Environments: 2
AVERTISSEMENT WARNUNG Um die Gefahr von Bränden oder elektrischen Schlägen zu verringern, darf dieses Gerät nicht Regen oder Feuchtigkeit ausgesetzt werden. Um einen elektrischen Schlag zu vermeiden, darf das Gehäuse nicht geöffnet werden. Überlassen Sie Wartungsarbeiten stets nur qualifiziertem Fachpersonal. Für Kunden in Europa Dieses Produkt besitzt die CE-Kennzeichnung und erfüllt die EMV-Richtlinie der EG-Kommission. Angewandte Normen: EN55103-1: Elektromagnetische Verträglichkeit (Störaussendung) EN55103-2: Elektromagnetische Verträglichkeit (Störfestigkeit) Für die folgenden elektromagnetischen Umgebungen: E1 (Wohnbereich), E2 (kommerzieller und in beschränktem Maße industrieller Bereich), E3 (Stadtbereich im Freien) und E4 (kontrollierter EMVBereich, z.B. Fernsehstudio). Der Hersteller dieses Produkts ist Sony Corporation, 1-7-1 Konan, Minato-ku, Tokyo, Japan. Der autorisierte Repräsentant für EMV und Produktsicherheit ist Sony Deutschland GmbH, Hedelfinger Strasse 61, 70327 Stuttgart, Deutschland. Bei jeglichen Angelegenheiten in Bezug auf Kundendienst oder Garantie wenden Sie sich bitte an die in den separaten Kundendienst- oder Garantiedokumenten aufgeführten Anschriften. Afin de réduire les risques d’incendie ou d’électrocution, ne pas exposer cet appareil à la pluie ou à l’humidité. Afin d’écarter tout risque d’électrocution, garder le coffret fermé. Ne confier l’entretien de l’appareil qu’à un personnel qualifié. Pour les clients européens Ce produit portant la marque CE est conforme à la Directive sur la compatibilité électromagnétique (EMC) émise par la Commission de la Communauté européenne. La conformité à cette directive implique la conformité aux normes européennes suivantes : EN55103-1 : Interférences électromagnétiques (émission) EN55103-2 : Sensibilité électromagnétique (immunité) Ce produit est prévu pour être utilisé dans les environnements électromagnétiques suivants : E1 (résidentiel), E2 (commercial et industrie légère), E3 (urbain extérieur) et E4 (environnement EMC contrôlé, ex. studio de télévision). Le fabricant de ce produit est Sony Corporation, 1-7-1 Konan, Minato-ku, Tokyo, Japon. Le représentant autorisé pour EMC et la sécurité des produits est Sony Deutschland GmbH, Hedelfinger Strasse 61, 70327 Stuttgart, Allemagne. Pour toute question concernant le service ou lagarantie, veuillez consulter les adresses indiquées dans les documents de service ou de garantie séparés. Pour les utilisateurs aux Etats-Unis et au Canada. RECYCLAGE DES ACCUMULATEURS AUX IONS DE LITHIUM Les accumulateurs aux ions de lithium sont recyclables. Vous pouvez contribuer à préserver l’environnement en rapportant les piles usées dans un point de collection et recyclage le plus proche. Pour plus d’informations sur le recyclage des accumulateurs, téléphonez le numéro gratuit 1-800-822-8837 (Etats-Unis et Canada uniquement), ou visitez http://www.rbrc.org/ Avertissment: Ne pas utiliser des accumulateurs aux ions de lithium qui sont endommagées ou qui fuient. 3
Table of Contents Chapter 1 Overview Setting the Frame Frequency ............................................... 9 1-1 Features ......................................................................... 11 1-1-1 Camera Features .............................................................11 1-1-2 VTR Features..................................................................12 1-1-3 Other Features.................................................................12 1-2 Example of System Configuration .............................. 14 1-3 Precautions ................................................................... 15 1-4 Using the CD-ROM Manual .......................................... 16 1-4-1 Preparations ....................................................................16 1-4-2 Reading the CD-ROM Manual .......................................16 Chapter 2 Locations and Functions of Parts and Controls 2-1 Power Supply ................................................................ 17 2-2 Accessory Attachments ............................................... 18 2-3 Audio Functions............................................................ 19 2-4 Shooting and Recording/Playback Functions ........... 22 2-5 Menu Operating Section............................................... 27 2-6 Time Code System........................................................ 29 2-7 Warnings and Indications ............................................ 31 2-8 Warnings and Indications on the Display Panel ........ 32 2-9 Indicators in the Viewfinder ......................................... 34 Chapter 3 Recording and Playback 3-1 About Cassettes............................................................ 35 3-1-1 Loading and Unloading a Cassette .................................35 3-1-2 Preventing Accidental Erasure........................................36 3-2 Recording ...................................................................... 37 3-2-1 Basic Procedures.............................................................37 3-2-2 Continuous Recording ....................................................38 3-2-3 Recording Good Shot Marks ..........................................39 3-2-4 Recording a Recording Start Mark .................................40 3-2-5 Starting a Shoot with a Few Seconds of Pre-Stored Picture Data (Picture Cache Function: with the HKDW-703)....41 4 Table of Contents
3-2-6 Shooting Picture at Intervals (Interval Rec Function: with the HKDW-703)..............................................................43 3-2-7 Continuous Recording on Previous Cut..........................50 3-2-8 Searching for the Last Recorded Portion and Turning on Recording Pause Mode (End Search Function) ..............51 3-3 Checking Recording and Playback..............................51 3-3-1 Checking the Last Two Seconds of the Recording — Recording Review...........................................................51 3-3-2 Checking the Recording on the Color Video Monitor — Playback in Color............................................................52 3-3-3 Checking the Camera Picture on the Viewfinder and/or Color Video Monitor.......................................................52 3-4 Recording the Recording Start Time Code onto the Memory Label — Tele-File ............................................53 3-4-1 Recording the Recording Start Time Code onto the Memory Label.................................................................53 3-4-2 Recording a Tele-File Mark (OK/NG/KP) onto the Memory Label.................................................................53 3-4-3 Warning/Error Messages in Memory Label Operation...55 3-4-4 Confirming the Remaining Capacity on the Memory Label ...............................................................................56 3-4-5 Clearing Recorded Data ..................................................56 3-5 Freezing a Picture During Playback.............................57 3-6 Setting the Stand-by off Timer During Rec-Pause .....58 Chapter 4 Adjustments and Settings for Recording 4-1 Adjusting the Black Balance and the White Balance .59 4-1-1 Adjusting the Black Balance...........................................59 4-1-2 Adjusting the White Balance ..........................................60 4-2 Setting the Electronic Shutter ......................................62 4-2-1 Shutter Modes .................................................................62 4-2-2 Selecting the Shutter Mode and Shutter Speed...............63 4-3 Changing the Reference Value for Automatic Iris Adjustment.....................................................................66 4-4 Adjusting the Audio Level ............................................68 4-4-1 Manually Adjusting the Audio Input Level of the AUDIO IN CH-1/CH-2 Connectors .............................................68 4-4-2 Manually Adjusting the Audio Level of the Front Microphone .....................................................................69 4-4-3 Input Level of Audio Channels CH-3 and CH-4 ............70 4-5 Setting the Time Data ....................................................72 4-5-1 Setting the Time Code.....................................................72 4-5-2 Saving the Actual Time in the Time Code......................72 Table of Contents 5
4-5-3 Setting the User Bits .......................................................73 4-5-4 Synchronizing the Time Code ........................................73 Chapter 5 Menu Displays and Detailed Settings 5-1 Menu Organization and Operation .............................. 75 5-1-1 Menu Organization .........................................................75 5-1-2 Basic Menu Operations...................................................76 5-1-3 Editing the USER Menu .................................................78 5-1-4 Adding Functions to be Assigned to Assignable Switches..........................................................................80 5-2 Status Display on the Viewfinder Screen ................... 82 5-2-1 Layout of the Status Display on the Viewfinder Screen.82 5-2-2 Selecting Display Items ..................................................84 5-2-3 Display Modes and Setting Change Confirmation/ Adjustment Progress Messages ......................................85 5-2-4 Selecting the Items for Which the ‘!’ LED is to Light ...86 5-2-5 Setting Marker Display...................................................87 5-2-6 Setting the Viewfinder ....................................................88 5-2-7 Recording Shot Data Superimposed on the Color Bars..88 5-2-8 Setting the Shot ID..........................................................89 5-2-9 Displaying the Status Confirmation Windows ...............91 5-2-10 Confirming the Image of the Return Video Signal in the Viewfinder ......................................................................92 5-3 Adjustments and Settings from Menus ...................... 93 5-3-1 Setting Gain Values for the GAIN Selector Positions....93 5-3-2 Selecting Output Signals.................................................94 5-3-3 Setting the Color Temperature Manually .......................95 5-3-4 Specifying an Offset for the Auto White Balance Setting.............................................................................95 5-3-5 Assigning Functions to Assignable Switches .................96 5-3-6 Setting the Date/Time of the Internal Clock...................98 5-3-7 Selecting a Lens File.......................................................99 5-3-8 Using UMID Data.........................................................100 5-3-9 Using the Hyper Gamma ..............................................102 5-3-10 Using the USER Gamma ............................................103 5-3-11 Using the Freeze Mix Function ..................................104 5-4 Resetting USER Menu Settings to the Standard Settings........................................................................ 107 6 Table of Contents
Chapter 6 Saving and Loading User Setting Data 6-1 Saving and Loading User Files ..................................108 6-1-1 Handling the “Memory Stick” ......................................108 6-1-2 Saving USER Menu Data (User File) to the “Memory Stick”.............................................................................109 6-1-3 Loading Saved Data from a “Memory Stick” ...............111 6-2 Saving and Loading Scene Files................................112 6-2-1 Saving a Scene File .......................................................112 6-2-2 Loading a Scene File.....................................................114 6-2-3 Resetting the Camcorder Settings to the Standard Settings Saved in the Reference File ..........................................115 6-3 Jumping to a File-Related Menu Page When Inserting a “Memory Stick”............................................................116 Chapter 7 Setting Up the Camcorder 7-1 Power Supply ...............................................................118 7-1-1 Using a Battery Pack.....................................................118 7-1-2 Avoiding Breaks in Operation Due to an Exhausted Battery...........................................................................118 7-1-3 Using an AC Adaptor....................................................119 7-1-4 Using the Anton Bauer Ultralight System ....................119 7-2 Adjusting the Viewfinder.............................................119 7-2-1 Adjusting the Viewfinder Position................................119 7-2-2 Adjusting the Viewfinder Focus and Screen.................120 7-2-3 Detaching the Viewfinder .............................................120 7-2-4 Detaching the Eyepiece.................................................121 7-3 Mounting the Lens.......................................................122 7-4 Adjusting the Flange Focal Length............................122 7-5 Audio Input System .....................................................123 7-5-1 Using the Supplied Microphone....................................123 7-5-2 Using an External Microphone .....................................124 7-5-3 Attaching a UHF Portable Tuner (for a UHF Wireless Microphone System).....................................................126 7-5-4 Connecting Line Input Audio Equipment .....................127 7-6 Tripod Mounting ..........................................................127 7-7 Attaching/Detaching the Shoulder Strap...................128 7-8 Adjusting the Shoulder Pad Position ........................129 7-9 Attaching the Rain Cover (Not Supplied) ..................129 7-10 Connecting the Remote Control Unit.......................130 Table of Contents 7
8-1 Testing the Camcorder Before Shooting.................. 132 8-1-1 Preparations for Testing................................................132 8-1-2 Testing the Camera .......................................................132 8-1-3 Testing the VTR............................................................134 8-2 Maintenance ................................................................ 136 8-2-1 Cleaning the Video Heads ............................................136 8-2-2 Cleaning the Viewfinder...............................................136 8-2-3 Cleaning the Tape Transport System............................136 8-2-4 Performing Maintenance After Use Under Severe Condition ......................................................................136 8-2-5 Note About the Battery Terminal .................................137 8-3 Periodic Inspection..................................................... 137 8-3-1 Hours Meter ..................................................................137 8-3-2 List of Parts for the Periodic Inspection .......................138 8-4 Operation Warnings.................................................... 139 Specifications..................................................................... 141 General ....................................................................................141 Video Camera Section.............................................................141 VTR Section ............................................................................142 Recommended Additional Equipment ....................................142 Menu List ............................................................................ 144 OPERATION Menu ................................................................144 PAINT Menu ...........................................................................152 MAINTENANCE Menu .........................................................157 FILE Menu ..............................................................................166 DIAGNOSIS Menu .................................................................169 About a “Memory Stick”.................................................... 170 Index.................................................................................... 172 Chapter 8 Maintenance Appendixes 8 Table of Contents
分享到:
收藏