你的第一个双相机应用程序
�
Repeating what you did in first session
Add 2nd Display
Add Label & Text
Format the HMI
• Locate part with PatMax and Read ID Code
2 | Confidential © 2012 Cognex Corporation
�
Steps to do
1.
Add another Camera Device for Image acquisition
2.
3.
4.
5.
Specify Image Database
Add device to a sequence
Add a VisionPro ToolBlock
Connect Camera Device with ToolBlock
Add IDMax Tool to ToolBlock
Setup IDMax Tool
Export IDMax Decoded String out of ToolBlock
6. Assign Tag to Decoded String
7. Draw HMI
Add Display, Command Button, Label, Text Box
Connect HMI elements with Tags / Results
Fine Tune the layout on the screen
8.
9.
10. Run the application
3 | Confidential © 2012 Cognex Corporation
�
Now it’s your turn
4 | Confidential © 2012 Cognex Corporation
�
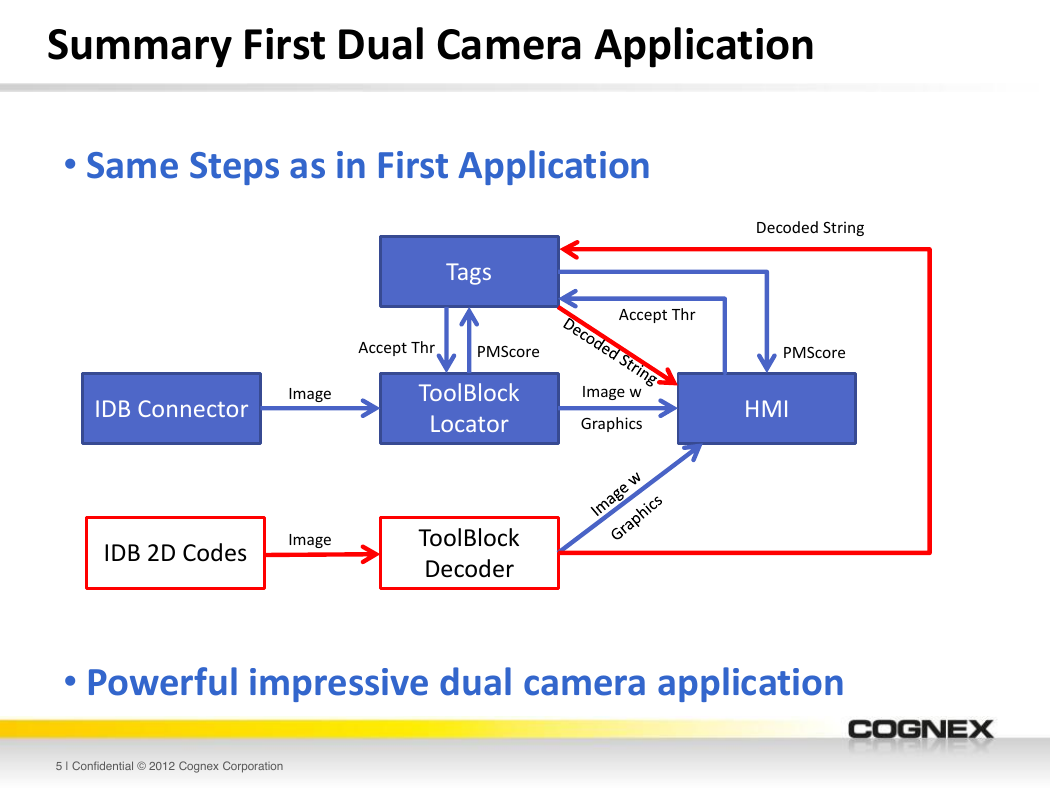
Summary First Dual Camera Application
• Same Steps as in First Application
IDB Connector
IDB 2D Codes
Decoded String
Tags
Accept Thr
Accept Thr
PMScore
ToolBlock
Locator
Image w
Graphics
PMScore
HMI
ToolBlock
Decoder
Image
Image
• Powerful impressive dual camera application
5 | Confidential © 2012 Cognex Corporation
�
Let’s take a look at the supported
Acquisition Models
�
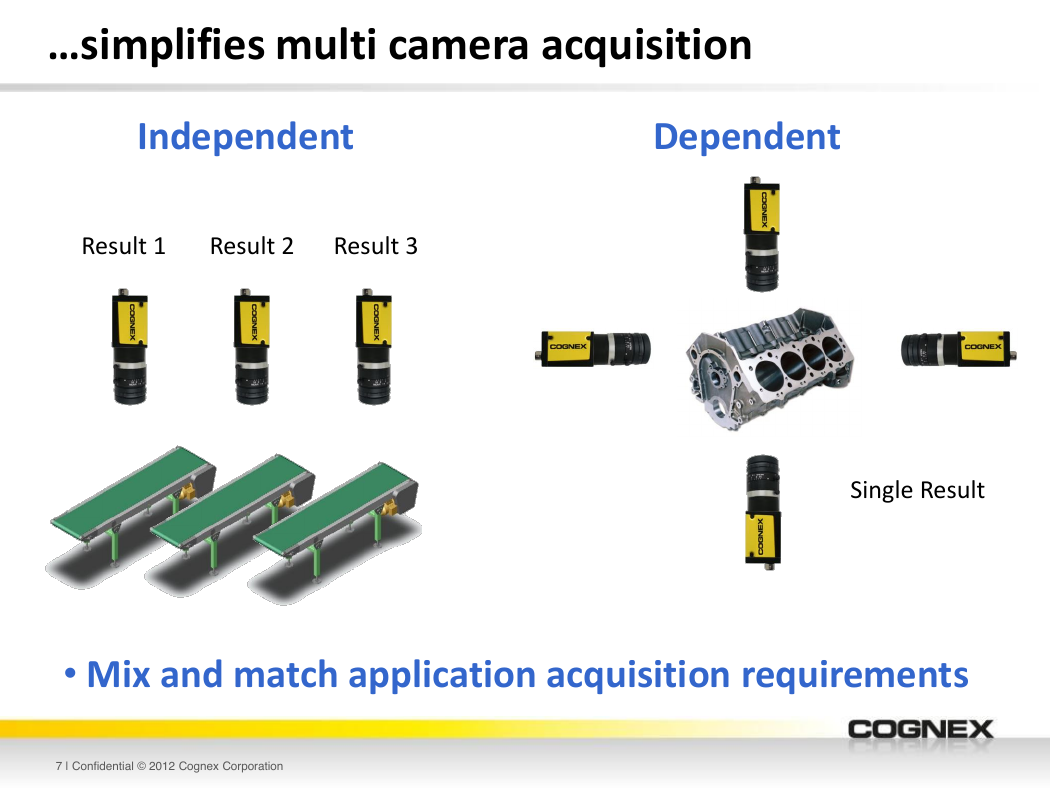
…simplifies multi camera acquisition
Independent
Dependent
Result 1
Result 2
Result 3
Single Result
• Mix and match application acquisition requirements
7 | Confidential © 2012 Cognex Corporation
�
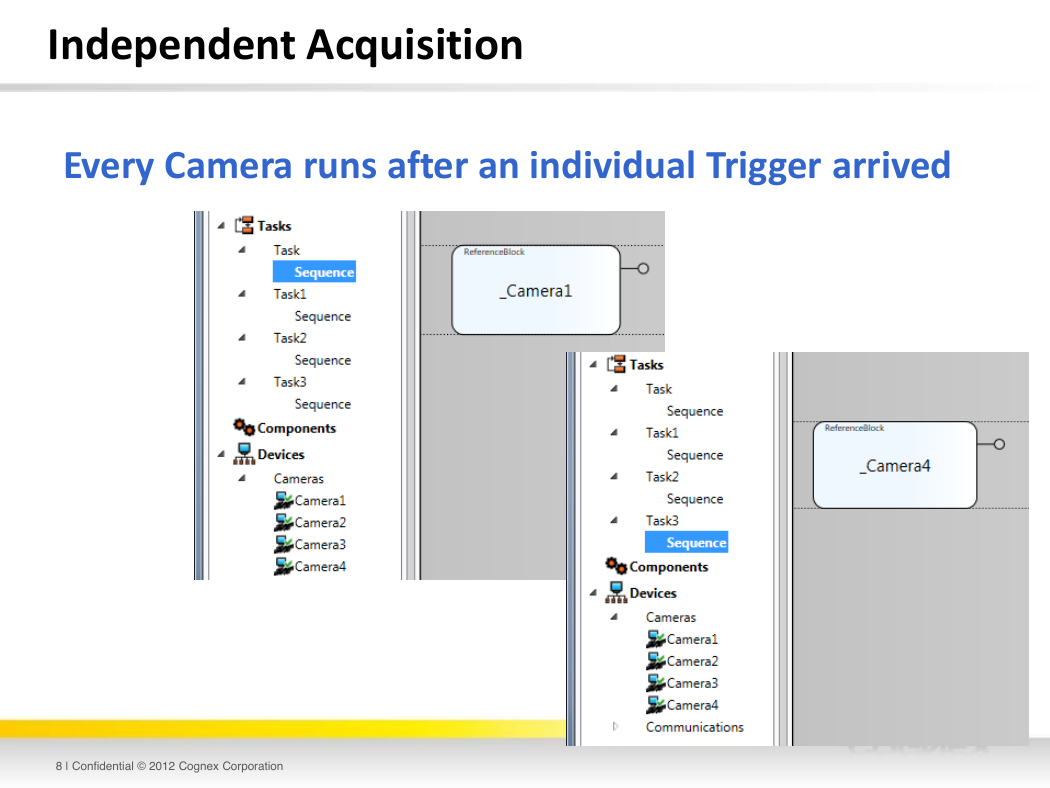
Independent Acquisition
Every Camera runs after an individual Trigger arrived
8 | Confidential © 2012 Cognex Corporation
�






 2023年江西萍乡中考道德与法治真题及答案.doc
 2012年重庆南川中考生物真题及答案.doc
 2013年江西师范大学地理学综合及文艺理论基础考研真题.doc
 2020年四川甘孜小升初语文真题及答案I卷.doc
 2020年注册岩土工程师专业基础考试真题及答案.doc
 2023-2024学年福建省厦门市九年级上学期数学月考试题及答案.doc
 2021-2022学年辽宁省沈阳市大东区九年级上学期语文期末试题及答案.doc
 2022-2023学年北京东城区初三第一学期物理期末试卷及答案.doc
 2018上半年江西教师资格初中地理学科知识与教学能力真题及答案.doc
 2012年河北国家公务员申论考试真题及答案-省级.doc
 2020-2021学年江苏省扬州市江都区邵樊片九年级上学期数学第一次质量检测试题及答案.doc
 2022下半年黑龙江教师资格证中学综合素质真题及答案.doc