DV5470
User Manual
Package Contents:
Manual
Camera Pouch
Installation CD
Earbuds
AV Cable
�
CONTENTS
1. NOTICE....................................................................2
2. SETUP .....................................................................3
2.1 BATTERY INSTALLATION...........................................3
2.2 MEMORY CARD.......................................................4
2.3 CONFIGURATION & INSTALLATION .............................4
3. MENU SETUP..........................................................5
4. BASIC FUNCTIONS...............................................10
4.1 VIDEO MODE ........................................................10
4.2 CAMERA MODE.....................................................12
4.3 PLAYBACK ...........................................................18
4.4 MUSIC .................................................................20
4.5 PHOTO PREVIEW ..................................................21
4.6 RECORD (VOICE RECORDING)................................23
5. USB MODE ............................................................23
6. TECHNICAL PARAMETERS:...............................364
1
�
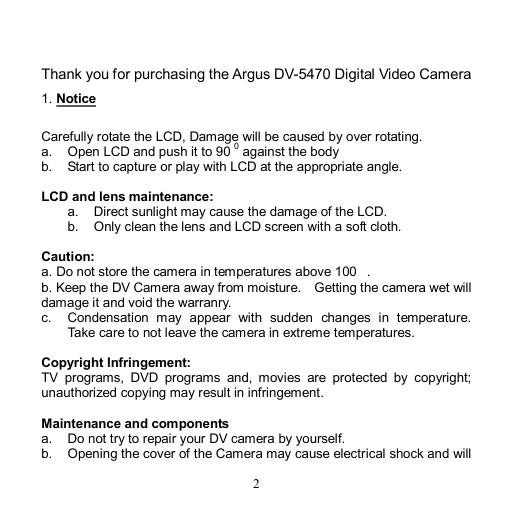
Thank you for purchasing the Argus DV5470 Digital Video Camera
1. Notice
Carefully rotate the LCD, Damage will be caused by over rotating.
a. Open LCD and push it to 90 0 against the body
b. Start to capture or play with LCD at the appropriate angle.
LCD and lens maintenance:
a. Direct sunlight may cause the damage of the LCD.
b. Only clean the lens and LCD screen with a soft cloth.
Caution:
a. Do not store the camera in temperatures above 100 .
b. Keep the DV Camera away from moisture. Getting the camera wet will
damage it and void the warranry.
c. Condensation may appear with sudden changes in temperature.
Take care to not leave the camera in extreme temperatures.
Copyright Infringement:
TV programs, DVD programs and, movies are protected by copyright;
unauthorized copying may result in infringement.
Maintenance and components
a. Do not try to repair your DV camera by yourself.
b. Opening the cover of the Camera may cause electrical shock and will
2
�
void your warrany.
c. Please consult with a qualified technician for maintenance.
d. Any use of the unrecognized components may cause fire, electrical
shock or other dangers.
2. Installation
2.1 installation of the battery
1). Push the battery door at the bottom of the DV.
2). Open the battery door.
3). Inset the battery according to the positive pole.
Notice to the battery security
1). The lithium battery keeps the clock running and internal flash memory
when the AC adapter is unconnected.
2). In the proper condition, the lithium battery usually lasts for 3 hours after
it’s fully charged.
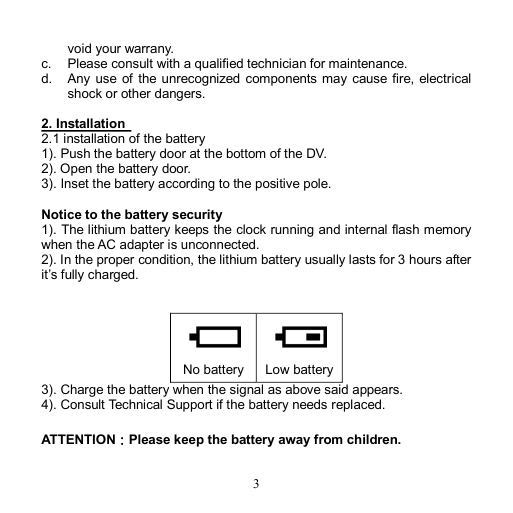
No battery
Low battery
3). Charge the battery when the signal as above said appears.
4). Consult Technical Support if the battery needs replaced.
ATTENTION:Please keep the battery away from children.
3
�
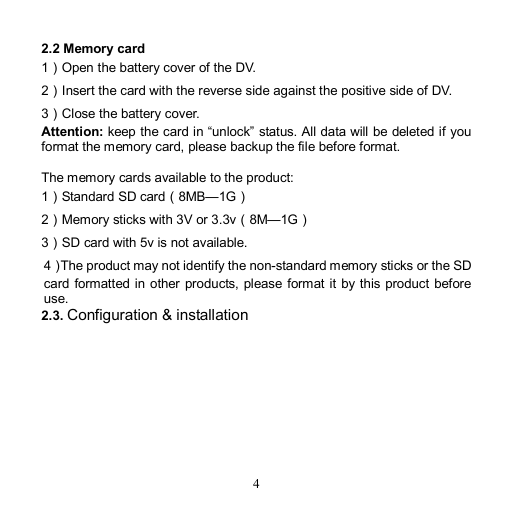
2.2 Memory card
1)Open the battery cover of the DV.
2)Insert the card with the reverse side against the positive side of DV.
3)Close the battery cover.
Attention: keep the card in “unlock” status. All data will be deleted if you
format the memory card, please backup the file before format.
The memory cards available to the product:
1)Standard SD card(8MB—1G)
2)Memory sticks with 3V or 3.3v(8M—1G)
3)SD card with 5v is not available.
4) The product may not identify the nonstandard memory sticks or the SD
card formatted in other products, please format it by this product before
use.
2.3. Configuration & installation
4
�
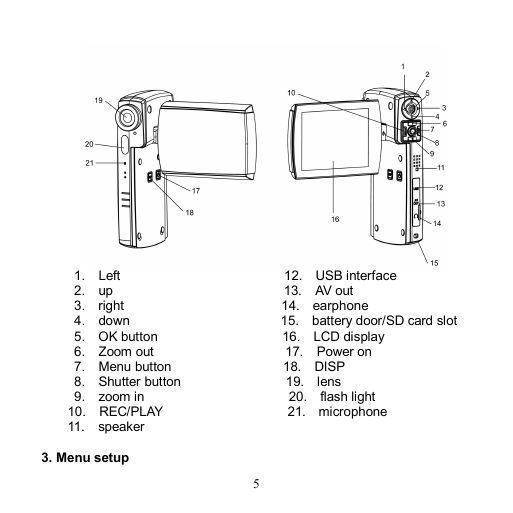
1. Left
2. up
3.
right
4. down
5. OK button
6. Zoom out
7. Menu button
8. Shutter button
9. zoom in
10. REC/PLAY
11. speaker
3. Menu setup
12. USB interface
13. AV out
14. earphone
15. battery door/SD card slot
16. LCD display
17. Power on
18. DISP
lens
19.
20.
flash light
21. microphone
5
�
How to enter menu setup
1). POWER on;
2). Press “REC/PLAY” button,Push the 5way button left/right to select
“setup” icon.
3). Press the “OK” button to enter “setup” menu.
3.1 Flicker frequency
Set the light frequency according to different countries:
1). Power on and press “REC/PLAY” button to enter “Setup” menu;
2). Press the 5way button to select “flicker frequency” icon, then press the
“OK” button to enter;
3). Press the 5way button up/down to select “60HZ” or “50HZ”;
4). Press the “OK” button to select the right frequency.
5). Press “REC/PLAY” or “MENU” button to return to the main menu.
3.2 Time
Please set the time (date / time) before recording, since it will show on the
image or video automatically.
1)Power on and press “REC/PLAY” button to enter “Setup” menu;
2)Push the 5way button left/right to select “time”
3)Press the “OK” button to confirm and enter the time setup;
4)Push the 5way button right/left to select minute, hour, day, month and
year, push 5way button up/down to modify them;
5) Press “REC/PLAY” or “MENU” button to return to the main menu.
6
�
3.3 Beep
1)Power on and press “REC/PLAY” button to enter “Setup” menu;
2)Push the 5way button left/right to select “Beep”;
3)Press the “OK” button to enter the beep setup, select “on” or “off”;
4)Press “REC/PLAY” or “MENU” button to return to the main menu.
Insert the memory card into the card slot and power on;
3.4 Memory card format
1. Set the memory card in “UNLOCK” status;
2.
3. Press “REC/PLAY” button to enter “SETUP” menu;
3. push the 5way button left/right to select “format”;
4. Press the “OK” button to confirm, then press 5way button up/down to
select “Yes” to start formatting;
5. Formatting may lasts 2 – 3 minutes, then return to the submenu
automatically;
7:Press “REC/PLAY” or “MENU” button to return to the main menu.
3.5 Media select
The Internal flash of this model is 128MB, external card is optional.
You can choose to save in the internal flash or external card.
1)Power on and press “REC/PLAY” button to enter “Setup” menu;
2)Push the 5way button up/down to select “media select” icon;
7
�



 2023年江西萍乡中考道德与法治真题及答案.doc
 2012年重庆南川中考生物真题及答案.doc
 2013年江西师范大学地理学综合及文艺理论基础考研真题.doc
 2020年四川甘孜小升初语文真题及答案I卷.doc
 2020年注册岩土工程师专业基础考试真题及答案.doc
 2023-2024学年福建省厦门市九年级上学期数学月考试题及答案.doc
 2021-2022学年辽宁省沈阳市大东区九年级上学期语文期末试题及答案.doc
 2022-2023学年北京东城区初三第一学期物理期末试卷及答案.doc
 2018上半年江西教师资格初中地理学科知识与教学能力真题及答案.doc
 2012年河北国家公务员申论考试真题及答案-省级.doc
 2020-2021学年江苏省扬州市江都区邵樊片九年级上学期数学第一次质量检测试题及答案.doc
 2022下半年黑龙江教师资格证中学综合素质真题及答案.doc