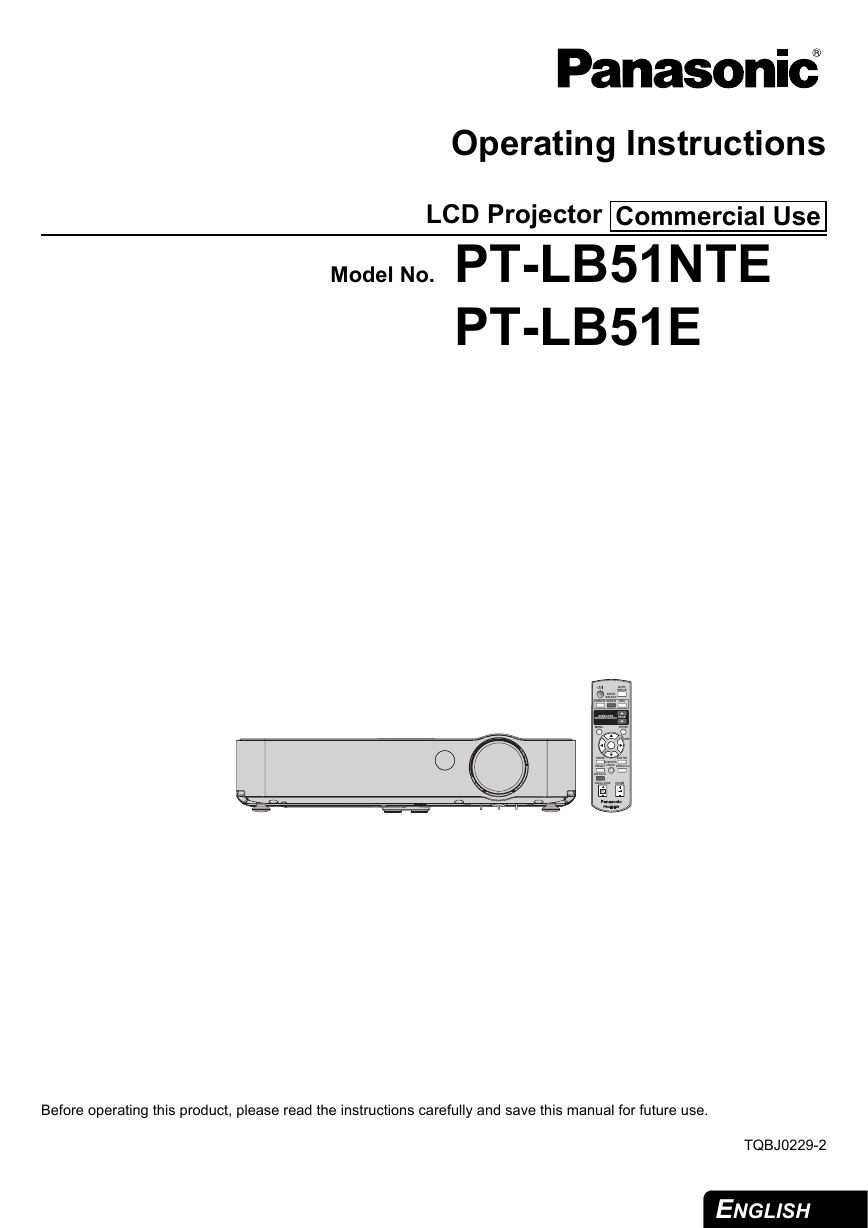
Operating Instructions
LCD Projector
Commercial Use
Model No. PT-LB51NTE
PT-LB51E
AUTO
SETUP
INPUT
SELECT
COMPUTER WIRELESS
VIDEO
WIRELESS
PRESENTATION PAGE
MENU
RETURN
ENTER
FREEZE
SHUTTER
COMPUTER
SEARCH
INDEX-WINDOW
DEFAULT
MULTI-LIVE
DIGITAL ZOOM
VOLUME
Before operating this product, please read the instructions carefully and save this manual for future use.
TQBJ0229-2
ENGLISH
�
I
I
n
f
o
r
m
a
t
i
o
n
m
p
o
r
t
a
n
t
Important Safety Notice
Dear Panasonic Customer:
This instruction booklet provides all the necessary operating information that you might require. We hope it will help
you to get the most out of your new product, and that you will be pleased with your Panasonic LCD projector. The
serial number of your product may be found on its bottom. You should note it in the space provided below and retain
this booklet in case service is required.
Model number:
PT-LB51NTE/PT-LB51E
Serial number:
WARNING:
THIS APPARATUS MUST BE EARTHED.
WARNING:
To prevent damage which may result in fire or shock hazard, do not expose this appliance
to rain or moisture.
Machine Noise Information Ordinance 3. GSGV, January 18, 1991: The sound pressure level at the operator
position is equal or less than 70 dB (A) according to ISO 7779.
WARNING:
1. Remove the plug from the mains socket when this unit is not in use for a prolonged period of time.
2. To prevent electric shock, do not remove cover. No user serviceable parts inside. Refer servicing to qualified
service personnel.
3. Do not remove the earthing pin on the mains plug. This apparatus is equipped with a three prong earthing-
type mains plug. This plug will only fit an earthing-type mains socket. This is a safety feature. If you are unable
to insert the plug into the mains socket, contact an electrician. Do not defeat the purpose of the earthing plug.
CAUTION:
To assure continued compliance, follow the attached installation instructions, which includes using
the provided power cord and shielded interface cables when connecting to computer or peripheral
device. If you use serial port to connect PC for external control of projector, you must use optional
RS-232C serial interface cable with ferrite core. Any unauthorized changes or modifications to this
equipment will void the user’s authority to operate.
Pursuant to at the directive 2004/108/EC, article 9(2)
Panasonic Testing Centre
Panasonic Service Europe, a division of Panasonic Marketing Europe GmbH
Winsbergring 15, 22525 Hamburg, F.R. Germany
ENGLISH - 2
�
Important Safety Notice
Information on Disposal for Users of Waste Electrical & Electronic Equipment (private
households)
This symbol on the products and/or accompanying documents means that used electrical and
electronic products should not be mixed with general household waste.
For proper treatment, recovery and recycling, please take these products to designated collection
points, where they will be accepted on a free of charge basis. Alternatively, in some countries you may
be able to return your products to your local retailer upon the purchase of an equivalent new product.
Disposing of this product correctly will help to save valuable resources and prevent any potential
negative effects on human health and the environment which could otherwise arise from inappropriate
waste handling. Please contact your local authority for further details of your nearest designated collection point.
Penalties may be applicable for incorrect disposal of this waste, in accordance with national legislation.
t
n
a
t
r
o
p
m
n
o
i
t
a
m
r
o
f
n
I
I
For business users in the European Union
If you wish to discard electrical and electronic equipment, please contact your dealer or supplier for further
information.
Information on Disposal in other Countries outside the European Union
This symbol is only valid in the European Union.
If you wish to discard this product, please contact your local authorities or dealer and ask for the correct method of
disposal.
ENGLISH - 3
�
I
I
n
f
o
r
m
a
t
i
o
n
m
p
o
r
t
a
n
t
Declaration of Conformity
Declaration of Conformity (DoC)
This equipment is in compliance with the essential requirements and other relevant provisions of Directive 1999/5/EC.
Customers can download a copy of the original DoC for this product from our DoC server: http://www.doc.panasonic.de
Contact in the EU: Panasonic Services Europe, a Division of Panasonic Marketing Europe GmbH, Panasonic Testing Centre,
Winsbergring 15, 22525 Hamburg, F.R.Germany
This product is intended to be used in the following countries.
Austria, Belgium, Bulgaria, Czech, Cyprus, Denmark, Estonia, Finland, France, Germany, Greece, Hungary, Iceland, Ireland, Italy, Latvia,
Lithuania, Luxembourg, Malta, Netherlands, Norway, Poland, Portugal, Romania, Slovenia, Slovak, Spain, Sweden, Switzerland & UK
Konformitätserklärung (KE)
Dieses Gerät entspricht den grundlegenden Anforderungen und den weiteren entsprechenden Vorgaben der Richtlinie 1999/5/EU.
Kunden können eine Kopie der Original-KE für dieses Produkt von unserem KE-Server herunterladen: http://www.doc.panasonic.de
Kontaktadresse in der EG: Panasonic Services Europe, a Division of Panasonic Marketing Europe GmbH, Panasonic Testing Centre,
Winsbergring 15, 22525 Hamburg, F.R.Germany
Dieses Produkt ist für den Einsatz in den folgenden Ländern vorgesehen.
Österreich, Belgien, Bulgarien, Tschechische Republik, Zypern, Dänemark, Estland, Finnland, Frankreich, Deutschland, Griechenland,
Ungarn, Island, Irland, Italien, Lettland, Litauen, Luxemburg, Malta, Niederlande, Norwegen, Polen, Portugal, Rumänien, Slowenien,
Slowakei, Spanien, Schweden, Schweiz und Großbritannien
Déclaration de Conformité (DC)
Cet appareil est conforme aux exigences essentielles et aux autres dispositions pertinentes de la Directive 1999/5/EC.
Les clients peuvent télécharger une copie de la DC originale pour ce produit à partir de notre serveur DC: http://www.doc.panasonic.de
Coordonnées dans l’UE : Panasonic Services Europe, a Division of Panasonic Marketing Europe GmbH, Panasonic Testing Centre,
Winsbergring 15, 22525 Hamburg, F.R.Germany
Ce produit est conçu pour l’utilisation dans les pays suivants.
Autriche, Belgique, Bulgarie, République Tchéquie, Chypre, Danemark, Estonie, Finlande, France, Allemagne, Grèce, Hongrie, Islande,
Irlande, Italie, Lettonie, Lituanie, Luxembourg, Malte, Pays-Bas, Norvège, Pologne, Portugal, Roumanie, Slovénie, Slovaquie, Espagne,
Suède, Suisse et Royaume-Uni
Declaración de conformidad (DC)
Este equipo cumple con los requisitos esenciales asi como con otras disposiciones de la Directiva 1999/5/CE.
El cliente puede descargar una copia de la DC original de este producto desde nuestro servidor DC: http://www.doc.panasonic.de
Contacto en la U.E.: Panasonic Services Europe, a Division of Panasonic Marketing Europe GmbH, Panasonic Testing Centre,
Winsbergring 15, 22525 Hamburg, F.R.Germany
Este producto ha sido desarrollado para el uso en los siguientes países.
Austria, Bélgica, Bulgaria, República Checa, Chipre, Dinamarca, Estonia, Finlandia, Francia, Alemania, Grecia, Hungría, Islandia, Irlanda,
Italia, Letonia, Lituania, Luxemburgo, Malta, Holanda, Noruega, Polonia, Portugal, Rumania, Eslovenia, Eslovaquia, España, Suecia,
Suiza y el Reino Unido
Dichiarazione di conformità (DoC)
Questo apparato é conforme ai requisiti essenziali ed agli altri principi sanciti dalla Direttiva 1999/5/CE.
I clienti possono scaricare la copia del DoC originale per questo prodotto dal nostro server DoC: http://www.doc.panasonic.de
Contatto nella EU: Panasonic Services Europe, a Division of Panasonic Marketing Europe GmbH, Panasonic Testing Centre,
Winsbergring 15, 22525 Hamburg, F.R.Germany
I prodotti sono stati prodotti per l’uso nei seguenti paesi.
Austria, Belgio, Bulgaria, Repubblica Ceca, Cipro, Danimarca, Estonia, Finlandia, Francia, Germania, Grecia, Irlanda, Islanda, Italia,
Lettonia, Lituania, Lussembugo, Malta, Olanda, Norvegia, Polonia, Portogallo, Romania, Regno Unito, Slovenia, Slovacchia, Spagna,
Svezia, Svizzera, Ungheria
ENGLISH - 4
�
t
n
a
t
r
o
p
m
n
o
i
t
a
m
o
f
n
I
I
ENGLISH - 5
�
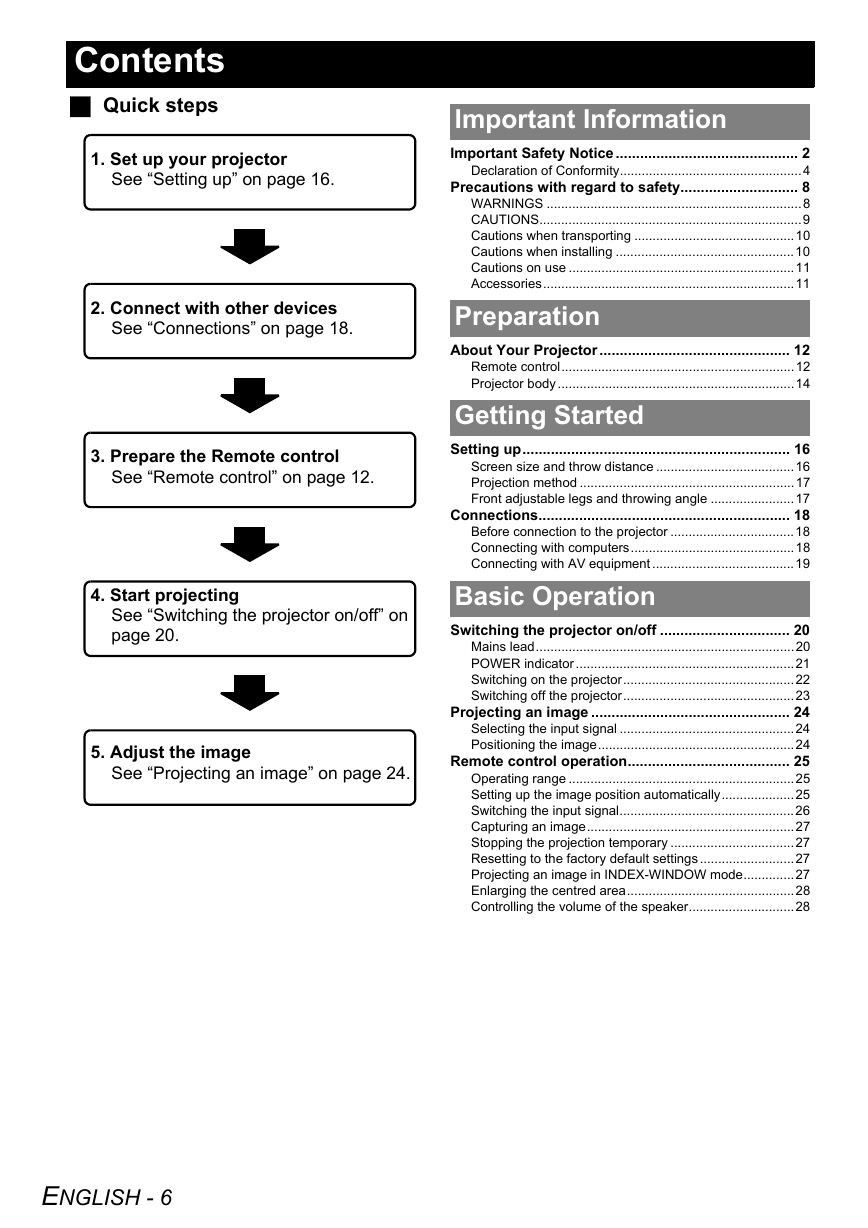
Contents
Quick steps
1. Set up your projector
See “Setting up” on page 16.
2. Connect with other devices
See “Connections” on page 18.
3. Prepare the Remote control
See “Remote control” on page 12.
4. Start projecting
See “Switching the projector on/off” on
page 20.
5. Adjust the image
See “Projecting an image” on page 24.
Important Information
Important Safety Notice............................................. 2
Declaration of Conformity..................................................4
Precautions with regard to safety............................. 8
WARNINGS ......................................................................8
CAUTIONS........................................................................9
Cautions when transporting ............................................10
Cautions when installing .................................................10
Cautions on use ..............................................................11
Accessories.....................................................................11
Preparation
About Your Projector............................................... 12
Remote control................................................................12
Projector body.................................................................14
Getting Started
Setting up.................................................................. 16
Screen size and throw distance ......................................16
Projection method ...........................................................17
Front adjustable legs and throwing angle .......................17
Connections.............................................................. 18
Before connection to the projector ..................................18
Connecting with computers.............................................18
Connecting with AV equipment .......................................19
Basic Operation
Switching the projector on/off ................................ 20
Mains lead.......................................................................20
POWER indicator............................................................21
Switching on the projector...............................................22
Switching off the projector...............................................23
Projecting an image ................................................. 24
Selecting the input signal ................................................24
Positioning the image......................................................24
Remote control operation........................................ 25
Operating range ..............................................................25
Setting up the image position automatically....................25
Switching the input signal................................................26
Capturing an image.........................................................27
Stopping the projection temporary ..................................27
Resetting to the factory default settings ..........................27
Projecting an image in INDEX-WINDOW mode..............27
Enlarging the centred area..............................................28
Controlling the volume of the speaker.............................28
ENGLISH - 6
�
Appendix
Technical Information.............................................. 46
List of compatible signals ............................................... 46
Serial terminal................................................................. 47
Computer connection guidance...................................... 49
Specifications ................................................................. 50
Dimensions..................................................................... 53
Trademark acknowledgements ...................................... 53
Index.......................................................................... 54
Settings
Menu Navigation .......................................................29
Navigating through the MENU ........................................ 29
Main menu and Sub-menu.............................................. 30
PICTURE menu..........................................................32
PICTURE MODE ............................................................ 32
CONTRAST .................................................................... 32
BRIGHTNESS................................................................. 32
COLOR ........................................................................... 32
TINT................................................................................ 32
SHARPNESS.................................................................. 32
COLOR TEMPERATURE............................................... 32
DAYLIGHT VIEW............................................................ 33
AI..................................................................................... 33
DETAILED SETUP ......................................................... 33
POSITION menu ........................................................34
REALTIME KEYSTONE ................................................. 34
KEYSTONE .................................................................... 34
POSITION....................................................................... 34
DOT CLOCK................................................................... 34
CLOCK PHASE .............................................................. 34
ASPECT.......................................................................... 34
RESIZING....................................................................... 35
FRAME LOCK................................................................. 35
LANGUAGE menu .....................................................35
OPTION menu............................................................36
INPUT GUIDE................................................................. 36
STARTUP LOGO............................................................ 36
FUNCTION BUTTON...................................................... 36
COMPUTER2 SELECT .................................................. 36
LAMP POWER................................................................ 36
LAMP RUNTIME............................................................. 37
POWER OFF TIMER...................................................... 37
DIRECT POWER ON...................................................... 37
CONTROL PANEL.......................................................... 37
AUTO SETUP................................................................. 37
SIGNAL SEARCH........................................................... 37
INSTALLATION .............................................................. 37
HIGHLAND ..................................................................... 38
RGB/YPBPR.................................................................... 38
VOLUME......................................................................... 38
DETAILED SETUP ......................................................... 38
SECURITY menu .......................................................39
INPUT PASSWORD ....................................................... 39
PASSWORD CHANGE................................................... 39
TEXT DISPLAY............................................................... 39
TEXT CHANGE .............................................................. 39
WIRELESS menu (PT-LB51NTE only) .....................40
Items in WIRELESS menu.............................................. 40
Maintenance
TEMP and LAMP Indicators .....................................41
Managing the indicated problems................................... 41
Care and Replacement .............................................42
Cleaning the projector..................................................... 42
Replacing the air filter ..................................................... 42
Replacing the Lamp unit ................................................. 43
Troubleshooting........................................................45
t
n
a
t
r
o
p
m
n
o
i
t
a
m
o
f
n
I
I
n
o
i
t
a
r
a
p
e
r
P
d
e
t
r
a
t
S
g
n
i
t
t
e
G
n
o
i
t
a
r
e
p
O
c
i
s
a
B
s
g
n
i
t
t
e
S
e
c
n
a
n
e
t
n
a
M
i
i
x
d
n
e
p
p
A
ENGLISH - 7
�
I
I
n
f
o
r
m
a
t
i
o
n
m
p
o
r
t
a
n
t
Precautions with regard to safety
WARNINGS
If you notice smoke, strange smells or noise coming
from the projector, disconnect the mains plug from
the mains socket.
Do not continue to use the projector in such cases,
Do not place the projector on top of surfaces which
are unstable.
If the projector is placed on top of a surface which is
sloped or unstable, it may fall down or tip over, and
injury or damage could result.
Do not place the projector into water or let it become
wet.
Failure to observe this may result in fire or electric
shocks.
Do not do anything that might damage the mains
lead or the mains plug.
Do not damage the mains lead, make any
modifications to it, place it near any hot objects, bend
it excessively, twist it, pull it, place heavy objects on
top of it or wrap it into a bundle.
If the mains lead is used while damaged, electric
shocks, short-circuits or fire may result.
Ask an Authorised Service Centre to carry out any
repairs to the mains lead that might be necessary.
Do not place the projector on soft materials such as
carpets or sponge mats.
Doing so may cause the projector to overheat, which
can cause burns, fire or damage to the projector.
Do not place liquid containers on top of the
projector.
If water spills onto the projector or gets inside it, fire
or electric shocks could result.
If any water gets inside the projector, contact an
Authorised Service Centre.
Do not insert any foreign objects into the projector.
Do not insert any metal objects or flammable objects
into the projector or drop them onto the projector, as
doing so can result in fire or electric shocks.
Do not allow the + and - terminals of the batteries to
come into contact with metallic objects such as
necklaces or hairpins.
Failure to observe this may cause the batteries to
leak, overheat, explode or catch fire.
Store the batteries in a plastic bag and keep them
away from metallic objects.
Do not touch the leaked liquid from the batteries.
If you touch the leaked liquid, it may hurt your skin.
Immediately wash away the liquid with water and
seek medical advice.
If you get the leaked liquid in your eye, it may cause
blindness or damage. Never rub your eye, and
immediately wash away the liquid with water and
seek medical advice.
During a thunderstorm, do not touch the projector or
the cable.
Electric shocks can result.
otherwise fire or electric shocks could result.
Check that no more smoke is coming out, and then
contact an Authorised Service Centre for repairs.
Do not attempt to repair the projector yourself, as this
can be dangerous.
Do not install this projector in a place which is not
strong enough to take the full weight of the
projector.
If the installation location is not strong enough, it may
fall down or tip over, and severe injury or damage
could result.
Installation work (such as ceiling suspension)
should only be carried out by a qualified technician.
If installation is not carried out correctly, there is the
danger that injury or electric shocks may occur.
Do not use other than an authorised ceiling mount
bracket.
If foreign objects or water get inside the projector, or
if the projector is dropped or the cabinet is broken,
disconnect the mains plug from the mains socket.
Continued use of the projector in this condition may
result in fire or electric shocks.
Contact an Authorised Service Centre for repairs.
Do not overload the mains socket.
If the power supply is overloaded (for example, by
using too many adapters), overheating may occur
and fire may result.
Never attempt to modify or disassemble the
projector.
High voltages can cause fire or electric shocks.
For any inspection, adjustment and repair work,
please contact an Authorised Service Centre.
Clean the mains plug regularly to prevent it from
becoming covered in dust.
If dust builds up on the mains plug, the resulting
humidity can damage the insulation, which could
result in fire. Pull the mains plug out from the mains
socket and wipe it with a dry cloth.
If not using the projector for an extended period of
time, pull the mains plug out from the mains socket.
Do not handle the mains plug with wet hands.
Failure to observe this may result in electric shocks.
Insert the mains plug securely into the mains socket.
If the plug is not inserted correctly, electric shocks or
overheating could result.
Do not use plugs which are damaged or mains
sockets which are coming loose from the wall.
ENGLISH - 8
�



 2023年江西萍乡中考道德与法治真题及答案.doc
 2012年重庆南川中考生物真题及答案.doc
 2013年江西师范大学地理学综合及文艺理论基础考研真题.doc
 2020年四川甘孜小升初语文真题及答案I卷.doc
 2020年注册岩土工程师专业基础考试真题及答案.doc
 2023-2024学年福建省厦门市九年级上学期数学月考试题及答案.doc
 2021-2022学年辽宁省沈阳市大东区九年级上学期语文期末试题及答案.doc
 2022-2023学年北京东城区初三第一学期物理期末试卷及答案.doc
 2018上半年江西教师资格初中地理学科知识与教学能力真题及答案.doc
 2012年河北国家公务员申论考试真题及答案-省级.doc
 2020-2021学年江苏省扬州市江都区邵樊片九年级上学期数学第一次质量检测试题及答案.doc
 2022下半年黑龙江教师资格证中学综合素质真题及答案.doc