Table of content
1. Introduction to Gerrit.................................................. 1
1.1. Main features ......................................................... 1
1.2. Gerrit usage ............................................................1
1.3. Terminology for Gerrit .............................................. 2
2. Contribution creation and uploading.............................. 2
2.1. Git and Gerrit commands.......................................... 2
2.2. Creating a new contribution.......................................2
1. Cloning from repository............................................... 2
2. Setting up commit message hook ................................. 3
3. Creating a topic branch ............................................... 3
4. Doing changes ........................................................... 3
5. Updating repository .................................................... 3
6. Pushing changes.........................................................4
3. Requesting and receiving contribution feedback.............. 4
3.1. Requesting contribution feedback...............................4
3.2. Reading contribution feedback................................... 5
1. Accessing My Changes page .........................................5
2. Locating comments in the change...................................
................................................................................... 5
3. Reading in-line comments............................................6
3.3. Reviewing contributions............................................ 6
1. Accessing Gerrit via web browser..................................7
2. Viewing change overview.............................................7
3. Reviewing changed files...............................................7
4. Publishing comments .................................................. 8
3.3.1. Command Line Review ...........................................9
1. Downloading change................................................... 9
2. Reviewing change or run tests......................................9
�
3. Publishing review result from command line................... 9
3.4. Updating a contribution with new code...................... 10
1. Accessing change code .............................................. 10
2. Modifying commit..................................................... 11
3. Pushing updated change ............................................ 11
4. Approving and abandoning......................................... 12
4.1. Approving and submitting a contribution to the CI
System or Git repository ............................................... 12
4.3. Finding new contributions by others ......................... 13
5. Continuous integration and staging............................. 13
5.1. Workflow.............................................................. 13
5.2. Web UI and CLI..................................................... 14
6. Merging feature branches .......................................... 14
6.1. Topics in Gerrit...................................................... 14
6.2. Merging feature branches........................................ 14
7. Access rights ........................................................... 15
7.1. Access rights are defined in the group level............... 15
8. Providing feedback about the set up............................ 15
�
1. Introduction to Gerrit
1.1. Main features
Gerrit is a web-based tool that is used for code review. Its main features are the side-by-side difference
viewing and inline commenting which makes code reviews quick and simple task. It is used together
with Git version control system. Gerrit allows authorized contributors to submit changes to Git
repository, after reviews are done. Contributors can get their code reviewed with a little effort, and
change get their changes quickly through the system.
1.2. Gerrit usage
There are two purposes Gerrit usage. First, the contributor can upload changes to Gerrit, and second,
approvers and peer reviewers can complete a review process with the web browser. Changes are
uploaded with git push command. Any Git client can be used to access Gerrit. The review process
includes the following steps:
* Review changes
* Publish comments
* Approve or abandon changes
Gerrit can manage multiple repositories (projects). Branches are fully supported by Gerrit, each
repository can have any number of branches.
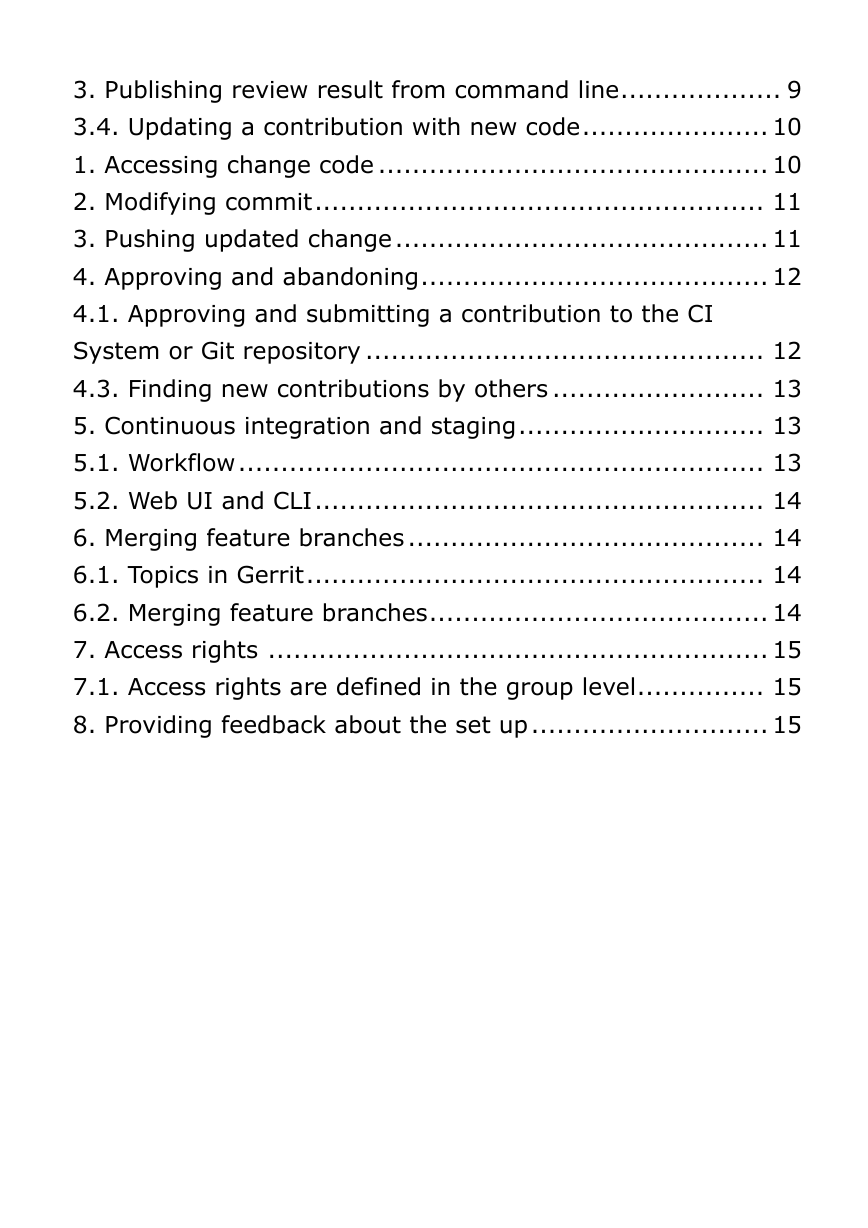
Gerrit stores changes, which are normal commits, as references in path refs/changes. When
contributor pushes changes, a special reference in path refs/for/ is used. For example, when
contributor uploads a commit to master branch the target ref will be refs/for/master.
Git repositories that Gerrit operates on are accessed through Gerrit instead of git-daemon. Any other
Git-related service can be used with Gerrit. However, it is recommended that all Git commands are
Page 1 of 15
�
run through Gerrit.
1.3. Terminology for Gerrit
Common terms used in Gerrit:
Term
Change
Patch Set
Score
Approval Category
Submit
Abandon
Project
Description
A single commit and unit of a review. Changes are
A version of a change. After each time a change
A value for approval category. Indicates if change
Name for a scope that is checked during review
An action that allows Gerrit to merge a change to
Action that archives a change. An abandoned
Git repository.
2. Contribution creation and uploading
2.1. Git and Gerrit commands
All Gerrit commands are using SSH protocol and the host port is 29418. A user can access Gerrit’s
Git repositories with SSH or HTTP protocols. The user must have registered in Gerrit and a public
SSH key before any command line commands can be used.
Before proceeding user needs to have a SSH public key configured in Gerrit.
2.2. Creating a new contribution
All contributions will be uploaded with regular Git command, like before. Gerrit handles reviews in
commit level. A single contribution can easily result in several reviewable changes in Gerrit. User,
typically a contributor, prepares a contribution by following these steps:
1. Cloning from the repository
2. Setting up a commit message hook
3. Creating a topic branch
4. Doing changes
5. Updating repository
6. Pushing changes
See the step-by-step introductions below on how to complete a commit upload. Note that Gerrit SSH
service is running in port 29418. There is no need to write this port number every time, just add the
following lines to ~/.ssh/config file:
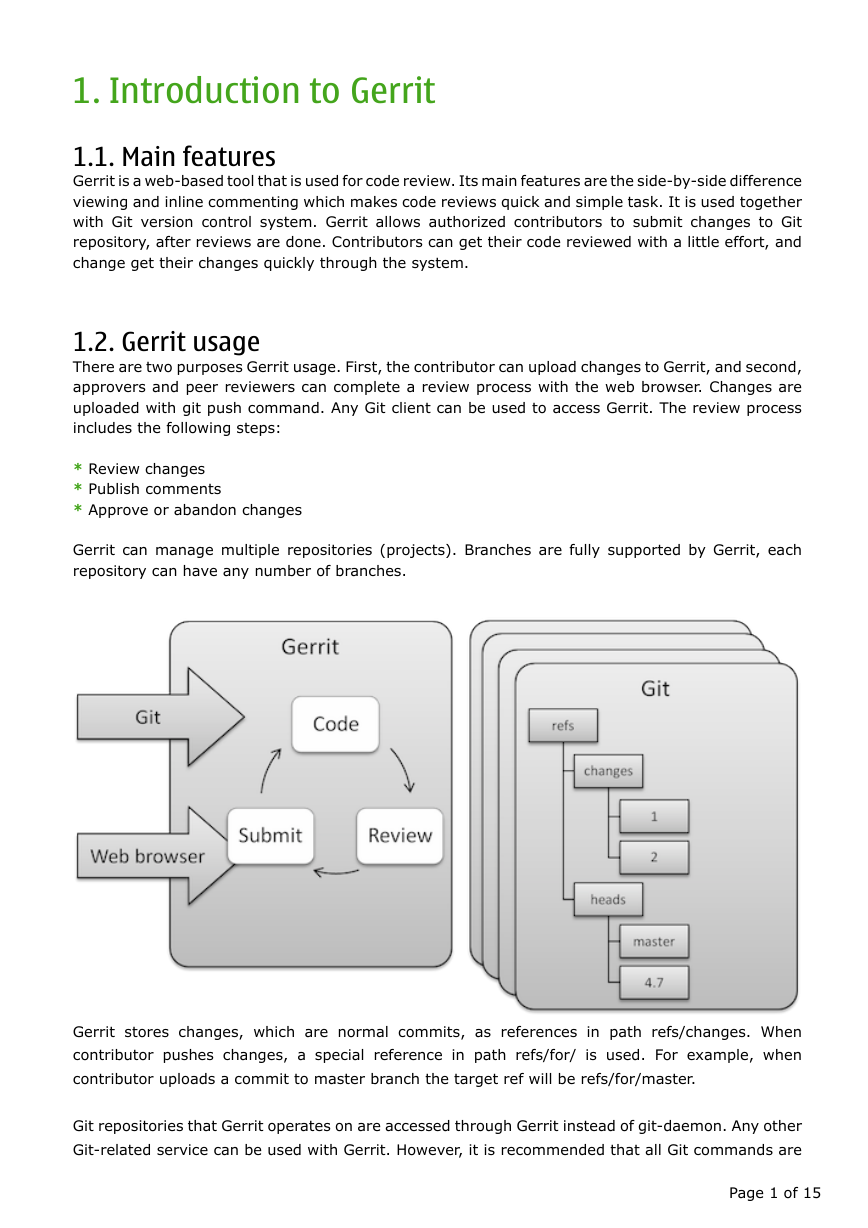
Host codereview.qt-project.org
Port 29418
Page 2 of 15
�
1. Cloning from repository
Git repository can be cloned from Gerrit over SSH with the following commands:
$ git clone ssh://qtcontributor@codereview.qt-project.org/qt/qtbase.git
Cloning into qtbase...
remote: Counting objects: 33523, done
remote: Finding sources: 100% (33523/33523)
Receiving objects: 100% (33523/33523), 69.45 MiB | 901 KiB/s, done.
remote: Total 33523 (delta 16501), reused 33523 (delta 16501)
Resolving deltas: 100% (16501/16501), done.
$
2. Setting up commit message hook
To add a Change-Id footer to your commit messages, download a message hook from Gerrit with
the following command.
$ scp -P 29418 @codereview.qt-project.org:hooks/commit-msg .git/hooks
3. Creating a topic branch
Keep code organized in topic branches.1 This is what Git excels in. “next-big-thing” is used as an
example topic branch below:
$ git checkout -b my-feature
Switched to a new branch 'my-feature'
$
4. Doing changes
Use your favorite editor to complete a coding task.
$ edit src/foo.cc
$
5. Updating repository
Call git add to all files that should be included in the commit that is created, and finally call git commit
to create a new commit as follows:
$ git add src/foo.cc
$ git commit
[my-feature c82710a] My Feature
1 files changed, 1 insertions(+), 0 deletions(-)
create mode 100644 src/foo.cc
$
Page 3 of 15
�
6. Pushing changes
Changes are pushed to Gerrit with Git push. Note that special target ref is used.
Gerrit reports how many changes were created and provides links to these changes.
$ git push ssh://qtcontributor@codereview.qt-project.org/qt/qtbase HEAD:refs/for/
master
Counting objects: 6, done.
Delta compression using up to 2 threads.
Compressing objects: 100% (3/3), done.
Writing objects: 100% (4/4), 407 bytes, done.
Total 4 (delta 2), reused 0 (delta 0)
remote: Resolving deltas: 0% (0/2)
To ssh://qtcontributor@codereview.qt-project.org:29418/qt/qtbase
* [new branch] HEAD -> refs/for/master
$
When pushing to Gerrit, a typical refspec2 uses HEAD as source ref and special Gerrit ref for target
branch. Target ref is in format refs/for/. Pushes to this target ref causes Gerrit to
create new changes for all commits pushed in this way. Note, that it is possible to use any other ref
as source ref instead of HEAD when necessary.
3. Requesting and
feedback
3.1. Requesting contribution feedback
receiving contribution
Contributor requests feedback by adding reviewers to the change. Typically this is done through web
browser. Approver or another contributor who is doing peer-review can review any change without
being added as a reviewer when having review access right to the project.
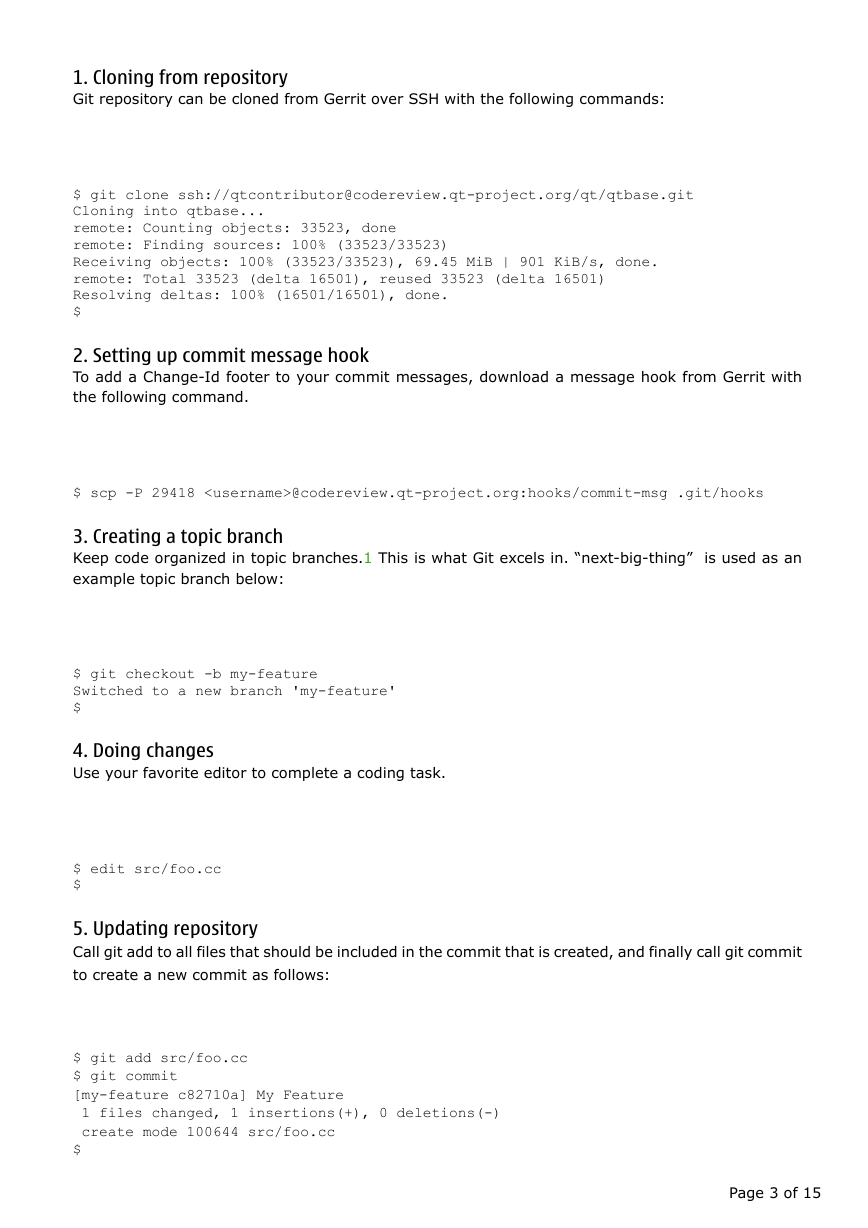
Access the change with web browser and use “Add Reviewer” button to add any other registered user
to the review like in the picture below:
Click to expand [developer.qt.nokia.com]
Page 4 of 15
�
Alternatively, reviewers can be added already when uploading a contribution. When pushing a change,
reviewers can be identified using receive-pack option. See example below and refer Gerrit user’s
guide for more detailed instructions3.
Using cc option for receive-pack sends an e-mail notification to that user. Gerrit will avoid sending
duplicate emails to the same user.
$ git push --receive-pack=
'git receive-pack --reviewer=approver@qt-project.org --cc qtcontributor@ovi.com'
ssh://qtcontributor@codereview.qt-project.org/qt/qtbase HEAD:refs/for/master
Counting objects: 7, done.
Delta compression using up to 2 threads.
Compressing objects: 100% (3/3), done.
Writing objects: 100% (4/4), 404 bytes, done.
Total 4 (delta 2), reused 0 (delta 0)
remote: Resolving deltas: 0% (0/2)
To ssh://qtcontributor@codereview.qt-project.org/qt/qtbase
* [new branch] HEAD -> refs/for/master
$
3.2. Reading contribution feedback
It is easy to have an overview of contributions in My Changes page. Contributor can view feedback
on his or her contributions by accessing the change page and reading comments file-by-file. It is
possible to reply on comments and have discussion about the code review in-line. Each time in-line
comments or a review scores are published, a general comment can be added.
Contributor reads the feedback by following the steps:
1. Accessing My Changes page
2. Locating comments in the change page
3. Reading in-line comments
4. Publishing a reply or upload new patch set
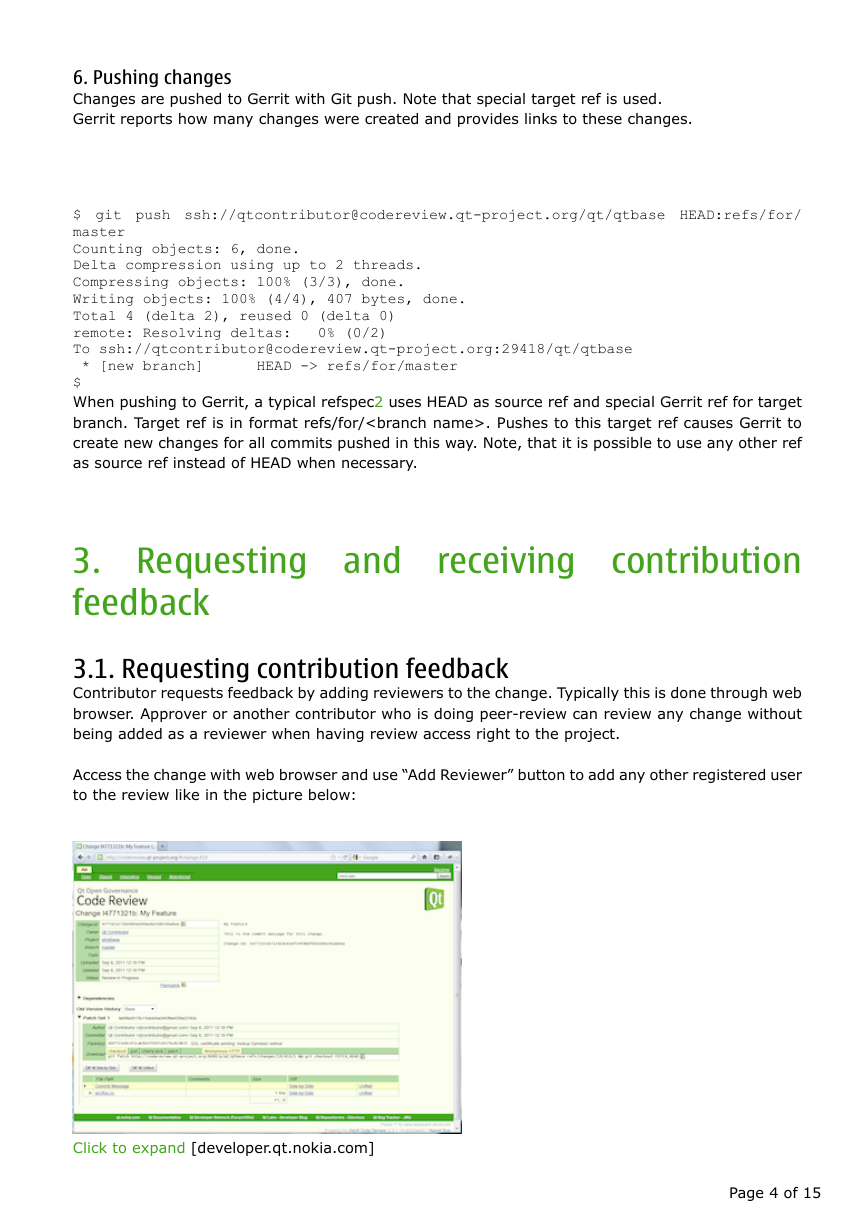
1. Accessing My Changes page
It can be done by done by clicking “My” link on the top left corner and then selecting link “Changes”.
Click to expand [developer.qt.nokia.com]
Page 5 of 15
�
2. Locating comments in the change
Comments are under each patch set. In the picture below the comments for Patch set 2 are examined
Click to expand [developer.qt.nokia.com]
3. Reading in-line comments
Reply can be posted by clicking the comment like in the picture beneath:
Click to expand [developer.qt.nokia.com]
3.3. Reviewing contributions
The review process starts from choosing a change to review. After choosing a change, changed files
can be viewed side-by-side and comments can be posted in-line to each file. Contributions are typically
reviewed by approvers and possibly peer-reviewed by other contributors.
Following steps are needed to complete a code review:
1. Accessing Gerrit with web browser
2. Viewing change overview
3. Reviewing changed files
4. Publishing comments and reviewing results
Page 6 of 15
�


 2023年江西萍乡中考道德与法治真题及答案.doc
 2012年重庆南川中考生物真题及答案.doc
 2013年江西师范大学地理学综合及文艺理论基础考研真题.doc
 2020年四川甘孜小升初语文真题及答案I卷.doc
 2020年注册岩土工程师专业基础考试真题及答案.doc
 2023-2024学年福建省厦门市九年级上学期数学月考试题及答案.doc
 2021-2022学年辽宁省沈阳市大东区九年级上学期语文期末试题及答案.doc
 2022-2023学年北京东城区初三第一学期物理期末试卷及答案.doc
 2018上半年江西教师资格初中地理学科知识与教学能力真题及答案.doc
 2012年河北国家公务员申论考试真题及答案-省级.doc
 2020-2021学年江苏省扬州市江都区邵樊片九年级上学期数学第一次质量检测试题及答案.doc
 2022下半年黑龙江教师资格证中学综合素质真题及答案.doc