FLTK 1.3.0 Tutorial
This a tutorial can be used by the absolute FLTK beginner. In the course of the tutorial
the most common widgets will be explained and you will gain a good overview of the FLTK
toolkit. The examples have been kept as short and simple as possible so it will not take a
lot of time to understand them.
I ported FLTK to DOS and took the screenshots in DOS. The examples will work without
any changes on any platform FLTK can be used for.
Contents
1. Introduction
2. The FLTK structure
3. Installation of the FLTK toolkit
4. The first program
5. The button widget
6. Callback functions
7. Input and Output boxes
8. The editor widget
9. The browser widget
10. The menubar widget
11. Toolbar and drop-down list
12. A dialog window with radio buttons
13. Displaying images
14. Grouping widgets in Tabs
15. Handling mouse events part1
16. Handling mouse events part2
17. Displaying the events generated by FLTK
18. The tree widget
19. References
�
1. Introduction
FLTK shall stand for Fast Light ToolKit and is a GUI written in C++ for C++ programs. It
can be used on Linux, Windows, Apple Mac and DOS. FLTK has lower memory
requirements than other toolkits and can be linked as a static library with an application. It
can also be compiled as a shared library too.
FLTK has been in development over many years and the currently latest version is 1.3.0.
There had been a version 2.0 before but unfortunately this branch never got out of alpha
and development of that has been canceled now in favor of version 1.3.0. So 1.3.0 is the
version any new development should be based on.
2. The FLTK structure
Being written in C++ FLTK defines a class for every widget. GUI toolkits usually refer to all
sorts of objects, like buttons, input boxes, scrollbars etc as widgets.
The base class for all widgets is the Fl_Widget class. All widgets are subclasses from the
Fl_Widget class or again subclasses from these subclasses.
This are some of the direct subclasses of Fl_Widget: Fl_Box, Fl_Button, Fl_Group,
Fl_Input_, Fl_Menu_, Fl_Progress and Fl_Timer.
A subclass of Fl_Group again is Fl_Window, a class you will be using in every program.
An example of a long tree of subclasses is FL_Radio_Round_Button. As shown below this
button type is a subclass of Fl_Round_Button which is a subclass of Fl_Light_Button
which is again a subclass of Fl_Button.
The FL_Radio_Round_Button class has access to all methods or functions defined in one
of the classes it is a subclass of. You will have to check in the documentation whether any
of these classes has a method which does what you want to achieve.
There is also the FL global (static) class containing state information and global methods
for the current application.
In addition several non-class functions and symbols are provided, they are grouped into
�
header files with lower-case names.
3. Installation of the FLTK toolkit
a.) Linux
download the latest source, unpack it and then do configure,make,install. Then compile
your program e.g. as:
"fltk-config' --compile example.cxx"
or if you use images:
"fltk-config --use-images --compile example.cxx"
Further details can be found in the FLTK manual here:
http://www.fltk.org/doc-1.3/basics.html There is a section called "Compiling Programs with
Standard Compilers" further below on that page.
You can also read the README.Unix.txt file that is included in the FLTK source code
package. This also covers using FLTK with the Code::Blocks IDE.
b.) Windows
There are a number of alternatives to develop FLTK programs on Windows. The FLTK site
just has the source code so you either compile FLTK on Windows or download binaries
from the net as described below.
b1.) DEV-CPP
This is an IDE which uses MinGW to generate C and C++ programs on Windows. You can
download it here: http://www.bloodshed.net/dev/devcpp.html
Then you can download a "devpak" of FLTK 1.3.0 here:
http://nanox-microwindows-nxlib-fltk-for-dos.googlecode.com/files/fltk-130-1gp.DevPak
After starting DEV-CPP select "Tools" from the menu and "Package Manager". In there
select "Install" and open the downloaded DevPak to install it.
Then open a new project (File->New->Project), select the "GUI" tab and in there select
"FLTK". After a few questions how to name the project and the program file this will come
up with the default FLTK program which you can build and run by entering "F9".
b2.) Code::Blocks
This is another good IDE using MinGW. If you open a new project, you can select the
FLTK icon in there. After that you will have enter the location of the FLTK files. You can
download the binaries here: http://code.google.com/p/fltkwinbin/downloads/list
and then put them into a directory of your choice. Then enter that path into the
Code::Blocks' input box. Code::Blocks just needs the path to the root FLTK directory where
bin, include, lib, share and test are in.
You can then select file->new->empty file and save that as main. Then cut and past one of
the examples in this tutorial into the edit window and save the file.
�
Then right-click on the project, select "Build options" and add the following libraries to the
linker settings:
libcomctl32.a, libcomdlg32.a, libole32.a,libgdi32.a and libuuid.a. You find these libraries in
the "CodeBlocks\MinGW\lib\" directory.
After this select Build->Run or CTRL-F10 that should build the project and run it.
b3.) Compile FLTK on Windows with MinGW.
Both DEV-CPP and Code::Blocks install MinGW on your PC. If you install MinGW after
you already have installed one of these IDEs Windows will point to the new MinGW
directory and and that causes problems with DEV-CPP.
Details how to compile FLTK with MinGW are in the file README.MSWindows.txt which is
included in the FLTK source code package.
It also described in there how to use FLTK with Cygwin.
You can also compile FLTK on Windows with Code::Blocks if you follow this tutorial:
http://gintasdx.althirius-studios.com/2011/08/tutorial-codeblocks-with-fltk.html
b4.) Microsoft Visual C++
This is covered in the file README.MSWindows.txt.
Further details can also be found here:
http://research.cs.wisc.edu/graphics/Courses/559-f2009/Main/Tutorial1
c.) Apple OS X
Please read the file README.OSX.txt which is included in the FLTK source code package.
d.) DOS
Download the DJGPP package from
http://code.google.com/p/nanox-microwindows-nxlib-fltk-for-dos/downloads/list ,
edit the start.bat file in there to your paths. The required FLTK libraries are already
included in the DJGPP package but can be downloaded from that site separately as well.
You can compile the examples either with this line (observe the line wrap here):
gpp -g -I/djgpp/include -o example.exe example.cxx -L/djgpp/lib -lfltk -lNX11 -lnano-X
-lfreetype
For the examples which load an image you have to add additional parameters to this line:
gpp -g -I/djgpp/include -o ex13.exe ex13.cxx -L/djgpp/lib -lfltk_images -lfltk -lNX11 -lnano-X
-lfreetype -ljpeg -lpng -lz
Or you enter a shell with "sh" and use the "fltk-config" script:
sh-2.04$ 'fltk-config' --compile example.cxx
sh-2.04$ 'fltk-config' --use-images --compile example.cxx
�
4. The first program
This tutorial starts with very simple examples. Some readers may consider them too
simple but those may read these parts more quickly.
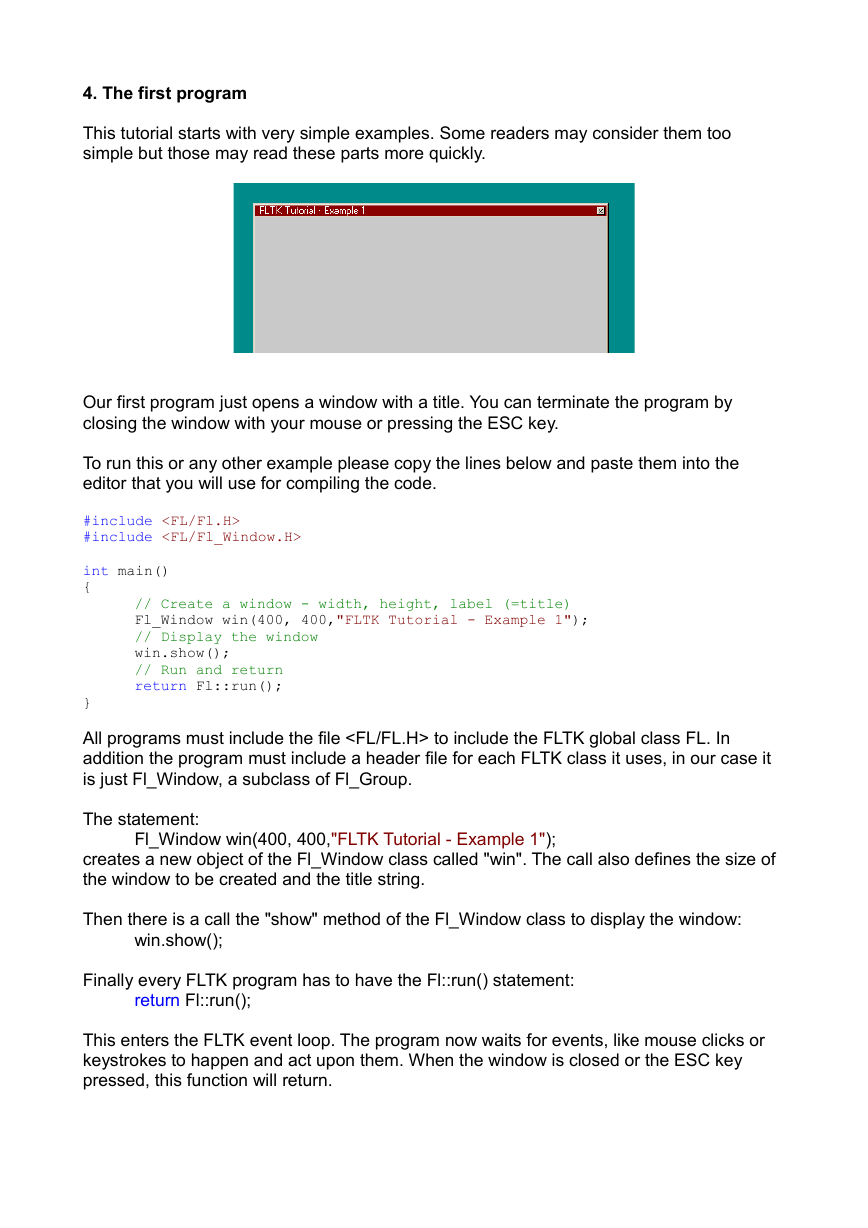
Our first program just opens a window with a title. You can terminate the program by
closing the window with your mouse or pressing the ESC key.
To run this or any other example please copy the lines below and paste them into the
editor that you will use for compiling the code.
#include
#include
int main()
{
Fl_Window win(400, 400,"FLTK Tutorial - Example 1");
// Display the window
// Create a window - width, height, label (=title)
win.show();
// Run and return
return Fl::run();
}
All programs must include the file to include the FLTK global class FL. In
addition the program must include a header file for each FLTK class it uses, in our case it
is just Fl_Window, a subclass of Fl_Group.
The statement:
Fl_Window win(400, 400,"FLTK Tutorial - Example 1");
creates a new object of the Fl_Window class called "win". The call also defines the size of
the window to be created and the title string.
Then there is a call the "show" method of the Fl_Window class to display the window:
win.show();
Finally every FLTK program has to have the Fl::run() statement:
return Fl::run();
This enters the FLTK event loop. The program now waits for events, like mouse clicks or
keystrokes to happen and act upon them. When the window is closed or the ESC key
pressed, this function will return.
�
5. The button widget
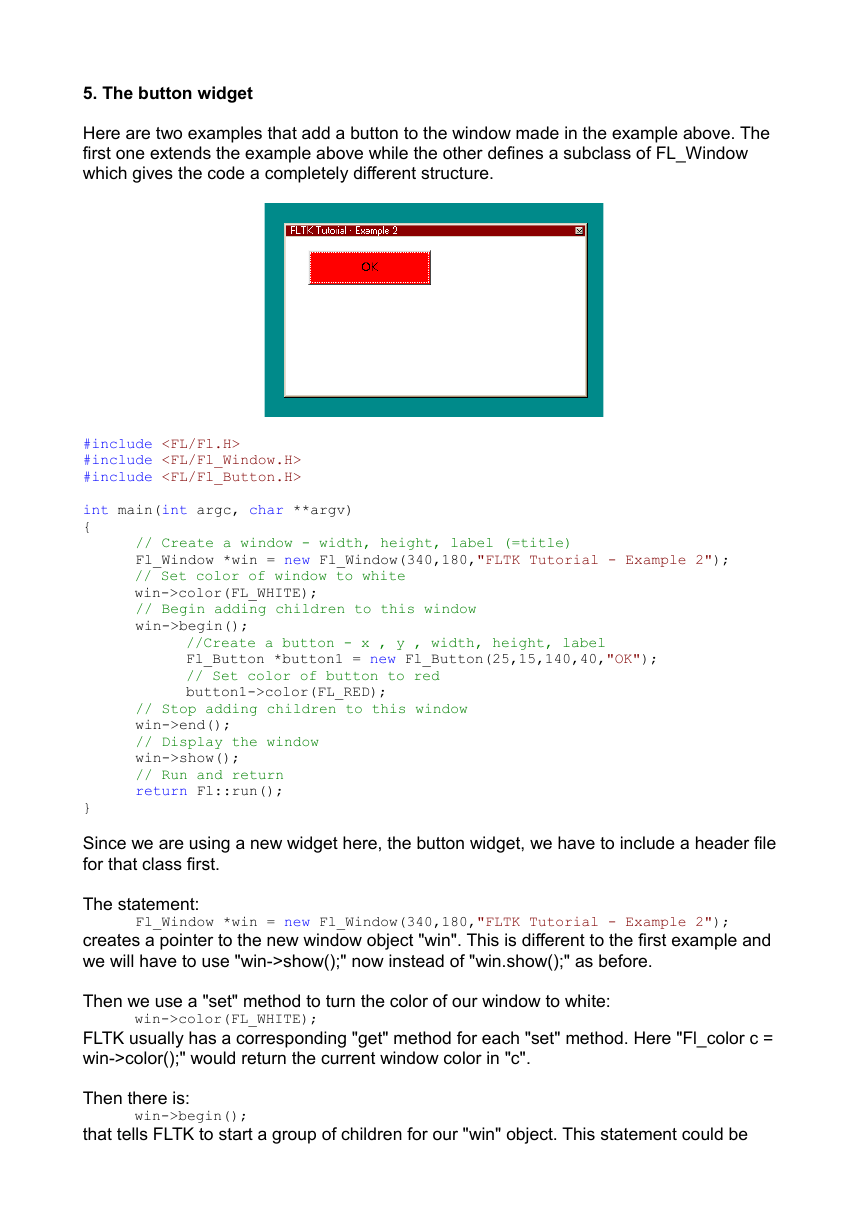
Here are two examples that add a button to the window made in the example above. The
first one extends the example above while the other defines a subclass of FL_Window
which gives the code a completely different structure.
#include
#include
#include
int main(int argc, char **argv)
{
// Create a window - width, height, label (=title)
Fl_Window *win = new Fl_Window(340,180,"FLTK Tutorial - Example 2");
// Set color of window to white
win->color(FL_WHITE);
// Begin adding children to this window
win->begin();
//Create a button - x , y , width, height, label
Fl_Button *button1 = new Fl_Button(25,15,140,40,"OK");
// Set color of button to red
button1->color(FL_RED);
// Stop adding children to this window
win->end();
// Display the window
win->show();
// Run and return
return Fl::run();
}
Since we are using a new widget here, the button widget, we have to include a header file
for that class first.
The statement:
Fl_Window *win = new Fl_Window(340,180,"FLTK Tutorial - Example 2");
creates a pointer to the new window object "win". This is different to the first example and
we will have to use "win->show();" now instead of "win.show();" as before.
Then we use a "set" method to turn the color of our window to white:
win->color(FL_WHITE);
FLTK usually has a corresponding "get" method for each "set" method. Here "Fl_color c =
win->color();" would return the current window color in "c".
Then there is:
win->begin();
that tells FLTK to start a group of children for our "win" object. This statement could be
�
omitted and FLTK will add this implicitly then.
Following that we create a pointer to a new button object:
Fl_Button *button1 = new Fl_Button(25,15,140,40,"OK");
and make a "set" statement to set its color to red.
The statement
win->end();
will tell FLTK that we are done defining the children for the "win" object. The defined group
will be set to the parent of the window, in this case to NULL because "win" does not have a
parent.
The following statements will cause the window to be displayed and enter the FLTK event
loop.
So far we have not defined classes in the examples. To show how this can be done using
FLTK classes and inheritance we rewrite the example above:
#include
#include
#include
class MyWindow : public Fl_Window
{
public:
MyWindow(int width, int height, const char* title=0) :
Fl_Window(width,height,title)
{
// Set color of window to white
color(FL_WHITE);
// Begin adding children to this window
begin();
//Create a button - x , y , width, height, label
Fl_Button *button1 = new Fl_Button(25,15,140,40,"OK");
// Set color of button to red
button1->color(FL_RED);
// Stop adding children to this window
end();
// Display the window
show();
}
};
int main()
{
// Create a window with our new class - width, height, label (=title)
MyWindow win(340,180,"FLTK Tutorial - Example 2++");
// Run and return
return Fl::run();
}
Here the statement
class MyWindow : public Fl_Window
creates a class called MyWindow which is derived from the Fl_Window class. In the
constructor of this class we define the color of the window, the button as a child of the
window and display the window. Since the "this" pointer is implicit, you do not need a
pointer in front of the begin(), end() and show() statements.
�
In the main function we just create a new object of the MyWindow class called "win" and
then enter the FLTK event loop.
6. Callback functions
Now we will add a callback function which will be called by FLTK as soon as the button is
clicked. This callback function will then change the color of the button.
There is no screenshot provided since it looks like the one in the previous example.
#include
#include
#include
void button1_cb(Fl_Widget* buttonptr){
if (buttonptr->color() == FL_BLUE) {
buttonptr->color(FL_RED); //toggle
}else {
buttonptr->color(FL_BLUE);//toggle
}
}
int main(int argc, char **argv)
{
// Create a window - width, height, label (=title)
Fl_Window *win = new Fl_Window(340,180,"FLTK Tutorial - Example 3");
// Begin adding children to this window
win->begin();
//Create a button - x , y , width, height, label
Fl_Button *button1 = new Fl_Button(25,15,140,40,"Click me!");
button1->color(FL_RED);
//register callback function with this button
button1->callback(button1_cb);
win->color(FL_WHITE);
// Stop adding children to this window
win->end();
// Display the window
win->show();
// Run and return
return Fl::run();
}
The statement:
button1->callback(button1_cb);
defines that the callback "button1_cb" will be called when the user clicks on it.
This function is defined as
void button1_cb(Fl_Widget* buttonptr)
Please observe that a pointer to the Fl_Widget class is passed and not to Fl_Button. This
way we can only use methods defined in Fl_Widget. For this example this is fine since we
will only be using the "color" method defined in Fl_Widget. If we want to use methods
defined in the Fl_Button class we will have to cast the buttonptr to a Fl_Button class e.g:
Fl_Button* b = (Fl_Button*)buttonptr;
The rest of the function checks if the button color is blue and if yes turns it to red and vice
versa.
�


 2023年江西萍乡中考道德与法治真题及答案.doc
 2012年重庆南川中考生物真题及答案.doc
 2013年江西师范大学地理学综合及文艺理论基础考研真题.doc
 2020年四川甘孜小升初语文真题及答案I卷.doc
 2020年注册岩土工程师专业基础考试真题及答案.doc
 2023-2024学年福建省厦门市九年级上学期数学月考试题及答案.doc
 2021-2022学年辽宁省沈阳市大东区九年级上学期语文期末试题及答案.doc
 2022-2023学年北京东城区初三第一学期物理期末试卷及答案.doc
 2018上半年江西教师资格初中地理学科知识与教学能力真题及答案.doc
 2012年河北国家公务员申论考试真题及答案-省级.doc
 2020-2021学年江苏省扬州市江都区邵樊片九年级上学期数学第一次质量检测试题及答案.doc
 2022下半年黑龙江教师资格证中学综合素质真题及答案.doc