THANK YOU!
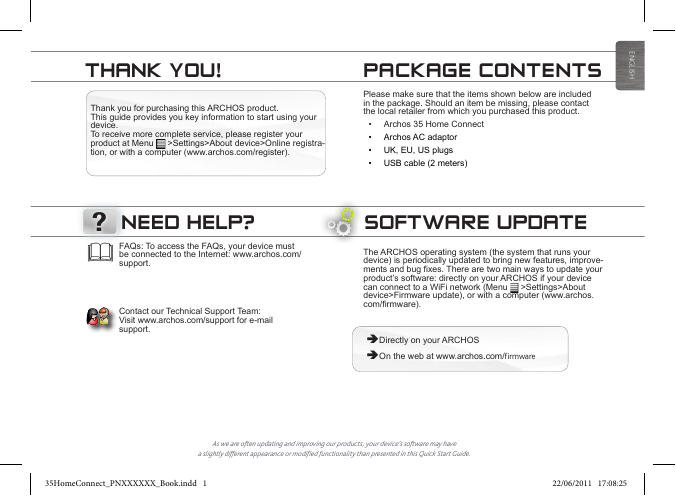
Thank you for purchasing this ARCHOS product.
This guide provides you key information to start using your
device.
To receive more complete service, please register your
product at Menu
tion, or with a computer (www.archos.com/register).
>Settings>About device>Online registra-
E
N
G
L
I
S
H
PACKAGE CONTENTS
Please make sure that the items shown below are included
in the package. Should an item be missing, please contact
the local retailer from which you purchased this product.
• Archos 35 Home Connect
• Archos AC adaptor
• UK, EU, US plugs
• USB cable (2 meters)
?
NEED HELP?
FAQs: To access the FAQs, your device must
be connected to the Internet: www.archos.com/
support.
Contact our Technical Support Team:
Visit www.archos.com/support for e-mail
support.
SOFTWARE UPDATE
The ARCHOS operating system (the system that runs your
device) is periodically updated to bring new features, improve-
ments and bug fixes. There are two main ways to update your
product’s software: directly on your ARCHOS if your device
can connect to a WiFi network (Menu
device>Firmware update), or with a computer (www.archos.
com/firmware).
>Settings>About
ÄDirectly on your ARCHOS
ÄOn the web at www.archos.com/firmware
As we are often updating and improving our products, your device’s software may have
a slightly different appearance or modified functionality than presented in this Quick Start Guide.
35HomeConnect_PNXXXXXX_Book.indd 1
22/06/2011 17:08:25
�
H
S
I
L
G
N
E
DESCRIPTION OF THE DEVICE
1
2
3
4
5
6
7
8
9
Power Button: press and hold to switch on/off.
When your device is plugged in, press the Power button once to put your device in clock
mode. When the device is not plugged in, press the Power button once to put your de-
vice in standby mode.When you press and hold on the Power button, a window appears
with a list of options. Tap on “Power Off” > “Power Off” to fully shut down your ARCHOS
Charging indicator - light on: battery charging / blinking: battery charged
Headphones input
Micro-USB port: 1- to charge the device using the power adapter or the USB cable con-
nected to a running computer. 2- to transfer files from your computer to your ARCHOS/
from your ARCHOS to your computer using the USB cable.
Micro-SD card slot
Back - returns to the previous screen.
Menu icon - gives menu options according to the current screen.
Volume buttons
12
12
10
Home icon - Short press: return to the Home screen. Hold: jump to one of the recent applications.
10
Search icon - allows you to search for an item on the device or on the Internet.
Camera
Loudspeakers
12
11
Touchscreen calibration: If the touchscreen functioning is impaired, carry out a calibration. Tap the Settings widget
screen, tap the Menu icon
Hardware Reset: In the event that your ARCHOS freezes operation, you can force the device to shut down by holding the
or on the Home
,/Settings. Down the list, tap Repair&formatting/Touchscreen calibration. Follow the on-screen instructions.
button for 10 seconds.
2
35HomeConnect_PNXXXXXX_Book.indd 2
22/06/2011 17:08:28
23149876511�
E
N
G
L
I
S
H
UK
EUR
US
STARTING UP
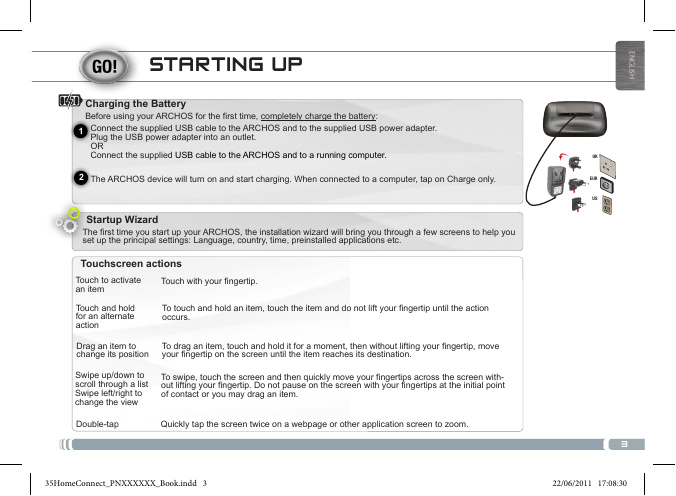
Charging the Battery
Before using your ARCHOS for the first time, completely charge the battery:
Connect the supplied USB cable to the ARCHOS and to the supplied USB power adapter.
Plug the USB power adapter into an outlet.
OR
Connect the supplied USB cable to the ARCHOS and to a running computer.
The ARCHOS device will turn on and start charging. When connected to a computer, tap on Charge only.
Startup Wizard
The first time you start up your ARCHOS, the installation wizard will bring you through a few screens to help you
set up the principal settings: Language, country, time, preinstalled applications etc.
Touchscreen actions
Touch to activate
an item
Touch with your fingertip.
Touch and hold
for an alternate
action
To touch and hold an item, touch the item and do not lift your fingertip until the action
occurs.
Drag an item to
change its position
To drag an item, touch and hold it for a moment, then without lifting your fingertip, move
your fingertip on the screen until the item reaches its destination.
Swipe up/down to
scroll through a list
Swipe left/right to
change the view
To swipe, touch the screen and then quickly move your fingertips across the screen with-
out lifting your fingertip. Do not pause on the screen with your fingertips at the initial point
of contact or you may drag an item.
Double-tap
Quickly tap the screen twice on a webpage or other application screen to zoom.
35HomeConnect_PNXXXXXX_Book.indd 3
3
22/06/2011 17:08:30
21�
H
S
I
L
G
N
E
www
CONNECTING TO A WIFI NETWORK
For this procedure to work, you need to be in a WiFi zone that will allow you to connect to it. Every time the ARCHOS is in range of
a network that you have already configured once, it will attempt to make a connection.
To configure a new WiFi network, go on the Home screen, tap on the Menu icon
, then select Settings
.
In the Settings screen, select Wireless & networks.
3
If the WiFi is off, tap on the Wi-Fi line to turn it on. Then select Wi-Fi settings. The ARCHOS will
scan for available WiFi networks and display them at the bottom of the screen.
Tap on the network you want to connect to. Then tap inside the Wireless password field to
make the virtual keyboard appear. We recommend that you select Show password, to be able
to see the characters you are typing.
Enter the required network information*, tap on Done, and then tap on Connect. Your
ARCHOS will now attempt to establish a connection to that WiFi access point with the
network parameters you entered.
1
2
4
5
* For free access WiFi points, there is no need to enter any special information. For secured networks, you will need either a key (a series of numbers
and/or letters) of the type WEP, WPA, or WPA2. Check with the person who manages the WiFi network to obtain the exact connection parameters
required.
4
35HomeConnect_PNXXXXXX_Book.indd 4
22/06/2011 17:08:31
�
INTERFACE
Clock screen
E
N
G
L
I
S
H
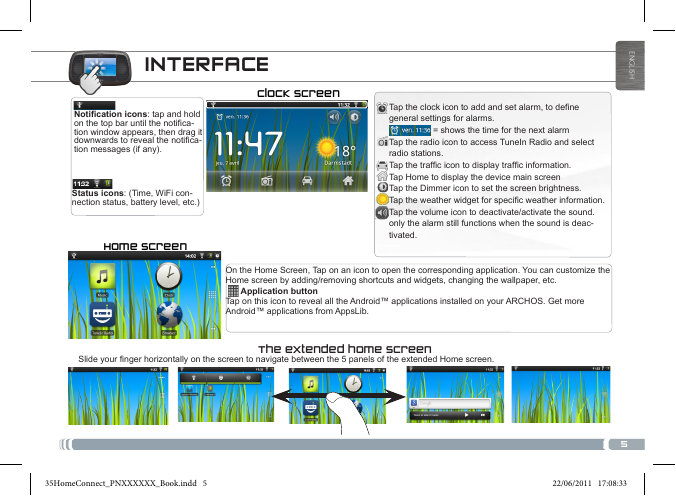
Notification icons: tap and hold
on the top bar until the notifica-
tion window appears, then drag it
downwards to reveal the notifica-
tion messages (if any).
Status icons: (Time, WiFi con-
nection status, battery level, etc.)
Home screen
Tap the clock icon to add and set alarm, to define
general settings for alarms.
= shows the time for the next alarm
Tap the radio icon to access TuneIn Radio and select
radio stations.
Tap the traffic icon to display traffic information.
Tap Home to display the device main screen
Tap the Dimmer icon to set the screen brightness.
Tap the weather widget for specific weather information.
Tap the volume icon to deactivate/activate the sound.
only the alarm still functions when the sound is deac-
tivated.
On the Home Screen, Tap on an icon to open the corresponding application. You can customize the
Home screen by adding/removing shortcuts and widgets, changing the wallpaper, etc.
Tap on this icon to reveal all the Android™ applications installed on your ARCHOS. Get more
Android™ applications from AppsLib.
Application button
Slide your finger horizontally on the screen to navigate between the 5 panels of the extended Home screen.
The extended home screen
35HomeConnect_PNXXXXXX_Book.indd 5
5
22/06/2011 17:08:33
�
H
S
I
L
G
N
E
APPLICATIONS
Main applications
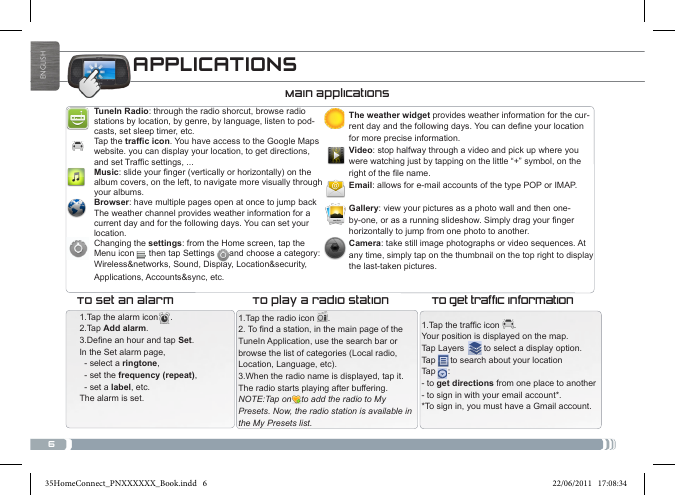
TuneIn Radio: through the radio shorcut, browse radio
stations by location, by genre, by language, listen to pod-
casts, set sleep timer, etc.
Tap the traffic icon. You have access to the Google Maps
website. you can display your location, to get directions,
and set Traffic settings, ...
Music: slide your finger (vertically or horizontally) on the
album covers, on the left, to navigate more visually through
your albums.
Browser: have multiple pages open at once to jump back
The weather channel provides weather information for a
current day and for the following days. You can set your
location.
Changing the settings: from the Home screen, tap the
Menu icon , then tap Settings and choose a category:
Wireless&networks, Sound, Display, Location&security,
Applications, Accounts&sync, etc.
The weather widget provides weather information for the cur-
rent day and the following days. You can define your location
for more precise information.
Video: stop halfway through a video and pick up where you
were watching just by tapping on the little “+” symbol, on the
right of the file name.
Email: allows for e-mail accounts of the type POP or IMAP.
Gallery: view your pictures as a photo wall and then one-
by-one, or as a running slideshow. Simply drag your finger
horizontally to jump from one photo to another.
Camera: take still image photographs or video sequences. At
any time, simply tap on the thumbnail on the top right to display
the last-taken pictures.
To set an alarm
1.Tap the alarm icon .
2.Tap Add alarm.
3.Define an hour and tap Set.
In the Set alarm page,
- select a ringtone,
- set the frequency (repeat),
- set a label, etc.
The alarm is set.
To play a radio station
To get traffic information
.
1.Tap the radio icon
2. To find a station, in the main page of the
TuneIn Application, use the search bar or
browse the list of categories (Local radio,
Location, Language, etc).
3.When the radio name is displayed, tap it.
The radio starts playing after buffering.
NOTE:Tap on to add the radio to My
Presets. Now, the radio station is available in
the My Presets list.
.
1.Tap the traffic icon
Your position is displayed on the map.
Tap Layers to select a display option.
Tap to search about your location
Tap :
- to get directions from one place to another
- to sign in with your email account*.
*To sign in, you must have a Gmail account.
6
35HomeConnect_PNXXXXXX_Book.indd 6
22/06/2011 17:08:34
�
APPSLIB : APPLICATION STORE
E
N
G
L
I
S
H
AppsLib is the application marketplace for Android devices. Thousands of apps available to download straight to your Android device.
Check out the best in free and paid-for applications.
1. Tap on the AppsLib icon.
2. Search through the Categories, Top 50, Selection or type key words on the search bar.
Find the application you want!
Approved apps
Thanks to our approved stamp, you
can see which applications have
already been tested to work on your
tablet by our engineers.
All kinds of applications
Clear and unique categories such
as 3D games.
When an update is available, you can:
UPDATE APPSLIB now
1.Tap on the AppsLib icon
The application is opened. An update notification is displayed.
2.Tap on Update Now. The update starts.
3.Follow the on-screen instructions.
4.At the end of the installation, tap on Open.
.
Simple, secure
Completely secure payment via
Paypal. Tie your paypal account
into AppsLib for hassle free shop-
ping whenever you want.
Ratings and comments
Share your opinions. With AppsLib
you can rate and comment on your
applications for all the AppsLib com-
munity to see.
UPDATE APPSLIB later
.
1.Tap on the AppsLib icon
The application is opened. An update notification is displayed.
2.Tap on Update Later.
You can access the application categories and download.
Appslib will be listed on your My Apps list. Tap on it to update.
As long as you do not update, a notification will be displayed
whenever you open AppsLib.
NOTE: Download AppsLib at www.appslib.com
35HomeConnect_PNXXXXXX_Book.indd 7
7
22/06/2011 17:08:35
�
H
S
I
L
G
N
E
Transferring files to your ARCHOS
1. Connect the supplied USB cable to the ARCHOS and to a running computer.
The ARCHOS will turn on and ask you if you want to connect it.
2. Tap on Mount to connect it. Within a few seconds the ARCHOS will appear as an icon on your computer.
3. You can transfer your media files to the ARCHOS either by copy/pasting them into the respective folders using Windows® Explorer
(or the Finder on a Mac®), or by using Windows Media® Player (Sync tab).
4. Once all your file transfers are finished, close Windows® Explorer and any other program that may have read or written to the
ARCHOS. Click on the ‘safely remove’ icon in the system tray, next to the clock. You can now unplug the USB cable.
8
35HomeConnect_PNXXXXXX_Book.indd 8
22/06/2011 17:08:36
�





 2023年江西萍乡中考道德与法治真题及答案.doc
 2012年重庆南川中考生物真题及答案.doc
 2013年江西师范大学地理学综合及文艺理论基础考研真题.doc
 2020年四川甘孜小升初语文真题及答案I卷.doc
 2020年注册岩土工程师专业基础考试真题及答案.doc
 2023-2024学年福建省厦门市九年级上学期数学月考试题及答案.doc
 2021-2022学年辽宁省沈阳市大东区九年级上学期语文期末试题及答案.doc
 2022-2023学年北京东城区初三第一学期物理期末试卷及答案.doc
 2018上半年江西教师资格初中地理学科知识与教学能力真题及答案.doc
 2012年河北国家公务员申论考试真题及答案-省级.doc
 2020-2021学年江苏省扬州市江都区邵樊片九年级上学期数学第一次质量检测试题及答案.doc
 2022下半年黑龙江教师资格证中学综合素质真题及答案.doc