This Quick Start Guide is only for quick reference. For more details on advanced
functions, you can refer to your user’s manual which you will find as pdf document
on the CD-ROM. Before you can read the file, please download the free software
Acrobat Reader from our website www.rollei.de, English, Service, download.
GETTING TO KNOW YOUR CAMERA
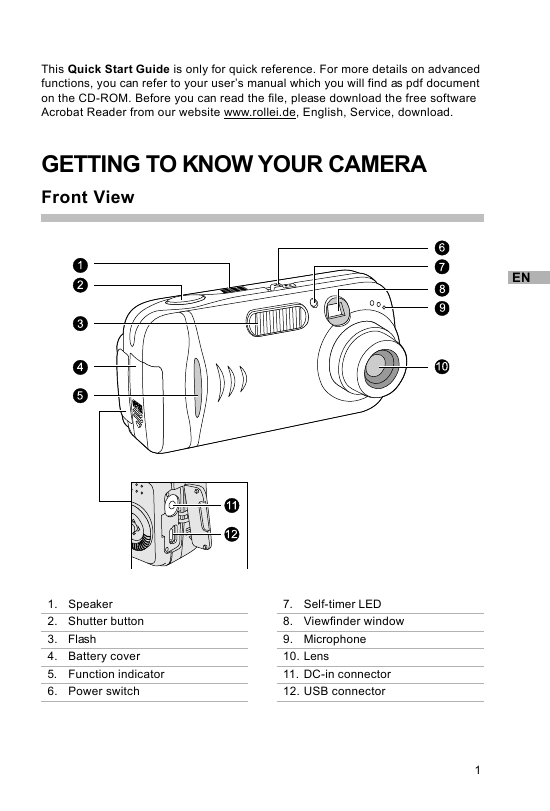
Front View
EN
1
1. Speaker
2. Shutter button
3. Flash
4. Battery cover
5. Function indicator
6. Power switch
7. Self-timer LED
8. Viewfinder window
9. Microphone
10. Lens
11. DC-in connector
12. USB connector
�
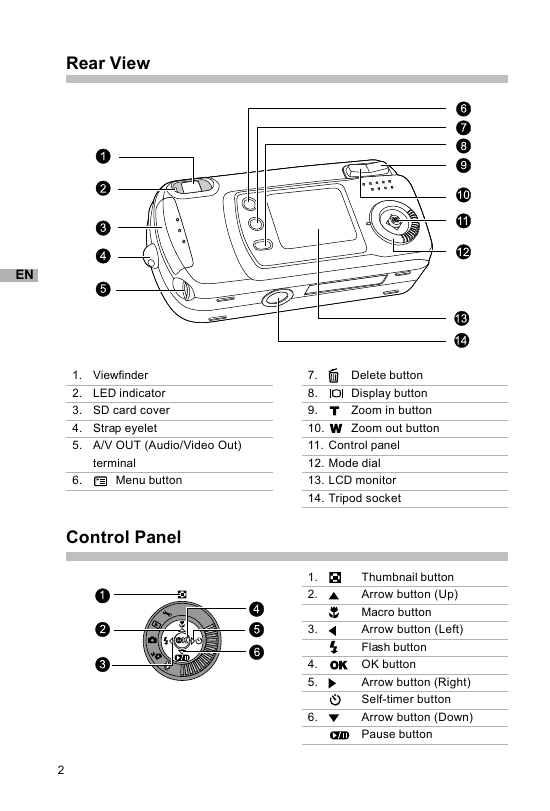
Rear View
1. Viewfinder
2. LED indicator
3. SD card cover
4. Strap eyelet
5. A/V OUT (Audio/Video Out)
terminal
6.
Menu button
Control Panel
EN
2
Delete button
Display button
Zoom in button
Zoom out button
7.
8.
9.
10.
11. Control panel
12. Mode dial
13. LCD monitor
14. Tripod socket
1.
2.
3.
4.
5.
6.
Thumbnail button
Arrow button (Up)
Macro button
Arrow button (Left)
Flash button
OK button
Arrow button (Right)
Self-timer button
Arrow button (Down)
Pause button
�
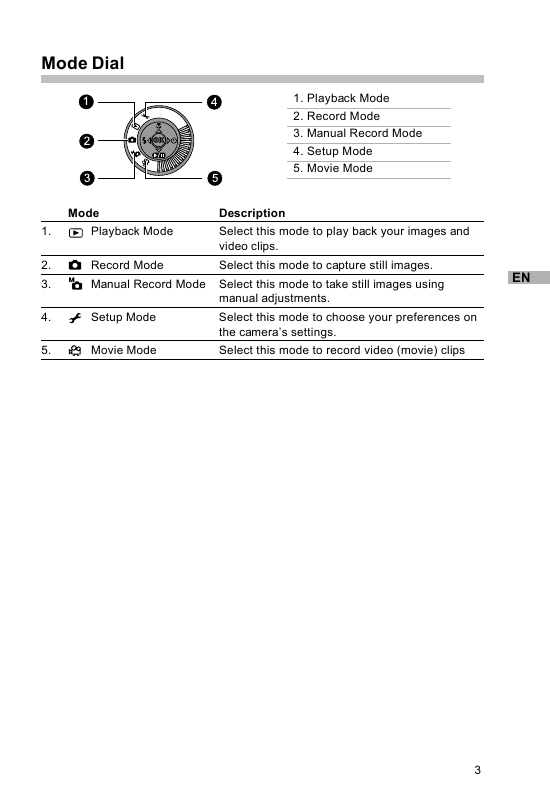
Mode Dial
1. Playback Mode
2. Record Mode
3. Manual Record Mode
4. Setup Mode
5. Movie Mode
Mode
Playback Mode
Setup Mode
Movie Mode
Record Mode
Manual Record Mode Select this mode to take still images using
EN
Description
Select this mode to play back your images and
video clips.
Select this mode to capture still images.
manual adjustments.
Select this mode to choose your preferences on
the camera’s settings.
Select this mode to record video (movie) clips
1.
2.
3.
4.
5.
3
�
GETTING STARTED
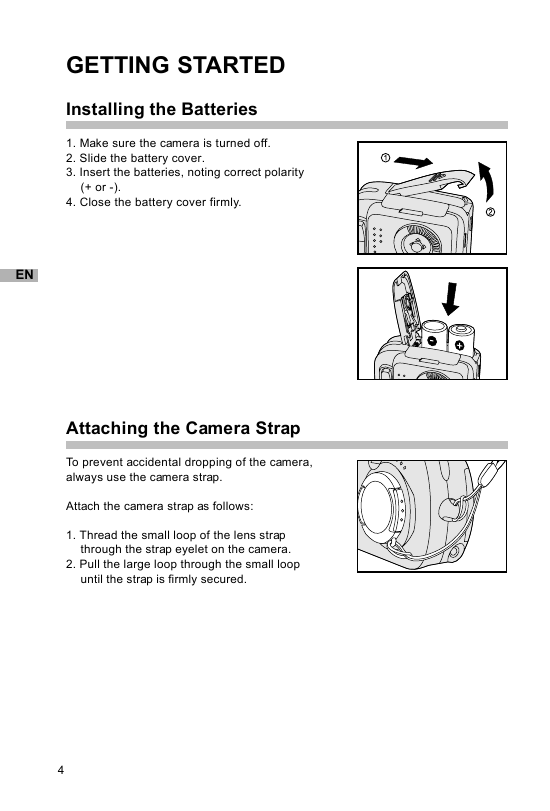
Installing the Batteries
1. Make sure the camera is turned off.
2. Slide the battery cover.
3. Insert the batteries, noting correct polarity
(+ or -).
4. Close the battery cover firmly.
Attaching the Camera Strap
To prevent accidental dropping of the camera,
always use the camera strap.
Attach the camera strap as follows:
1. Thread the small loop of the lens strap
through the strap eyelet on the camera.
2. Pull the large loop through the small loop
until the strap is firmly secured.
EN
4
�
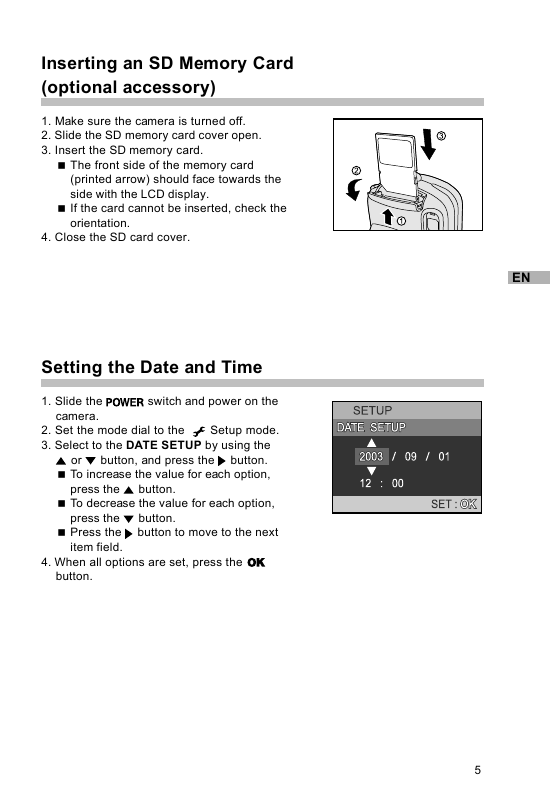
Inserting an SD Memory Card
(optional accessory)
1. Make sure the camera is turned off.
2. Slide the SD memory card cover open.
3. Insert the SD memory card.
The front side of the memory card
(printed arrow) should face towards the
side with the LCD display.
If the card cannot be inserted, check the
orientation.
4. Close the SD card cover.
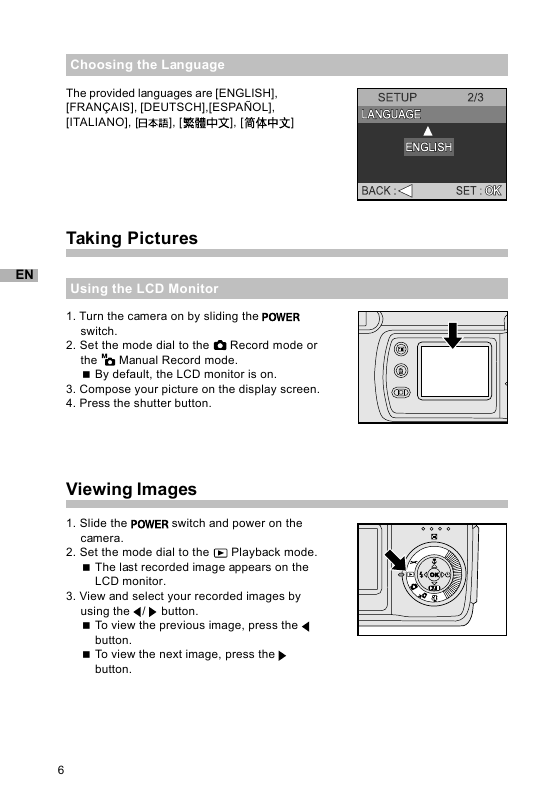
Setting the Date and Time
1. Slide the
camera.
switch and power on the
press the
Press the
item field.
button.
2. Set the mode dial to the
3. Select to the DATE SETUP by using the
button.
To increase the value for each option,
button, and press the
Setup mode.
or
press the
button.
To decrease the value for each option,
button.
button to move to the next
4. When all options are set, press the
EN
5
�
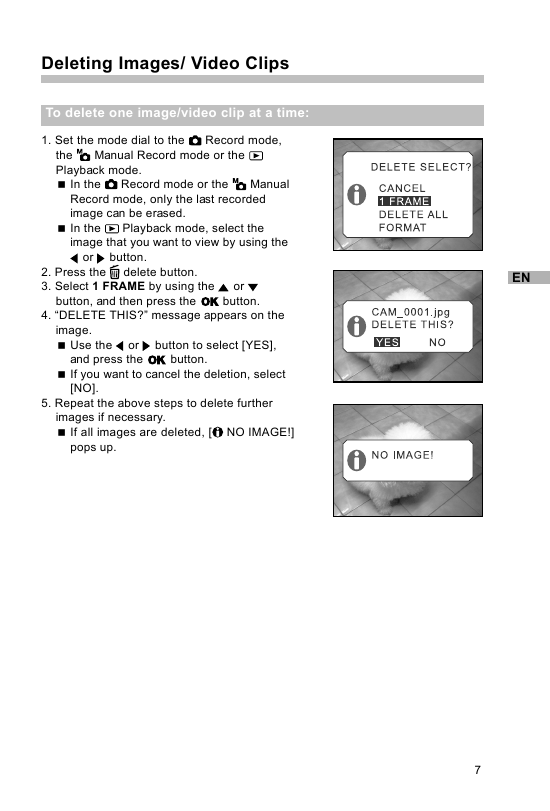
Choosing the Language
The provided languages are [ENGLISH],
[FRANÇAIS], [DEUTSCH],[ESPAÑOL],
[ITALIANO], [
], [
], [
]
Taking Pictures
EN
Using the LCD Monitor
1. Turn the camera on by sliding the
switch.
2. Set the mode dial to the
Record mode or
Manual Record mode.
the
By default, the LCD monitor is on.
3. Compose your picture on the display screen.
4. Press the shutter button.
Viewing Images
1. Slide the
camera.
switch and power on the
2. Set the mode dial to the
Playback mode.
The last recorded image appears on the
LCD monitor.
3. View and select your recorded images by
using the
To view the previous image, press the
button.
/
To view the next image, press the
button.
button.
6
�
Deleting Images/ Video Clips
To delete one image/video clip at a time:
1. Set the mode dial to the
Record mode,
Manual Record mode or the
the
Playback mode.
In the
Record mode or the
Manual
Record mode, only the last recorded
image can be erased.
In the
Playback mode, select the
image that you want to view by using the
or
button.
2. Press the
3. Select 1 FRAME by using the
delete button.
button, and then press the
or
button.
4. “DELETE THIS?” message appears on the
image.
Use the
or
and press the
button to select [YES],
button.
If you want to cancel the deletion, select
5. Repeat the above steps to delete further
images if necessary.
If all images are deleted, [
NO IMAGE!]
[NO].
pops up.
EN
7
�
TRANSFERRING RECORDED IMAGES/
VIDEO CLIPS TO YOUR COMPUTER
To transfer images/video clips from the camera to your computer, follow the steps
below:
Step 1: Installing the USB driver (only for Windows 98)
Step 2: Connecting the camera to your computer
Step 3: Downloading images/video clips
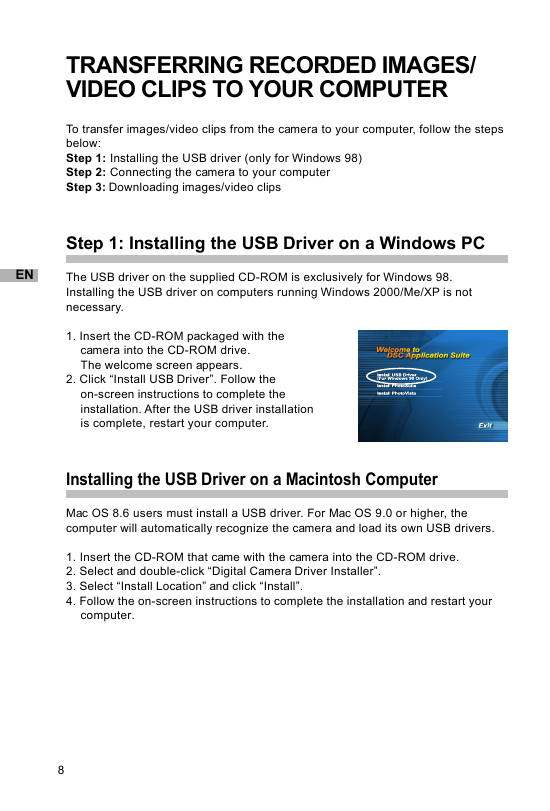
Step 1: Installing the USB Driver on a Windows PC
EN
The USB driver on the supplied CD-ROM is exclusively for Windows 98.
Installing the USB driver on computers running Windows 2000/Me/XP is not
necessary.
1. Insert the CD-ROM packaged with the
camera into the CD-ROM drive.
The welcome screen appears.
2. Click “Install USB Driver”. Follow the
on-screen instructions to complete the
installation. After the USB driver installation
is complete, restart your computer.
Installing the USB Driver on a Macintosh Computer
Mac OS 8.6 users must install a USB driver. For Mac OS 9.0 or higher, the
computer will automatically recognize the camera and load its own USB drivers.
1. Insert the CD-ROM that came with the camera into the CD-ROM drive.
2. Select and double-click “Digital Camera Driver Installer”.
3. Select “Install Location” and click “Install”.
4. Follow the on-screen instructions to complete the installation and restart your
computer.
8
�


 2023年江西萍乡中考道德与法治真题及答案.doc
 2012年重庆南川中考生物真题及答案.doc
 2013年江西师范大学地理学综合及文艺理论基础考研真题.doc
 2020年四川甘孜小升初语文真题及答案I卷.doc
 2020年注册岩土工程师专业基础考试真题及答案.doc
 2023-2024学年福建省厦门市九年级上学期数学月考试题及答案.doc
 2021-2022学年辽宁省沈阳市大东区九年级上学期语文期末试题及答案.doc
 2022-2023学年北京东城区初三第一学期物理期末试卷及答案.doc
 2018上半年江西教师资格初中地理学科知识与教学能力真题及答案.doc
 2012年河北国家公务员申论考试真题及答案-省级.doc
 2020-2021学年江苏省扬州市江都区邵樊片九年级上学期数学第一次质量检测试题及答案.doc
 2022下半年黑龙江教师资格证中学综合素质真题及答案.doc