3-856-814-21 (1)
Video Camera
Recorder H
Operating Instructions
Before operating the unit, please read this manual thoroughly,
and retain it for future reference.
Manual de instrucciones
Antes de utilizar la unidad, lea este manual por completo y
consérvelo para consultar.
Owner’s Record
The model and serial numbers are located on the bottom. Record
the serial number in the space provided below. Refer to these
numbers whenever you call upon your Sony dealer regarding this
product.
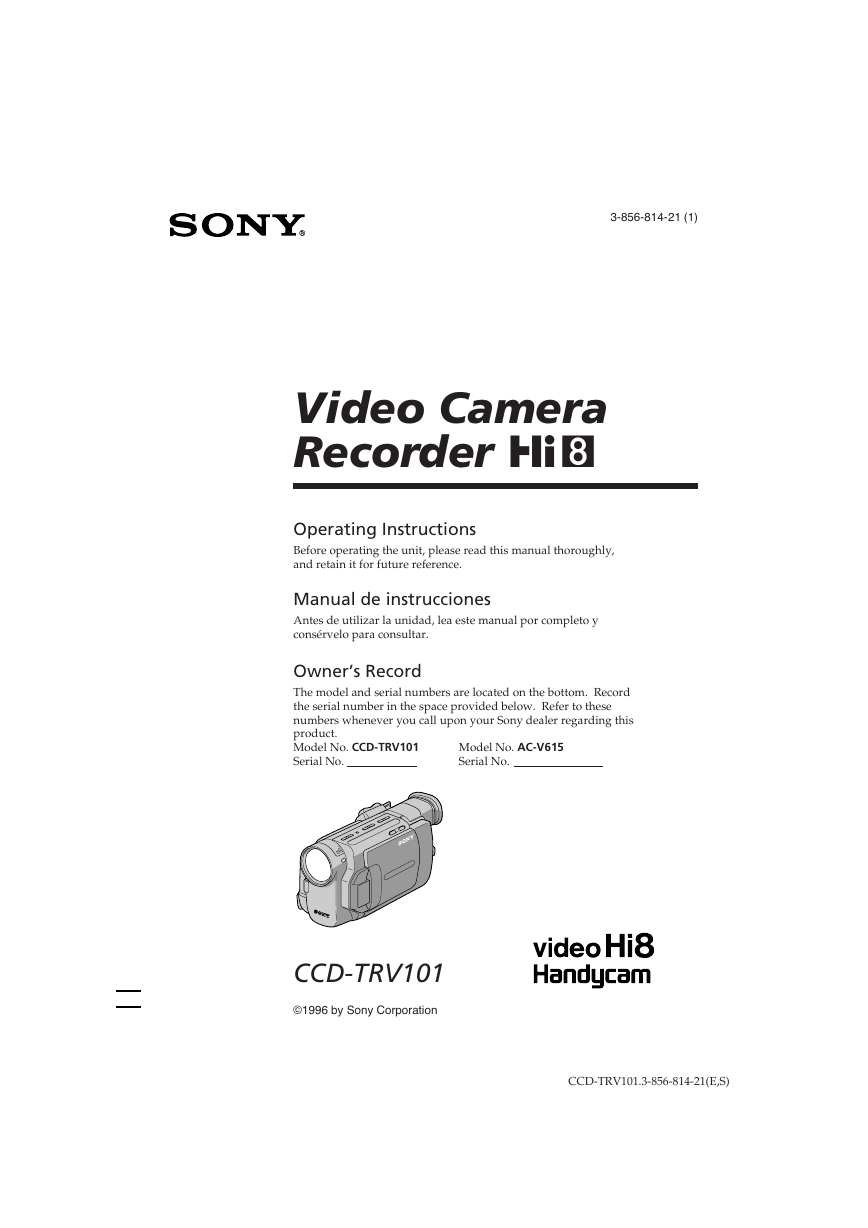
Model No. CCD-TRV101
Serial No.
Model No. AC-V615
Serial No.
CCD-TRV101
©1996 by Sony Corporation
CCD-TRV101.3-856-814-21(E,S)
�
English
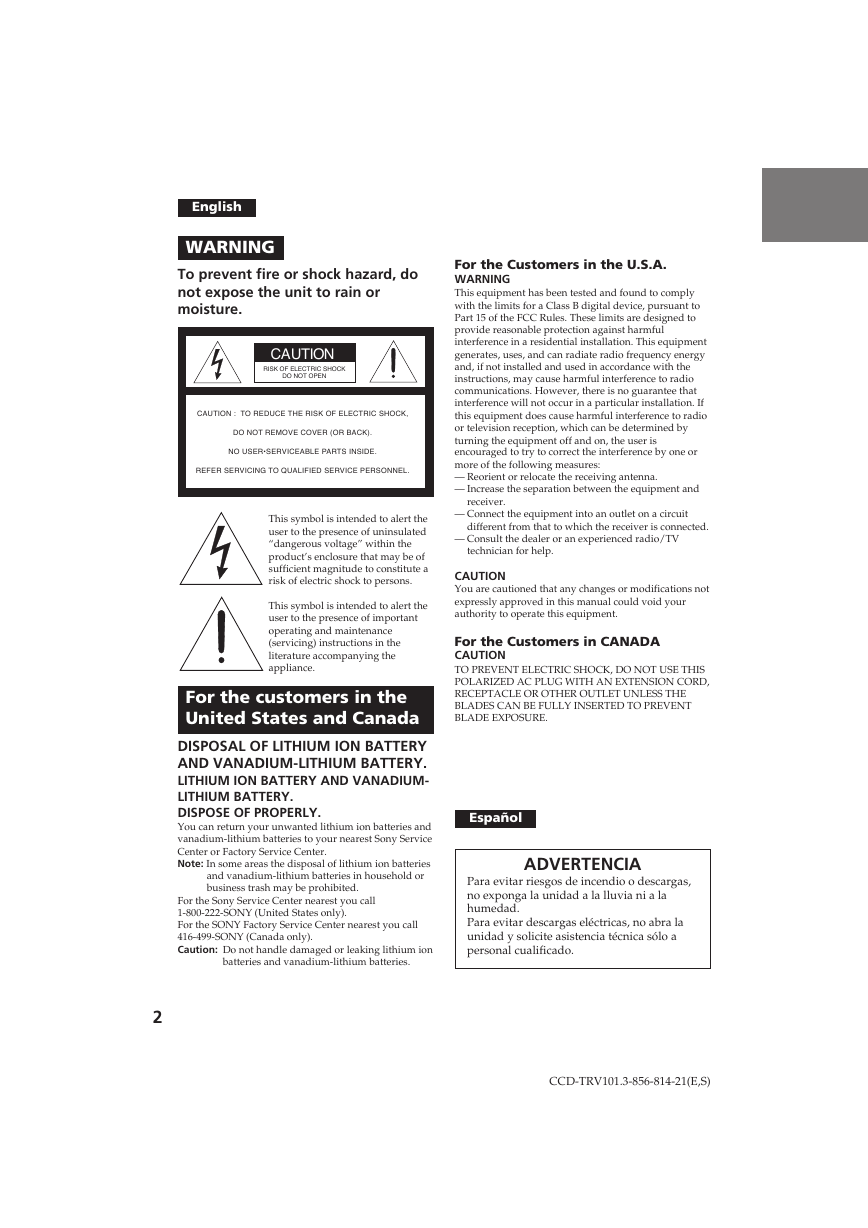
WARNING
To prevent fire or shock hazard, do
not expose the unit to rain or
moisture.
CAUTION
RISK OF ELECTRIC SHOCK
DO NOT OPEN
CAUTION : TO REDUCE THE RISK OF ELECTRIC SHOCK,
DO NOT REMOVE COVER (OR BACK).
NO USER•SERVICEABLE PARTS INSIDE.
REFER SERVICING TO QUALIFIED SERVICE PERSONNEL.
This symbol is intended to alert the
user to the presence of uninsulated
“dangerous voltage” within the
product’s enclosure that may be of
sufficient magnitude to constitute a
risk of electric shock to persons.
This symbol is intended to alert the
user to the presence of important
operating and maintenance
(servicing) instructions in the
literature accompanying the
appliance.
For the customers in the
United States and Canada
DISPOSAL OF LITHIUM ION BATTERY
AND VANADIUM-LITHIUM BATTERY.
LITHIUM ION BATTERY AND VANADIUM-
LITHIUM BATTERY.
DISPOSE OF PROPERLY.
You can return your unwanted lithium ion batteries and
vanadium-lithium batteries to your nearest Sony Service
Center or Factory Service Center.
Note: In some areas the disposal of lithium ion batteries
and vanadium-lithium batteries in household or
business trash may be prohibited.
For the Sony Service Center nearest you call
1-800-222-SONY (United States only).
For the SONY Factory Service Center nearest you call
416-499-SONY (Canada only).
Caution: Do not handle damaged or leaking lithium ion
batteries and vanadium-lithium batteries.
2
For the Customers in the U.S.A.
WARNING
This equipment has been tested and found to comply
with the limits for a Class B digital device, pursuant to
Part 15 of the FCC Rules. These limits are designed to
provide reasonable protection against harmful
interference in a residential installation. This equipment
generates, uses, and can radiate radio frequency energy
and, if not installed and used in accordance with the
instructions, may cause harmful interference to radio
communications. However, there is no guarantee that
interference will not occur in a particular installation. If
this equipment does cause harmful interference to radio
or television reception, which can be determined by
turning the equipment off and on, the user is
encouraged to try to correct the interference by one or
more of the following measures:
— Reorient or relocate the receiving antenna.
— Increase the separation between the equipment and
receiver.
— Connect the equipment into an outlet on a circuit
different from that to which the receiver is connected.
— Consult the dealer or an experienced radio/TV
technician for help.
CAUTION
You are cautioned that any changes or modifications not
expressly approved in this manual could void your
authority to operate this equipment.
For the Customers in CANADA
CAUTION
TO PREVENT ELECTRIC SHOCK, DO NOT USE THIS
POLARIZED AC PLUG WITH AN EXTENSION CORD,
RECEPTACLE OR OTHER OUTLET UNLESS THE
BLADES CAN BE FULLY INSERTED TO PREVENT
BLADE EXPOSURE.
Español
ADVERTENCIA
Para evitar riesgos de incendio o descargas,
no exponga la unidad a la lluvia ni a la
humedad.
Para evitar descargas eléctricas, no abra la
unidad y solicite asistencia técnica sólo a
personal cualificado.
CCD-TRV101.3-856-814-21(E,S)
�
Table of contents
Indice
Before you begin
Using this manual 4
Checking supplied accessories 6
Getting started
Charging and installing the battery pack 7
Inserting a cassette 11
Basic operations
Camera recording 12
Using the zoom feature 16
Shooting with the LCD screen 18
Hints for better shooting 19
Checking the recorded picture 22
Playing back a tape 23
Displaying the date or time when you
recorded – data code function 26
Searching for the end of the picture 28
Advanced operations
Using alternative power sources 29
Using the house current 29
Changing the mode settings 32
—for camera recording—
Letting the subject monitor the shot 37
Recording with the date or time 39
Fade-in and fade-out 40
Enjoying picture effect 42
Using the wide mode function 44
Shooting scenery in several short takes 46
Superimposing a title 47
Making your own original titles 50
Releasing the STEADYSHOT function 52
Using the PROGRAM AE function 54
Focusing manually 56
Adjusting the exposure 58
Shooting with backlighting 60
Rerecording a picture in the middle of a recorded
tape 61
Optimizing the tape condition before recording 63
—for playing back/editing—
Watching on a TV screen 65
Searching the boundaries of recorded tape 67
Returning to a pre-registered position 69
Locating the marking position 71
Writing the RC time code on a recorded tape 77
Editing onto another tape 79
Recording from a VCR or TV 81
Additional Information
Charging the vanadium-lithium battery in the
camcorder 83
Resetting the date and time 84
Usable cassettes and playback modes 86
Tips for using the battery pack 87
Maintenance information and precautions 91
Using your camcorder abroad 95
Trouble check 96
Specifications 106
Identifying the parts 108
Warning indicators 118
Index 119
Antes de empezar
Uso del manual 4
Comprobación de accesorios suministrados 6
Puesta en marcha
Carga e instalación del paquete de baterías 7
Inserción de videocassettes 11
Operaciones básicas
Grabación con la cámara 12
Uso de la función de zoom 16
Videofilmación con la pantalla LCD 18
Consejos para videofilmar mejor 19
Comprobación de imágenes grabadas 22
Reproducción de cintas 23
Visualización de la fecha u hora de grabación -
función de código de datos 26
Búsqueda del final de la imagen 28
Operaciones avanzadas
Uso de fuentes de alimentación alternativas 29
Uso de corriente doméstica 29
Cambio de los ajustes de modo 32
— para grabación con la cámara—
Control de videofilmación por el sujeto 37
Grabación con fecha u hora 39
Aparición y desaparición gradual de imágenes 40
Uso del efecto de imagen 42
Uso de la función de modo panorámico 44
Videofilmación de escenarios en varias tomas cortas
46
Sobreimpresión de títulos 47
Creación de títulos originales 50
Desactivación de la función STEADYSHOT 52
Uso de la función PROGRAM AE 54
Enfoque manual 56
Ajuste de la exposición 58
Videofilmación con iluminación a contraluz 60
Grabación de una imagen en el medio de una cinta
grabada 61
grabar 63
Optimización de las condiciones de la cinta antes de
—para reproducción/edición—
Reproducción en pantallas de televisior 65
Búsqueda de los límites de la fecha de grabación 67
Localización de posiciones registradas de antemano 69
Localización de posiciones marcadas 71
Escritura del código de tiempos RC en cintas
grabadas 77
Edición en otra cinta 79
Grabación desde una videograbadora o un televisor 81
Información adicional
Carga de la pila de vanadio-litio en la videocámara 83
Reajuste de fecha y hora 84
Videocassettes utilizables y modos de reproducción 86
Consejos para usar el paquete de baterías 87
Información y precauciones de mantenimiento 91
Uso de la videocámara en el extranjero 95
Comprobación de errores 101
Especificaciones 107
Identificación de componentes 108
Indicadores de aviso 118
Indice Tapa posterior
B
e
f
o
r
e
i
y
o
u
b
e
g
n
/
A
n
t
e
s
d
e
e
m
p
e
z
a
r
3
CCD-TRV101.3-856-814-21(E,S)
�
Before you begin
Using this manual
Antes de empezar
Uso del manual
Welcome to Video
H
Congratulations on your purchase of this
Sony Handycam® camcorder. With your
Handycam you can capture life’s precious
moments with superior picture and sound
quality.
Your Handycam is loaded with advanced
features, but at the same time it is very easy
to use. You will soon be producing home
video that you can enjoy for years to come.
As you read through this manual, buttons and
settings on the camcorder are shown in capital
letters.
e.g., Set the POWER switch to CAMERA.
As indicated with
hear the beep sound to confirm your operation.
in the illustrations, you can
Note on TV color systems
TV color systems differ from country to country.
To view your recordings on a TV, you need an
NTSC system-based TV.
Precaution on copyright
Television programs, films, video tapes, and
other materials may be copyrighted.
Unauthorized recording of such materials may
be contrary to the provision of the copyright
laws.
Bienvenido al Video
H
Enhorabuena por haber adquirido esta
videocámara Sony Handycam®. Con ella
podrá captar los momentos más preciados de
su vida con una imagen superior y gran
calidad de sonido.
Esta Handycam está provista de funciones
avanzadas, pero a la vez resulta muy fácil de
usar. Pronto podrá grabar sus vídeos
domésticos y disfrutarlos durante muchos
años.
Al leer este manual observará que los botones y
ajustes de la videocámara se indican en
mayúsculas.
Por ejemplo, Ajuste el interruptor POWER en
CAMERA.
Tal como se indica con
cámara emitirá un pitido para confirmar la
operación.
en las ilustraciones, la
Nota sobre sistemas de color de
televisión
Los sistemas de color de televisión difieren de un
país a otro. Para visualizar las grabaciones en un
televisor, éste debe basarse en el sistema NTSC.
Precauciones sobre los derechos
de autor
Los derechos de autor de programas de
televisión, películas, cintas de vídeo y otros
materiales pueden estar registrados. La
grabación no autorizada de dichos materiales
puede infringir las disposiciones de la legislación
sobre derechos de autor.
4
CCD-TRV101.3-856-814-21(E,S)
�
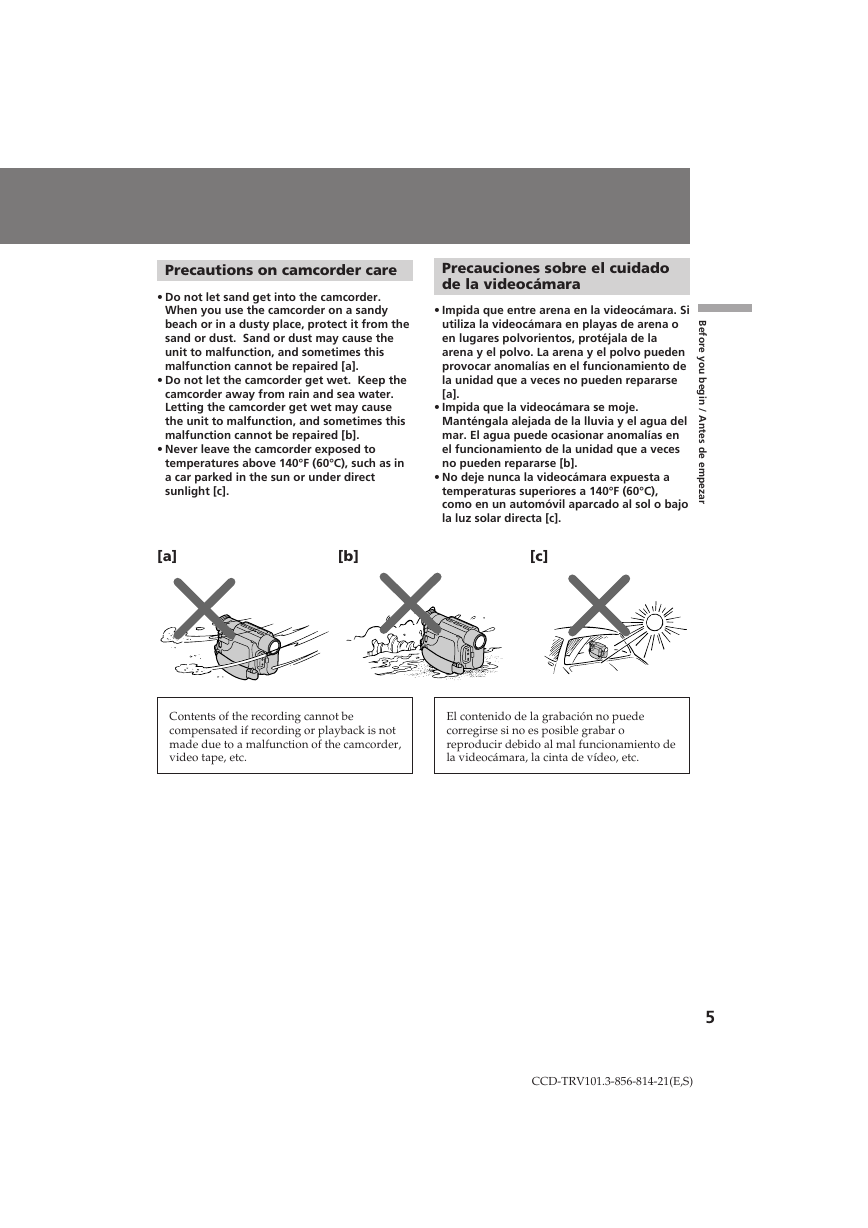
Precautions on camcorder care
• Do not let sand get into the camcorder.
When you use the camcorder on a sandy
beach or in a dusty place, protect it from the
sand or dust. Sand or dust may cause the
unit to malfunction, and sometimes this
malfunction cannot be repaired [a].
• Do not let the camcorder get wet. Keep the
camcorder away from rain and sea water.
Letting the camcorder get wet may cause
the unit to malfunction, and sometimes this
malfunction cannot be repaired [b].
• Never leave the camcorder exposed to
temperatures above 140°F (60°C), such as in
a car parked in the sun or under direct
sunlight [c].
Precauciones sobre el cuidado
de la videocámara
• Impida que entre arena en la videocámara. Si
utiliza la videocámara en playas de arena o
en lugares polvorientos, protéjala de la
arena y el polvo. La arena y el polvo pueden
provocar anomalías en el funcionamiento de
la unidad que a veces no pueden repararse
[a].
• Impida que la videocámara se moje.
Manténgala alejada de la lluvia y el agua del
mar. El agua puede ocasionar anomalías en
el funcionamiento de la unidad que a veces
no pueden repararse [b].
• No deje nunca la videocámara expuesta a
temperaturas superiores a 140°F (60°C),
como en un automóvil aparcado al sol o bajo
la luz solar directa [c].
[a]
[b]
[c]
Contents of the recording cannot be
compensated if recording or playback is not
made due to a malfunction of the camcorder,
video tape, etc.
El contenido de la grabación no puede
corregirse si no es posible grabar o
reproducir debido al mal funcionamiento de
la videocámara, la cinta de vídeo, etc.
CCD-TRV101.3-856-814-21(E,S)
B
e
f
o
r
e
i
y
o
u
b
e
g
n
/
A
n
t
e
s
d
e
e
m
p
e
z
a
r
5
�
Checking supplied
accessories
Comprobación de
accesorios
suministrados
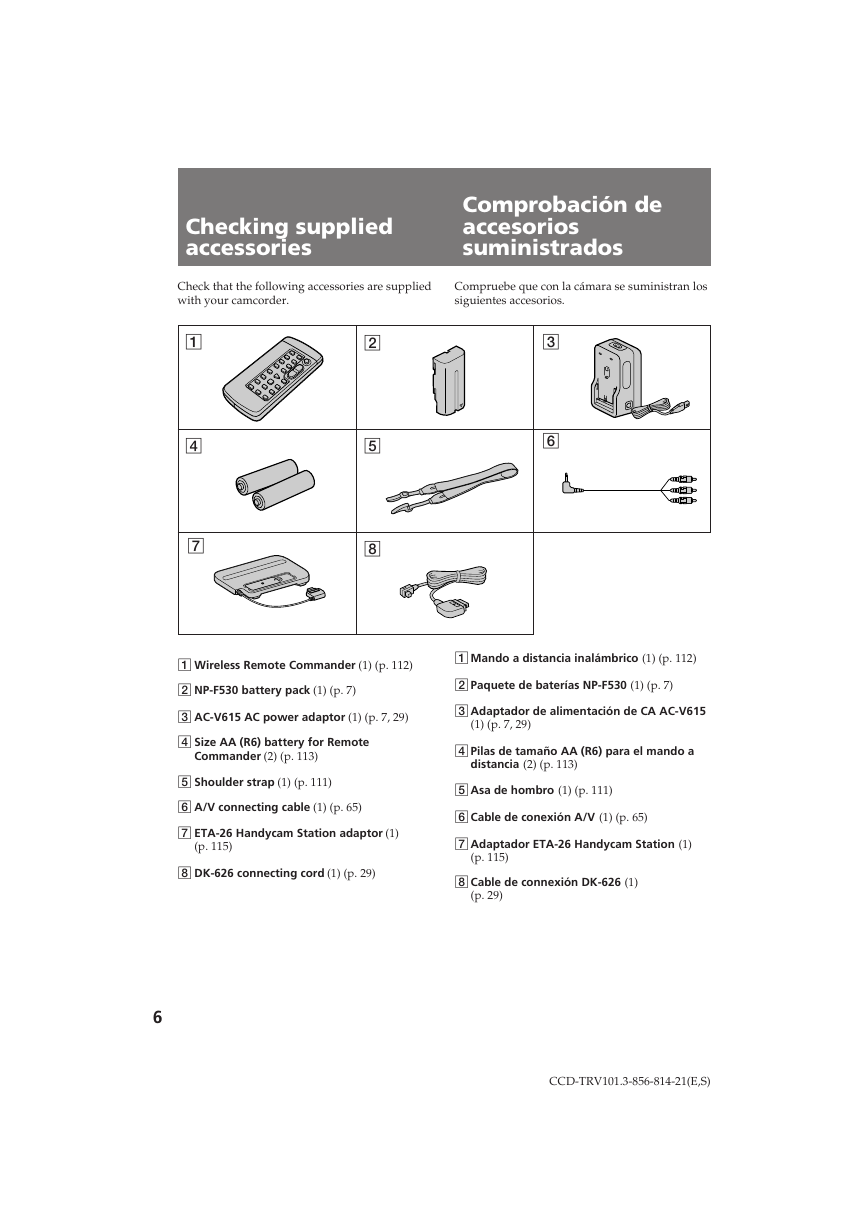
Check that the following accessories are supplied
with your camcorder.
Compruebe que con la cámara se suministran los
siguientes accesorios.
1
4
7
2
5
8
3
6
1 Wireless Remote Commander (1) (p. 112)
2 NP-F530 battery pack (1) (p. 7)
3 AC-V615 AC power adaptor (1) (p. 7, 29)
4 Size AA (R6) battery for Remote
Commander (2) (p. 113)
5 Shoulder strap (1) (p. 111)
6 A/V connecting cable (1) (p. 65)
7 ETA-26 Handycam Station adaptor (1)
(p. 115)
8 DK-626 connecting cord (1) (p. 29)
1 Mando a distancia inalámbrico (1) (p. 112)
2 Paquete de baterías NP-F530 (1) (p. 7)
3 Adaptador de alimentación de CA AC-V615
(1) (p. 7, 29)
4 Pilas de tamaño AA (R6) para el mando a
distancia (2) (p. 113)
5 Asa de hombro (1) (p. 111)
6 Cable de conexión A/V (1) (p. 65)
7 Adaptador ETA-26 Handycam Station (1)
(p. 115)
8 Cable de connexión DK-626 (1)
(p. 29)
6
CCD-TRV101.3-856-814-21(E,S)
�
Getting started
Charging and installing
the battery pack
Puesta en marcha
Carga e instalación del
paquete de baterías
Before using your camcorder, you first need to
charge and install the battery pack. To charge
the battery pack, use the supplied AC power
adaptor.
This camcorder operates with the InfoLITHIUM
battery pack NP-F530. If you use any other
battery pack to operate your camcorder, the
camcorder may not operate or battery life may be
shorten.
“InfoLITHIUM” is a trademark of Sony
Corporation.
Antes de emplear la videocámara, primero es
necesario cargar e instalar el paquete de baterías.
Para cargarlo, utilice el adaptador de
alimentación de CA suministrado.
Esta videocámara funciona con el paquete de
baterías InfoLITHIUM NP-F530. Si emplea la
videocámara con otro tipo de paquete de
baterías, es posible que dicha videocámara no
funcione o que la duración de la batería se
reduzca.
“InfoLITHIUM” es una marca comercial de Sony
Corporation.
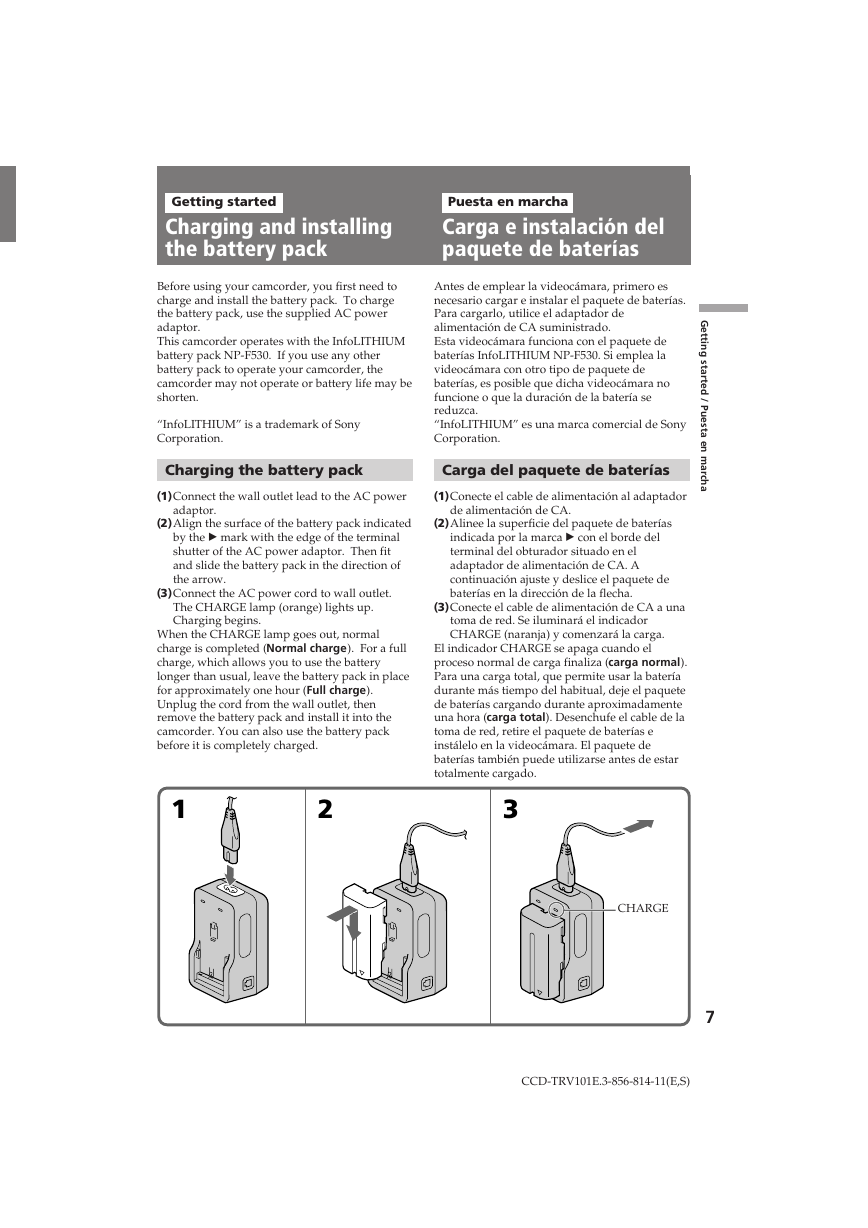
Charging the battery pack
Carga del paquete de baterías
(1)Connect the wall outlet lead to the AC power
(1)Conecte el cable de alimentación al adaptador
adaptor.
de alimentación de CA.
(2)Align the surface of the battery pack indicated
(2)Alinee la superficie del paquete de baterías
by the z mark with the edge of the terminal
shutter of the AC power adaptor. Then fit
and slide the battery pack in the direction of
the arrow.
(3)Connect the AC power cord to wall outlet.
The CHARGE lamp (orange) lights up.
Charging begins.
When the CHARGE lamp goes out, normal
charge is completed (Normal charge). For a full
charge, which allows you to use the battery
longer than usual, leave the battery pack in place
for approximately one hour (Full charge).
Unplug the cord from the wall outlet, then
remove the battery pack and install it into the
camcorder. You can also use the battery pack
before it is completely charged.
indicada por la marca z con el borde del
terminal del obturador situado en el
adaptador de alimentación de CA. A
continuación ajuste y deslice el paquete de
baterías en la dirección de la flecha.
(3)Conecte el cable de alimentación de CA a una
toma de red. Se iluminará el indicador
CHARGE (naranja) y comenzará la carga.
El indicador CHARGE se apaga cuando el
proceso normal de carga finaliza (carga normal).
Para una carga total, que permite usar la batería
durante más tiempo del habitual, deje el paquete
de baterías cargando durante aproximadamente
una hora (carga total). Desenchufe el cable de la
toma de red, retire el paquete de baterías e
instálelo en la videocámara. El paquete de
baterías también puede utilizarse antes de estar
totalmente cargado.
1
2
3
CHARGE
CCD-TRV101E.3-856-814-11(E,S)
G
e
t
t
i
n
g
s
t
a
r
t
e
d
/
P
u
e
s
t
a
e
n
m
a
r
c
h
a
7
�
Charging and installing the
battery pack
Carga e instalación del
paquete de baterías
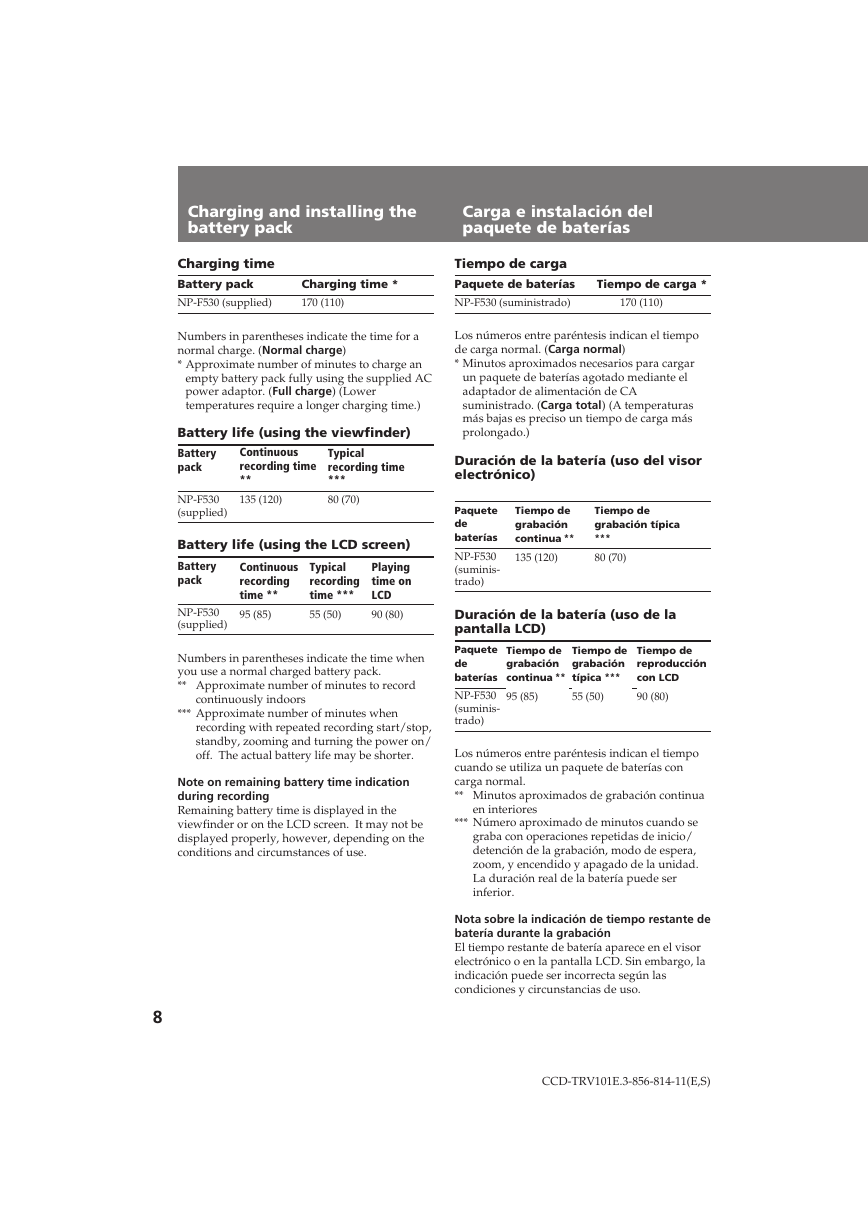
Charging time
Battery pack
NP-F530 (supplied)
Charging time *
170 (110)
Tiempo de carga
Paquete de baterías
NP-F530 (suministrado)
Tiempo de carga *
170 (110)
Numbers in parentheses indicate the time for a
normal charge. (Normal charge)
* Approximate number of minutes to charge an
empty battery pack fully using the supplied AC
power adaptor. (Full charge) (Lower
temperatures require a longer charging time.)
Battery life (using the viewfinder)
Battery
pack
Continuous
recording time
**
135 (120)
Typical
recording time
***
80 (70)
NP-F530
(supplied)
Battery life (using the LCD screen)
Battery
Playing
pack
time on
LCD
90 (80)
Continuous
recording
time **
95 (85)
Typical
recording
time ***
55 (50)
NP-F530
(supplied)
Numbers in parentheses indicate the time when
you use a normal charged battery pack.
** Approximate number of minutes to record
continuously indoors
*** Approximate number of minutes when
recording with repeated recording start/stop,
standby, zooming and turning the power on/
off. The actual battery life may be shorter.
Note on remaining battery time indication
during recording
Remaining battery time is displayed in the
viewfinder or on the LCD screen. It may not be
displayed properly, however, depending on the
conditions and circumstances of use.
8
Los números entre paréntesis indican el tiempo
de carga normal. (Carga normal)
* Minutos aproximados necesarios para cargar
un paquete de baterías agotado mediante el
adaptador de alimentación de CA
suministrado. (Carga total) (A temperaturas
más bajas es preciso un tiempo de carga más
prolongado.)
Duración de la batería (uso del visor
electrónico)
Tiempo de
grabación
continua **
135 (120)
Tiempo de
grabación típica
***
80 (70)
Paquete
de
baterías
NP-F530
(suminis-
trado)
Duración de la batería (uso de la
pantalla LCD)
Paquete
de
baterías
Tiempo de
reproducción
con LCD
Tiempo de
grabación
continua **
95 (85)
Tiempo de
grabación
típica ***
55 (50)
90 (80)
NP-F530
(suminis-
trado)
Los números entre paréntesis indican el tiempo
cuando se utiliza un paquete de baterías con
carga normal.
** Minutos aproximados de grabación continua
en interiores
*** Número aproximado de minutos cuando se
graba con operaciones repetidas de inicio/
detención de la grabación, modo de espera,
zoom, y encendido y apagado de la unidad.
La duración real de la batería puede ser
inferior.
Nota sobre la indicación de tiempo restante de
batería durante la grabación
El tiempo restante de batería aparece en el visor
electrónico o en la pantalla LCD. Sin embargo, la
indicación puede ser incorrecta según las
condiciones y circunstancias de uso.
CCD-TRV101E.3-856-814-11(E,S)
�


 2023年江西萍乡中考道德与法治真题及答案.doc
 2012年重庆南川中考生物真题及答案.doc
 2013年江西师范大学地理学综合及文艺理论基础考研真题.doc
 2020年四川甘孜小升初语文真题及答案I卷.doc
 2020年注册岩土工程师专业基础考试真题及答案.doc
 2023-2024学年福建省厦门市九年级上学期数学月考试题及答案.doc
 2021-2022学年辽宁省沈阳市大东区九年级上学期语文期末试题及答案.doc
 2022-2023学年北京东城区初三第一学期物理期末试卷及答案.doc
 2018上半年江西教师资格初中地理学科知识与教学能力真题及答案.doc
 2012年河北国家公务员申论考试真题及答案-省级.doc
 2020-2021学年江苏省扬州市江都区邵樊片九年级上学期数学第一次质量检测试题及答案.doc
 2022下半年黑龙江教师资格证中学综合素质真题及答案.doc