Digital Video Camera
User Manual
�
Content
Section 1 Getting to Know Your Camera..............................2
Section 2 Getting Up and Running .......................................5
Section 3 Record Mode..........................................................7
Section 4 Playback Mode ....................................................34
Section 5 Listening to MP3 Music ......................................47
Section 6 Reading eBook ....................................................49
Section 7 Viewing MPEG4 Movie on PC.............................51
Section 8 Viewing Pictures and Movies on a TV ...............52
Section 9 Video File Converter............................................53
Section 10 Burning the Recorded Clip into DVD...............53
Section 11 Transferring Data to a Computer........................9
Section 12 Specifications and System Requirements ...... 11
1
�
Section 1
Getting to Know Your Camera
Overview
The camera with 5 Mega Pixel sensor can take DVD-Quality MPEG-4 movies. By way of using
MPEG-4 technology, more videos can be taken within certain amount of memory. High quality
images with up to 11 mega-pixels can also be delivered smoothly. With a color LCD monitor,
users can compose images and examine them easily.
Exposure and color balance can either be adjusted automatically or allowed to be changed
manually. An 8x digital zoom increases user control over the movies and pictures you take.
The camera is also ideally suited for using as a PC camera hooked up to your home computer
via high speed USB 2.0 port
Biuld-in 64 MB memory allows you to take pictures and movies without memory card. The
memory card slot allows users to increase the storage capacity up to 2GB.
Note
Partial memory of the built-in 64MB memory is used
for Firmware code
Standard Accessories
Unpack the package and make sure all standard accessories listed are included:
Camera
USB Cable
Power Adaptor
AV Cable
Lithium-ion Rechargeable Battery
Quick Guide
CD-ROM ( Driver, Arcsoft Software and User Manual)
Remote Control (Optional)
Earphone
Strap
Pouch
2
�
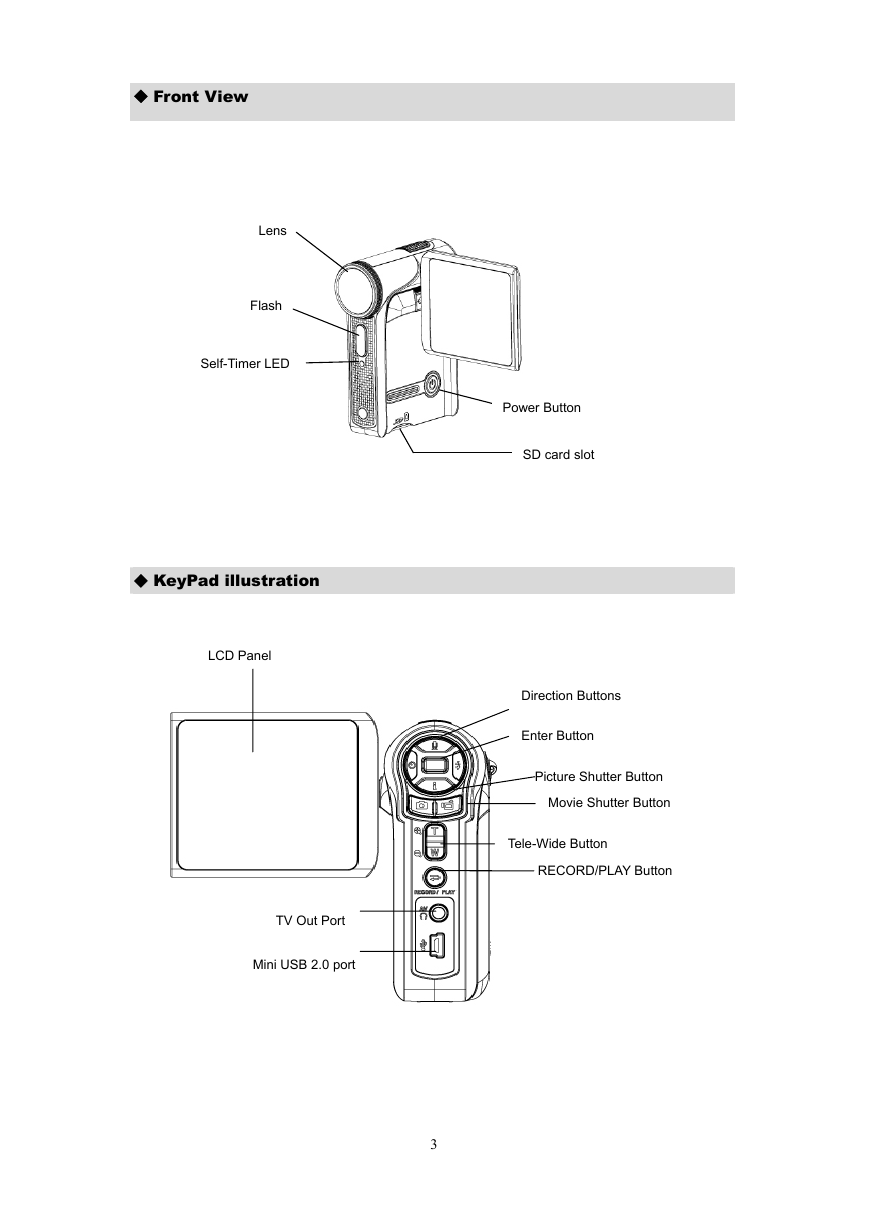
Front View
Lens
Flash
Self-Timer LED
KeyPad illustration
LCD Panel
TV Out Port
Mini USB 2.0 port
3
Power Button
SD card slot
Direction Buttons
Enter Button
Picture Shutter Button
Movie Shutter Button
Tele-Wide Button
RECORD/PLAY Button
�
Battery Cover
Side View
Speaker
Strap Hole
Macro Switch
Microphone
4
�
Section 2
Getting Up and Running
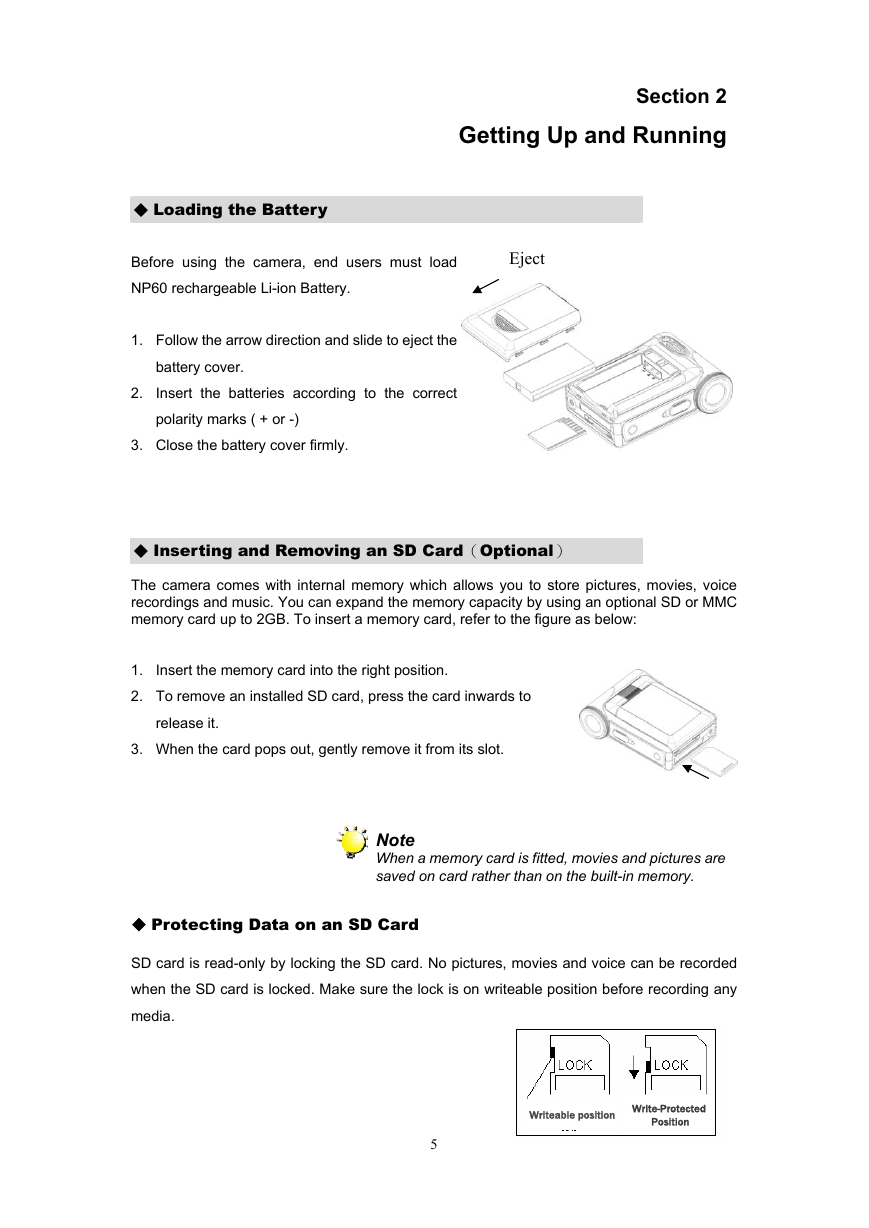
Loading the Battery
Before using the camera, end users must load
NP60 rechargeable Li-ion Battery.
1. Follow the arrow direction and slide to eject the
2.
battery cover.
Insert the batteries according to the correct
polarity marks ( + or -)
Eject
3. Close the battery cover firmly.
Inserting and Removing an SD Card(Optional)
The camera comes with internal memory which allows you to store pictures, movies, voice
recordings and music. You can expand the memory capacity by using an optional SD or MMC
memory card up to 2GB. To insert a memory card, refer to the figure as below:
1.
2. To remove an installed SD card, press the card inwards to
Insert the memory card into the right position.
release it.
3. When the card pops out, gently remove it from its slot.
Note
When a memory card is fitted, movies and pictures are
saved on card rather than on the built-in memory.
Protecting Data on an SD Card
SD card is read-only by locking the SD card. No pictures, movies and voice can be recorded
when the SD card is locked. Make sure the lock is on writeable position before recording any
media.
Writeable position
Writeable position
Write-Protected
Write-Protected
Position
Position
5
�
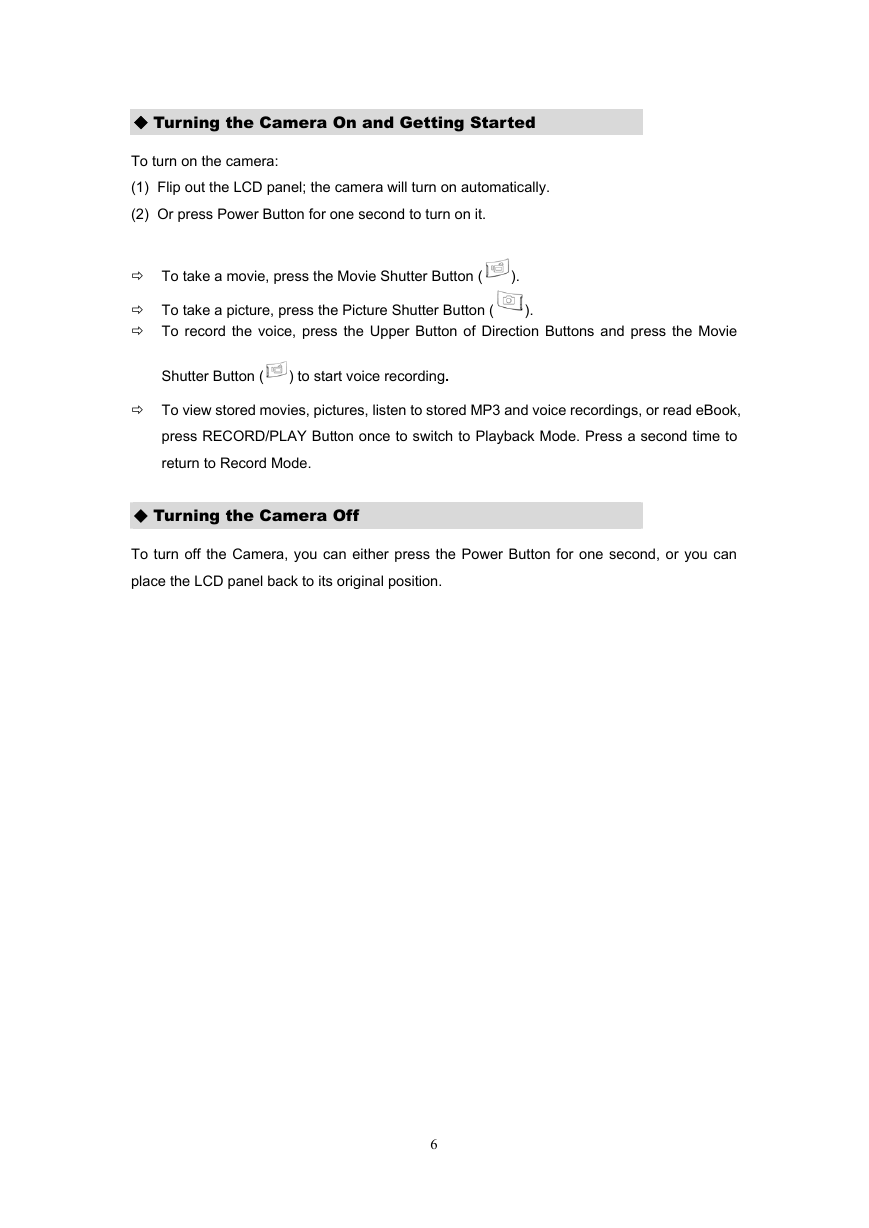
Turning the Camera On and Getting Started
To turn on the camera:
(1) Flip out the LCD panel; the camera will turn on automatically.
(2) Or press Power Button for one second to turn on it.
To take a movie, press the Movie Shutter Button (
).
To take a picture, press the Picture Shutter Button (
To record the voice, press the Upper Button of Direction Buttons and press the Movie
).
Shutter Button (
) to start voice recording.
To view stored movies, pictures, listen to stored MP3 and voice recordings, or read eBook,
press RECORD/PLAY Button once to switch to Playback Mode. Press a second time to
return to Record Mode.
Turning the Camera Off
To turn off the Camera, you can either press the Power Button for one second, or you can
place the LCD panel back to its original position.
6
�
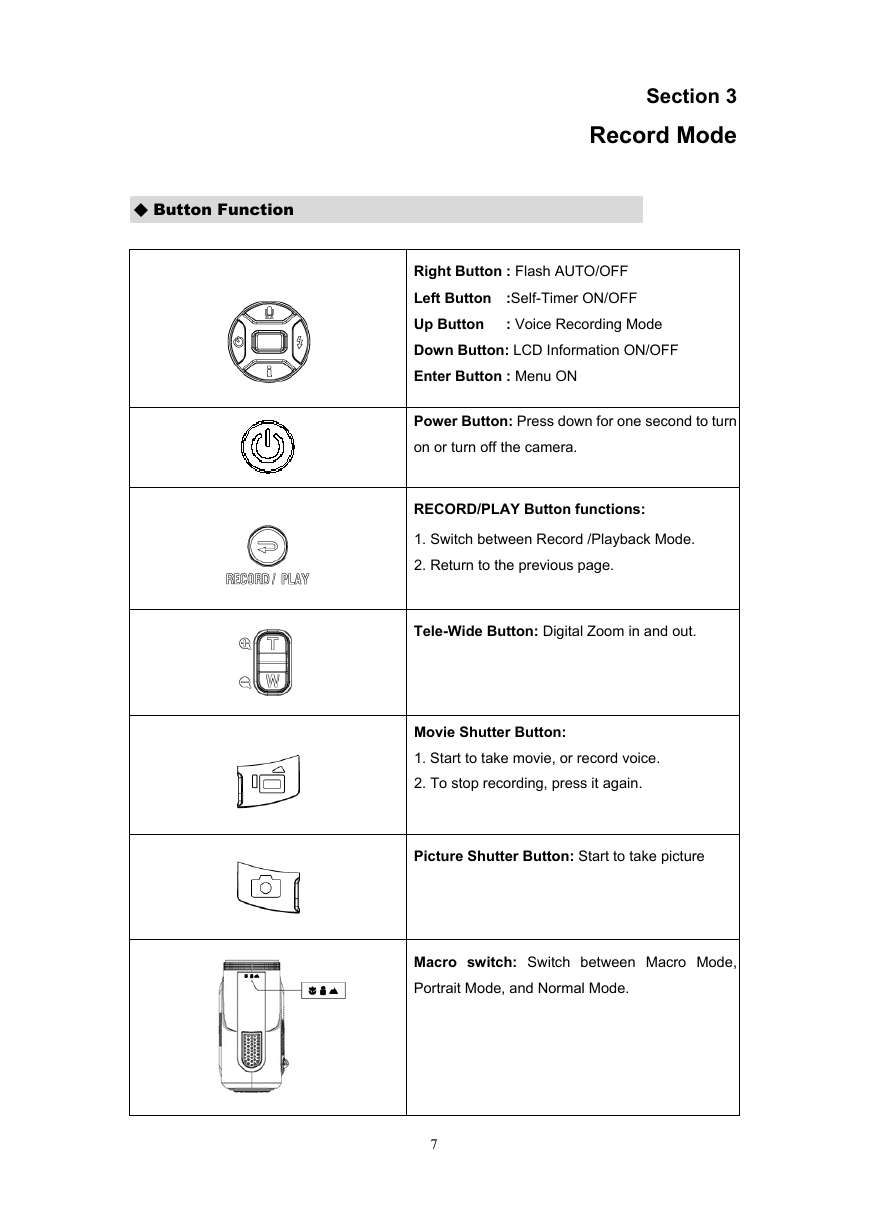
Button Function
Section 3
Record Mode
Right Button : Flash AUTO/OFF
Left Button :Self-Timer ON/OFF
Up Button : Voice Recording Mode
Down Button: LCD Information ON/OFF
Enter Button : Menu ON
Power Button: Press down for one second to turn
on or turn off the camera.
RECORD/PLAY Button functions:
1. Switch between Record /Playback Mode.
2. Return to the previous page.
Tele-Wide Button: Digital Zoom in and out.
Movie Shutter Button:
1. Start to take movie, or record voice.
2. To stop recording, press it again.
Picture Shutter Button: Start to take picture
Macro switch: Switch between Macro Mode,
Portrait Mode, and Normal Mode.
7
�




 2023年江西萍乡中考道德与法治真题及答案.doc
 2012年重庆南川中考生物真题及答案.doc
 2013年江西师范大学地理学综合及文艺理论基础考研真题.doc
 2020年四川甘孜小升初语文真题及答案I卷.doc
 2020年注册岩土工程师专业基础考试真题及答案.doc
 2023-2024学年福建省厦门市九年级上学期数学月考试题及答案.doc
 2021-2022学年辽宁省沈阳市大东区九年级上学期语文期末试题及答案.doc
 2022-2023学年北京东城区初三第一学期物理期末试卷及答案.doc
 2018上半年江西教师资格初中地理学科知识与教学能力真题及答案.doc
 2012年河北国家公务员申论考试真题及答案-省级.doc
 2020-2021学年江苏省扬州市江都区邵樊片九年级上学期数学第一次质量检测试题及答案.doc
 2022下半年黑龙江教师资格证中学综合素质真题及答案.doc