MeshLAB tutorial
1
�
A. OPENING POINT CLOUDS
(Notepad++ � Text editor)
(Cloud Compare � Point cloud and mesh editor)
(MeshLab � Point cloud and mesh editor)
2
�
OPENING POINT CLOUDS IN NOTEPAD ++
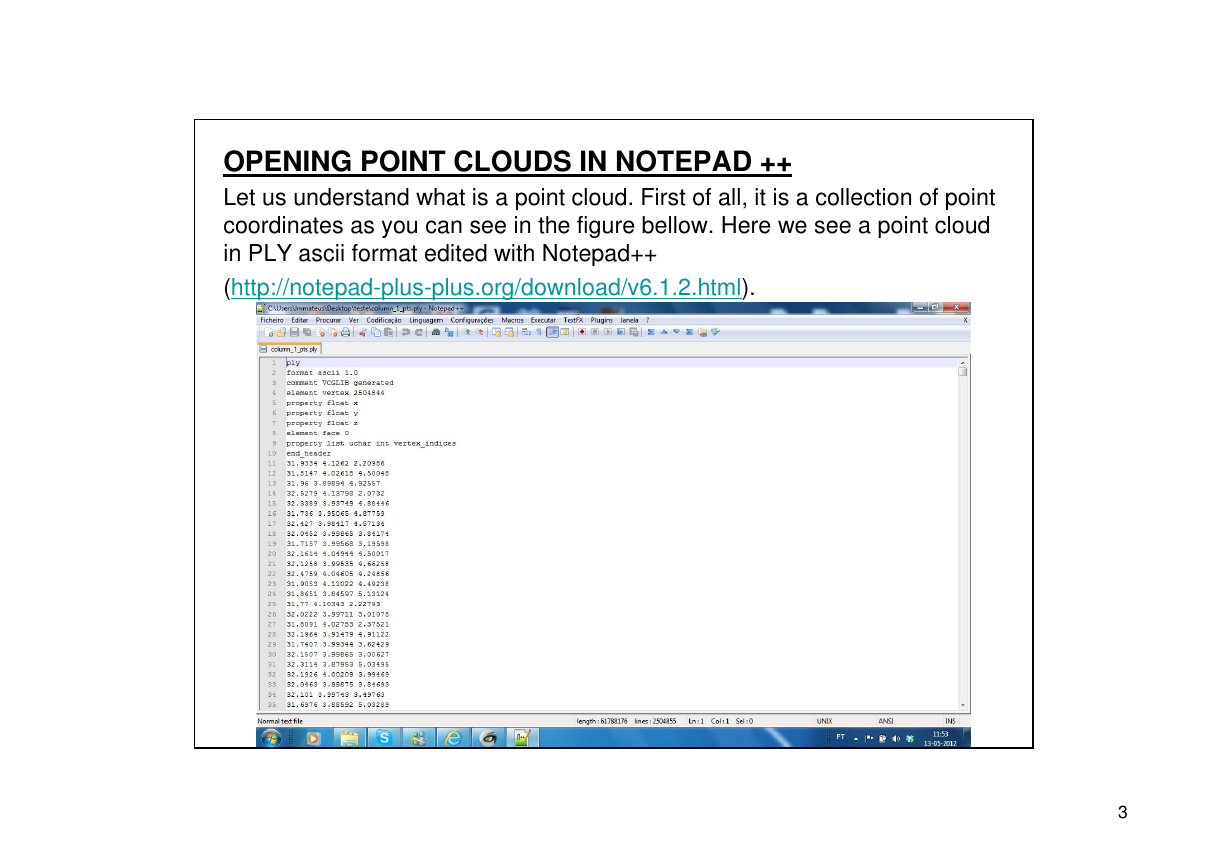
Let us understand what is a point cloud. First of all, it is a collection of point
coordinates as you can see in the figure bellow. Here we see a point cloud
in PLY ascii format edited with Notepad++
(http://notepad-plus-plus.org/download/v6.1.2.html).
3
�
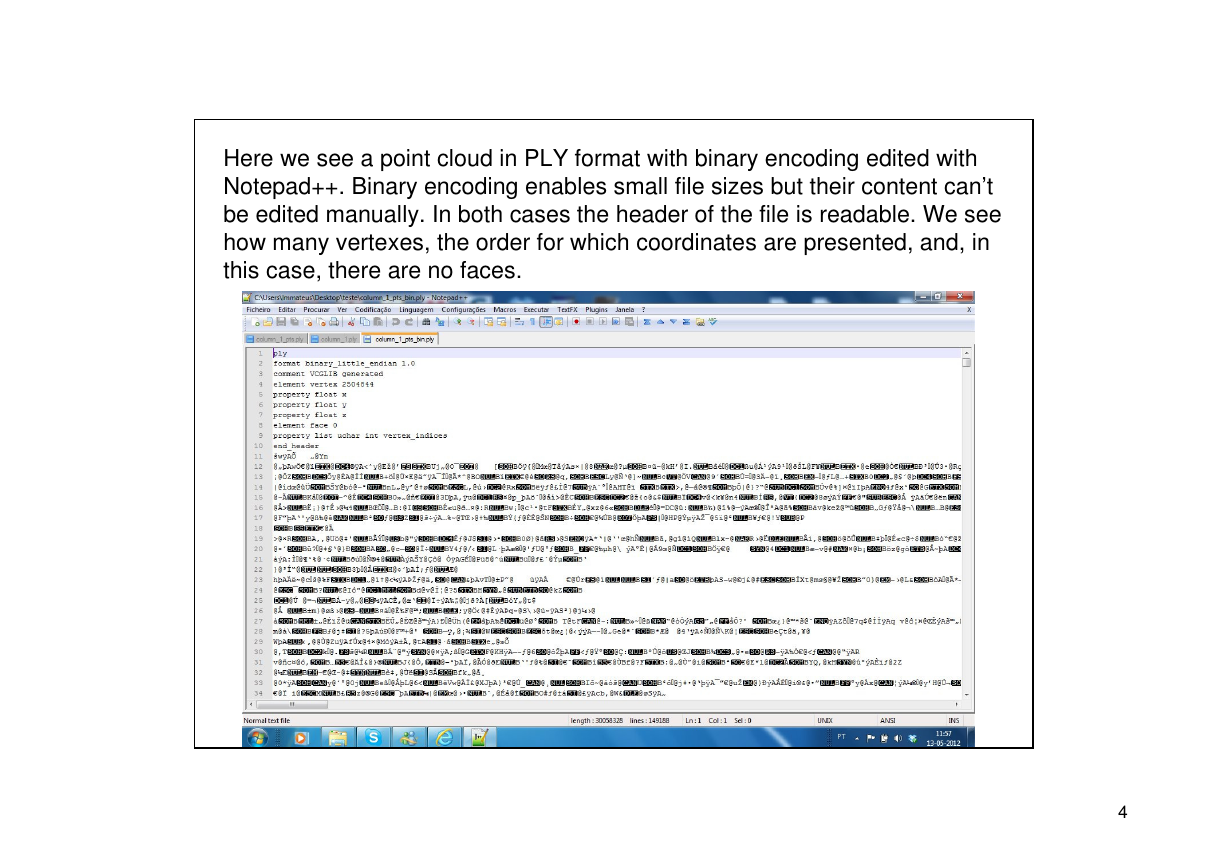
Here we see a point cloud in PLY format with binary encoding edited with
Notepad++. Binary encoding enables small file sizes but their content can’t
be edited manually. In both cases the header of the file is readable. We see
how many vertexes, the order for which coordinates are presented, and, in
this case, there are no faces.
4
�
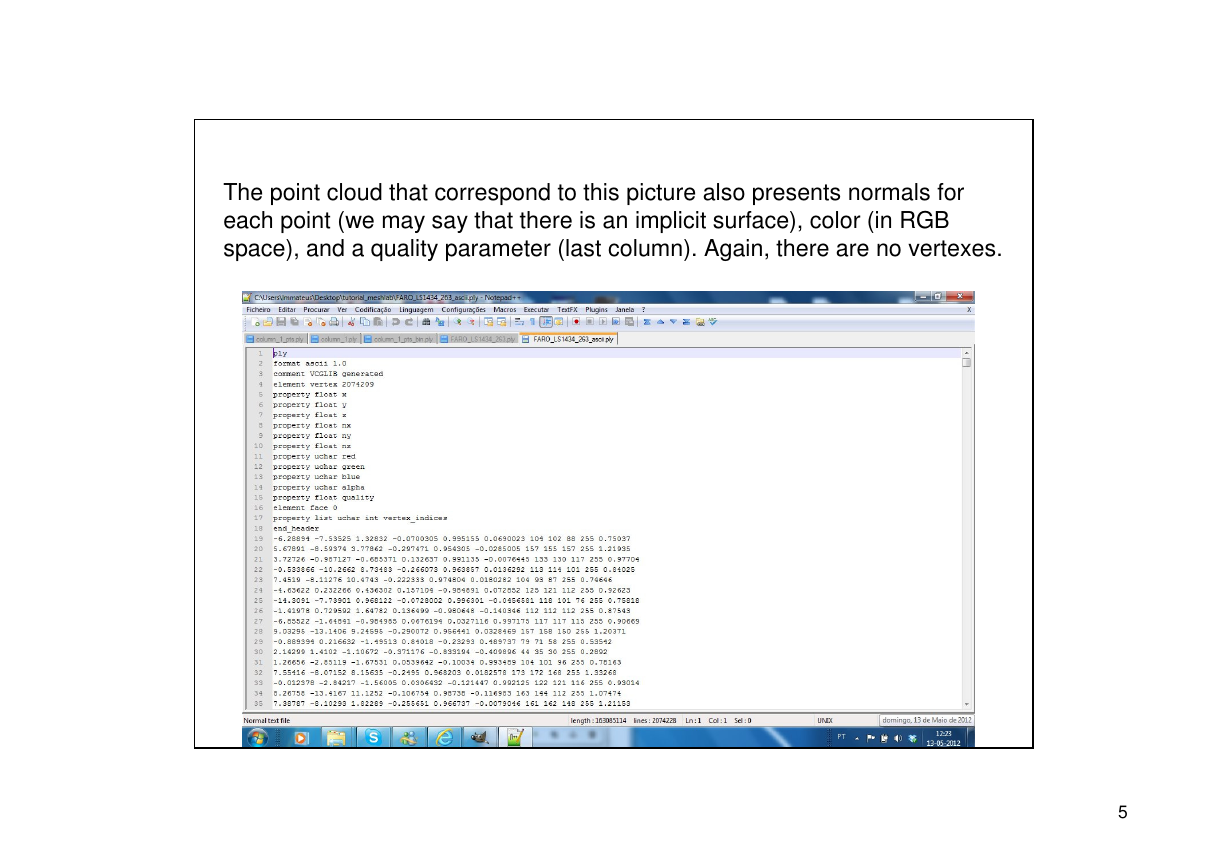
The point cloud that correspond to this picture also presents normals for
each point (we may say that there is an implicit surface), color (in RGB
space), and a quality parameter (last column). Again, there are no vertexes.
5
�
OPENING POINT CLOUDS IN CLOUD COMPARE
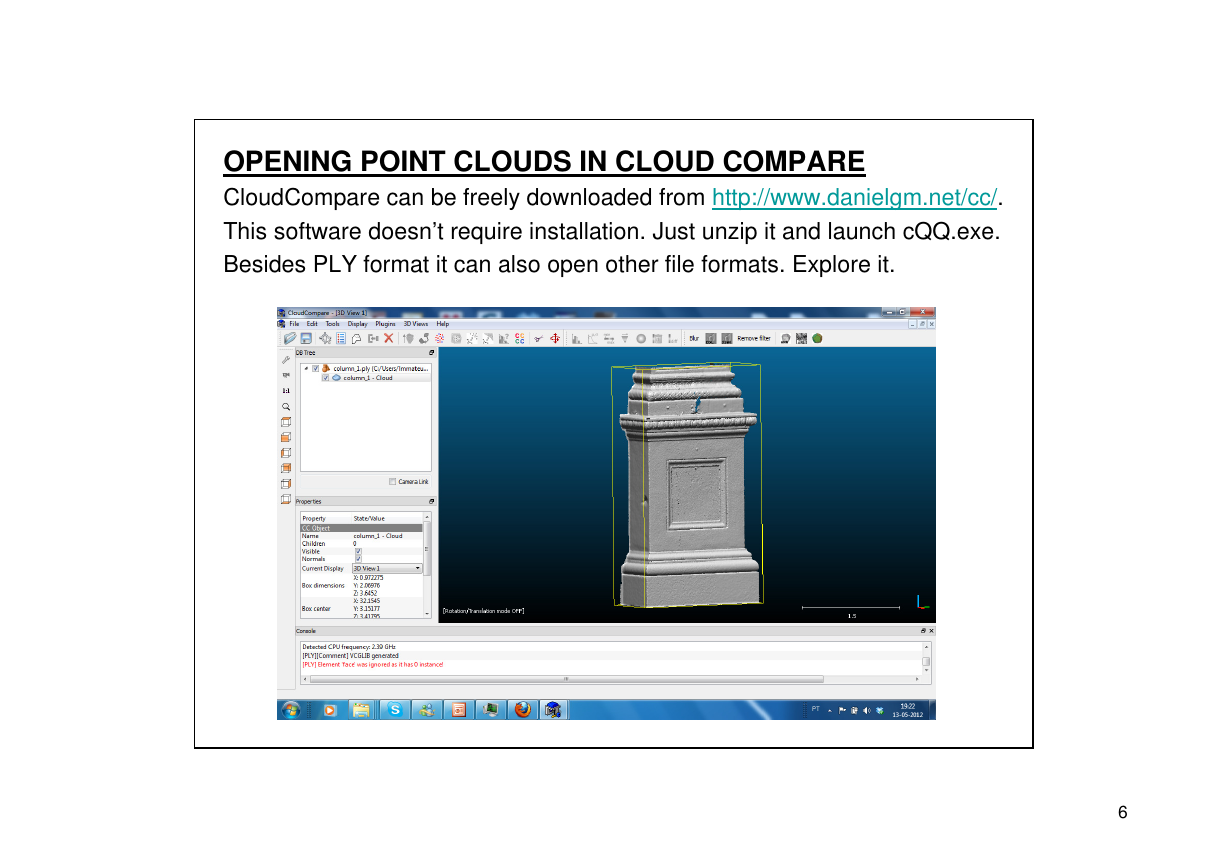
CloudCompare can be freely downloaded from http://www.danielgm.net/cc/.
This software doesn’t require installation. Just unzip it and launch cQQ.exe.
Besides PLY format it can also open other file formats. Explore it.
6
�
OPENING POINT CLOUDS IN MESHLAB
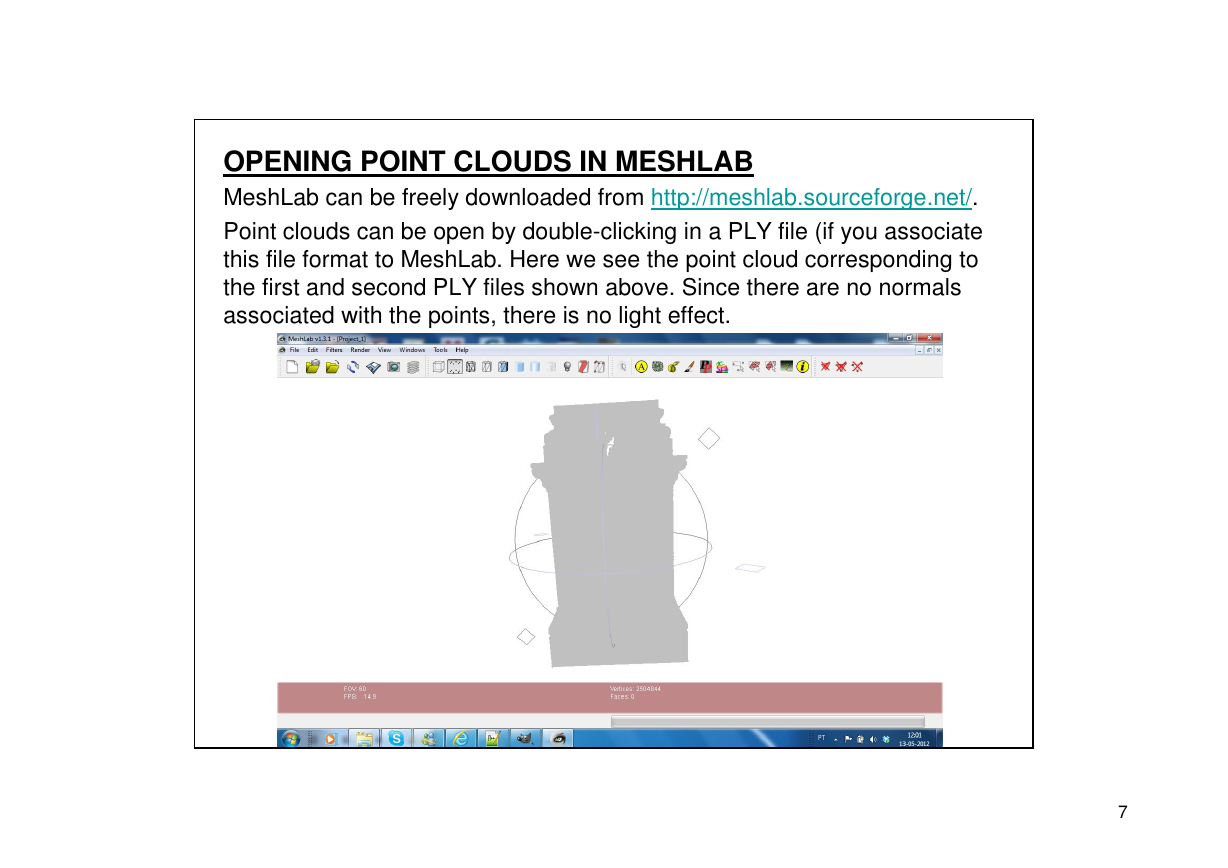
MeshLab can be freely downloaded from http://meshlab.sourceforge.net/.
Point clouds can be open by double-clicking in a PLY file (if you associate
this file format to MeshLab. Here we see the point cloud corresponding to
the first and second PLY files shown above. Since there are no normals
associated with the points, there is no light effect.
7
�
NAVIGATION IN MeshLAB
1. Left mouse button + drag: rotate around trackball center
2. Mouse wheel: move forward or backward
3. Center mouse button + drag: pan
4. Shift + mouse wheel: change camera field of view
5. Double click on specific point: places that point at the trackball center
6. Control + mouse wheel: moves near clipping plan
7. Control + Shift + mouse wheel: moves far clipping plan
8. Alt + Enter: enter full screen mode
9. Control + Shift + left mouse button + drag: changes light direction (this
only takes effect if there are normals)
VISUALIZATION OPTIONS IN MeshLAB
Appearance options can be found under the menu TOOLS.
Other appearance and info options can be found under the menu VIEW.
Also explore the menu RENDER to change lighting, shaders, render mode
and color.
8
�


 2023年江西萍乡中考道德与法治真题及答案.doc
 2012年重庆南川中考生物真题及答案.doc
 2013年江西师范大学地理学综合及文艺理论基础考研真题.doc
 2020年四川甘孜小升初语文真题及答案I卷.doc
 2020年注册岩土工程师专业基础考试真题及答案.doc
 2023-2024学年福建省厦门市九年级上学期数学月考试题及答案.doc
 2021-2022学年辽宁省沈阳市大东区九年级上学期语文期末试题及答案.doc
 2022-2023学年北京东城区初三第一学期物理期末试卷及答案.doc
 2018上半年江西教师资格初中地理学科知识与教学能力真题及答案.doc
 2012年河北国家公务员申论考试真题及答案-省级.doc
 2020-2021学年江苏省扬州市江都区邵樊片九年级上学期数学第一次质量检测试题及答案.doc
 2022下半年黑龙江教师资格证中学综合素质真题及答案.doc