VP-D391( i )
VP-D3910
VP-D392( i )
VP-D395i
Digital Video Camcorder
user manual
imagine the possibilities
Thank you for purchasing this Samsung product.
To receive more complete service, please register
your product at
www.samsung.com/global/register
�
key features of your miniDV camcorder
Audio Enhancement
Provides more powerful sound with
the Real Stereo and Audio Effect
features.
FEATURES OF YOUR NEW MINIDV CAMCORDER
Digital Data Transfer Function
with IEEE1394
By incorporating the IEEE 1394
(i.LINK™: i.LINK is a serial
data transfer protocol and
interconnectivity system, used to
transmit DV data) high speed data
transport port, both moving and
photo images can be transferred to
a PC, making it possible to produce
or edit various images.
Colour TFT LCD
A high-resolution colour TFT LCD
gives you clean, sharp images as
well as the ability to review your
recordings immediately.
High Power Zoom Lens
Power Zoom lens allows users to
magnify the subject clearly up to
34x.
Digital Still Camera Function
(VP-D395 i only)
•
Using memory card, you can
easily record and playback
standard photo images.
You can transfer standard photo
images on the memory card to
your PC using the USB interface.
•
Moving Image Recording on a
Memory Card (VP-D395 i only)
Moving image recording makes
it possible to record video onto a
memory card.
USB Interface for Digital Image
Data Transfer (VP-D395 i only)
You can transfer images to a PC
using the USB interface without an
add-on card.
Tape Photo Recording on a Tape
Tape photo recording makes it
possible to record a photo image on
a tape.
800K pixel CCD
Your camcorder incorporates a 800K
pixel CCD. Photo images can be
recorded to a memory card.
1200x Digital Zoom
Allows you to magnify an image up
to 1200 times its original size.
ii_ English
Digital Image Stabilizer (DIS)
The DIS compensates for any hand
shaking, reducing unstable images
particularly at high magnifi cation.
Various Visual Effects
The Visual Effects allow you to give
your fi lms a special look by adding
various special effects.
Back Light Compensation (BLC)
The BLC function compensates for
a bright background behind a
subject you're recording.
MMC/SD card slot (VP-D395 i
only)
MMC/SD card slot can use MMC
(Multi Media Cards) and SD cards.
Program AE
The Program AE enables you to alter
the shutter speed and aperture to suit
the type of scene/action to be fi lmed.
�
safety warnings
What the icons and signs in this user manual mean :
WARNING
CAUTION
CAUTION
Means that death or serious personal injury is a risk.
Means that there is a potential risk for personal injury or material damage.
To reduce the risk of fi re, explosion, electric shock, or personal injury when using your miniDV
camcorder, follow these basic safety precautions:
Means hints or referential pages that may be helpful when operating the miniDV camcorder.
These warning signs are here to prevent injury to you and others.
Please follow them explicitly. After reading this section, keep it in a safe place for future reference.
precautions
This camcorder should always be connected to an AC outlet with a protective grounding connection.
Batteries shall not be exposed to excessive heat such as sunshine, fi re or the like.
Warning!
Caution
Danger of explosion if battery is incorrectly replaced.
Replace only with the same or equivalent type.
To disconnect the apparatus from the mains, the plug must be pulled out from the mains socket,
therefore the mains plug shall be readily operable.
English_iii
�
notes and safety instructions
NOTES REGARDING THE VIDEO HEAD CLEANING
To ensure normal recording and a clear picture, clean the video heads regularly.
If a square block-shape distorts playback, or only a blue screen is displayed, the video heads may be dirty.
If this happens, clean the video heads with a dry type cleaning cassette.
Do not use a wet-type cleaning cassette. It may damage the video heads.
ADJUSTING THE LCD SCREEN
Please rotate the LCD screen carefully as illustrated. Over rotation may
cause damage to the inside of the hinge that connects the LCD screen
to the camcorder.
1. Open the LCD screen 90 degrees from the camcorder with your fi nger.
2. Rotate it to the best angle to record or play.
If you rotate the LCD screen 180 degrees so it is facing forward,
you can close the LCD screen with the display facing out.
-
- This is convenient during playback operations.
Refer to page 31 to adjust brightness and colour of the LCD screen.
MENU
W
T
DV
AV
POWER
MODE
CHG
BATT.
NOTES REGARDING THE LCD SCREEN
Direct sunlight can damage the LCD screen, the inside of the the Lens. Take pictures of the sun only in low light
conditions, such as at dusk.
The LCD screen has been manufactured using high precision technology. However, there may be tiny dots (red,
blue or green in colour) that appear on the LCD screen. These dots are normal and do not affect the recorded
picture in any way.
Do not pick up the camcorder by holding the LCD screen or battery pack.
iv_English
�
SERVICING & REPLACEMENT PARTS
Do not attempt to service this camcorder yourself.
Opening or removing covers may expose you to dangerous voltage or other hazards.
Refer all servicing to qualifi ed service personnel.
When replacement parts are required, be sure the service technician has used replacement parts specifi ed by the
manufacturer and having the same characteristics as the original part.
Unauthorised substitutions may result in fi re, electric shock or other hazards.
NOTES REGARDING CAMCORDER
Do not leave the camcorder exposed to high temperatures (above 60 °C or 140 °F). For example, in a parked car
in the sun or exposed to direct sunlight.
Do not let the camcorder get wet. Keep the camcorder away from rain, sea water, and any other form of moisture.
If the camcorder gets wet, it may get damaged. Sometimes a malfunction due to exposure to liquids cannot
be repaired.
A sudden rise in atmospheric temperature may cause condensation to form inside the camcorder.
- When you move the camcorder from a cold location to a warm location (e.g. from outside to inside during
the winter.)
- When you move the camcorder from a cool location to a hot location (e.g. from inside to outside during the summer.)
(DEW) protection feature is activated, leave the camcorder for at least two hours in a dry, warm room with
If the
the cassette compartment opened and the battery pack removed.
To disconnect the apparatus from the mains, the plug must be pulled out from the mains socket, therefore the
mains plug shall be readily operable.
Correct Disposal of This Product
(Waste Electrical & Electronic Equipment)
(Applicable in the European Union and other European countries with separate collection systems)
This marking shown on the product or its literature, indicates that it should not be disposed with other
household wastes at the end of its working life. To prevent possible harm to the environment or human
health from uncontrolled waste disposal, please separate this from other types of wastes and recycle it
responsibly to promote the sustainable reuse of material resources.
Household users should contact either the retailer where they purchased this product, or their local
government office, for details of where and how they can take this item for environmentally safe recycling.
Business users should contact their supplier and check the terms and conditions of the purchase contract.
This product should not be mixed with other commercial wastes for disposal.
English_v
�
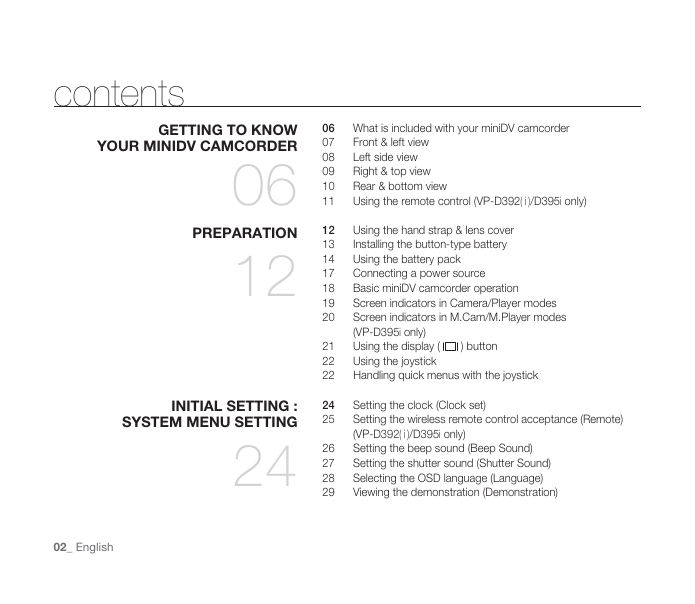
contents
GETTING TO KNOW
YOUR MINIDV CAMCORDER
PREPARATION
06
12
06 What is included with your miniDV camcorder
07
08
09
10
11
Front & left view
Left side view
Right & top view
Rear & bottom view
Using the remote control (VP-D392( i )/D395i only)
Using the hand strap & lens cover
Installing the button-type battery
Using the battery pack
12
13
14
17 Connecting a power source
18
19
20
Basic miniDV camcorder operation
Screen indicators in Camera/Player modes
Screen indicators in M.Cam/M.Player modes
(VP-D395i only)
Using the display (
Using the joystick
21
22
22 Handling quick menus with the joystick
) button
INITIAL SETTING :
SYSTEM MENU SETTING
24
24
25
26
27
28
29
Setting the clock (Clock set)
Setting the wireless remote control acceptance (Remote)
(VP-D392( i )/D395i only)
Setting the beep sound (Beep Sound)
Setting the shutter sound (Shutter Sound)
Selecting the OSD language (Language)
Viewing the demonstration (Demonstration)
02_ English
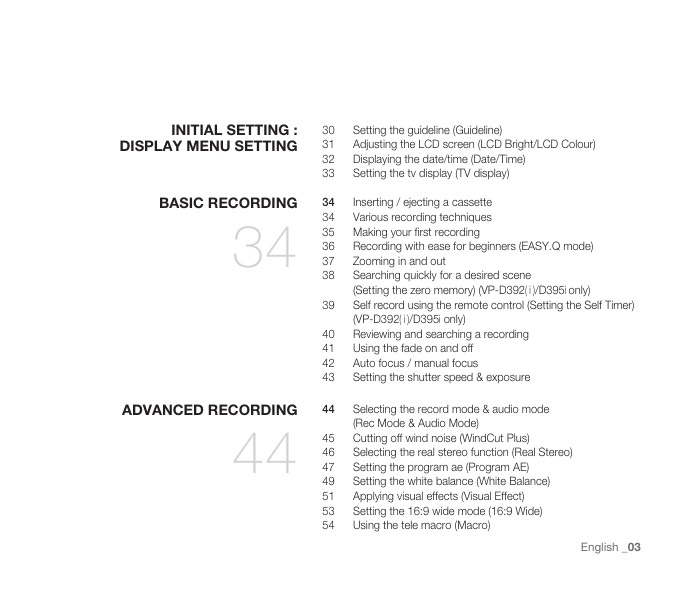
�
INITIAL SETTING :
DISPLAY MENU SETTING
30
31
32
33
Setting the guideline (Guideline)
Adjusting the LCD screen (LCD Bright/LCD Colour)
Displaying the date/time (Date/Time)
Setting the tv display (TV display)
BASIC RECORDING
34
ADVANCED RECORDING
44
39
40
41
42
43
44
Inserting / ejecting a cassette
Various recording techniques
34
34
35 Making your fi rst recording
36
37
38
Recording with ease for beginners (EASY.Q mode)
Zooming in and out
Searching quickly for a desired scene
(Setting the zero memory) (VP-D392( i )/D395i only)
Self record using the remote control (Setting the Self Timer)
(VP-D392( i )/D395i only)
Reviewing and searching a recording
Using the fade on and off
Auto focus / manual focus
Setting the shutter speed & exposure
Selecting the record mode & audio mode
(Rec Mode & Audio Mode)
45 Cutting off wind noise (WindCut Plus)
46
47
49
51
53
54
Selecting the real stereo function (Real Stereo)
Setting the program ae (Program AE)
Setting the white balance (White Balance)
Applying visual effects (Visual Effect)
Setting the 16:9 wide mode (16:9 Wide)
Using the tele macro (Macro)
English _03
�
contents
1
PLAYBACK
62
68
CONNECTION
55
56
57
58
59
60
61
62
63
65
66
67
68
Setting the digital image stabilizer (DIS)
Using back light compensation mode (BLC)
Zooming in and out with digital zoom (Digital Zoom)
Using the colour nite (C.Nite)
Using the light (Light) (VP-D392( i )/D395i only)
Recording a photo image on a tape -tape photo recording
Searching for a photo image on a tape (Photo Search)
Playing back a tape on the LCD screen
Various functions while in Player mode
Audio dubbing (VP-D392( i )/D395i only)
Dubbed audio playback (Audio Select)
Audio effect
Setting the AV in/out (AV In/Out)
(VP-D391i/D392i/D395i only)
Tape playing back on a TV screen
69
71 Copying a camcorder tape onto a video tape
72
73
Using the VOICE+ function
Recording (copying) a TV programme or video tape onto a
camcorder tape (VP-D391i/D392i/D395i only)
DIGITAL STILL CAMERA MODE
(VP-D395 i ONLY)
74
74
75
77
78
79
80
81
Using a memory card (usable memory card) (not supplied)
Structure of folders and fi les on the memory card
Setting the fi le number (File No.)
Taking a photo image (JPEG) on the memory card
Viewing photo images (JPEG)
Protection from accidental erasure (Protect)
Deleting photo images and moving images (Delete)
04_ English
�



 2023年江西萍乡中考道德与法治真题及答案.doc
 2012年重庆南川中考生物真题及答案.doc
 2013年江西师范大学地理学综合及文艺理论基础考研真题.doc
 2020年四川甘孜小升初语文真题及答案I卷.doc
 2020年注册岩土工程师专业基础考试真题及答案.doc
 2023-2024学年福建省厦门市九年级上学期数学月考试题及答案.doc
 2021-2022学年辽宁省沈阳市大东区九年级上学期语文期末试题及答案.doc
 2022-2023学年北京东城区初三第一学期物理期末试卷及答案.doc
 2018上半年江西教师资格初中地理学科知识与教学能力真题及答案.doc
 2012年河北国家公务员申论考试真题及答案-省级.doc
 2020-2021学年江苏省扬州市江都区邵樊片九年级上学期数学第一次质量检测试题及答案.doc
 2022下半年黑龙江教师资格证中学综合素质真题及答案.doc