IEEE JOURNAL OF ROBOTICS AND AUTOMATION, VOL. RA-3, NO. 4, AUGUST 1987
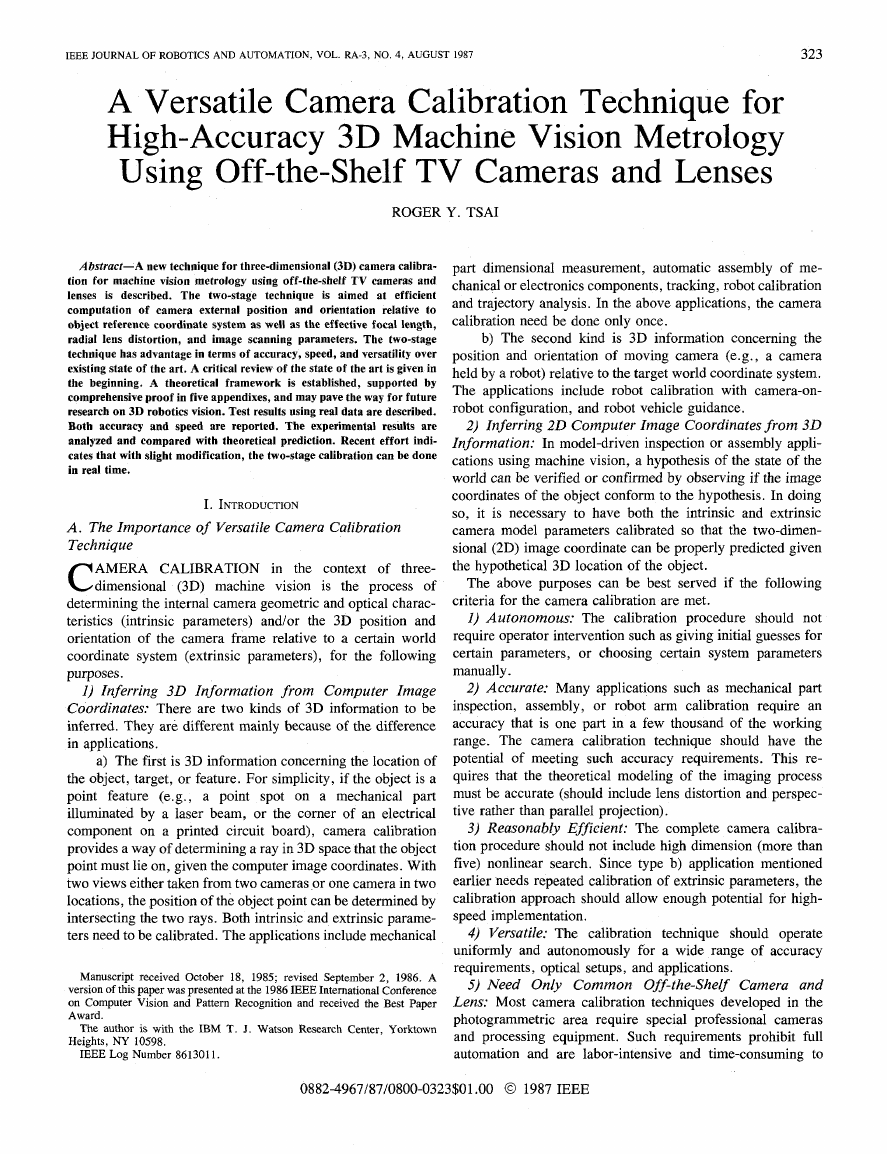
323
A Versatile Camera Calibration Techniaue for
High-Accuracy 3D Machine Vision Metrology
Using Off-the-shelf TV Cameras and Lenses
ROGER
Y. TSAI
Abstract-A new technique for three-dimensional (3D) camera calibra-
tion for machine vision metrology using off-the-shelf TV cameras and
lenses is described. The two-stage technique is aimed at efficient
computation of camera external position and orientation relative to
object reference coordinate system as well as the effective focal length,
radial lens distortion, and image scanning parameters. The two-stage
technique has advantage in terms of accuracy, speed, and versatility over
existing state of the art. A critical review of the state of the art is given in
the beginning. A theoretical framework is established, supported by
comprehensive proof in five appendixes, and may pave the way for future
research on 3D robotics vision. Test results using real data are described.
Both accuracy and speed are reported. The experimental results are
analyzed and compared with theoretical prediction. Recent effort indi-
cates that with slight modification, the two-stage calibration can be done
in real time.
I. INTRODUCTION
A . The Importance of Versatile Camera Calibration
dimensional (3D) machine vision is
Technique C AMERA CALIBRATION in the context of three-
the process of
determining the internal camera geometric and optical charac-
teristics (intrinsic parameters) and/or the 3D position and
orientation of the camera frame relative to a certain world
coordinate system (extrinsic parameters), for the following
purposes.
I ) Inferring 3 0 Information from Computer Image
Coordinates: There are two kinds of 3D information to be
inferred. They are different mainly because of the difference
in applications.
a) The first is 3D information concerning the location of
the object, target, or feature. For simplicity, if the object is a
point feature (e.g., a point spot on a mechanical part
illuminated by a laser beam, or the corner of an electrical
component on a printed circuit board), camera calibration
provides a way of determining a ray in 3D space that the object
point must lie on, given the computer image coordinates. With
two views either taken from two cameras ,or one camera in two
locations, the position of the object point can be determined by
intersecting the two rays. Both intrinsic and extrinsic parame-
ters need to be calibrated. The applications include mechanical
part dimensional measurement, automatic assembly of me-
chanical or electronics components, tracking, robot calibration
and trajectory analysis. In the above applications, the camera
calibration need be done only once.
b) The second kind is 3D information concerning the
position and orientation of moving camera (e.g., a camera
held by a robot) relative to the target world coordinate system.
The applications include robot calibration with camera-on-
robot configuration, and robot vehicle guidance.
2) Inferring 2 0 Computer Image Coordinates from 3 0
In formation: In model-driven inspection or assembly appli-
cations using machine vision, a hypothesis of the state of the
world can be verified or confirmed by observing if the image
coordinates of the object conform to the hypothesis. In doing
so, it is necessary to have both the intrinsic and extrinsic
camera model parameters calibrated so that the two-dimen-
sional (2D) image coordinate can be properly predicted given
the hypothetical 3D location of the object.
The above purposes can be best served if the following
criteria for the camera calibration are met.
I ) Autonomous: The calibration procedure should not
require operator intervention such as giving initial guesses for
certain parameters, or choosing certain system parameters
manually.
2) Accurate: Many applications such as mechanical part
inspection, assembly, or robot arm calibration require an
accuracy that is one part in a few thousand of the working
range. The camera calibration technique should have the
potential of meeting such accuracy requirements. This re-
quires that the theoretical modeling of the imaging process
must be accurate (should include lens distortion and perspec-
tive rather than parallel projection).
3) Reasonably Efficient: The complete camera calibra-
tion procedure should not include high dimension (more than
five) nonlinear search. Since type b) application mentioned
earlier needs repeated calibration of extrinsic parameters, the
calibration approach should allow enough potential for high-
speed implementation.
4) Versatile: The calibration technique should operate
uniformly and autonomously for a wide range of accuracy
requirements, optical setups, and applications.
5) Need Only Common Off-the-shelf Camera and
Lens: Most camera calibration techniques developed in the
photogrammetric area require special professional cameras
and processing equipment. Such requirements prohibit full
automation and are labor-intensive and time-consuming to
Manuscript received October
18, 1985; revised September
2, 1986. A
version of this paper was presented at the 1986 IEEE International Conference
on Computer Vision and Pattern Recognition and received the Best Paper
Award.
The author is with the IBM T. J . Watson Research Center, Yorktown
Heights, NY 10598.
IEEE Log Number 8613011.
0882-4967/87/0800-0323$01.00 O 1987 IEEE
�
324
implement. ’ The advantages of using off-the-shelf solid state
or vidicon camera and lens are
versatile-solid state cameras and lenses can be used for a
variety of automation applications;
availability-since off-the-shelf solid state cameras and
lenses are common in many applications, they are at hand
when you need them and need not be custom ordered;
familiarity, user-friendly-not many people have
the
experience of operating the professional metric camera
used in photogrammetry
or the tetralateral photodiode
with preamplifier and associated electronics calibration,
while solid state is easily interfaced with a computer and
easy to install.
The next section shows deficiencies of existing techniques in
one or more of these criteria.
B. Why Existing Techniques Need Improvement
In this section, existing techniques are first classified into
of each
several categories. The strength and weakness
category are analyzed.
Category I-Techniques Involving Full-Scale Nonlinear
Optimization: See [I]-[3], [7], [lo], [14], [17], [22], [30],
for example.
Advantage: It allows easy adaptation of any arbitrarily
accurate yet complex model
for imaging. The best accuracy
obtained in this category is comparable to the accuracy of the
new technique proposed in this paper.
Problems: I) It requires a good initial guess to start the
nonlinear search. This violates the principle of automation. 2)
It needs computer-intensive full-scale nonlinear search.
Classical Approach: Faig’s technique [7]
is a good
representative for these techniques. It uses a very elaborate
model for imaging, uses at least 17 unknowns for each photo,
and is very computer-intensive [7]. However, because of the
large number of unknowns, the accuracy is excellent. The rms
(root mean square or average) error can be as good as 0.1 mil.
However, this rms error is in photo scale (i.e., error of fitting
the model with
plane). When
transformed into 3D error, it is comparable to the average
error (0.5 mil) obtained using monoview multiplane
calibra-
is the typical case among the various
tion technique, which
two-stage techniques proposed in
this paper. Another reason
why such photogrammetric techniques produce very accurate
results is that large professional format photo is used rather
than solid-state image array such as CCD. The resolution for
such photos is generally three to four times better than that for
the solid-state imaging sensor array.
the observations in image
Direct linear transformation (DL T): Another example
is the direct linear transformation (DLT) developed by Abdel-
Aziz and Karara [ 11, [2]. One reason why DLT was developed
is that only linear equations need be solved. However, it was
later found that, unless lens distortion is ignored, full-scale
nonlinear search
is needed. In [14, p. 361 Karara, the co-
’ Although existing techniques such
Section I-B) can be implemented
cameras, the version NBS implemented uses high resolution analog tetra-
lateral photodiode, and the associated optoelectronics accessories need special
manual calibration (see [5] for details).
transformation (see
or vidicon
using common solid state
as direct linear
IEEE JOURNAL OF ROBOTICS
AUTOMATION,
AND
VOL. RA-3, NO. 4, AUGUST 1987
inventor of DLT, comments,
When originally presented in 1971 (Abdel-Aziz and Karara,
1971), the DLT basic equations did not involve any image
refinement parameters, and represented an actual linear
transformation between comparator coordinates
and object-
space coordinates. When the DLT mathematical model was
later expanded to encompass image refinement parameters, the
title DLT was retained unchanged.
Although Wong [30] mentioned
that there are two possible
procedures of using DLT (one entails solving linear equations
only, and the other requires nonlinear search), the procedure
using linear equation solving actually contains approximation.
One of the artificial parameters he introduced, K ~ ,
is a function
of (x, y , z ) world coordinate and
therefore not a constant.
Nevertheless, DLT bridges the gap between photogrammetry
and computer vision so that both areas can use DLT directly to
solve camera calibration problem.
(to be discussed
the same type of measure
When lens distortion is not considered, DLT falls into the
second category
later) that entails solving
linear equations only. It, too, has its pros and cons and will be
discussed later when the second category is presented. Dainis
and Juberts [5] from the Manufacturing Engineering Center of
NBS reported results using DLT for camera calibrations to do
accurate measurement of robot trajectory motion. Although
the NBS system can do 3D measurement at a rate of 40 Hz, the
camera calibration was not and need not be done in real time.
The accuracy reported uses
for
accessing or evaluating camera calibration accuracy as Type I
measure used
in this paper (see Section 111-A). The total
accuracy in 3D is one part in 2000 within the center 80 percent
of the detector field of view. This
is comparable to the
accuracy of the proposed two-stage method in measuring the x
(the proposed two-stage
and y parts of the 3D coordinates
technique yields better percentage accuracy
for the depth).
Notice, however, that the image sensing device NBS used is
not a TV camera but a tetralateral photodiode. It senses the
position of incidence light spot on the surface of detector by
means of analog and uses a 12-bit AID converter to convert the
analog positions into a digital quantity to be processed by the
computer. Therefore, the
effective 4K X 4K spatial resolution, as opposed to a 388 X
480 full-resolution Fairchild CCD area sensor. Many thought
that the low resolution characteristics of solid-state imaging
sensor could not be used
This paper reveals that wit,h proper calibration, a solid-state
sensor (such as CCD) is still a valid tool in high-accuracy 3D
machine vision metrology applications. Dainis and Juberts [5]
mentioned that the accuracy is 100 percent lower for points
outside the center 90-percent field of view. This suggests that
lens distortion is not considered when using DLT to calibrate
the camera. Therefore,
to be
solved. This actually puts the NBS work in a different category
that follows which include
all techniques that computes the
perspective transformation matrix first. Again, the pros and
cons for the latter will be discussed later.
for high-accuracy 3D metrology.
tetralateral photodiode has an
only linear equations need
Sobel, Gennery, Lowe: Sobel [23] described a system
solving.
is
for calibrating a camera using nonlinear equation
Eighteen parameters must be optimized. The approach
�
TSAI: VERSATILE CAMERA CALIBRATION TECHNIQUE
325
similar to Faig’s method described earlier. No accuracy results
were reported. Gennery [lo] described a method that finds
camera parameters iteratively by minimizing the error of
epipolar constraints without using 3D coordinates of calibra-
tion points. It is mentioned in [4, p. 2531 and [20, p. 501 that
the technique is too error-prone.
Category 11- Techniques Involving Computing Perspec-
tive Transformation Matrix First Using Linear Equation
Solving: See [ 13, [2], [9], [ 111, [ 141, [241, [251, and [3 11, for
example.
Advantage: No nonlinear optimization is needed.
Problems: 1) Lens distortion cannot be considered. 2)
The number of unknowns in linear equations is much larger
than the actual degrees of freedom (i.e., the unknowns to be
solved are not linearly independent). The disadvantage of such
redundant parameterization is that erroneous combination of
these parameters can still make a good fit between experimen-
tal observations and model prediction in real situation when
the observation is not
perfect. This means the accuracy
potential is limited in noisy situation.
Although the equations characterizing the transformation
from 3D world coordinates to 2D image coordinates are
nonlinear functions of the extrinsic and intrinsic camera model
parameters (see Section 11-C1 and -2 for definition of camera
parameters), they are linear if lens distortion is ignored and if
the coefficients of the 3 x 4 perspective transformation matrix
are regarded as unknown parameters (see Duda and Hart [6]
for a definition of perspective transformation matrix). Given
the 3D world coordinates of a number of points and
the
corresponding 2D image coordinates, the coefficients in the
perspective transformation matrix can be solved by least
square solution of an overdetermined systems of linear
equations. Given the perspective transformation matrix, the
camera model parameters can then be computed if needed.
However, many investigators have found that ignoring lens
distortion is unacceptable when doing 3D measurement (e.g.,
Itoh et al. [12], Luh and Klassen
[ 161). The error of 3D
measurement reported in this paper using two-stage camera
calibration technique would have been an order of magnitude
larger if the lens distortion were not corrected.
Sutherland: Sutherland [25] formulated very explicitly
the procedure for computing the perspective transformation
matrix given 3 0 world coordinates and 2D image coordinates
of a number of points. It was applied to graphics applications,
and no accuracy results are reported.
Yakimovsky and Cunningham: Yakimovsky and Cun-
ningham’s stereo program [31] was developed for the JPL
Robotics Research Vehicle, a testbed for a Mars rover and
remote processing systems. Due to the narrow field of view
and large object distance, they used a highly linear lens and
ignored distortion. They reported that the 3D measurement
accuracy of k 5 mm at a distance of 2 m. This is equivalent to
a depth resolution of one part in 400, which is one order of
magnitude less accurate than the test results to be described in
this paper. One reason is that Yakimovsky and Cunningham’s
system does not consider lens distortion. The other reason is
probably that
the unknown parameters computed by linear
equations are not linearly independent. Notice also that had it
not been for the fact that the field of view in Yakimovsky and
Cunningham’s system is narrow and that the object distance is
large, ignoring distortion should cause more error.
DLT: By disregarding lens distortion, DLT developed
by Abdel-Aziz and Karara [ 11, [2] described in Category I falls
into Category 11. Accuracy results on real experiments have
been reported only by Dainis and Juberts from NBS [SI. The
accuracy results and the comparison with the proposed
technique are described earlier in Category I.
Hall et al.: Hall et al. [l 11 used a straightforward linear
least square technique to solve for the elements of perspective
transformation matrix for doing 3D curved surface measure-
ment. The computer 3D coordinates were tabulated, but no
ground truth was given, and therefore the accuracy is
unknown.
Ganapathy, Strat: Ganapathy [9] derived a noniterative
technique in computing camera parameters given the perspec-
tive transformation matrix computed using any of the tech-
niques discussed in this category. He used
the perspective
transformation matrix given from Potmesil through private
communications and computed the camera parameters. It was
not applied to 3D measurement, and therefore no accuracy
results were available. Similar results are obtained by Strat
~ 4 1 .
Category 111-Two-Plane Method: See [13] and 1191 for
ple.
Advantage: No nonlinear search is needed.
Problems: 1) No lens distortion can be considered. 2)
Focal length is assumed given. 3) Uncertainty of image scale
factor is not allowed.
Fischler and Bolles [8] use a geometric construction to
derive direct solution for the camera locations and orientation.
However, none of the camera intrinsic parameters (see Section
11-C2) can be computed. No accuracy results of real 3D
measurement was reported.
example.
Advantage: Only linear equations need be solved.
Problems: 1) The number of unknowns is at least 24 (12
for each plane), much larger than the degrees of freedom. 2)
The formula used for the transformation between image and
object coordinates is empirically based only.
The two-plane method developed by Martins et ai.
[19]
theoretically can be applied in general without having any
restrictions on the extrinsic camera parameters. However, for
the experimental results reported, the relative orientation
between the camera coordinate system and the object world
coordinate system was assumed known (no relative rotation).
In such a restricted case, the average error is about 4 mil with a
distance of 25 in, which is comparable to the accuracy
obtained using the proposed technique. Since the formula for
the transformation between image and object coordinates is
empirically based, it is not clear what kind of approximation is
assumed. Nonlinear lens distortion theoretically cannot be
corrected. A general calibration using the two-plane technique
was proposed by Isaguirre et al. [13]. Full-scale nonlinear
optimization is needed. No experimental results were re-
ported.
Category IV-Geometric Technique:
See [8] for exam-
�
326
IEEE JOURNAL OF ROBOTICS AND AUTOMATION, VOL. RA-3. NO. 4, AUGUST 1987
0
)X
11. THE NEW APPROACH TO MACHINE VISION CAMERA
CALIBRATION USING A TWO-STAGE TECHNIQUE
the problem. After
In the following, an overview is first given that describes
the strategy we took in approaching
the
overview, the underlying camera model and the definition of
the parameters to be
calibrated are described. Then, the
calibration algorithm and the theoretical derivation and other
issues will be presented. For those readers who would like to
have a physical feeling of how to perform calibration in a real
setup, first read “Experimental Procedure,” Section IV-A1 .
A . Overview
Camera calibration entails solving for a large number of
calibration parameters, resulting in the classical approach
mentioned in the Introduction that requires large scale nonlin-
ear search. The conventional way of avoiding this large-scale
nonlinear search
is to use the approaches similar to DLT
described in the Introduction that solves for a set of parameters
(coefficients of homogeneous transformation matrix) with
linear equations, ignoring the dependency between the param-
eters, resulting in a situation with the number of unknowns
greater than the number of degrees of freedoms. The lens
distortion is also ignored (see the Introduction for more
detail). Our approach
is to look for a real constraint or
equation that is only a function of a subset of the calibration
parameters to reduce the dimensionality of
the unknown
parameter space. It turns out that such constraint does exist,
and we call it the radial alignment constraint (to be described
later). This constraint (or equations resulting from such
physical constraint) is only a function of the relative rotation
and translation (except for the z component) between
the
camera and the calibration points (see Section 11-B for detail).
Furthermore, although the constraint is a nonlinear function of
the abovementioned calibration parameters (called group I
parameters), there is a simple and efficient way of computing
them. The rest of the calibration parameters (called group I1
parameters) are computed with normal projective equations. A
very good initial guess of group I1 parameters can be obtained
by ignoring the lens distortion and using simple linear equation
with two unknowns. The precise values for group I1 parame-
ters can then be computed with one
or two iterations in
minimizing the perspective equation error. Be aware that when
single-plane calibration points are used, the plane must not be
exactly parallel to image plane (see (15), to follow, for detail).
for the image-to-object
transformation described
in the next section, subpixel accu-
racy interpolation for extracting image coordinates of calibra-
tion points can be used to enhance the calibration accuracy to
maximum. Note
that this is not true if a DLT-type linear
approximation technique
is used since ignoring distortion
results in image coordinate error more than a pixel unless very
narrow angle
subpixel
accuracy image feature extraction is described in Section IV-
Al.
B. The Camera Model
lens is used. One way of achieving
Due to the accurate modeling
This section describes the camera model,
defines the
calibration parameters, and presents the simple radial align-
Fig. 1. Camera geometry with perspective projection and radial lens
distortion.
or P(xw,yw,zw)
at Oi
ment principle (to be described in Section 11-E) that provides
the original motivation for the proposed technique. The
camera model itself is basically the same as that used by any of
the techniques in Category I in Section I-B.
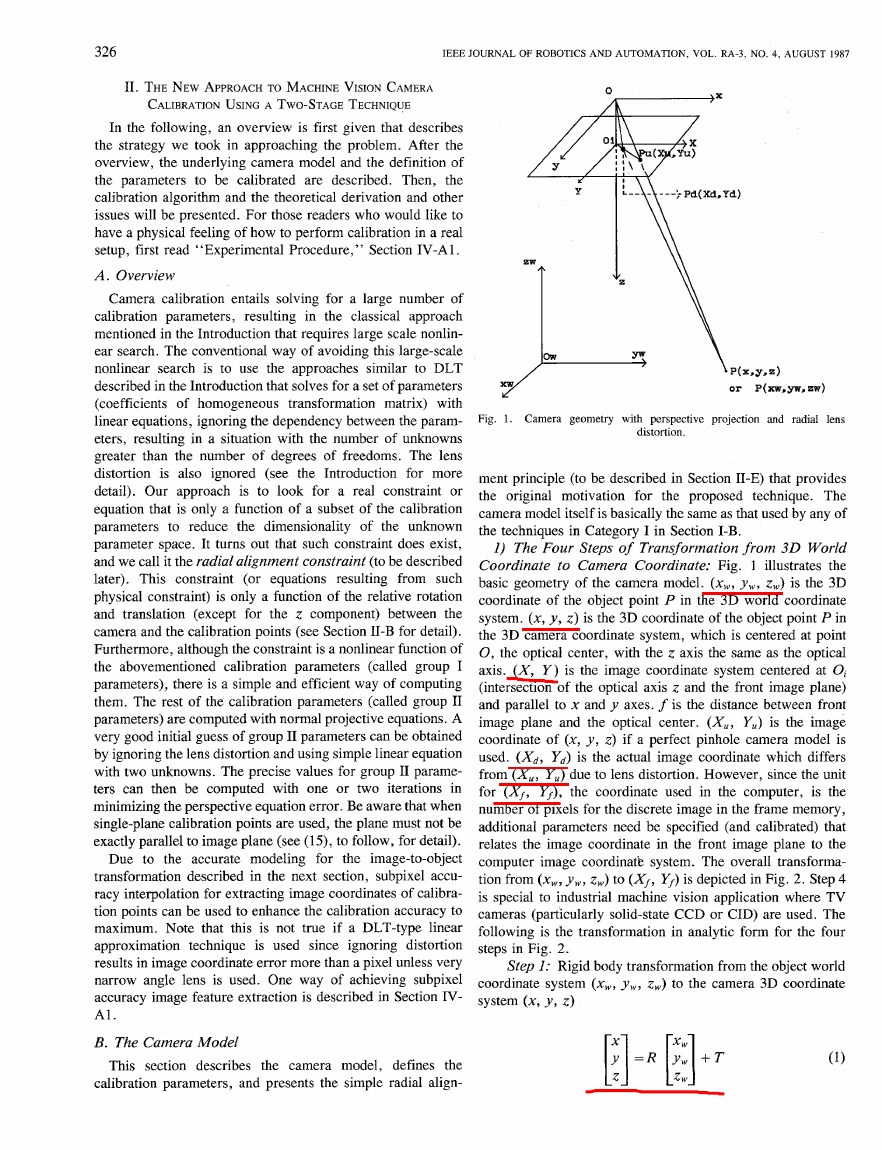
I) The Four Steps of Transformation from 3 0 World
Coordinate to Camera Coordinate: Fig. 1
illustrates the
basic geometry of the camera model. (xw, y w , z,) is the 3D
coordinate of the object point P in the 3D world coordinate
system. (x, y , z ) is the 3D coordinate of the object point P in
the 3D camera coordinate system, which
is centered at point
0, the optical center, with the z axis the same as the optical
axis. ( X , Y ) is the image coordinate system centered
(intersection of the optical axis z and the front image plane)
and parallel to x and y axes. f is the distance between front
the optical center. (X,, Y,) is the image
image plane and
coordinate of (x, y , z) if a perfect pinhole camera model
is
used. ( X d , Yd) is the actual image coordinate which differs
from (X,, Y,) due to lens distortion. However, since the unit
for ( X f , Yf), the coordinate used in
the computer, is the
number of pixels for the discrete image in the frame memory,
additional parameters need be specified (and calibrated) that
relates the image coordinate in the front image plane to the
computer image coordinatk system. The overall transforma-
tion from (x,,,, y,, z,) to ( X f , Yf) is depicted in Fig. 2. Step 4
is special to industrial machine vision application where TV
cameras (particularly solid-state CCD or CID) are used. The
following is the transformation in analytic form for the four
steps in Fig. 2.
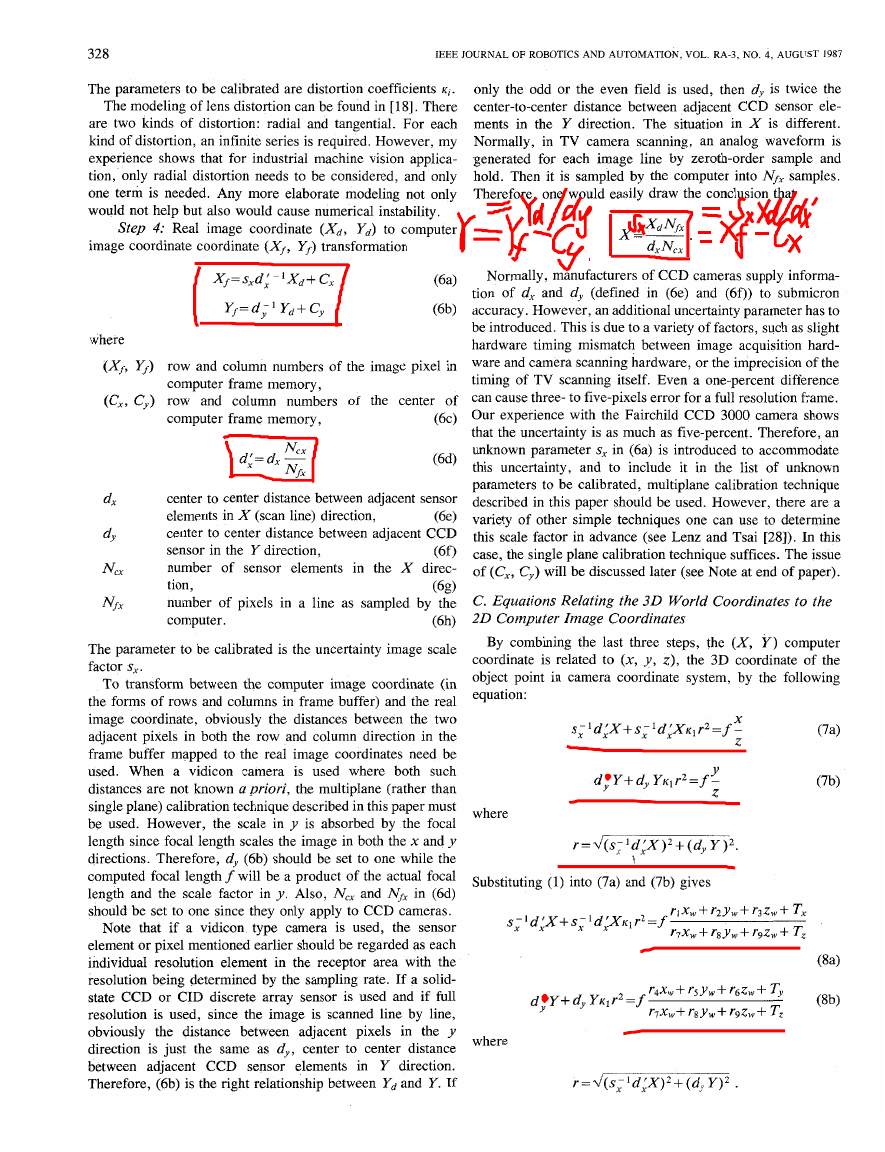
Step I: Rigid body transformation from the object world
coordinate system (x,,,, yw, z,,,) to the camera 3D coordinate
system (x, Y , z )
�
TSAI: VERSATILE CAMERA CALIBRATION TECHNIQUE
327
(xw, yw, zw) 3 0 world coordinate
I
v
Rigid body transformation from (xw, y,. zw) to (x, y , z )
Step 1
Parameters to be calibrated: R, T
I
v
(x, y, z ) 3 0 camera coordinate system
I
7
Step 2
Perspective projection with pin hole geometry
Parameters to be calibrated: f
I
v
(X,, Y,) Ideal undistorted image coordinate
I
v
Step 3
Radial lens distortion
Parameters to be calibrated: K , , K*
I
v
(X,, Y,) Distorted image coordinate
I
w
TV scanning, Sampling, computer acquisition
Parameter to be calibrated: uncertainty scale factor s, for image
~
~
~~
Step 4
X coordinate
I
v
(Xr. Yf) Computer image coordinate in frame medory
Fig, 2. Four steps of transformation from 3D world coordinate to computer image coordinate.
where R is the 3 X 3 rotation matrix
r3
R = r4 rs r6
r9]
f-1 r2
[ r7 r8
[;I.
T E
,
(2)
(3)
and T is the translation vector
The parameters to be calibrated are R and T.
Note that the rigid body transformation from one Cartesian
coordinate system (x,,,, yw, z,) to another (x, y , z ) is unique if
the transformation is defined as 3D rotation around the origin
(be it defined as three separate rotations-yaw, pitch, and roll-
around an axis passing through the origin) followed by the 3D
translation. Most of
the existing techniques for camera
calibration (e.g., see Section I-B) define the transformation as
translation followed by rotation. It will be seen later (see
Section 11-E) that this order (rotation followed by translation)
is crucial to the motivation and development of the new
calibration technique.
Step 2: Transformation from 3D camera coordinate (x,
y , z ) to ideal (undistorted) image coordinate (Xu, Yu) using
perspective projection with pinhole camera geometry
X
X u = f -
Z
(44
The parameter to be calibrated is the effective focal length f .
Step 3: Radial lens distortion is
x d + D x = x u
(54
(5b)
where ( X d , Yd) is the distorted or true image coordinate on the
image plane ,and
Y d + D y = Y u
DX =Xd( K , r2 + ~~r~ +
-)
Dy= Y d ( ~ I r 2 + ~ 2 r 4 +
* e -
)
r = q d .
�
328
IEEE JOURNAL OF ROBOTICS AND AUTOMATION, VOL. RA-3, NO. 4, AUGUST 1987
The parameters to be calibrated are distortion coefficients K ~ .
The modeling of lens distortion can be found in [ 181. There
are two kinds of distortion: radial and tangential. For each
kind of distortion, an infinite series is required. However, my
experience shows that for industrial machine vision applica-
tion, only radial distortion needs to be considered, and only
one term is needed. Any more elaborate modeling not only
would not help but also would cause numerical instability.
Step 4: Real image coordinate ( X d , Yd) to computer
image coordinate coordinate ( X f , Y f ) transformation
only the odd or the even field is used, then dy is twice the
center-to-center distance between adjacent CCD sensor ele-
ments in the Y direction. The situation in X is different.
Normally, in TV camera scanning, an analog waveform is
generated for each image line by zeroth-order sample and
hold. Then it is sampled by the computer into Nfx samples.
Therefore, one would easily draw the conclusion that
where
(Xf, Yf) row and column numbers of the image pixel in
(ex, Cy) row and column numbers of the center of
(6c)
computer frame memory,
computer frame memory,
dX
dY
N c x
Nfx
the
direction,
center to center distance between adjacent sensor
elements in X (scan line)
@e)
center to center distance between adjacent CCD
sensor in
(6f)
number of sensor elements in the X direc-
tion,
(6g)
number of pixels in a line as sampled by the
computer.
(6h)
Y direction,
The parameter to be calibrated is the uncertainty image scale
factor s,.
To transform between the computer image coordinate (in
the forms of rows and columns in frame buffer) and the real
image coordinate, obviously the distances between the two
adjacent pixels in both the row and column direction in the
frame buffer mapped to the real image coordinates need be
used. When a vidicon camera is used where both such
distances are not known a priori, the multiplane (rather than
single plane) calibration technique described in this paper must
be used. However, the scale in y is absorbed by the focal
length since focal length scales the image in both the x and y
directions. Therefore, dy (6b) should be set to one while the
computed focal length f will be a product of the actual focal
length and the scale factor in y . Also, Ncx and Nfx in (6d)
should be set to one since they only apply to CCD cameras.
a vidicon type camera is used, the sensor
element or pixel mentioned earlier should be regarded as each
individual resolution element in the receptor area with the
resolution being determined by the sampling rate. If a solid-
state CCD or CID discrete array sensor is used and
if full
resolution is used, since the image is scanned line by line,
obviously the distance between adjacent pixels in the y
direction is just the same as dy , center to center distance
between adjacent CCD sensor elements in Y direction.
Therefore, (6b) is the right relationship between Yd and Y. If
Note that if
Normally, manufacturers of CCD cameras supply informa-
tion of dx and dy (defined in (6e) and (6f)) to submicron
accuracy. However, an additional uncertainty parameter has to
be introduced. This is due to a variety of factors, such as slight
hardware timing mismatch between image acquisition hard-
ware and camera scanning hardware, or the imprecision of the
timing of TV scanning itself. Even a one-percent difference
can cause three- to five-pixels error for a full resolution frame.
Our experience with the Fairchild CCD 3000 camera shows
that the uncertainty is as much as five-percent. Therefore, an
unknown parameter sx in (6a) is introduced to accommodate
this uncertainty, and to include it in
the list of unknown
parameters to be calibrated, multiplane calibration technique
described in this paper should be used. However, there are a
variety of other simple techniques one can use to determine
this scale factor in advance (see Lenz and Tsai [ZS]). In this
case, the single plane calibration technique suffices. The issue
of (ex, Cy) will be discussed later (see Note at end of paper).
C. Equations Relating the 3 0 World Coordinates to the
2 0 Computer Image Coordinates
By combining the last three steps, the ( X , Y ) computer
coordinate is related to (x, y , z), the 3D coordinate of the
object point in camera coordinate system, by the following
equation:
s;'d:X+s;'d:XK1r2=
X
f -
2
dy'Y+dyYKIr2=f- Y
Z
(7b)
where
r=d(s;1d:X)2+(dyY)2.
\,
Substituting (1) into (7a) and (7b) gives
where
�
TSAI: VERSATILE CAMERA CALIBRATION TECHNIQUE
329
The parameters used in
categorized into the following two classes:
the transformation in Fig. 2 can be
1) Extrinsic Parameters: The parameters in Step 1 in Fig.
2 for the transformation from 3D object world coordinate
system to the camera 3D coordinate system centered at the
optical center are called the extrinsic parameters. There are
six extrinsic parameters: the Euler angles yaw 8, pitch +, and
tilt $ for rotation, the three components for the translation
vector T. The rotation matrix R can be expressed as function
of 8, 9, and $ as follows:
r
1
-sin$cos++cos$sin8cos+
sin$sin++cos$sin8cos+
cos $ cos 8
R =
- -
according to (4a) and (4b), z changes X , and Y, by the same
scale, so that oiP,//oiPd).
- Observation IV.‘ The constraint that OjPd is parallel to
Po,P for every point, being shown to be independent of the
radial distortion coefficients K ] and K ~ , the effective focal
length f, and the z component of 3D translation vector T, is
actually sufficient to determine the 3D rotation R , X , and Y
component of 3D translation from the world coordinate system
to the camera coordinate system, and the uncertainty scale
factor s, in X component of the image coordinate.
sin $ cos 8
cos $cosc$+sin$sinesin+ cosOsin+
-cos$sin++sin$sinOcos+
-sin 8 1
.
1
C O S ~ C O S +
(9)
2) Intrinsic Parameters: The parameters in Steps 2-4 in
Fig. 2 for the transformation from 3D object coordinate in the
camera coordinate system to the computer image coordinate
are called the intrinsic parameters. There are six intrinsic
effective focal length, or image plane to projec-
tive center distance,
lens distortion coefficient,
uncertainty scale factor for x , due to TV camera
scanning and acquisition timing error,
computer image coordinate for the origin in the
image plane.
D. Problem Definition
The problem of camera calibration is to compute the camera
intrinsic and extrinsic parameters based on a number of points
whose object coordinates in the (xw, yw, z,) coordinate system
are known and whose image coordinates ( X , Y ) are mea-
sured.
E. The New Two-Stage Camera Calibration Technique:
Motivation
The original basis of the new technique is the following four
observations.
-
Observation Z: Since we assume that the distortion is
radial, no matter how much the distortion is, the direction of
the vector OiPd extending from the origin oi in the image
plane to the image point (Xd, Yd) - remains unchanged and is
radially aligned with the vector P,,P extending from the
optical axis (or, more precisely, the point Po, on the optical
axis whose z coordinate is the same as that for the object point
( x , y , z ) ) to the object point (x, y, z). This is illustrated in Fig.
3. See Appendix I for a geometric and an algebraic proof of
the radial alignment constraint (RAC).
Observation ZI: The effective focal length f also does not
-
influence the direction of the vector Oipd, since f scales the
image coordinate Xd and Yd by the same rate.
Observation ZIZ: Once the object world coordinate system
is rotated and translated in x and y as in step 1 such that OiPd is
parallel to PozP for every point, then translation in will not
alter the direction of OjPd (this comes from the fact that,
-
-
Among the four observations, the first three are clearly true,
while the last one requires some geometric intuition and
“imagination” to establish its validity. It is possible for the
author to go into further details on how
this intuition was
sufficient for a complete proof.
reached, but it will not be
Rather, the complete proof will be given
analytically in the
next few sections. In fact, as we will see later, not only is the
radial alignment constraint sufficient to determine uniquely the
extrinsic parameters (except for T,) and one of the intrinsic
parameters (s,), but also the computation entails only the
solution of linear equations with five to seven unknowns. This
means it can ‘be done fast and done automatically since no
initial guess, which is
normally required for nonlinear
optimization, is needed.
F. Calibrating a Camera Using a Monoview Coplanar
Set of Points
To aid those readers who intend to implement the proposed
technique in their applications, the presentation will be
algorithm-oriented. The computation procedure for each
individual step will first be given, while the derivation and
other theoretical issues will follow. Most technical details
appear in the Appendices.
Fig. 4 illustrates the setup for calibrating a camera using a
monoview coplanar set of points. In the actual setup, the plane
illustrated in the figure is the top surface of a metal block. The
detailed description of the physical setup is given in Section
IV-A1. Since the calibration points are on a common plane,
the (xw, yw, z,) coordinate system can be chosen such that zw
= 0 and the origin is not close to the center of the view or y
axis of the camera coordinate system. Since the (xw, y w , z,) is
user-defined and the origin is arbitrary, it is no problem setting
z,) to be out of the field of view and not
the origin of (xw, yw,
close to the y axis. The purpose for the latter is to make sure
that T, is not exactly zero, so that the presentation of the
computation procedure to be described in the following can be
made more unified and simpler. (In case it is zero, it is quite
straightforward to modify the algorithm but is unnecessary
since it can be avoided.)
I ) Stage I-Compute 3D Orientation, Position (x and
Y):
�
/*
O
A
X
330
IEEE JOURNAL OF ROBOTICS AND AUTOMATION, VOL. RA-3, NO. 4, AUGUST 1987
Y
I I \ L . \
--j-\---)Pd(Xd,Yd)
Fig. 3.
Illustration of radial alignment constraint. Radial distortion doesnot
alter direction of vector from origin to image point, which leads to O,P,//
- -
O,P,//O,,P.
flat surface
holding the
calibration
po i nta, whi ch
a r e the cornera
of squares.
I
I
I
I
Fig. 4. Schematic diagram of experimental setup for camera calibration
using monoview coplanar set of points.
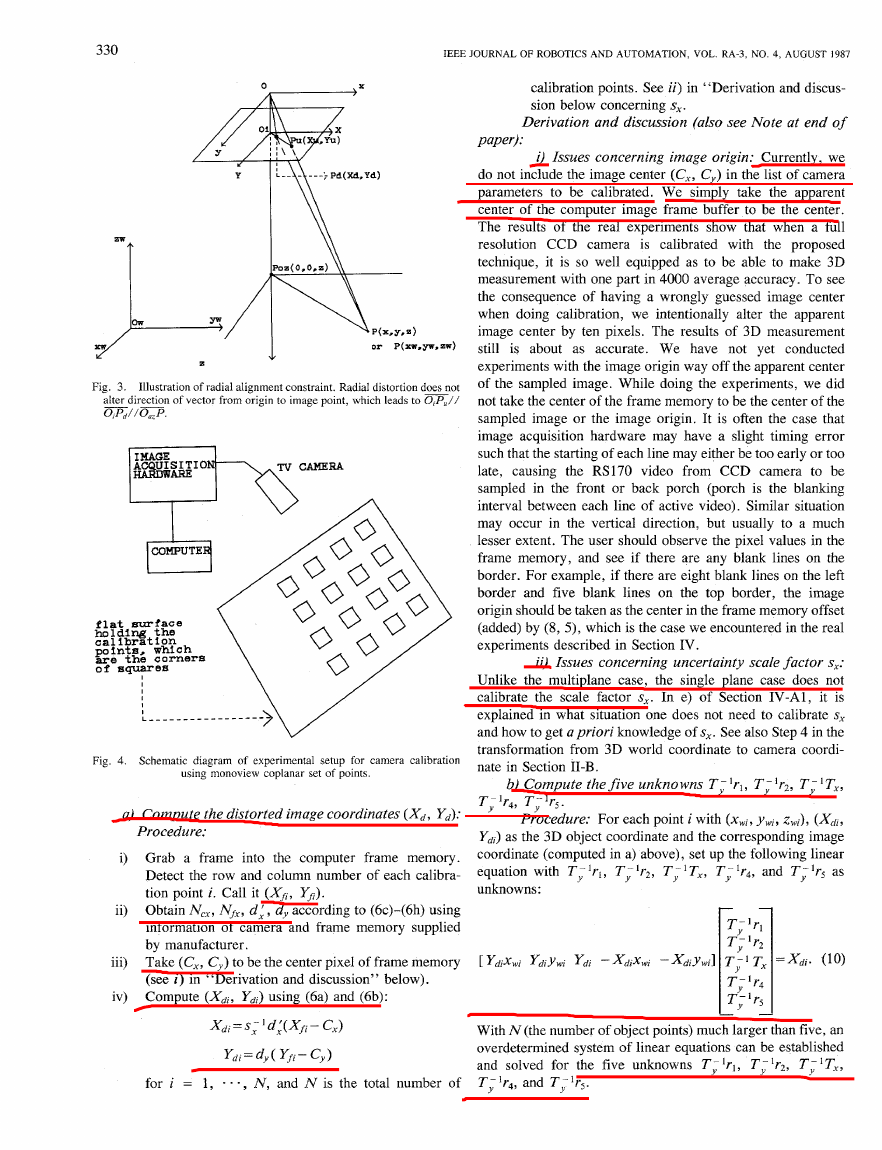
a) Compute the distorted image coordinates ( X d , Yd):
Procedure:
i) Grab a frame
into the computer frame memory.
Detect the row and column number of each
tion point i. Call it (Xfi, Yfi).
calibra-
ii) Obtain N,, Nf,, d i , dy according to (6c)-(6h) using
supplied
information of camera and frame memory
by manufacturer.
iii) Take (C,, Cy) to be the center pixel of frame memory
(see i ) in “Derivation and discussion” below).
iv) Compute (Xdi, Ydj) using (6a) and (6b):
X d i = S i d i (X, - c,)
Ydj=dy(Yfj-Cy)
for i = 1, . . . , N, and N is the total number of
calibration points. See ii) in “Derivation and discus-
sion below concerning s,.
Derivation and discussion (also see Note at end of
paper):
i) Issues concerning image origin: Currently, we
do not include the image center (C,, Cy) in the list of camera
parameters to be calibrated. We simply
take the apparent
center of the computer image frame buffer to be the center.
The results of the real experiments show
that when a full
resolution CCD camera is calibrated with the proposed
technique, it is so well equipped as to be able to make 3D
measurement with one part in 4000 average accuracy. To see
the consequence of having a wrongly guessed image center
when doing calibration, we intentionally alter the apparent
image center by ten pixels. The results of 3D measurement
still is about as accurate. We have not yet conducted
experiments with the image origin way off the apparent center
of the sampled image. While doing
the experiments, we did
not take the center of the frame memory to be the center of the
sampled image or the image origin. It is often the case that
image acquisition hardware may have
a slight timing error
such that the starting of each line may either be too early or too
late, causing the RS170 video from CCD camera to be
sampled in
is the blanking
interval between each line of active video). Similar situation
may occur in
to a much
lesser extent. The user should observe the pixel values in the
frame memory, and
see if there are any blank lines on the
border. For example, if there are eight blank lines on the left
border and
five blank lines on the top border, the image
origin should be taken as the center in the frame memory offset
(added) by (8, 5), which is the case we encountered in the real
experiments described in Section IV.
the vertical direction, but usually
the front or back porch (porch
ii) Issues concerning uncertainty scale factor s,:
Unlike the multiplane case, the single plane case does not
calibrate the scale factor s,.
it is
explained in what situation one does not need
to calibrate s,
and how to get apriori knowledge of s,.
See also Step 4 in the
to camera coordi-
transformation from 3D world coordinate
nate in Section 11-B.
b) Compute the five unknowns T;lrl, T;’r2, T;lT,,
In e) of Section IV-A1,
T;lr4, T;’r5.
Procedure: For each point i with (xwj, ywj, zwj), (&i,
Ydj) as the 3D object coordinate and the corresponding image
coordinate (computed in a) above), set up the following linear
equation with
as
unknowns:
T;lrl, T;lr2, T; ‘T,, T;Ir4, and
7:;1
[ Ydjxwi Ydiywj Y d i - x d i x w i
- x d i ~ w i I T; 1 T, =
(10)
With N (the number of object points) much larger than five, an
overdetermined system of linear equations can be established
for the five unknowns T; lrl, T y ‘r2, T i T,,
and solved
T;lr4, and Ty1r5.
�






 2023年江西萍乡中考道德与法治真题及答案.doc
 2012年重庆南川中考生物真题及答案.doc
 2013年江西师范大学地理学综合及文艺理论基础考研真题.doc
 2020年四川甘孜小升初语文真题及答案I卷.doc
 2020年注册岩土工程师专业基础考试真题及答案.doc
 2023-2024学年福建省厦门市九年级上学期数学月考试题及答案.doc
 2021-2022学年辽宁省沈阳市大东区九年级上学期语文期末试题及答案.doc
 2022-2023学年北京东城区初三第一学期物理期末试卷及答案.doc
 2018上半年江西教师资格初中地理学科知识与教学能力真题及答案.doc
 2012年河北国家公务员申论考试真题及答案-省级.doc
 2020-2021学年江苏省扬州市江都区邵樊片九年级上学期数学第一次质量检测试题及答案.doc
 2022下半年黑龙江教师资格证中学综合素质真题及答案.doc