Network Analysis and Visualization with R and igraph
Katherine Ognyanova, www.kateto.net
NetSciX 2016 School of Code Workshop, Wroclaw, Poland
Contents
1. A quick reminder of R basics
3
3
1.1 Assignment . . . . . . . . . . . . . . . . . . . . . . . . . . . . . . . . . . . . . . . . . .
4
. . . . . . . . . . . . . . . . . . . . . . . . . . . . . . . . . . . . .
1.2 Value comparisons
4
1.3 Special constants . . . . . . . . . . . . . . . . . . . . . . . . . . . . . . . . . . . . . . .
4
. . . . . . . . . . . . . . . . . . . . . . . . . . . . . . . . . . . . . . . . . . . .
1.4 Vectors
6
. . . . . . . . . . . . . . . . . . . . . . . . . . . . . . . . . . . . . . . . . . . .
1.5 Factors
7
. . . . . . . . . . . . . . . . . . . . . . . . . . . . . . . . . . . . . .
1.6 Matrces & Arrays
8
1.7 Lists . . . . . . . . . . . . . . . . . . . . . . . . . . . . . . . . . . . . . . . . . . . . . .
9
1.8 Data Frames . . . . . . . . . . . . . . . . . . . . . . . . . . . . . . . . . . . . . . . . .
. . . . . . . . . . . . . . . . . . . . . . . . . . . . . . . . . . . 10
1.9 Flow Control and loops
1.10 R plots and colors . . . . . . . . . . . . . . . . . . . . . . . . . . . . . . . . . . . . . .
11
1.11 R troubleshooting . . . . . . . . . . . . . . . . . . . . . . . . . . . . . . . . . . . . . . 13
2. Networks in igraph
14
. . . . . . . . . . . . . . . . . . . . . . . . . . . . . . . . . . . . . . . 14
2.1 Create networks
2.2 Edge, vertex, and network attributes . . . . . . . . . . . . . . . . . . . . . . . . . . . . 18
21
2.3 Specific graphs and graph models . . . . . . . . . . . . . . . . . . . . . . . . . . . . . .
3. Reading network data from files
3.1 DATASET 1: edgelist
3.2 DATASET 2: matrix
27
. . . . . . . . . . . . . . . . . . . . . . . . . . . . . . . . . . . . 27
. . . . . . . . . . . . . . . . . . . . . . . . . . . . . . . . . . . . 27
4. Turning networks into igraph objects
28
4.1 Dataset 1 . . . . . . . . . . . . . . . . . . . . . . . . . . . . . . . . . . . . . . . . . . . 28
4.2 Dataset 2 . . . . . . . . . . . . . . . . . . . . . . . . . . . . . . . . . . . . . . . . . . . 30
1
�
5. Plotting networks with igraph
32
. . . . . . . . . . . . . . . . . . . . . . . . . . . . . . . . . . . . . 32
5.1 Plotting parameters
. . . . . . . . . . . . . . . . . . . . . . . . . . . . . . . . . . . . . . . 36
5.2 Network layouts
5.3 Improving network plots . . . . . . . . . . . . . . . . . . . . . . . . . . . . . . . . . . . 44
. . . . . . . . . . . . . . . . . . . . . . . . . . . . . . . 46
5.4 Interactive plotting with tkplot
. . . . . . . . . . . . . . . . . . . . . . . . . . . . 47
5.5 Other ways to represent a network
5.6 Plotting two-mode networks with igraph . . . . . . . . . . . . . . . . . . . . . . . . . . 48
6. Network and node descriptives
50
6.1 Density . . . . . . . . . . . . . . . . . . . . . . . . . . . . . . . . . . . . . . . . . . . . 50
6.2 Reciprocity . . . . . . . . . . . . . . . . . . . . . . . . . . . . . . . . . . . . . . . . . . 50
6.3 Transitivity . . . . . . . . . . . . . . . . . . . . . . . . . . . . . . . . . . . . . . . . . .
51
6.4 Diameter . . . . . . . . . . . . . . . . . . . . . . . . . . . . . . . . . . . . . . . . . . .
51
. . . . . . . . . . . . . . . . . . . . . . . . . . . . . . . . . . . . . . . . . 53
6.5 Node degrees
6.6 Degree distribution . . . . . . . . . . . . . . . . . . . . . . . . . . . . . . . . . . . . . . 54
6.7 Centrality & centralization . . . . . . . . . . . . . . . . . . . . . . . . . . . . . . . . . 54
6.8 Hubs and authorities . . . . . . . . . . . . . . . . . . . . . . . . . . . . . . . . . . . . . 55
7. Distances and paths
56
8. Subgroups and communities
59
. . . . . . . . . . . . . . . . . . . . . . . . . . . . . . . . . . . . . . . . . . . . 60
8.1 Cliques
8.2 Community detection . . . . . . . . . . . . . . . . . . . . . . . . . . . . . . . . . . . . 60
8.3 K-core decomposition . . . . . . . . . . . . . . . . . . . . . . . . . . . . . . . . . . . . 63
9. Assortativity and Homophily
64
2
�
Note: You can download all workshop materials here, or visit kateto.net/netscix2016.
This tutorial covers basics of network analysis and visualization with the R package igraph (main-
tained by Gabor Csardi and Tamas Nepusz). The igraph library provides versatile options for
descriptive network analysis and visualization in R, Python, and C/C++. This workshop will focus
on the R implementation. You will need an R installation, and RStudio. You should also install the
latest version of igraph for R:
install.packages("igraph")
1. A quick reminder of R basics
Before we start working with networks, we will go through a quick introduction/reminder of some
simple tasks and principles in R.
1.1 Assignment
You can assign a value to an object using assign(), <-, or =.
x <- 3
x
y <- 4
y + 5
# Assignment
# Evaluate the expression and print result
# Assignment
# Evaluation, y remains 4
z <- x + 17*y # Assignment
# Evaluation
z
3
�
rm(z)
z
# Remove z: deletes the object.
# Error!
1.2 Value comparisons
We can use the standard operators <, >, <=, >=, ==(equality) and != (inequality). Comparisons
return Boolean values: TRUE or FALSE (often abbreviated to just T and F).
# Equality
# Inequality
2==2
2!=2
x <= y # less than or equal: "<", ">", and ">=" also work
1.3 Special constants
Special constants include:
• NA for missing or undefined data
• NULL for empty object (e.g. null/empty lists)
• Inf and -Inf for positive and negative infinity
• NaN for results that cannot be reasonably defined
# NA - missing or undefined data
5 + NA
is.na(5+NA) # Check if missing
# When used in an expression, the result is generally NA
# NULL - an empty object, e.g. a null/empty list
10 + NULL
is.null(NULL) # check if NULL
# use returns an empty object (length zero)
Inf and -Inf represent positive and negative infinity. They can be returned by mathematical
operations like division of a number by zero:
5/0
is.finite(5/0) # Check if a number is finite (it is not).
NaN (Not a Number) - the result of an operation that cannot be reasonably defined, such as dividing
zero by zero.
0/0
is.nan(0/0)
1.4 Vectors
Vectors can be constructed by combining their elements with the important R function c().
4
�
v1 <- c(1, 5, 11, 33)
v2 <- c("hello","world")
v3 <- c(TRUE, TRUE, FALSE) # Logical vector, same as c(T, T, F)
# Numeric vector, length 4
# Character vector, length 2 (a vector of strings)
Combining different types of elements in one vector will coerce the elements to the least restrictive
type:
v4 <- c(v1,v2,v3,"boo")
# All elements turn into strings
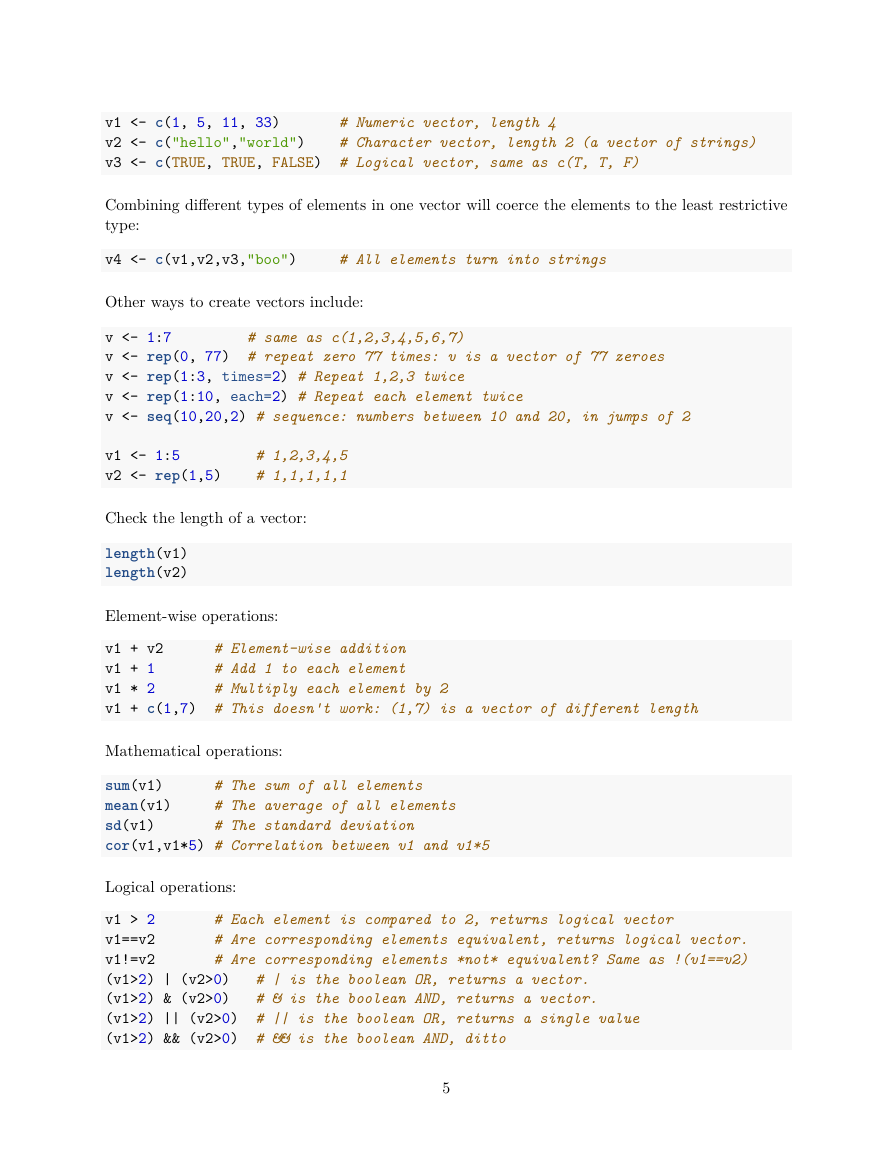
Other ways to create vectors include:
# same as c(1,2,3,4,5,6,7)
v <- 1:7
v <- rep(0, 77) # repeat zero 77 times: v is a vector of 77 zeroes
v <- rep(1:3, times=2) # Repeat 1,2,3 twice
v <- rep(1:10, each=2) # Repeat each element twice
v <- seq(10,20,2) # sequence: numbers between 10 and 20, in jumps of 2
v1 <- 1:5
v2 <- rep(1,5)
# 1,2,3,4,5
# 1,1,1,1,1
Check the length of a vector:
length(v1)
length(v2)
Element-wise operations:
v1 + v2
v1 + 1
v1 * 2
v1 + c(1,7) # This doesn�t work: (1,7) is a vector of different length
# Element-wise addition
# Add 1 to each element
# Multiply each element by 2
Mathematical operations:
sum(v1)
mean(v1)
sd(v1)
cor(v1,v1*5) # Correlation between v1 and v1*5
# The sum of all elements
# The average of all elements
# The standard deviation
Logical operations:
v1 > 2
v1==v2
v1!=v2
(v1>2) | (v2>0)
(v1>2) & (v2>0)
(v1>2) || (v2>0)
(v1>2) && (v2>0)
# Each element is compared to 2, returns logical vector
# Are corresponding elements equivalent, returns logical vector.
# Are corresponding elements *not* equivalent? Same as !(v1==v2)
# | is the boolean OR, returns a vector.
# & is the boolean AND, returns a vector.
# || is the boolean OR, returns a single value
# && is the boolean AND, ditto
5
�
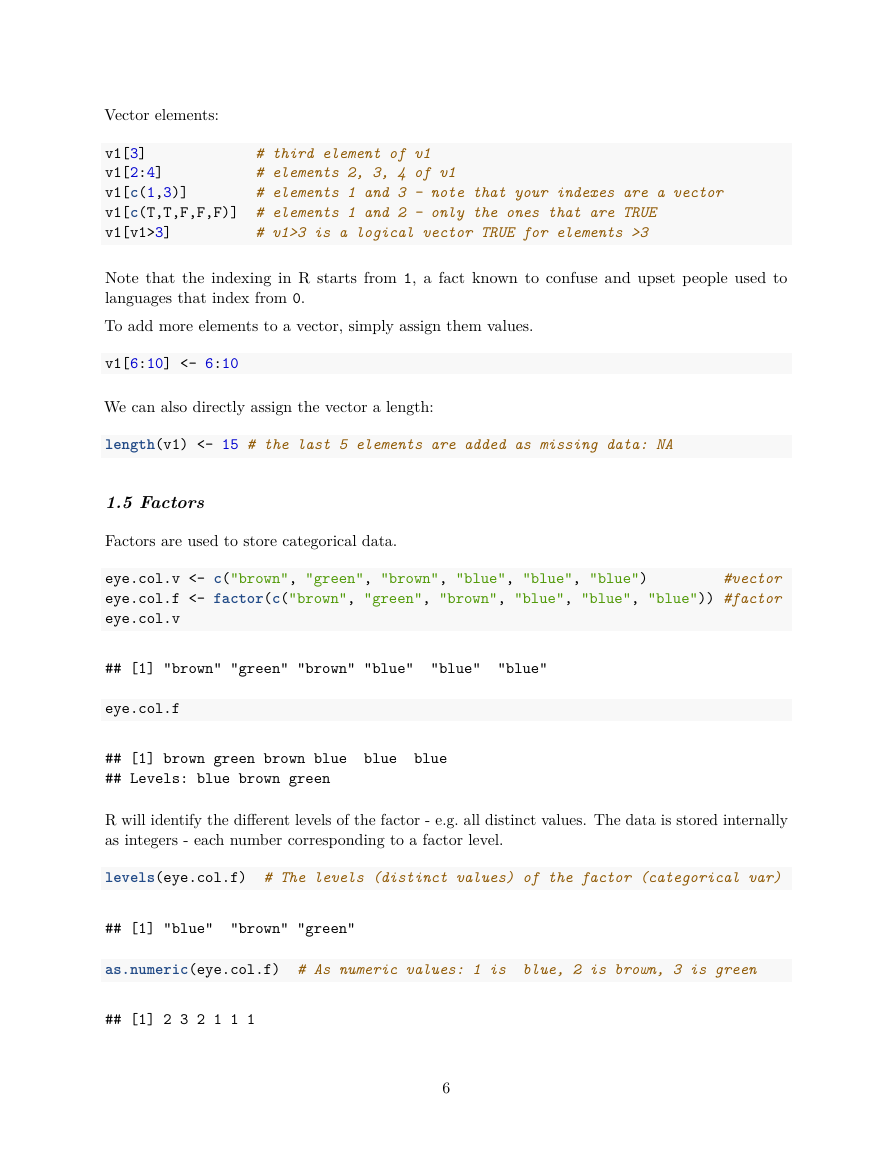
Vector elements:
v1[3]
v1[2:4]
v1[c(1,3)]
v1[c(T,T,F,F,F)]
v1[v1>3]
# third element of v1
# elements 2, 3, 4 of v1
# elements 1 and 3 - note that your indexes are a vector
# elements 1 and 2 - only the ones that are TRUE
# v1>3 is a logical vector TRUE for elements >3
Note that the indexing in R starts from 1, a fact known to confuse and upset people used to
languages that index from 0.
To add more elements to a vector, simply assign them values.
v1[6:10] <- 6:10
We can also directly assign the vector a length:
length(v1) <- 15 # the last 5 elements are added as missing data: NA
1.5 Factors
Factors are used to store categorical data.
#vector
eye.col.v <- c("brown", "green", "brown", "blue", "blue", "blue")
eye.col.f <- factor(c("brown", "green", "brown", "blue", "blue", "blue")) #factor
eye.col.v
## [1] "brown" "green" "brown" "blue"
"blue"
"blue"
eye.col.f
## [1] brown green brown blue blue
## Levels: blue brown green
blue
R will identify the different levels of the factor - e.g. all distinct values. The data is stored internally
as integers - each number corresponding to a factor level.
levels(eye.col.f) # The levels (distinct values) of the factor (categorical var)
## [1] "blue" "brown" "green"
as.numeric(eye.col.f) # As numeric values: 1 is
blue, 2 is brown, 3 is green
## [1] 2 3 2 1 1 1
6
�
as.numeric(eye.col.v) # The character vector can not be coerced to numeric
## Warning: NAs introduced by coercion
## [1] NA NA NA NA NA NA
as.character(eye.col.f)
## [1] "brown" "green" "brown" "blue"
"blue"
"blue"
as.character(eye.col.v)
## [1] "brown" "green" "brown" "blue"
"blue"
"blue"
1.6 Matrces & Arrays
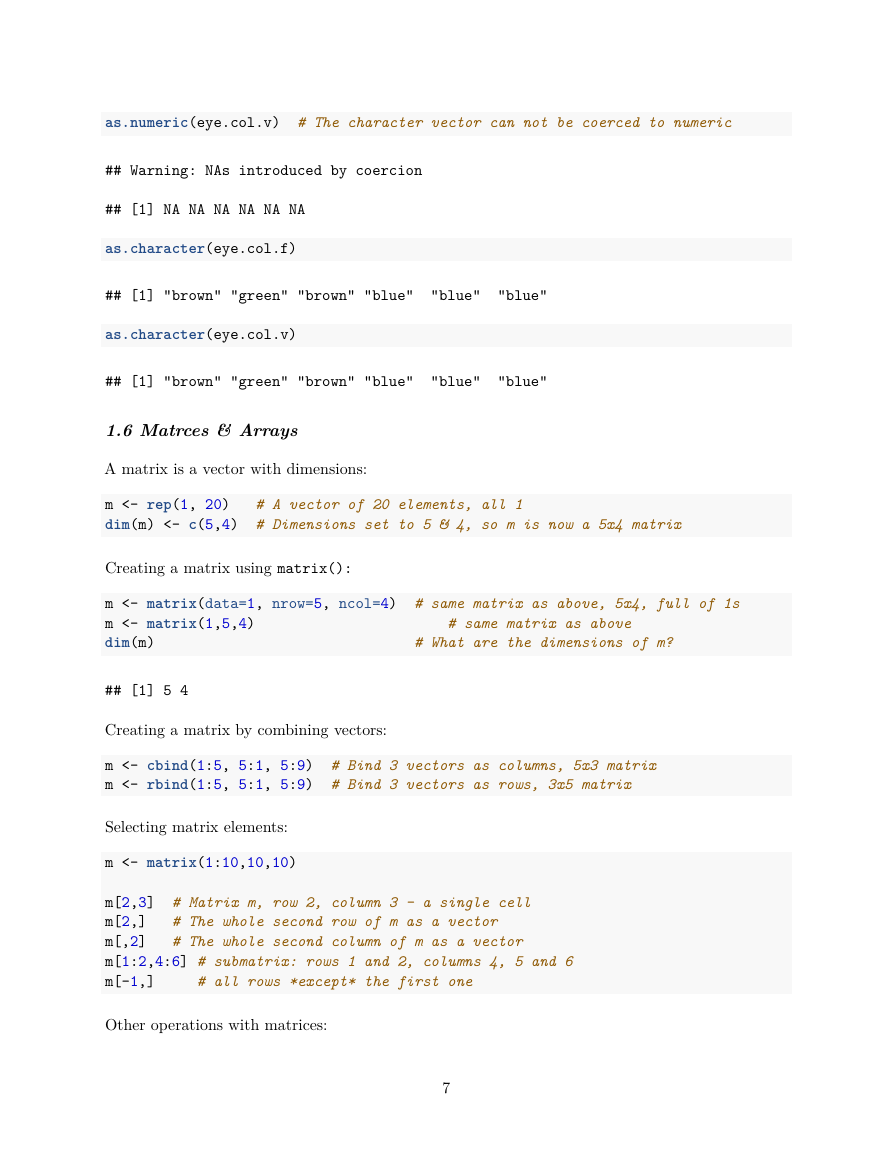
A matrix is a vector with dimensions:
m <- rep(1, 20)
dim(m) <- c(5,4)
# A vector of 20 elements, all 1
# Dimensions set to 5 & 4, so m is now a 5x4 matrix
Creating a matrix using matrix():
m <- matrix(data=1, nrow=5, ncol=4) # same matrix as above, 5x4, full of 1s
m <- matrix(1,5,4)
dim(m)
# What are the dimensions of m?
# same matrix as above
## [1] 5 4
Creating a matrix by combining vectors:
m <- cbind(1:5, 5:1, 5:9) # Bind 3 vectors as columns, 5x3 matrix
m <- rbind(1:5, 5:1, 5:9) # Bind 3 vectors as rows, 3x5 matrix
Selecting matrix elements:
m <- matrix(1:10,10,10)
# The whole second row of m as a vector
# The whole second column of m as a vector
m[2,3] # Matrix m, row 2, column 3 - a single cell
m[2,]
m[,2]
m[1:2,4:6] # submatrix: rows 1 and 2, columns 4, 5 and 6
m[-1,]
# all rows *except* the first one
Other operations with matrices:
7
�
# Are elements in row 1 equivalent to corresponding elements from column 1:
m[1,]==m[,1]
# A logical matrix: TRUE for m elements >3, FALSE otherwise:
m>3
# Selects only TRUE elements - that is ones greater than 3:
m[m>3]
t(m)
m <- t(m)
m %*% t(m)
m * m
# Transpose m
# Assign m the transposed m
# %*% does matrix multiplication
# * does element-wise multiplication
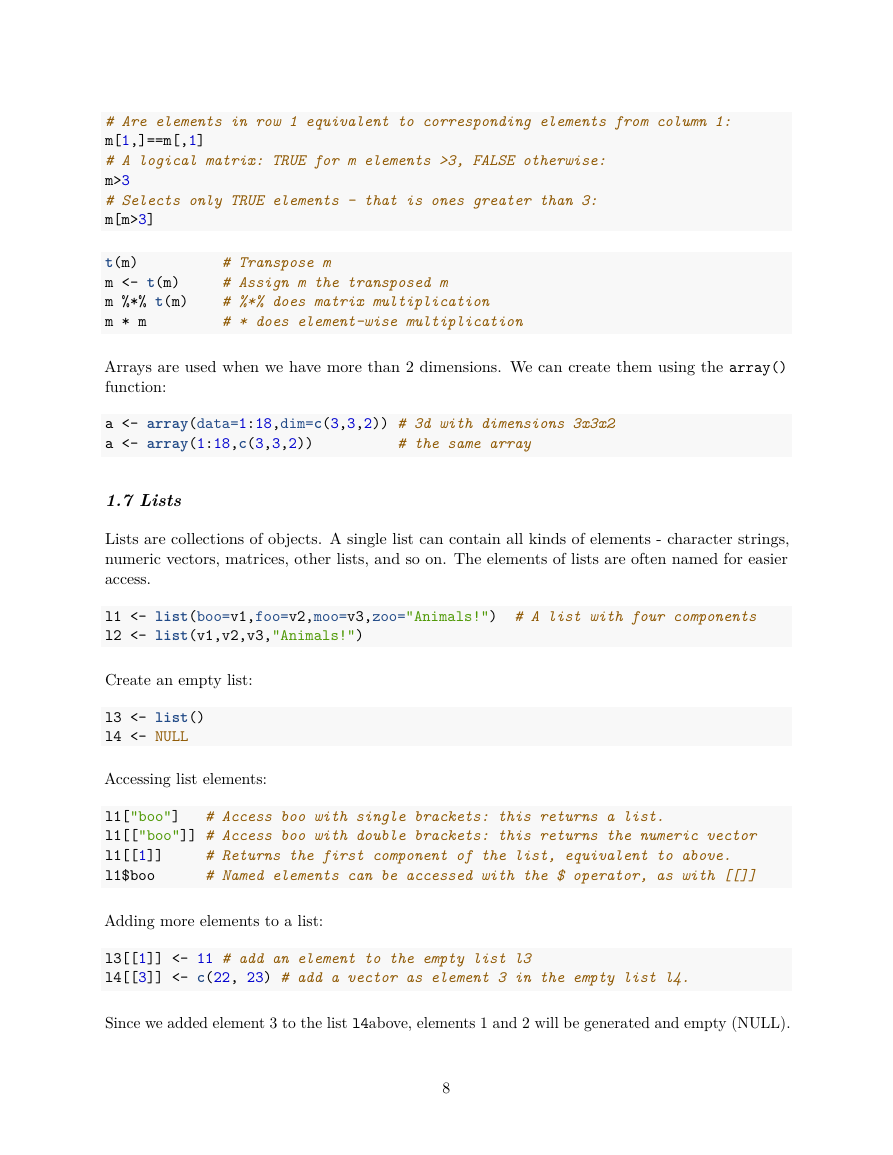
Arrays are used when we have more than 2 dimensions. We can create them using the array()
function:
a <- array(data=1:18,dim=c(3,3,2)) # 3d with dimensions 3x3x2
a <- array(1:18,c(3,3,2))
# the same array
1.7 Lists
Lists are collections of objects. A single list can contain all kinds of elements - character strings,
numeric vectors, matrices, other lists, and so on. The elements of lists are often named for easier
access.
l1 <- list(boo=v1,foo=v2,moo=v3,zoo="Animals!") # A list with four components
l2 <- list(v1,v2,v3,"Animals!")
Create an empty list:
l3 <- list()
l4 <- NULL
Accessing list elements:
# Access boo with single brackets: this returns a list.
l1["boo"]
l1[["boo"]] # Access boo with double brackets: this returns the numeric vector
l1[[1]]
l1$boo
# Returns the first component of the list, equivalent to above.
# Named elements can be accessed with the $ operator, as with [[]]
Adding more elements to a list:
l3[[1]] <- 11 # add an element to the empty list l3
l4[[3]] <- c(22, 23) # add a vector as element 3 in the empty list l4.
Since we added element 3 to the list l4above, elements 1 and 2 will be generated and empty (NULL).
8
�


 2023年江西萍乡中考道德与法治真题及答案.doc
 2012年重庆南川中考生物真题及答案.doc
 2013年江西师范大学地理学综合及文艺理论基础考研真题.doc
 2020年四川甘孜小升初语文真题及答案I卷.doc
 2020年注册岩土工程师专业基础考试真题及答案.doc
 2023-2024学年福建省厦门市九年级上学期数学月考试题及答案.doc
 2021-2022学年辽宁省沈阳市大东区九年级上学期语文期末试题及答案.doc
 2022-2023学年北京东城区初三第一学期物理期末试卷及答案.doc
 2018上半年江西教师资格初中地理学科知识与教学能力真题及答案.doc
 2012年河北国家公务员申论考试真题及答案-省级.doc
 2020-2021学年江苏省扬州市江都区邵樊片九年级上学期数学第一次质量检测试题及答案.doc
 2022下半年黑龙江教师资格证中学综合素质真题及答案.doc