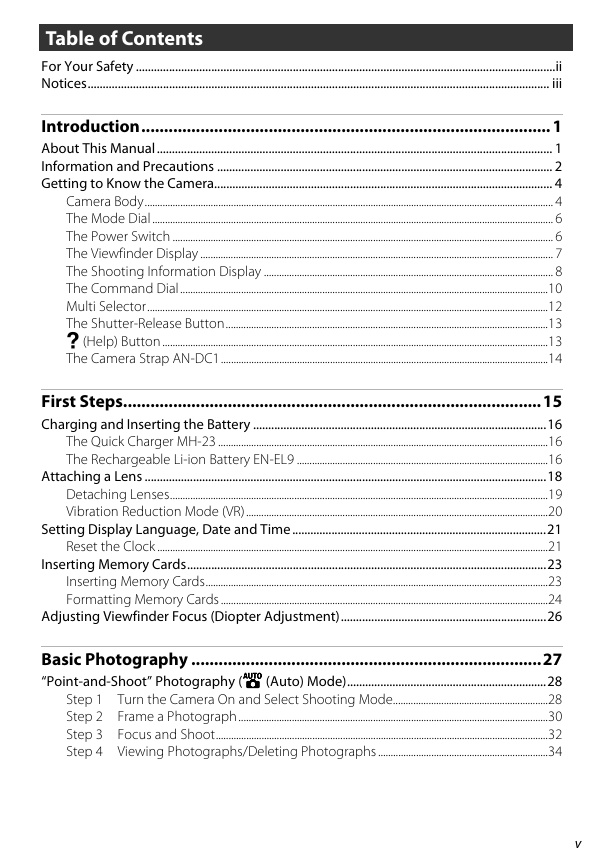
For Your Safety
Notices
Introduction
About This Manual
Information and Precautions
Getting to Know the Camera
Camera Body
The Mode Dial
The Power Switch
The Viewfinder Display
The Shooting Information Display
The Command Dial
Multi Selector
The Shutter-Release Button
? (Help) Button
The Camera Strap AN-DC1
First Steps
Charging and Inserting the Battery
The Quick Charger MH-23
The Rechargeable Li-ion Battery EN-EL9
Attaching a Lens
Detaching Lenses
Vibration Reduction Mode (VR)
Setting Display Language, Date and Time
Reset the Clock
Inserting Memory Cards
Inserting Memory Cards
Formatting Memory Cards
Adjusting Viewfinder Focus (Diopter Adjustment)
Basic Photography
"Point-and-Shoot” Photography (Auto Mode)
Step 1 Turn the Camera On and Select Shooting Mode
Step 2 Frame a Photograph
Step 3 Focus and Shoot
Step 4 Viewing Photographs/Deleting Photographs
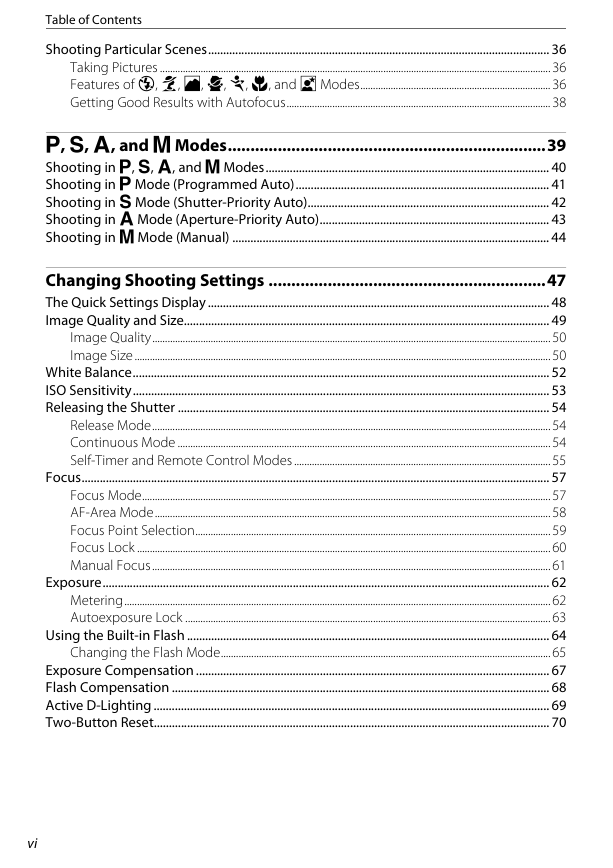
Shooting Particular Scenes
Taking Pictures
Features
Getting Good Results with Autofocus
P, S, A, and M Modes
Shooting in P, S, A, and M Modes
Shooting in P Mode (Programmed Auto)
Shooting in S Mode (Shutter-Priority Auto)
Shooting in A Mode (Aperture-Priority Auto)
Shooting in M Mode (Manual)
Changing Shooting Settings
The Quick Settings Display
Image Quality and Size
Image Quality
Image Size
White Balance
ISO Sensitivity
Releasing the Shutter
Release Mode
Continuous Mode
Self-Timer and Remote Control Modes
Focus
Focus Mode
AF-Area Mode
Focus Point Selection
Focus Lock
Manual Focus
Exposure
Metering
Autoexposure Lock
Using the Built-in Flash
Changing the Flash Mode
Exposure Compensation
Flash Compensation
Active D-Lighting
Two-Button Reset
More on Playback
Viewing Photographs in Full-Frame Playback
Full-Frame Playback
Photo Information
Viewing Multiple Photographs: Thumbnail Playback
Taking a Closer Look: Playback Zoom
Protecting Photographs from Deletion
Connecting to a Computer, Printer, or TV
Connecting to a Computer
Before Connecting the Camera
Connecting the USB Cable
Connecting to a Printer
Printing Via Direct USB Connection
Connecting the Printer
Printing Photographs One at a Time
Printing Multiple Photographs
Creating an Index Print
Creating a DPOF Print Order: Print Set
Viewing Photographs on TV
Menu Guide
Using Camera Menus
Playback Options: The Playback Menu
Delete
Playback Folder
Rotate Tall
Slide Show
Stop-Motion Movie
Shooting Options: The Shooting Menu
Optimize Image
Customizing Image Enhancement Options: Custom
White Balance
Fine-Tuning White Balance
Preset Manual
Noise Reduction
Custom Settings
R Reset
01 Beep
06 No Memory Card?
07 Image Review
09 AF-assist
10 ISO Auto
11 Self-Timer/FUNC Button
12 AE-L/AF-L
13 AE Lock
14 Built-in Flash/Optional Flash Unit
15 Auto off Timers
16 Self-Timer
17 Remote on Duration
18 Date Imprint
19 Rangefinder
Basic Camera Settings: The Setup Menu
CSM/Setup Menu
Choosing Menu Items for My Menu
Info Display Format
Auto Shooting Info
Shooting Info Auto off
LCD Brightness
Video Mode
Language
Image Comment
Folders
File No. Sequence
Clean Image Sensor
Mirror Lock-Up
Firmware Version
Dust off Ref Photo
Auto Image Rotation
Creating Retouched Copies: The Retouch Menu
Creating Retouched Copies
Creating Retouched Copies in Full-frame Playback
Quick Retouch
D-Lighting
Red-Eye Correction
Trim
Monochrome
Filter Effects
Small Picture
Image Overlay
NEF (RAW) Processing
Stop-motion Movie
Before and after (Making a Side-by-Side Comparison)
Optional Accessories
Compatible Lenses
Optional Flash Units (Speedlights)
Other Accessories
Connecting the Power Connector and the AC Adapter
Approved Memory Cards
Maximizing the Life of the Camera
Caring for the Camera
Storage
Cleaning
Caring for the Optical Low-Pass Filter
Caring for the Camera and Battery: Cautions
The Camera and Lens
The Battery
Technical Notes
Troubleshooting
Display
Shooting
Playback
Others
Camera Error Messages and Displays
Appendix
Available Settings and Defaults
Memory Card Capacity and Image Quality / Size
Exposure Program (Mode P)
Flash Control
Shutter Speeds Available with the Built-in Flash
Aperture, Sensitivity, and Flash Range
Specifications
Supported Standards
Index




 2023年江西萍乡中考道德与法治真题及答案.doc
 2012年重庆南川中考生物真题及答案.doc
 2013年江西师范大学地理学综合及文艺理论基础考研真题.doc
 2020年四川甘孜小升初语文真题及答案I卷.doc
 2020年注册岩土工程师专业基础考试真题及答案.doc
 2023-2024学年福建省厦门市九年级上学期数学月考试题及答案.doc
 2021-2022学年辽宁省沈阳市大东区九年级上学期语文期末试题及答案.doc
 2022-2023学年北京东城区初三第一学期物理期末试卷及答案.doc
 2018上半年江西教师资格初中地理学科知识与教学能力真题及答案.doc
 2012年河北国家公务员申论考试真题及答案-省级.doc
 2020-2021学年江苏省扬州市江都区邵樊片九年级上学期数学第一次质量检测试题及答案.doc
 2022下半年黑龙江教师资格证中学综合素质真题及答案.doc