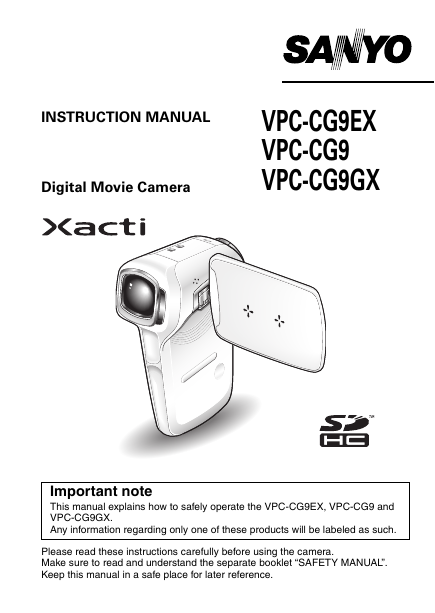
INSTRUCTION MANUAL
Digital Movie Camera
VPC-CG9EX
VPC-CG9
VPC-CG9GX
Important note
This manual explains how to safely operate the VPC-CG9EX, VPC-CG9 and
VPC-CG9GX.
Any information regarding only one of these products will be labeled as such.
Please read these instructions carefully before using the camera.
Make sure to read and understand the separate booklet “SAFETY MANUAL”.
Keep this manual in a safe place for later reference.
�
Symbols used in this manual
HINT
Points giving some extended instructions or special points to pay
attention to.
CAUTION Points that require special attention.
(page xx) Refer to the page indicated for detailed information.
You may find the answers to questions or problems concerning camera
operation in the sections “COMMONLY ASKED QUESTIONS” (page 180)
and “TROUBLESHOOTING” (page 187).
i
English
�
SHOOT, PLAY BACK AND SAVE
Prepare the battery pack
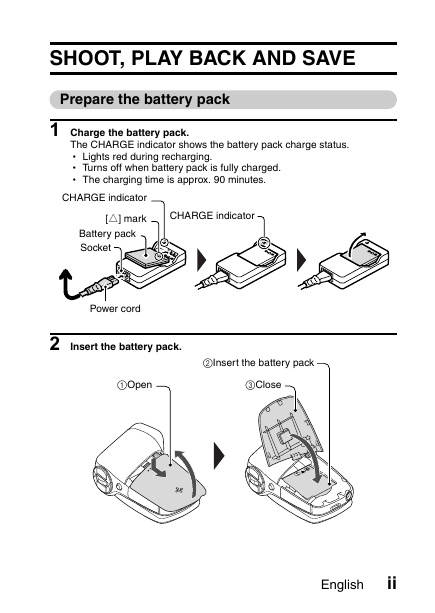
1 Charge the battery pack.
The CHARGE indicator shows the battery pack charge status.
h Lights red during recharging.
h Turns off when battery pack is fully charged.
h The charging time is approx. 90 minutes.
CHARGE indicator
[o] mark
Battery pack
Socket
CHARGE indicator
Power cord
2 Insert the battery pack.
2Insert the battery pack
1Open
3Close
English
ii
�
SHOOT, PLAY BACK AND SAVE
Before capturing those important shots, be sure to first take a
test shot to confirm that your camera is set up and ready to go
i Sanyo declines any claim for compensation for recorded contents etc. in case
of photographing or recording failure due to a chance camera or card flaw.
Shooting
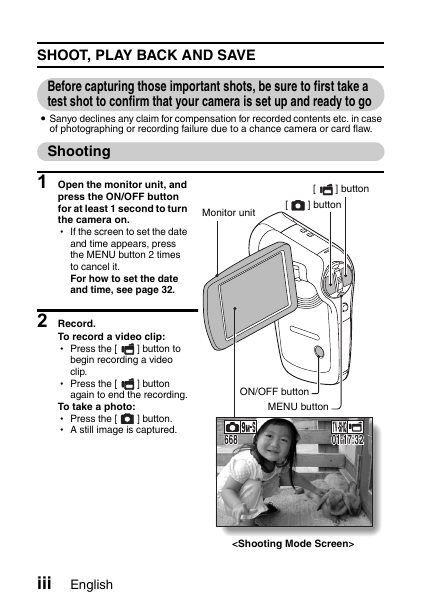
1 Open the monitor unit, and
] button
Monitor unit
[
[
] button
press the ON/OFF button
for at least 1 second to turn
the camera on.
h If the screen to set the date
and time appears, press
the MENU button 2 times
to cancel it.
For how to set the date
and time, see page 32.
2 Record.
To record a video clip:
h Press the [
] button to
begin recording a video
clip.
h Press the [
] button
again to end the recording.
To take a photo:
h Press the [
] button.
h A still image is captured.
iii
English
ON/OFF button
MENU button
668
668
668
01:17:32
01:17:32
01:17:32
�
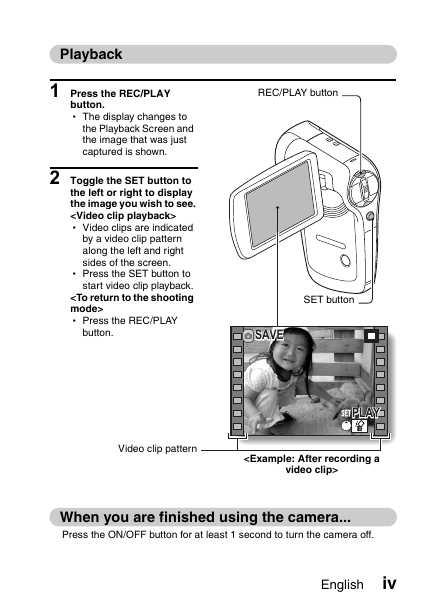
Playback
1 Press the REC/PLAY
button.
h The display changes to
the Playback Screen and
the image that was just
captured is shown.
2 Toggle the SET button to
the left or right to display
the image you wish to see.
SHOOT, PLAY BACK AND SAVE
Copy files to the computer (Windows XP)
Connect your camera to a computer, and copy files to the computer.
1 Turn on the computer, and use the supplied dedicated USB interface
cable to connect your camera to the computer.
h Connect the cable between the camera’s USB/AV terminal and the
computer’s USB connector.
2 Turn on the camera (page 29).
h The USB Connection Screen appears on the camera’s monitor.
SET button
To USB/AV terminal
on the camera
Supplied dedicated
USB interface cable
To USB connector
on the computer
USB CONNECTION
COMPUTER
PRINTER
CANCEL
CANCEL
OK
3 Select “COMPUTER”, and press the SET button.
h The screen to select the computer connection mode appears.
v
English
�
4 Select “CARD READER”, and press the SET button.
h The message [Found New Hardware] appears in the task tray,
showing that the camera is recognized as a drive.
h The card is recognized (mounted) as a disk, and the [XACTI_INT (E:)]
icon appears in the [My Computer] window.
* The drive name (E:) may be different on your computer.
h Click on [Exit] to cancel the access menu.
5 Select an action.
h If the [XACTI_INT (E:)] window appears automatically, select the
desired procedure from the window.
Dismounting the camera
CAUTION
i To disconnect your camera, be sure to follow the procedure below. Failure
to follow this procedure may cause faulty operation of your computer or
corrupt the files in your camera.
1 Left-click on the icon for safely removing hardware in the task tray.
h A list appears showing the devices connected to the computer’s USB
connector.
h Close the window.
2 Left-click on the camera drive (E:).
h The camera can now be disconnected.
* The drive name (E:) may be different on your computer.
No software is included with this camera. Instructions for obtaining
the software can be found on page 167.
English vi
�
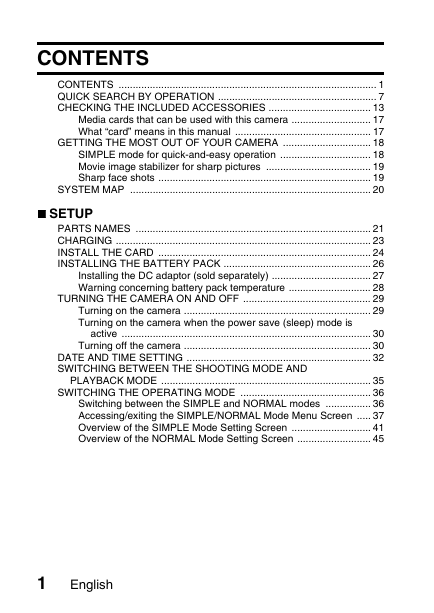
CONTENTS
CONTENTS ........................................................................................... 1
QUICK SEARCH BY OPERATION ........................................................ 7
CHECKING THE INCLUDED ACCESSORIES .................................... 13
Media cards that can be used with this camera ............................ 17
What “card” means in this manual ................................................ 17
GETTING THE MOST OUT OF YOUR CAMERA ............................... 18
SIMPLE mode for quick-and-easy operation ................................ 18
Movie image stabilizer for sharp pictures ..................................... 19
Sharp face shots ........................................................................... 19
SYSTEM MAP ..................................................................................... 20
SETUP
PARTS NAMES ................................................................................... 21
CHARGING .......................................................................................... 23
INSTALL THE CARD ........................................................................... 24
INSTALLING THE BATTERY PACK .................................................... 26
Installing the DC adaptor (sold separately) ................................... 27
Warning concerning battery pack temperature ............................. 28
TURNING THE CAMERA ON AND OFF ............................................. 29
Turning on the camera .................................................................. 29
Turning on the camera when the power save (sleep) mode is
active ........................................................................................ 30
Turning off the camera .................................................................. 30
DATE AND TIME SETTING ................................................................. 32
SWITCHING BETWEEN THE SHOOTING MODE AND
PLAYBACK MODE .......................................................................... 35
SWITCHING THE OPERATING MODE .............................................. 36
Switching between the SIMPLE and NORMAL modes ................ 36
Accessing/exiting the SIMPLE/NORMAL Mode Menu Screen ..... 37
Overview of the SIMPLE Mode Setting Screen ............................ 41
Overview of the NORMAL Mode Setting Screen .......................... 45
1
English
�





 2023年江西萍乡中考道德与法治真题及答案.doc
 2012年重庆南川中考生物真题及答案.doc
 2013年江西师范大学地理学综合及文艺理论基础考研真题.doc
 2020年四川甘孜小升初语文真题及答案I卷.doc
 2020年注册岩土工程师专业基础考试真题及答案.doc
 2023-2024学年福建省厦门市九年级上学期数学月考试题及答案.doc
 2021-2022学年辽宁省沈阳市大东区九年级上学期语文期末试题及答案.doc
 2022-2023学年北京东城区初三第一学期物理期末试卷及答案.doc
 2018上半年江西教师资格初中地理学科知识与教学能力真题及答案.doc
 2012年河北国家公务员申论考试真题及答案-省级.doc
 2020-2021学年江苏省扬州市江都区邵樊片九年级上学期数学第一次质量检测试题及答案.doc
 2022下半年黑龙江教师资格证中学综合素质真题及答案.doc