logo资料库

android项目_-天气预报详解实例.docx

第1页 / 共10页
第2页 / 共10页
第3页 / 共10页
第4页 / 共10页
第5页 / 共10页
第6页 / 共10页
第7页 / 共10页
第8页 / 共10页
资料共10页,剩余部分请下载后查看
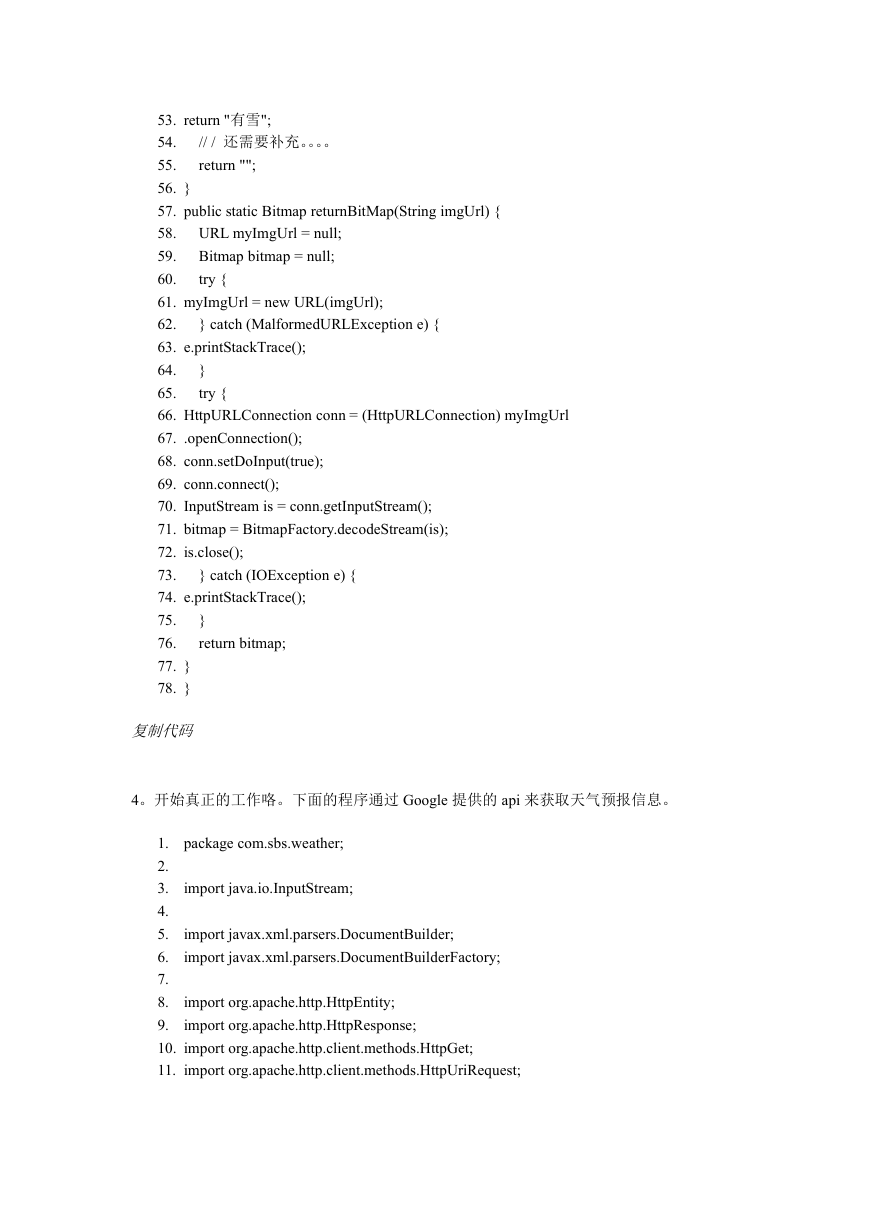
http://hi.baidu.com/einyboy/blog/item/1cb8c9656cb43ffef6365404.html Android 中文天气预报程序 2010 年 09 月 13 日 星期一 12:47 大家好!由于项目原因好长时间没学 android 了。今天抽出点儿时间做个天气预报程序。贴 出来希望对大家有用。 先说一下 Google 天气预报的 AIP 吧。 http://www.google.com/ig/api?&weather=城市名(中文 全拼). 我发现在模拟器上面返回的结果和在 pc 上返回的结果不太一样,pc 上有中文的,android 模拟器上没有的。 好了不说别的了。开始吧! now start。 1。建立工程。我取名 sbsWeather。结构如下: 我们一步一步来,慢慢完善 2。我习惯先写布局。 1. 2.
android:id="@+id/tvPlace" android:orientation="vertical" android:layout_width="fill_parent" android:layout_height="fill_parent" 3. 8. 13. 19.
if (enWeek.equals("Mon") || enWeek.equals("Monday")) else if (enWeek.equals("Tue") || enWeek.equals("Tuesday")) else if (enWeek.equals("Fri") || enWeek.equals("Friday")) else if (enWeek.equals("Sat") || enWeek.equals("Saturday")) else if (enWeek.equals("Sun") || enWeek.equals("Sunday")) else if (enWeek.equals("Wed") || enWeek.equals("Wednesday")) else if (enWeek.equals("Thu") || enWeek.equals("Thursday")) return ""; if (enWeather.equals("Clear")) 10. public class Utils { 11. public static String week(String enWeek) { 12. 13. return "星期一"; 14. 15. return "星期二"; 16. 17. return "星期三"; 18. 19. return "星期四"; 20. 21. return "星期五"; 22. 23. return "星期六"; 24. 25. return "星期日"; 26. 27. } 28. public static String weather(String enWeather) { 29. 30. return "晴"; 31. 32. || enWeather.equals("partly_cloudy")) 33. return "多云"; 34. 35. return "晴转雨"; 36. 37. return "暴雨"; 38. 39. return "雷阵雨"; 40. 41. return "大雾"; 42. 43. return "有雾"; 44. 45. return "雨"; 46. 47. return "大雨"; 48. 49. return "小雨"; 50. 51. return "大雨"; 52. else if (enWeather.equals("Chance of Rain")) else if (enWeather.equals("thunderstorm")) else if (enWeather.equals("Partly Sunny") else if (enWeather.equals("fog")) else if (enWeather.equals("haze")) else if (enWeather.equals("rain")) else if (enWeather.equals("storm")) else if (enWeather.equals("heavyrain")) else if (enWeather.equals("lightrain")) else if (enWeather.equals("heavyrain")) else if (enWeather.equals("snow"))
} catch (MalformedURLException e) { // / 还需要补充。。。。 return ""; URL myImgUrl = null; Bitmap bitmap = null; try { 53. return "有雪"; 54. 55. 56. } 57. public static Bitmap returnBitMap(String imgUrl) { 58. 59. 60. 61. myImgUrl = new URL(imgUrl); 62. 63. e.printStackTrace(); 64. 65. 66. HttpURLConnection conn = (HttpURLConnection) myImgUrl 67. .openConnection(); 68. conn.setDoInput(true); 69. conn.connect(); 70. InputStream is = conn.getInputStream(); 71. bitmap = BitmapFactory.decodeStream(is); 72. is.close(); 73. 74. e.printStackTrace(); 75. 76. 77. } 78. } } try { } catch (IOException e) { } return bitmap; 复制代码 4。开始真正的工作咯。下面的程序通过 Google 提供的 api 来获取天气预报信息。 import java.io.InputStream; import javax.xml.parsers.DocumentBuilder; import javax.xml.parsers.DocumentBuilderFactory; 1. package com.sbs.weather; 2. 3. 4. 5. 6. 7. 8. 9. 10. import org.apache.http.client.methods.HttpGet; 11. import org.apache.http.client.methods.HttpUriRequest; import org.apache.http.HttpEntity; import org.apache.http.HttpResponse;
12. import org.apache.http.impl.client.DefaultHttpClient; 13. import org.apache.http.util.EntityUtils; 14. import org.w3c.dom.Document; 15. import org.w3c.dom.NodeList; 16. import org.xml.sax.InputSource; 17. 18. import android.app.Activity; 19. import android.graphics.Bitmap; 20. import android.os.Bundle; 21. import android.os.Handler; 22. import android.os.Message; 23. import android.util.Log; 24. import android.view.View; 25. import android.widget.Button; 26. import android.widget.EditText; 27. import android.widget.ImageView; 28. import android.widget.TextView; 29. 30. public class Weather extends Activity { 31. 32. public EditText ETplace; 33. public TextView TvPlace; 34. public Button query; 35. public TextView placeName; 36. public ImageView imView; 37. 38. /** Called when the activity is first created. */ 39. @Override 40. public void onCreate(Bundle savedInstanceState) { 41. super.onCreate(savedInstanceState); 42. setContentView(R.layout.main); 43. 44. ETplace = (EditText)findViewById(R.id.place); 45. query = (Button)findViewById(R.id.query); 46. imView = (ImageView)findViewById(R.id.myImageView); 47. placeName = (TextView)findViewById(R.id.placeName); 48. 49. query.setOnClickListener(new Button.OnClickListener() { 50. public void onClick(View v) { 51. try{ 52. TvPlace = (TextView)findViewById(R.id.tvPlace); 53. 54. String place = CntoEn.getFullSpell(ETplace.getText().toString());
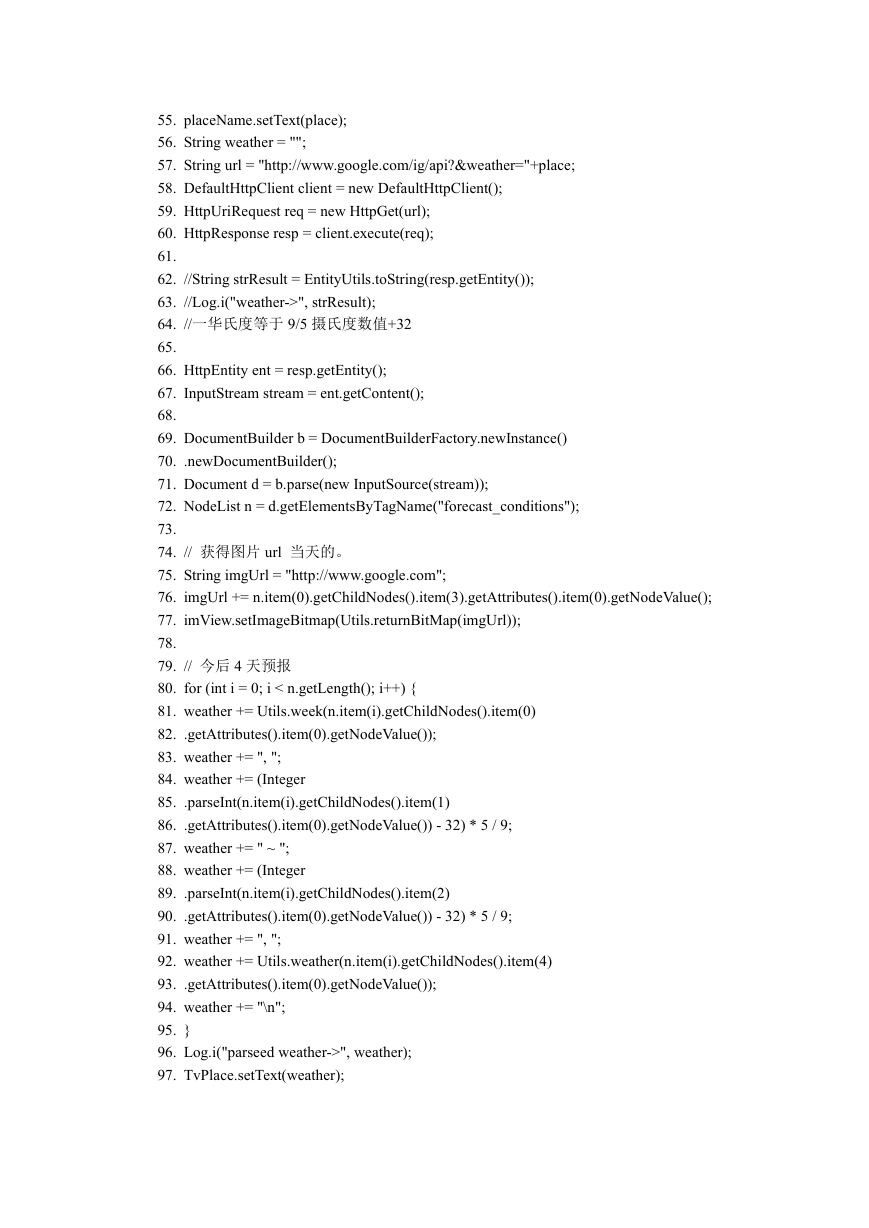
55. placeName.setText(place); 56. String weather = ""; 57. String url = "http://www.google.com/ig/api?&weather="+place; 58. DefaultHttpClient client = new DefaultHttpClient(); 59. HttpUriRequest req = new HttpGet(url); 60. HttpResponse resp = client.execute(req); 61. 62. //String strResult = EntityUtils.toString(resp.getEntity()); 63. //Log.i("weather->", strResult); 64. //一华氏度等于 9/5 摄氏度数值+32 65. 66. HttpEntity ent = resp.getEntity(); 67. InputStream stream = ent.getContent(); 68. 69. DocumentBuilder b = DocumentBuilderFactory.newInstance() 70. .newDocumentBuilder(); 71. Document d = b.parse(new InputSource(stream)); 72. NodeList n = d.getElementsByTagName("forecast_conditions"); 73. 74. // 获得图片 url 当天的。 75. String imgUrl = "http://www.google.com"; 76. imgUrl += n.item(0).getChildNodes().item(3).getAttributes().item(0).getNodeValue(); 77. imView.setImageBitmap(Utils.returnBitMap(imgUrl)); 78. 79. // 今后 4 天预报 80. for (int i = 0; i < n.getLength(); i++) { 81. weather += Utils.week(n.item(i).getChildNodes().item(0) 82. .getAttributes().item(0).getNodeValue()); 83. weather += ", "; 84. weather += (Integer 85. .parseInt(n.item(i).getChildNodes().item(1) 86. .getAttributes().item(0).getNodeValue()) - 32) * 5 / 9; 87. weather += " ~ "; 88. weather += (Integer 89. .parseInt(n.item(i).getChildNodes().item(2) 90. .getAttributes().item(0).getNodeValue()) - 32) * 5 / 9; 91. weather += ", "; 92. weather += Utils.weather(n.item(i).getChildNodes().item(4) 93. .getAttributes().item(0).getNodeValue()); 94. weather += "\n"; 95. } 96. Log.i("parseed weather->", weather); 97. TvPlace.setText(weather);
98. 99. } catch (Exception e) { 100. e.printStackTrace(); 101. } 102. 103. }}); 104. } 105. } 复制代码 5。嗯这一步相当重要,就是添加权限。要是没有权限一切白搭! android:versionCode="1" android:versionName="1.0"> 1. 2. 7. 8. 10. 11. 12. 13. 14. 15. 16. 17. 复制代码 6。开始运行咯。
分享到:
收藏