logo资料库

爱普泰克数码摄像机-T8 pro说明书.pdf

第1页 / 共121页
第2页 / 共121页
第3页 / 共121页
第4页 / 共121页
第5页 / 共121页
第6页 / 共121页
第7页 / 共121页
第8页 / 共121页
资料共121页,剩余部分请下载后查看
English
Welcome
Safety Notice
Preparing the Camcorder
Product overview
Getting Started
Loading the battery
Charging the battery
Inserting the SD card
Turning the power on/off
Realizing the battery life indicator
Recording a video clip
Taking a still picture
Exporting to a standard TV and HDTV
Advanced settings
Key tips
Setting menu options
Setting menu options (continued)
Deutsch
Herzlich willkommen
Sicherheitshinweise
Vorbereiten des Camcorders
Produktübersicht
Erste Schritte
Einlegen des Akkus
Aufladen des Akkus
Einlegen der SD-Karte
Ein-/Ausschalten des Camcorders
Erkennen des Akkuladeanzeige
Aufzeichnen eines Videoclips
Aufnehmen eines Fotos
An einen Standard-TV und HDTV exportieren
Erweiterte Einstellungen
Kurztipps
Optionen des Einstellungsmenüs
Optionen des Einstellungsmenüs (Fortsetzungen)
Français
Bienvenue
Avis relatif à la sécurité
Préparer le caméscope
Vue d'ensemble du produit
Mise en route
Installer la batterie
Charger la batterie
Insertion de la carte SD
Mise sous/hors tension
Voyant indicateur de l'état de charge de la batterie
Enregistrer un clip vidéo
Prendre une photo
Exporter vers un téléviseur standard ou un téléviseur haute définition
Réglages avancés
Touches
Options du menu de réglage
Options du menu de réglage (suite)
Italiano
Benvenuto
Avviso per la sicurezza
Preparazione della videocamera
Descrizione del prodotto
Preparazione
Inserimento della batteria
Caricamento della batteria
Inserimento della scheda SD
Accensione/Spegnimento
Indicazioni dell’indicatore di carica della batteria
Registrazione di una sequenza video
Fotografare
Esportazione ad un televisore standard e HD
Impostazioni avanzate
Suggerimenti sui tasti
Opzioni del menu Impostazioni
Opzioni del menu Impostazioni (segue)
Español
Bienvenido
Aviso de seguridad
Preparar la videocámara
Descripción general del producto
Procedimientos iniciales
Insertar la batería
Cargar la batería
Insertar la tarjeta SD
Encender y apagar la unidad
Interpretar el indicador de carga de la batería
Grabar un clip de vídeo
Capturar una imagen fija
Exportar a un TV estándar o de alta definición (HDTV)
Configuración avanzada
Información sobre los botones
Opciones del menú de configuración
Opciones del menú de configuración (continuación)
Nederlands
Welkom
Veiligheidsrichtlijnen
De camcorder voorbereiden
Productoverzicht
Aan de slag
De batterij plaatsen
De batterij opladen
De SD-kaart plaatsen
De voeding in/uitschakelen
De indicator voor de levensduur van de batterij begrijpen
Een videoclip opnemen
Een foto maken
Exporteren naar een standaard tv en HDTV
Geavanceerde instellingen
Belangrijke tips
Opties Instellingsmenu
Opties Instellingsmenu (vervolg)
Português
Bem-vindo
Normas de Segurança
Preparar a câmara de vídeo
Visão geral do produto
Introdução
Introduzir a bateria
Carregamento da bateria
Inserir o cartão SD
Ligar e desligar a energia
Leitura do indicador de duração da bateria
Gravação de um clip de vídeo
Tirar fotografias
Exportar para uma TV tradicional e TV de alta definição
Configuração avançada
Descrições das teclas
Opções do menu de configuração
Opções do menu de configuração (continuação)
Русский
Добро пожаловать
Памятка по технике безопасности
Подготовка видеокамеры к работе
Описание устройства
Подготовка к эксплуатации
Установка аккумулятора
Зарядка аккумулятора
Установка карты памяти SD
Включение и выключение питания
Индикатор заряда аккумулятора
Запись видеоклипа
Съемка фотографий
Вывод изображения на стандартный телевизор и телевизор высокой четкости
Дополнительные настройки
Функции кнопок
Настройка параметров в меню
Настройка параметров в меню (продолжение)
繁體中文
歡迎使用
安全須知
準備使用攝影機
產品概述
準備事項
安裝電池
電池充電
插入 SD 卡
開/關電源
查看電池壽命指示燈
錄製短片
拍照
匯出至標準的電視及HDTV
進階設定
按鈕提示
設定表單功能
設定表單功能(續上頁)
簡体中文
欢迎使用
安全注意事项
准备摄像机
产品概览
准备使用
安装电池
电池充电
插入 SD 卡
打开/关闭电源
了解电池电量图示
录制视频剪辑
拍摄静态照片
导出到标准电视和 HDTV
高级设置
按键提示
设置菜单选项
设置菜单选项(续)
日本語
ようこそ
安全にお使いいただくために
カムコーダを準備する
製品の概要
始めましょう
電池の取り付け
バッテリを充電する
SD カードを挿入する
電源のオン/オフを切り替える
充電インジケータについて
ビデオクリップを録画する
静止画像を撮影する
標準テレビおよひ HDTV をエクスポート
詳細設定
キー説明
メニューオプションの設定
メニューオプションの設定(続き)
한국어
감사의 말씀
안전 주의사항
캠코더 준비하기
제품 개요
시작하기
전지 장착하기
배터리 충전하기
SD 카드 삽입하기
전원 켜기/끄기
배터리 수명 표시등 이해하기
비디오 클립 녹화하기
정지 사진 촬영하기
표준 TV 및 HDTV로 내보내기
고급 설정
중요 사용법
설정 메뉴 옵션
설정 메뉴 옵션 (계속)
Português do Brasil
Bem-vindo
Observações de segurança
Como preparar a Filmadora
Visão geral do produto
Primeiros passos
Instalação da bateria
Como carregar a bateria
Como inserir um cartão SD
Como ligar/desligar a camcorder
Como ver o indicador de carga da bateria
Gravação de vídeo clipe
Tirar uma Fotografia Estática
Como exportar para uma TV normal e HDTV
Configurações avançadas
Dicas
Opções do menu de configuração
Opções do menu de configuração (continuação)
TÜRKÇE
Hoş geldiniz
Güvenlik Uyarısı
Kamerayı Hazırlama
Ürüne genel bakış
Başlarken
Pili doldurma
Pilin şarj edilmesi
SD kartı takma
Açma/kapama
Pil ömrü göstergesini anlama
Video klip kaydetme
Hareketsiz resim çekme
Standart bir TV ve HDTV'ye aktarma
Gelişmiş ayarlar
Anahtar ipuçları
Ayar menüsü seçenekleri
Ayar menüsü seçenekleri (devam)
العربية
اًبحرم
إخطار السلامة
ويديفلا اريماك ريضحت
جتنملا ىلع ةماع ةرظن
لمعلا يف عورشلا
ةيراطبلا بيكرت
ةيراطبلا نحش
SD ةقاطب بيكرت
ةقاطلا ليغشت فاقيإ/ليغشت
ةيراطبلا رمع رشؤم ةعباتم
ويديف عطقم ليجست
ةتباث ةروص طاقتلا
يسايق ةقدلا يلاع زافلت وأ زافلت ىلإ ريدصتلا
ةمدقتم تادادعإ
ليغشتلا تاحيملت
دادعلإا ةمئاق تارايخ
)عبات( دادعلإا ةمئاق تارايخ
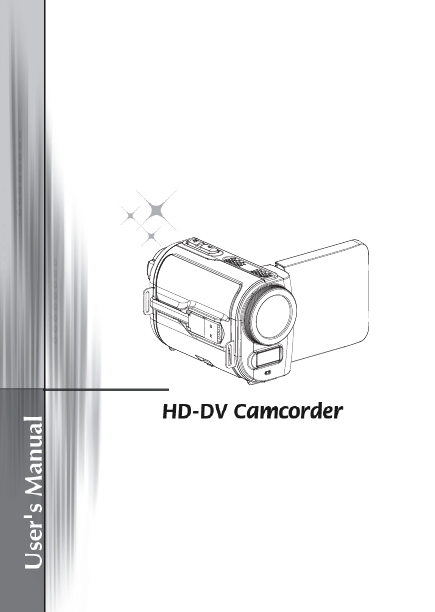
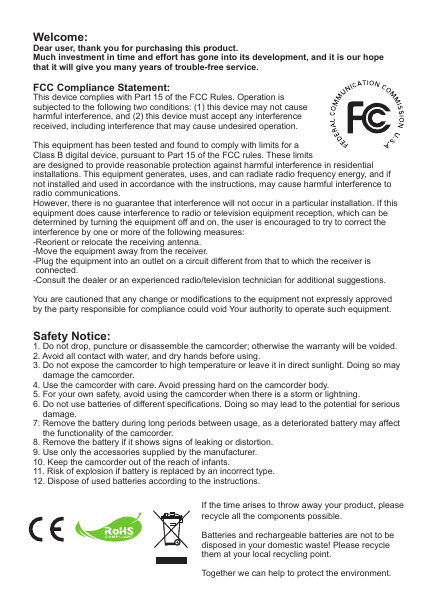
Welcome: Dear user, thank you for purchasing this product. Much investment in time and effort has gone into its development, and it is our hope that it will give you many years of trouble-free service. FCC Compliance Statement: This device complies with Part 15 of the FCC Rules. Operation is subjected to the following two conditions: (1) this device may not cause harmful interference, and (2) this device must accept any interference received, including interference that may cause undesired operation. This equipment has been tested and found to comply with limits for a Class B digital device, pursuant to Part 15 of the FCC rules. These limits are designed to provide reasonable protection against harmful interference in residential installations. This equipment generates, uses, and can radiate radio frequency energy, and if not installed and used in accordance with the instructions, may cause harmful interference to radio communications. However, there is no guarantee that interference will not occur in a particular installation. If this equipment does cause interference to radio or television equipment reception, which can be determined by turning the equipment off and on, the user is encouraged to try to correct the interference by one or more of the following measures: -Reorient or relocate the receiving antenna. -Move the equipment away from the receiver. -Plug the equipment into an outlet on a circuit different from that to which the receiver is connected. -Consult the dealer or an experienced radio/television technician for additional suggestions. You are cautioned that any change or modifications to the equipment not expressly approved by the party responsible for compliance could void Your authority to operate such equipment. Safety Notice: 1. Do not drop, puncture or disassemble the camcorder; otherwise the warranty will be voided. 2. Avoid all contact with water, and dry hands before using. 3. Do not expose the camcorder to high temperature or leave it in direct sunlight. Doing so may damage the camcorder. 4. Use the camcorder with care. Avoid pressing hard on the camcorder body. 5. For your own safety, avoid using the camcorder when there is a storm or lightning. 6. Do not use batteries of different specifications. Doing so may lead to the potential for serious damage. 7. Remove the battery during long periods between usage, as a deteriorated battery may affect the functionality of the camcorder. 8. Remove the battery if it shows signs of leaking or distortion. 9. Use only the accessories supplied by the manufacturer. 10. Keep the camcorder out of the reach of infants. 11. Risk of explosion if battery is replaced by an incorrect type. 12. Dispose of used batteries according to the instructions. If the time arises to throw away your product, please recycle all the components possible. Batteries and rechargeable batteries are not to be disposed in your domestic waste! Please recycle them at your local recycling point. Together we can help to protect the environment.
Preparing the Camcorder Product overview LCD display Speaker Playback As Joystick - Up: Icon Down: Video resolution Left: Flash Right: Menu Shutter Power LED indicator Record Delete Connector cover SD card slot Tripod socket TV-out / earphone connector HDMI output Zoom out/Volume down Zoom in/Volume up Battery cover Wrist strap holder (back) USB connector Wrist strap holder (front) Focus switch Lens Flash strobe Microphone 
Getting Started Loading the battery  Detach the USB connector as indicated, and then unfasten the battery cover to remove the cover.  Place the accessory Li-Ion battery into the compartment. Note that the metallic contacts must be aligned with the contacts in the compartment. 3 Replace the cover. When using for the first time, please fully charge the battery for at least 8 hours. Charging the battery  Detach the USB connector and plug it into a USB port on a powered PC. Make sure the camcorder is powered off.  The charging LED turns red and the charge starts. 3 When the charging is interrupted or the battery pack is fully charged, the charging LED will turn off. When using a PC to charge the battery: ) Do not power on the camcorder or the charge will stop. 2) If necessary, use a USB extension cable to extend the connection. 
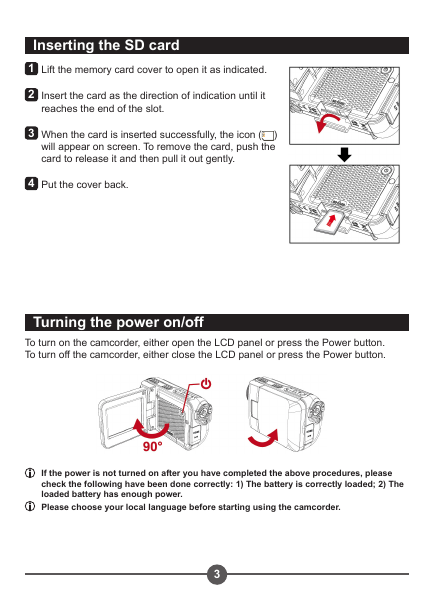
Inserting the SD card  Lift the memory card cover to open it as indicated.  Insert the card as the direction of indication until it reaches the end of the slot. 3 When the card is inserted successfully, the icon ( ) will appear on screen. To remove the card, push the card to release it and then pull it out gently. 4 Put the cover back. Turning the power on/off To turn on the camcorder, either open the LCD panel or press the Power button. To turn off the camcorder, either close the LCD panel or press the Power button. If the power is not turned on after you have completed the above procedures, please check the following have been done correctly: ) The battery is correctly loaded; ) The loaded battery has enough power. Please choose your local language before starting using the camcorder. 3
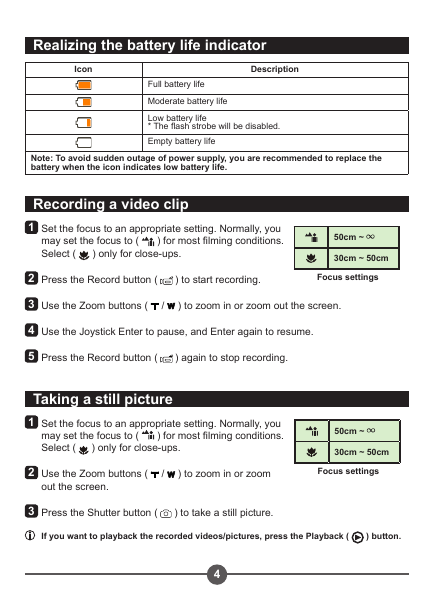
Realizing the battery life indicator Icon Description Full battery life Moderate battery life Low battery life * The flash strobe will be disabled. Empty battery life Note: To avoid sudden outage of power supply, you are recommended to replace the battery when the icon indicates low battery life. Recording a video clip  Set the focus to an appropriate setting. Normally, you ) for most filming conditions. may set the focus to ( Select ( ) only for close-ups. 50cm ~ 30cm ~ 50cm  Press the Record button ( ) to start recording. Focus settings 3 Use the Zoom buttons ( / ) to zoom in or zoom out the screen. 4 Use the Joystick Enter to pause, and Enter again to resume. 5 Press the Record button ( ) again to stop recording. Taking a still picture  Set the focus to an appropriate setting. Normally, you ) for most filming conditions. may set the focus to ( Select ( ) only for close-ups. 50cm ~ 30cm ~ 50cm  Use the Zoom buttons ( out the screen. / ) to zoom in or zoom Focus settings 3 Press the Shutter button ( ) to take a still picture. If you want to playback the recorded videos/pictures, press the Playback ( ) button. 4
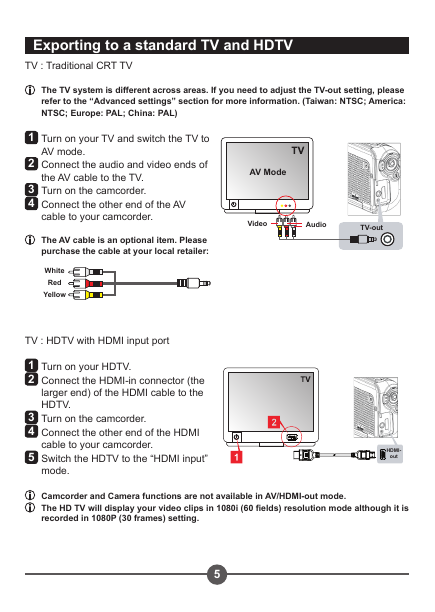
Exporting to a standard TV and HDTV TV : Traditional CRT TV The TV system is different across areas. If you need to adjust the TV-out setting, please refer to the “Advanced settings” section for more information. (Taiwan: NTSC; America: NTSC; Europe: PAL; China: PAL)  Turn on your TV and switch the TV to AV mode.  Connect the audio and video ends of the AV cable to the TV. 3 Turn on the camcorder. 4 Connect the other end of the AV cable to your camcorder. The AV cable is an optional item. Please purchase the cable at your local retailer: White Red Yellow TV : HDTV with HDMI input port  Turn on your HDTV.  Connect the HDMI-in connector (the larger end) of the HDMI cable to the HDTV. 3 Turn on the camcorder. 4 Connect the other end of the HDMI cable to your camcorder. 5 Switch the HDTV to the “HDMI input” mode. AV Mode Video Audio TV-out HDMI- out Camcorder and Camera functions are not available in AV/HDMI-out mode. The HD TV will display your video clips in 1080i (60 fields) resolution mode although it is recorded in 080P (30 frames) setting. 5
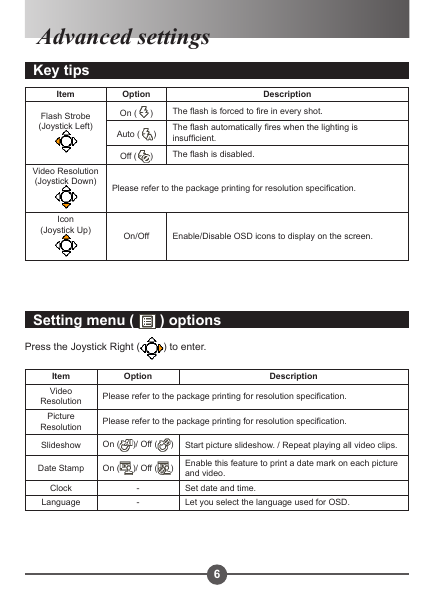
Advanced settings Key tips Item Flash Strobe (Joystick Left) Video Resolution (Joystick Down) Icon (Joystick Up) Option On ( Auto ( Off ( ) ) ) Description The flash is forced to fire in every shot. The flash automatically fires when the lighting is insufficient. The flash is disabled. Please refer to the package printing for resolution specification. On/Off Enable/Disable OSD icons to display on the screen. Setting menu ( Press the Joystick Right ( ) options ) to enter. Item Video Resolution Picture Resolution Option Description Please refer to the package printing for resolution specification. Please refer to the package printing for resolution specification. Slideshow On ( )/ Off ( Date Stamp On ( )/ Off ( Clock Language - - ) Start picture slideshow. / Repeat playing all video clips. ) Enable this feature to print a date mark on each picture and video. Set date and time. Let you select the language used for OSD. 
分享到:
收藏