Libraries
目录目录目录目录
Libraries provide extra functionality for use in sketches, e.g. working with hardware or
manipulating data. To use a library in a sketch, select it from Sketch > Import
Library.
Standard Libraries
EEPROM - reading and writing to "permanent" storage
Ethernet - for connecting to the internet using the Arduino Ethernet Shield
Firmata - for communicating with applications on the computer using a standard
serial protocol.
LiquidCrystal - for controlling liquid crystal displays (LCDs)
SD - for reading and writing SD cards
Servo - for controlling servo motors
SPI - for communicating with devices using the Serial Peripheral Interface (SPI)
Bus
SoftwareSerial - for serial communication on any digital pins. Version 1.0 and
later of Arduino incorporate Mikal Hart's NewSoftSerial library as SoftwareSerial.
Stepper - for controlling stepper motors
WiFi - for connecting to the internet using the Arduino WiFi shield
Wire - Two Wire Interface (TWI/I2C) for sending and receiving data over a net of
devices or sensors.
The Matrix and Sprite libraries are no longer part of the core distribution.
Leonardo Only Libraries
Keyboard - Send keystrokes to an attached computer.
Mouse - Control cursor movement on a connected computer.
Contributed Libraries
If you're using one of these libraries, you need to install it first. To do so, download the
library and unzip it. It should be in a folder of its own, and will typically contain at least
two files, one with a .h suffix and one with a .cpp suffix. Open your Arduino sketchbook
folder. If there is already a folder there called libraries, place the library folder in there.
If not, create a folder called libraries in the sketchbook folder, and drop the library
folder in there. Then re-start the Arduino programming environment, and you should see
your new library in the Sketch > Import Library menu.
For details, see the page on the Arduino environment.
Communication (networking and protocols):
Messenger - for processing text-based messages from the computer
NewSoftSerial - an improved version of the SoftwareSerial library
OneWire - control devices (from Dallas Semiconductor) that use the One Wire
•
•
•
•
•
•
•
•
•
•
•
•
•
•
•
•
protocol.
�
•
•
•
•
•
•
•
•
•
•
•
•
•
•
•
•
•
•
•
•
•
•
•
PS2Keyboard - read characters from a PS2 keyboard.
Simple Message System - send messages between Arduino and the computer
SSerial2Mobile - send text messages or emails using a cell phone (via AT
commands over software serial)
Webduino - extensible web server library (for use with the Arduino Ethernet
Shield)
X10 - Sending X10 signals over AC power lines
XBee - for communicating with XBees in API mode
SerialControl - Remote control other Arduinos over a serial connection
Sensing:
Capacitive Sensing - turn two or more pins into capacitive sensors
Debounce - for reading noisy digital inputs (e.g. from buttons)
Displays and LEDs:
Improved LCD library fixes LCD initialization bugs in official Arduino LCD
library
GLCD - graphics routines for LCD based on the KS0108 or equivalent chipset.
LedControl - for controlling LED matrices or seven-segment displays with
a MAX7221 or MAX7219.
LedControl - an alternative to the Matrix library for driving multiple LEDs with
Maxim chips.
LedDisplay - control of a HCMS-29xx scrolling LED display.
These libraries are compatible Wiring versions, and the links below point to the (excellent)
Wiring documentation.
Matrix - Basic LED Matrix display manipulation library
Sprite - Basic image sprite manipulation library for use in animations with an
LED matrix
Frequency Generation and Audio:
Tone - generate audio frequency square waves in the background on any
microcontroller pin
Motors and PWM:
TLC5940 - 16 channel 12 bit PWM controller.
Timing:
DateTime - a library for keeping track of the current date and time in software.
Metro - help you time actions at regular intervals
MsTimer2 - uses the timer 2 interrupt to trigger an action every N milliseconds.
Utilities:
PString - a lightweight class for printing to buffers
Streaming - a method to simplify print statements
For a guide to writing your own libraries, see this tutorial
�
Writing a Library for Arduino
This document explains how to create a library for Arduino. It starts with a sketch with a
sketch for flashing Morse code and explains how to convert its functions into a library.
This allows other people to easily use the code that you've written and to easily update it
as you improve the library.
We start with a sketch that does simple Morse code:
int pin = 13;
void setup()
{
pinMode(pin, OUTPUT);
}
void loop()
{
dot(); dot(); dot();
dash(); dash(); dash();
dot(); dot(); dot();
delay(3000);
}
void dot()
{
digitalWrite(pin, HIGH);
delay(250);
digitalWrite(pin, LOW);
delay(250);
}
void dash()
{
digitalWrite(pin, HIGH);
delay(1000);
digitalWrite(pin, LOW);
delay(250);
}
�
[Get Code]
If you run this sketch, it will flash out the code for SOS (a distress call) on pin 13.
The sketch has a few different parts that we'll need to bring into our library. First, of
course, we have the dot() and dash()functions that do the actual blinking. Second,
there's the ledPin variable which the functions use to determine which pin to use. Finally,
there's the call to pinMode() that initializes the pin as an output.
Let's start turning the sketch into a library!
You need at least two files for a library: a header file (w/ the extension .h) and the source
file (w/ extension .cpp). The header file has definitions for the library: basically a listing
of everything that's inside; while the source file has the actual code. We'll call our library
"Morse", so our header file will be Morse.h. Let's take a look at what goes in it. It might
seem a bit strange at first, but it will make more sense once you see the source file that
goes with it.
The core of the header file consists of a line for each function in the library, wrapped up
in a class along with any variables you need:
class Morse
{
public:
Morse(int pin);
void dot();
void dash();
private:
int _pin;
};
[Get Code]
A class is simply a collection of functions and variables that are all kept together in one
place. These functions and variables can be public, meaning that they can be accessed by
people using your library, or private, meaning they can only be accessed from within the
class itself. Each class has a special function known as a constructor, which is used to
create aninstance of the class. The constructor has the same name as the class, and no
return type.
You need a couple of other things in the header file. One is an #include statement that
gives you access to the standard types and constants of the Arduino language (this is
automatically added to normal sketches, but not to libraries). It looks like this (and goes
above the class definition given previously):
#include "Arduino.h"
Finally, it's common to wrap the whole header file up in a weird looking construct:
[Get Code]
#ifndef Morse_h
#define Morse_h
// the #include statment and code go here...
#endif
�
Basically, this prevents problems if someone accidently #include's your library twice.
Finally, you usually put a comment at the top of the library with its name, a short
description of what it does, who wrote it, the date, and the license.
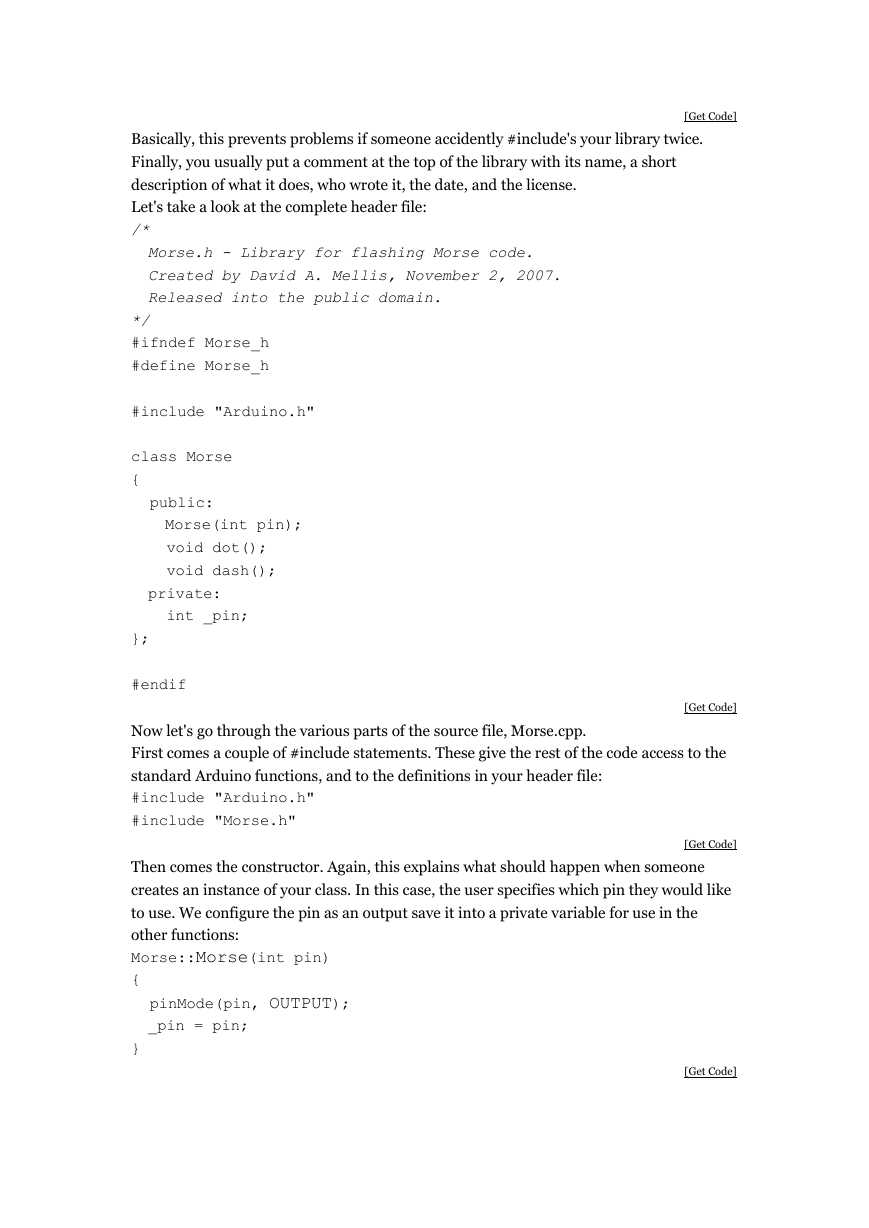
Let's take a look at the complete header file:
[Get Code]
/*
Morse.h - Library for flashing Morse code.
Created by David A. Mellis, November 2, 2007.
Released into the public domain.
*/
#ifndef Morse_h
#define Morse_h
#include "Arduino.h"
class Morse
{
public:
Morse(int pin);
void dot();
void dash();
private:
int _pin;
};
#endif
Now let's go through the various parts of the source file, Morse.cpp.
First comes a couple of #include statements. These give the rest of the code access to the
standard Arduino functions, and to the definitions in your header file:
[Get Code]
#include "Arduino.h"
#include "Morse.h"
Then comes the constructor. Again, this explains what should happen when someone
creates an instance of your class. In this case, the user specifies which pin they would like
to use. We configure the pin as an output save it into a private variable for use in the
[Get Code]
other functions:
Morse::Morse(int pin)
{
pinMode(pin, OUTPUT);
_pin = pin;
}
[Get Code]
�
There are a couple of strange things in this code. First is the Morse:: before the name of
the function. This says that the function is part of the Morse class. You'll see this again in
the other functions in the class. The second unusual thing is the underscore in the name
of our private variable, _pin. This variable can actually have any name you want, as long
as it matches the definition in the header file. Adding an underscore to the start of the
name is a common convention to make it clear which variables are private, and also to
distinguish the name from that of the argument to the function (pin in this case).
Next comes the actual code from the sketch that you're turning into a library (finally!). It
looks pretty much the same, except with Morse:: in front of the names of the functions,
and _pin instead of pin:
void Morse::dot()
{
digitalWrite(_pin, HIGH);
delay(250);
digitalWrite(_pin, LOW);
delay(250);
}
void Morse::dash()
{
digitalWrite(_pin, HIGH);
delay(1000);
digitalWrite(_pin, LOW);
delay(250);
}
Finally, it's typical to include the comment header at the top of the source file as well.
[Get Code]
Let's see the whole thing:
/*
Morse.cpp - Library for flashing Morse code.
Created by David A. Mellis, November 2, 2007.
Released into the public domain.
*/
#include "Arduino.h"
#include "Morse.h"
Morse::Morse(int pin)
{
pinMode(pin, OUTPUT);
_pin = pin;
}
void Morse::dot()
�
{
digitalWrite(_pin, HIGH);
delay(250);
digitalWrite(_pin, LOW);
delay(250);
}
void Morse::dash()
{
digitalWrite(_pin, HIGH);
delay(1000);
digitalWrite(_pin, LOW);
delay(250);
}
[Get Code]
And that's all you need (there's some other nice optional stuff, but we'll talk about that
later). Let's see how you use the library.
First, make a Morse directory inside of the libraries sub-directory of your sketchbook
directory. Copy or move the Morse.h and Morse.cpp files into that directory. Now launch
the Arduino environment. If you open the Sketch > Import Library menu, you should
see Morse inside. The library will be compiled with sketches that use it. If the library
doesn't seem to build, make sure that the files really end in .cpp and .h (with no extra .pde
or .txt extension, for example).
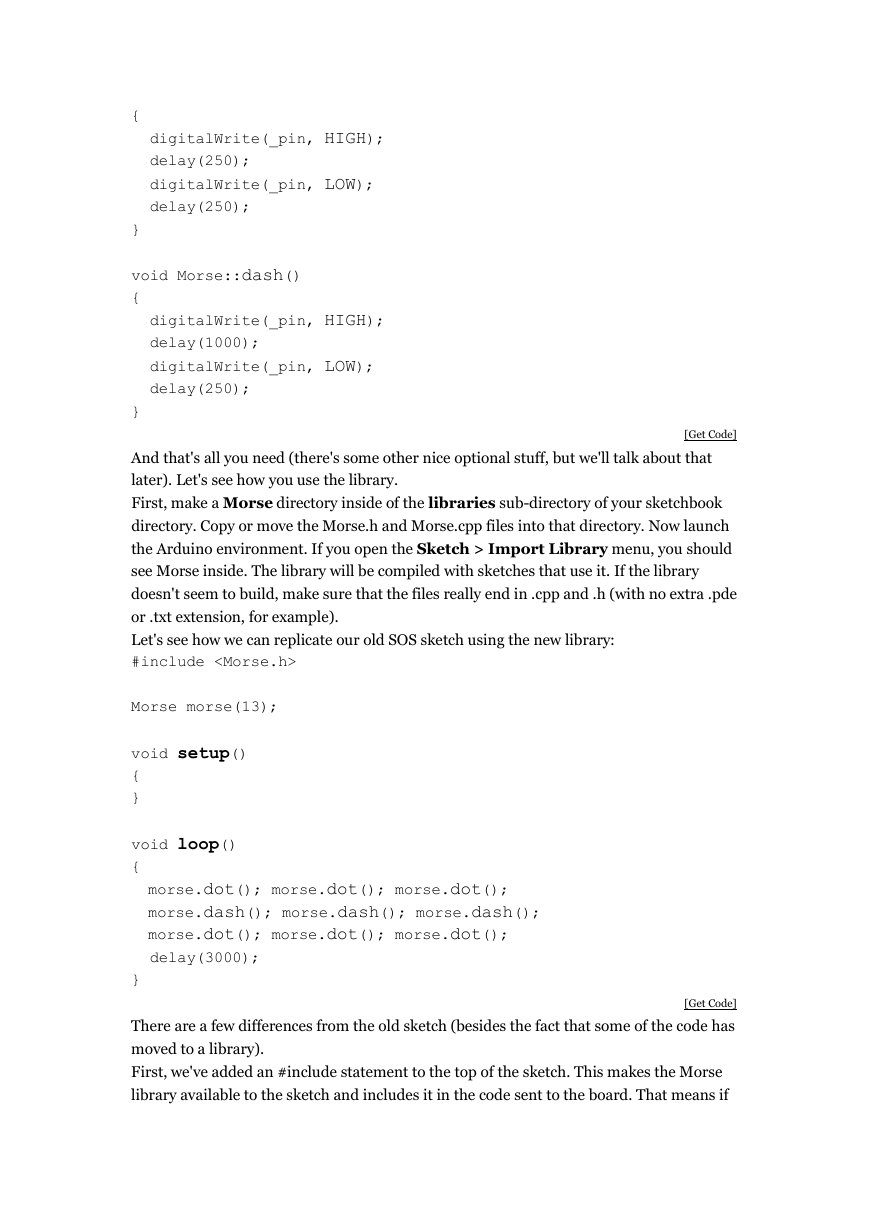
Let's see how we can replicate our old SOS sketch using the new library:
#include
Morse morse(13);
void setup()
{
}
void loop()
{
morse.dot(); morse.dot(); morse.dot();
morse.dash(); morse.dash(); morse.dash();
morse.dot(); morse.dot(); morse.dot();
delay(3000);
}
There are a few differences from the old sketch (besides the fact that some of the code has
moved to a library).
First, we've added an #include statement to the top of the sketch. This makes the Morse
library available to the sketch and includes it in the code sent to the board. That means if
[Get Code]
�
you no longer need a library in a sketch, you should delete the #include statement to save
space.
Second, we now create an instance of the Morse class called morse:
Morse morse(13);
[Get Code]
When this line gets executed (which actually happens even before the setup() function),
the constructor for the Morse class will be called, and passed the argument you've given
here (in this case, just 13).
Notice that our setup() is now empty; that's because the call to pinMode() happens
inside the library (when the instance is constructed).
Finally, to call the dot() and dash() functions, we need to prefix them with morse. - the
name of the instance we want to use. We could have multiple instances of the Morse class,
each on their own pin stored in the _pin private variable of that instance. By calling a
function on a particular instance, we specify which instance's variables should be used
during that call to a function. That is, if we had both:
Morse morse(13);
Morse morse2(12);
then inside a call to morse2.dot(), _pin would be 12.
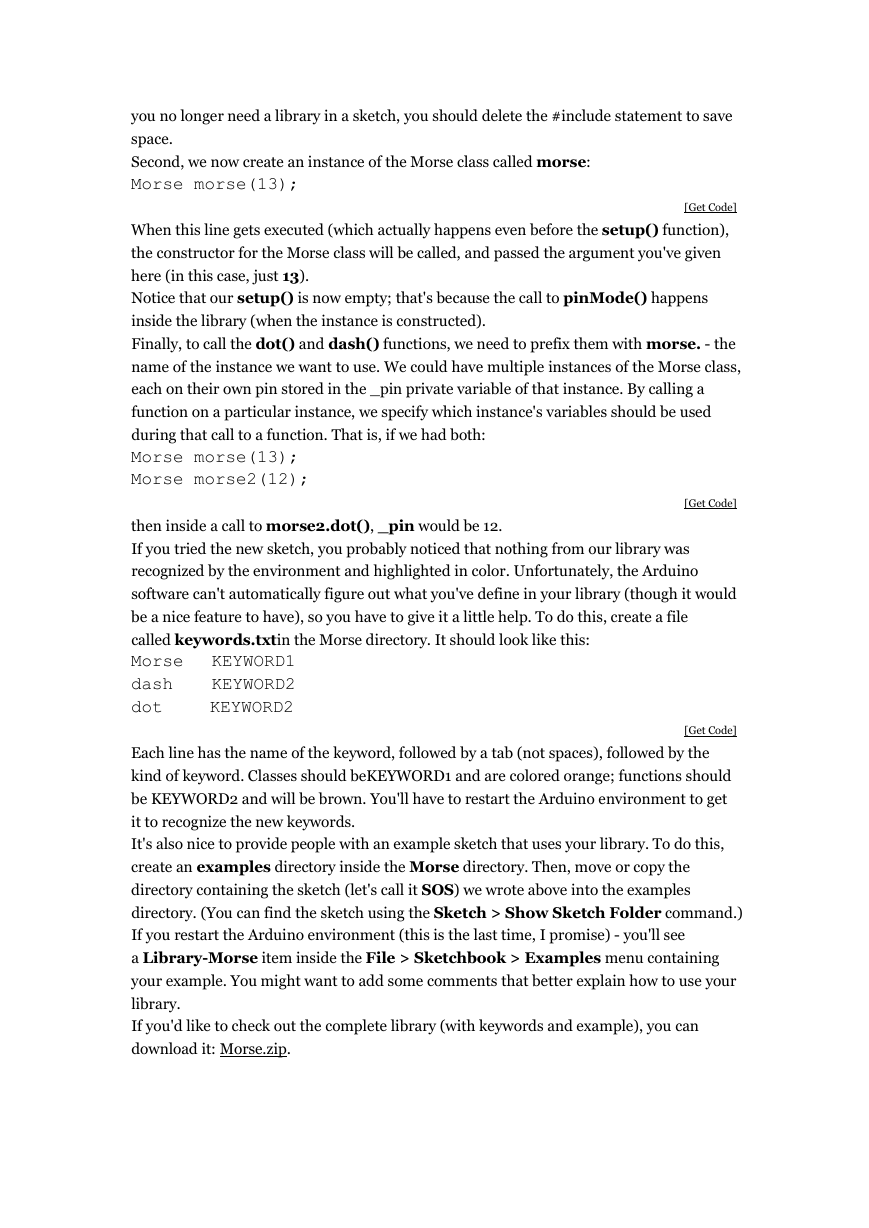
If you tried the new sketch, you probably noticed that nothing from our library was
recognized by the environment and highlighted in color. Unfortunately, the Arduino
software can't automatically figure out what you've define in your library (though it would
be a nice feature to have), so you have to give it a little help. To do this, create a file
[Get Code]
called keywords.txtin the Morse directory. It should look like this:
Morse KEYWORD1
dash KEYWORD2
dot KEYWORD2
[Get Code]
Each line has the name of the keyword, followed by a tab (not spaces), followed by the
kind of keyword. Classes should beKEYWORD1 and are colored orange; functions should
be KEYWORD2 and will be brown. You'll have to restart the Arduino environment to get
it to recognize the new keywords.
It's also nice to provide people with an example sketch that uses your library. To do this,
create an examples directory inside the Morse directory. Then, move or copy the
directory containing the sketch (let's call it SOS) we wrote above into the examples
directory. (You can find the sketch using the Sketch > Show Sketch Folder command.)
If you restart the Arduino environment (this is the last time, I promise) - you'll see
a Library-Morse item inside the File > Sketchbook > Examples menu containing
your example. You might want to add some comments that better explain how to use your
library.
If you'd like to check out the complete library (with keywords and example), you can
download it: Morse.zip.
�



 2023年江西萍乡中考道德与法治真题及答案.doc
 2012年重庆南川中考生物真题及答案.doc
 2013年江西师范大学地理学综合及文艺理论基础考研真题.doc
 2020年四川甘孜小升初语文真题及答案I卷.doc
 2020年注册岩土工程师专业基础考试真题及答案.doc
 2023-2024学年福建省厦门市九年级上学期数学月考试题及答案.doc
 2021-2022学年辽宁省沈阳市大东区九年级上学期语文期末试题及答案.doc
 2022-2023学年北京东城区初三第一学期物理期末试卷及答案.doc
 2018上半年江西教师资格初中地理学科知识与教学能力真题及答案.doc
 2012年河北国家公务员申论考试真题及答案-省级.doc
 2020-2021学年江苏省扬州市江都区邵樊片九年级上学期数学第一次质量检测试题及答案.doc
 2022下半年黑龙江教师资格证中学综合素质真题及答案.doc