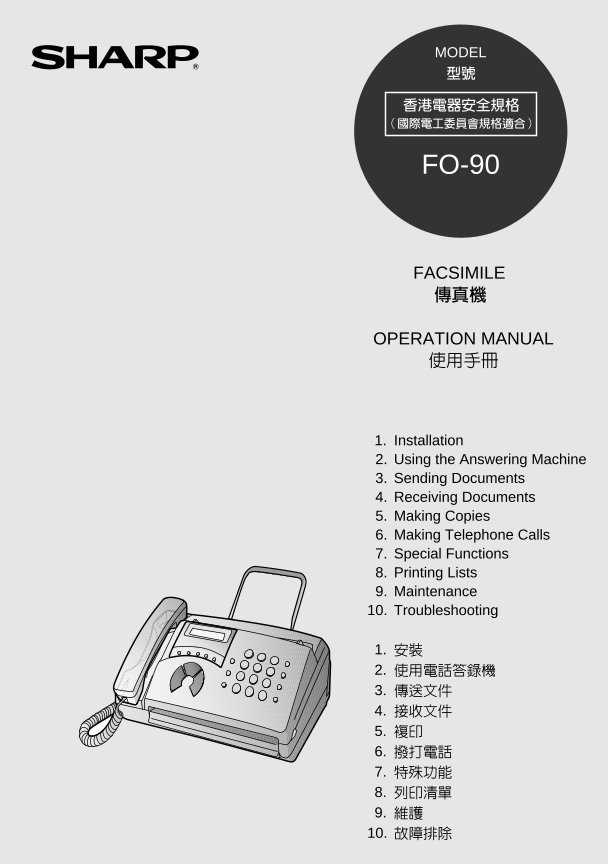
MODEL
FO-90
FACSIMILE
OPERATION MANUAL
1. Installation
2. Using the Answering Machine
3. Sending Documents
4. Receiving Documents
5. Making Copies
6. Making Telephone Calls
7. Special Functions
8. Printing Lists
9. Maintenance
10. Troubleshooting
1.
2.
3.
4.
5.
6.
7.
8.
9.
10.
FO-90 FACSIMILE
all-fo90hk.book Page 1 Friday, December 3, 1999 10:00 AM
Quick Reference Guide
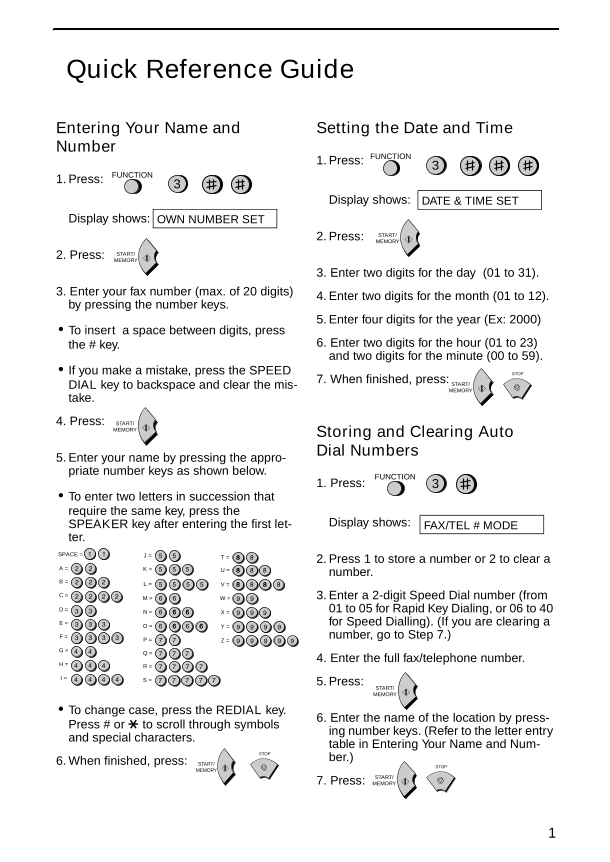
Entering Your Name and Setting the Date and Time
Number
1. Press: FUNCTION
3
1. Press: FUNCTION
3
Display shows: DATE & TIME SET
Display shows: OWN NUMBER SET
2. Press: START/
MEMORY
2. Press: START/
MEMORY
3. Enter two digits for the day (01 to 31).
3. Enter your fax number (max. of 20 digits) 4. Enter two digits for the month (01 to 12).
by pressing the number keys.
5. Enter four digits for the year (Ex: 2000)
• To insert a space between digits, press
the # key. 6. Enter two digits for the hour (01 to 23)
and two digits for the minute (00 to 59).
• If you make a mistake, press the SPEED STOP
DIAL key to backspace and clear the mis- 7. When finished, press: START/
MEMORY
take.
4. Press: START/
MEMORY Storing and Clearing Auto
5. Enter your name by pressing the appro- Dial Numbers
priate number keys as shown below. FUNCTION
1. Press: 3
• To enter two letters in succession that
require the same key, press the
SPEAKER key after entering the first let- Display shows: FAX/TEL # MODE
ter.
SPACE = J = T = 2. Press 1 to store a number or 2 to clear a
A = K = U = number.
B = L = V =
C = M = W = 3. Enter a 2-digit Speed Dial number (from
D = N = X = 01 to 05 for Rapid Key Dialing, or 06 to 40
E = O = Y = for Speed Dialling). (If you are clearing a
F = P = number, go to Step 7.)
Z =
G = Q = 4. Enter the full fax/telephone number.
H = R =
I = S = 5. Press:
START/
MEMORY
• To change case, press the REDIAL key.
Press # or * to scroll through symbols 6. Enter the name of the location by press-
and special characters. ing number keys. (Refer to the letter entry
table in Entering Your Name and Num-
STOP
6. When finished, press: ber.)
START/ STOP
MEMORY
7. Press: START/
MEMORY
1
all-fo90hk.book Page 2 Friday, December 3, 1999 10:00 AM
Quick Reference Guide
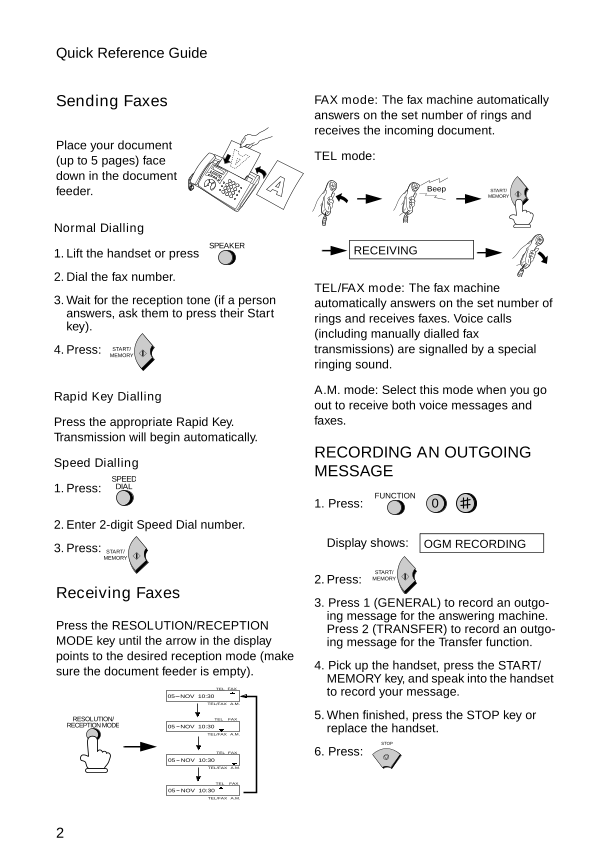
Sending Faxes FAX mode: The fax machine automatically
answers on the set number of rings and
receives the incoming document.
Place your document
(up to 5 pages) face TEL mode:
down in the document
feeder. Beep START/
MEMORY
Normal Dialling
SPEAKER
1. Lift the handset or press RECEIVING
2. Dial the fax number.
TEL/FAX mode: The fax machine
3. Wait for the reception tone (if a person automatically answers on the set number of
answers, ask them to press their Start rings and receives faxes. Voice calls
key).
(including manually dialled fax
4. Press: START/ transmissions) are signalled by a special
MEMORY
ringing sound.
Rapid Key Dialling A.M. mode: Select this mode when you go
out to receive both voice messages and
Press the appropriate Rapid Key. faxes.
Transmission will begin automatically.
RECORDING AN OUTGOING
Speed Dialling
MESSAGE
SPEED
1. Press: DIAL
FUNCTION
1. Press: 0
2. Enter 2-digit Speed Dial number.
3. Press: Display shows: OGM RECORDING
START/
MEMORY
START/
2. Press: MEMORY
Receiving Faxes
3. Press 1 (GENERAL) to record an outgo-
ing message for the answering machine.
Press the RESOLUTION/RECEPTION Press 2 (TRANSFER) to record an outgo-
MODE key until the arrow in the display ing message for the Transfer function.
points to the desired reception mode (make
sure the document feeder is empty). 4. Pick up the handset, press the START/
MEMORY key, and speak into the handset
TEL FAX
05 NOV 10:30 to record your message.
TEL/FAX A.M.
RESOLUTION/ TEL FAX 5. When finished, press the STOP key or
RECEPTION MODE 05 NOV 10:30 replace the handset.
TEL/FAX A.M.
STOP
TEL FAX 6. Press:
05 NOV 10:30
TEL/FAX A.M.
TEL FAX
05 NOV 10:30
TEL/FAX A.M.
2
all-fo90hk.book Page 3 Friday, December 3, 1999 10:00 AM
Introduction
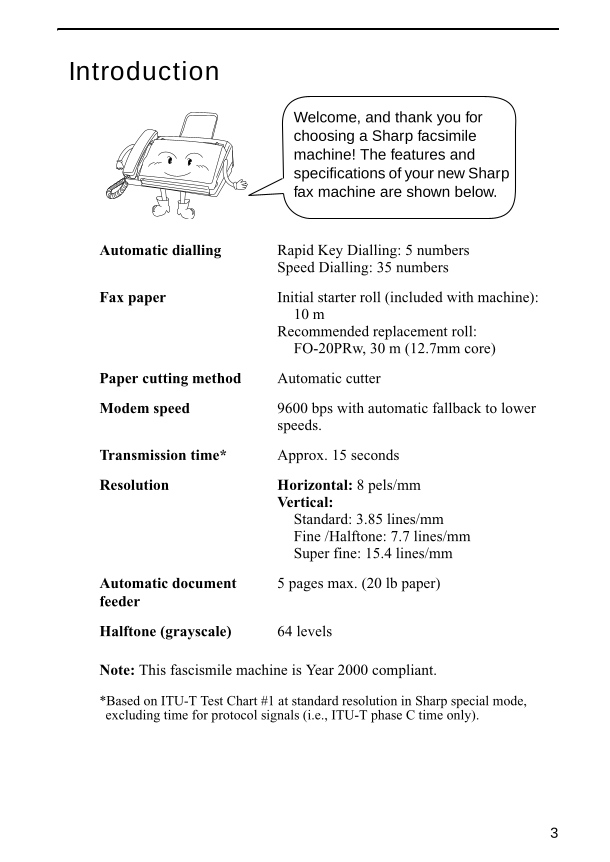
Welcome, and thank you for
choosing a Sharp facsimile
machine! The features and
specifications of your new Sharp
fax machine are shown below.
Automatic dialling Rapid Key Dialling: 5 numbers
Speed Dialling: 35 numbers
Fax paper Initial starter roll (included with machine):
10 m
Recommended replacement roll:
FO-20PRw, 30 m (12.7mm core)
Paper cutting method Automatic cutter
Modem speed 9600 bps with automatic fallback to lower
speeds.
Transmission time* Approx. 15 seconds
Resolution Horizontal: 8 pels/mm
Vertical:
Standard: 3.85 lines/mm
Fine /Halftone: 7.7 lines/mm
Super fine: 15.4 lines/mm
Automatic document 5 pages max. (20 lb paper)
feeder
Halftone (grayscale) 64 levels
Note: This fascismile machine is Year 2000 compliant.
*Based on ITU-T Test Chart #1 at standard resolution in Sharp special mode,
excluding time for protocol signals (i.e., ITU-T phase C time only).
3
all-fo90hk.book Page 4 Friday, December 3, 1999 10:00 AM
Display 16-digit LCD display
Compression scheme MR, MH, Sharp (H2)
Applicable telephone line Public switched telephone network
Compatibility ITU-T (CCITT) G3 mode
Input document size Automatic feeding:
Width: 148 to 216 mm
Length: 140 to 297 mm
Manual feeding:
Width: 148 to 216 mm
Length: 140 to 600 mm
Effective scanning width 210 mm max.
Effective printing width 210 mm max.
Contrast control Automatic/Dark selectable
Reception modes Fax, Tel, Tel/Fax, A.M.
Copy function Yes
Telephone function Yes (cannot be used if power fails)
Power requirements 220-240 V AC, 50/60 Hz
Operating temperature 5 - 35°C
Humidity Maximum: 85% RH
Power consumption Standby: 2.6 W
Maximum: 115 W
Dimensions Width: 304 mm
Depth: 236 mm
Height: 122 mm
Weight Approx. 2.6 kg
4
all-fo90hk.book Page 5 Friday, December 3, 1999 10:00 AM
As a part of our policy of continuous improvement, SHARP reserves the right to
make design and specification changes for product improvement without prior notice.
The performance specification figures indicated are nominal values of production
units. There may be some deviations from these values in individual units.
Important safety information
Be sure to save these instructions!
When using your fascimile equipment, basic safety precautions
should always be followed to reduce the risk of fire, electric shock
and injury to persons, including the following:
• Do not disassemble this machine or attempt any procedures not
described in this manual. Refer all servicing to qualified service
personnel.
• This machine must only be connected to a 220-240 V, 50/60 Hz,
grounded (3-prong) outlet. Connecting it to any other kind of outlet
will damage the machine and invalidate the warranty.
• Do not install or use the machine near water, or when you are wet.
For example, do not use the machine near a bath tub, wash bowl,
kitchen sink or laundry tub, in a wet basement, or near a swimming
pool. Take care not to spill any liquids on the machine.
• Unplug the machine from the power outlet and telephone jack and
consult a qualified service representative if any of the following sit-
uations occur:
- Liquid has been spilled into the machine or the machine has been
exposed to rain or water.
- The machine produces odors, smoke, or unusual noises.
- The power cord is frayed or damaged.
- The machine has been dropped or the housing damaged.
• Do not allow anything to rest on the power cord, and do not install
the machine where people may walk on the power cord.
5
all-fo90hk.book Page 6 Friday, December 3, 1999 10:00 AM
• Never insert objects of any kind into slots or openings on the
machine. This could create a risk of fire or electric shock. If an
object falls into the machine that you cannot remove, unplug the
machine and consult a qualified service representative.
• Do not place this machine on an unstable cart, stand or table. The
machine could be seriously damaged if it falls.
• Never install telephone wiring during a lightning storm.
• Never install telephone jacks in wet locations unless the jack is spe-
cifically designed for wet locations.
• Never touch bare telephone wires or terminals unless the telephone
line has been disconnected at the network interface.
• Use caution when installing or modifying telephone lines.
• Avoid using a telephone (other than a cordless type) during an elec-
trical storm. There may be a remote risk of electric shock from
lightning.
• Do not use a telephone to report a gas leak in the vicinity of the
leak.
• The power outlet must be installed near the equipment and must be
easily accessible.
Important:
• This facsimile machine is not designed for use on a line which has
call waiting, call forwarding, or certain other special services
offered by your telephone company. If you attempt to use the fax
machine in conjunction with any of these services, you may experi-
ence errors during transmission and reception of facsimile mes-
sages.
• This facsimile machine is not compatible with digital telephone sys-
tems.
6
all-fo90hk.book Page 7 Friday, December 3, 1999 10:00 AM
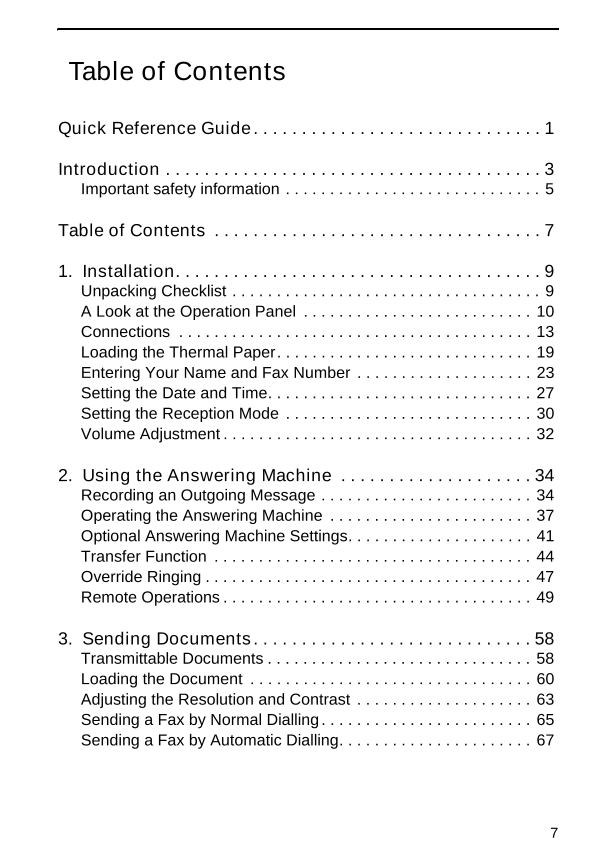
Table of Contents
Quick Reference Guide . . . . . . . . . . . . . . . . . . . . . . . . . . . . . . 1
Introduction . . . . . . . . . . . . . . . . . . . . . . . . . . . . . . . . . . . . . . . 3
Important safety information . . . . . . . . . . . . . . . . . . . . . . . . . . . . . 5
Table of Contents . . . . . . . . . . . . . . . . . . . . . . . . . . . . . . . . . . 7
1. Installation. . . . . . . . . . . . . . . . . . . . . . . . . . . . . . . . . . . . . . 9
Unpacking Checklist . . . . . . . . . . . . . . . . . . . . . . . . . . . . . . . . . . . 9
A Look at the Operation Panel . . . . . . . . . . . . . . . . . . . . . . . . . . 10
Connections . . . . . . . . . . . . . . . . . . . . . . . . . . . . . . . . . . . . . . . . 13
Loading the Thermal Paper. . . . . . . . . . . . . . . . . . . . . . . . . . . . . 19
Entering Your Name and Fax Number . . . . . . . . . . . . . . . . . . . . 23
Setting the Date and Time. . . . . . . . . . . . . . . . . . . . . . . . . . . . . . 27
Setting the Reception Mode . . . . . . . . . . . . . . . . . . . . . . . . . . . . 30
Volume Adjustment . . . . . . . . . . . . . . . . . . . . . . . . . . . . . . . . . . . 32
2. Using the Answering Machine . . . . . . . . . . . . . . . . . . . . 34
Recording an Outgoing Message . . . . . . . . . . . . . . . . . . . . . . . . 34
Operating the Answering Machine . . . . . . . . . . . . . . . . . . . . . . . 37
Optional Answering Machine Settings. . . . . . . . . . . . . . . . . . . . . 41
Transfer Function . . . . . . . . . . . . . . . . . . . . . . . . . . . . . . . . . . . . 44
Override Ringing . . . . . . . . . . . . . . . . . . . . . . . . . . . . . . . . . . . . . 47
Remote Operations . . . . . . . . . . . . . . . . . . . . . . . . . . . . . . . . . . . 49
3. Sending Documents. . . . . . . . . . . . . . . . . . . . . . . . . . . . . 58
Transmittable Documents . . . . . . . . . . . . . . . . . . . . . . . . . . . . . . 58
Loading the Document . . . . . . . . . . . . . . . . . . . . . . . . . . . . . . . . 60
Adjusting the Resolution and Contrast . . . . . . . . . . . . . . . . . . . . 63
Sending a Fax by Normal Dialling . . . . . . . . . . . . . . . . . . . . . . . . 65
Sending a Fax by Automatic Dialling. . . . . . . . . . . . . . . . . . . . . . 67
7



 2023年江西萍乡中考道德与法治真题及答案.doc
 2012年重庆南川中考生物真题及答案.doc
 2013年江西师范大学地理学综合及文艺理论基础考研真题.doc
 2020年四川甘孜小升初语文真题及答案I卷.doc
 2020年注册岩土工程师专业基础考试真题及答案.doc
 2023-2024学年福建省厦门市九年级上学期数学月考试题及答案.doc
 2021-2022学年辽宁省沈阳市大东区九年级上学期语文期末试题及答案.doc
 2022-2023学年北京东城区初三第一学期物理期末试卷及答案.doc
 2018上半年江西教师资格初中地理学科知识与教学能力真题及答案.doc
 2012年河北国家公务员申论考试真题及答案-省级.doc
 2020-2021学年江苏省扬州市江都区邵樊片九年级上学期数学第一次质量检测试题及答案.doc
 2022下半年黑龙江教师资格证中学综合素质真题及答案.doc