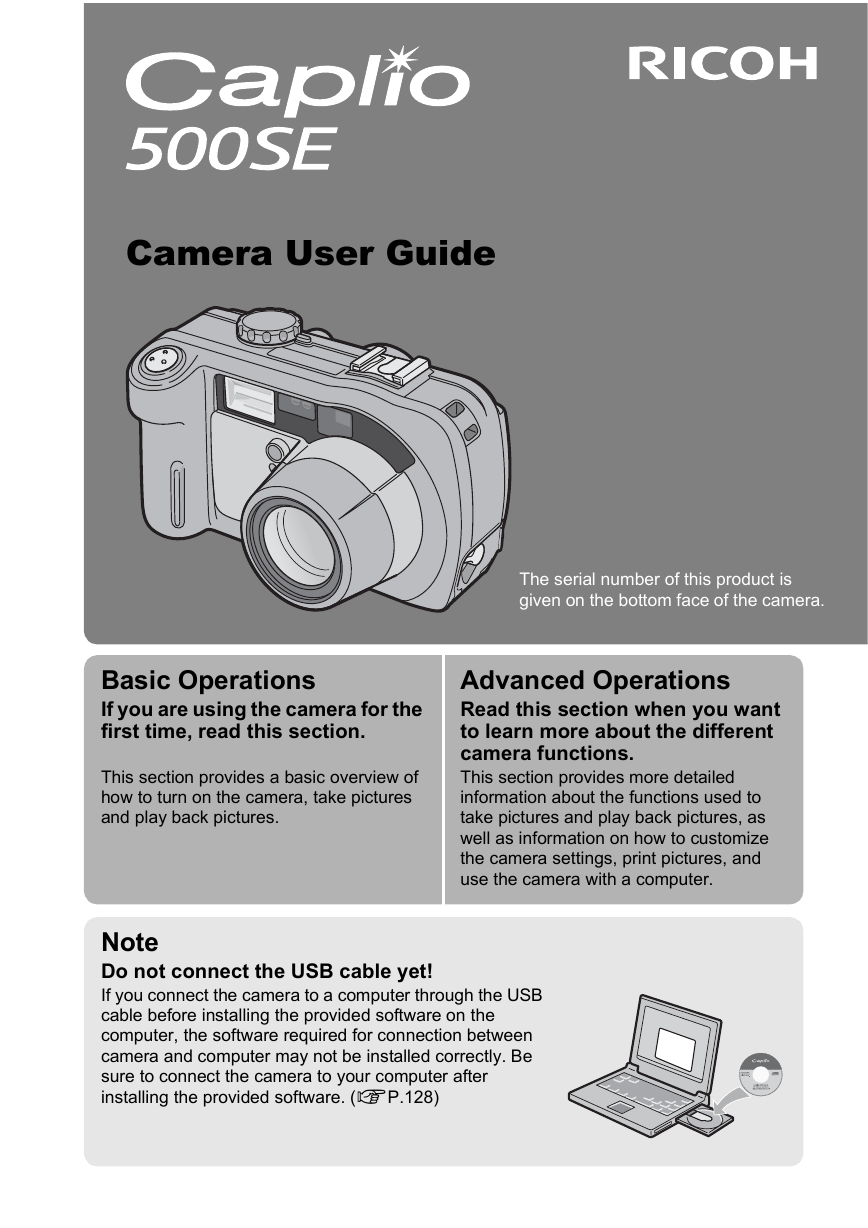
Camera User Guide
The serial number of this product is
given on the bottom face of the camera.
Basic Operations
If you are using the camera for the
first time, read this section.
This section provides a basic overview of
how to turn on the camera, take pictures
and play back pictures.
Advanced Operations
Read this section when you want
to learn more about the different
camera functions.
This section provides more detailed
information about the functions used to
take pictures and play back pictures, as
well as information on how to customize
the camera settings, print pictures, and
use the camera with a computer.
Note
Do not connect the USB cable yet!
If you connect the camera to a computer through the USB
cable before installing the provided software on the
computer, the software required for connection between
camera and computer may not be installed correctly. Be
sure to connect the camera to your computer after
installing the provided software. (GP.128)
�
Preface
This manual provides information on how to use the shooting and playback
functions of this product, as well as warnings on its use.
To make the best use of this product’s functions, read this manual thoroughly
before use. Please keep this manual handy for ease of reference.
Ricoh Co., Ltd.
Safety Precautions
Test Shooting
Copyright
Exemption from Liability
Warranty
Radio Interference
For the safe use of your camera, be sure to read the safety precautions
thoroughly.
Please be sure to do some test shooting to make sure it is recording
properly before normal use.
Reproduction or alteration of copyrighted documents, magazines, music
and other materials, other than for personal, home or similarly limited
purposes, without the consent of the copyright holder is prohibited.
Ricoh Co., Ltd. assumes no liability for failure to record or play back images
caused by malfunction of this product.
This product is manufactured to local specifications and the warranty is valid
within the country of purchase. Should the product fail or malfunction while
you are abroad, the manufacturer assumes no responsibility for servicing
the product locally or bearing the expenditure incurred thereof.
Operating this product in the vicinity of other electronic equipment may
adversely affect the performance of both devices. In particular, operating
the camera close to a radio or television may lead to interference. If
interference occurs, follow the procedures below.
• Move the camera as far away as possible from the TV, radio or other
device.
• Reorient the TV or radio antenna.
• Plug the devices into separate electrical outlets.
This publication may not be reproduced in whole or in part without the express written permission of Ricoh.
© 2006 RICOH CO., LTD. All rights reserved.
The contents of this document may be changed in the future, without prior notice.
This booklet was created with thorough attention to its content. If, however, you have a question, spot an
error, or find a description lacking, please refer to the end of this booklet for information on how to contact us.
Microsoft, MS, Windows and DirectX are registered trademarks of Microsoft Corporation in the United States
of America and other countries.
Macintosh, Power Macintosh, and Mac OS are registered trademarks of Apple Computer, Inc. in the United
States of America and other countries.
Adobe and Adobe Acrobat are trademarks of Adobe Systems Incorporated.
All trademarked company and product names mentioned in this manual are the property of their respective
owners.
Bluetooth® is a trademark owned by Bluetooth SIG, Inc. and licensed to Ricoh Co., Ltd.
�
Telephone Support Numbers in Europe
UK
(from within the UK)
(from outside of the UK)
02073 656 580
+44 2073 656 580
Deutschland
(innerhalb Deutschlands)
(außerhalb Deutschlands)
06331 268 438
+49 6331 268 438
France
Italia
España
(à partir de la France)
(en dehors de la France)
0800 91 4897
+49 6331 268 409
(dall’Italia)
(dall’estero)
02 696 33 451
+39 02 696 33 451
(desde España)
(desde fuera de España)
91 406 9148
+34 91 406 9148
http://www.service.ricohpmmc.com/
�
Using the Manuals
The following two manuals are included with your Caplio 500SE.
“Camera User Guide” (This booklet)
This guide explains the usage and functions of the camera. It
also explains how to install the provided software on your
computer.
* The “Camera User Guide” (English edition) is available from
the provided CD-ROM as a PDF file.
“Software User Guide” (PDF file)
This guide explains how to download images from the camera
to your computer and display and edit them on your computer.
* The “Software User Guide” is available in the following
folders on the provided CD-ROM.
Each language has its own
“Software User Guide” in
the respective folder.
“Camera User Guide”
(English edition) (PDF file)
To copy the Software User Guide onto your hard disk, copy
the PDF file from the above folder directly to your hard disk.
The camera is provided with the ImageMixer software that allows you to
display and edit images on your computer. For details on how to use
ImageMixer, click the [?] button on the ImageMixer window and see the
displayed manual.
For more information on ImageMixer, contact the Customer Support Center
below.
North America (Los Angeles)
Europe (U.K.)
Asia (Philippines)
China
TEL: +1-213-341-0163
TEL: +44-1489-564-764
TEL: +63-2-438-0090
TEL: +86-21-5450-0391
Business hours: 9:00 AM to 5:00 PM
1
�
Key Features
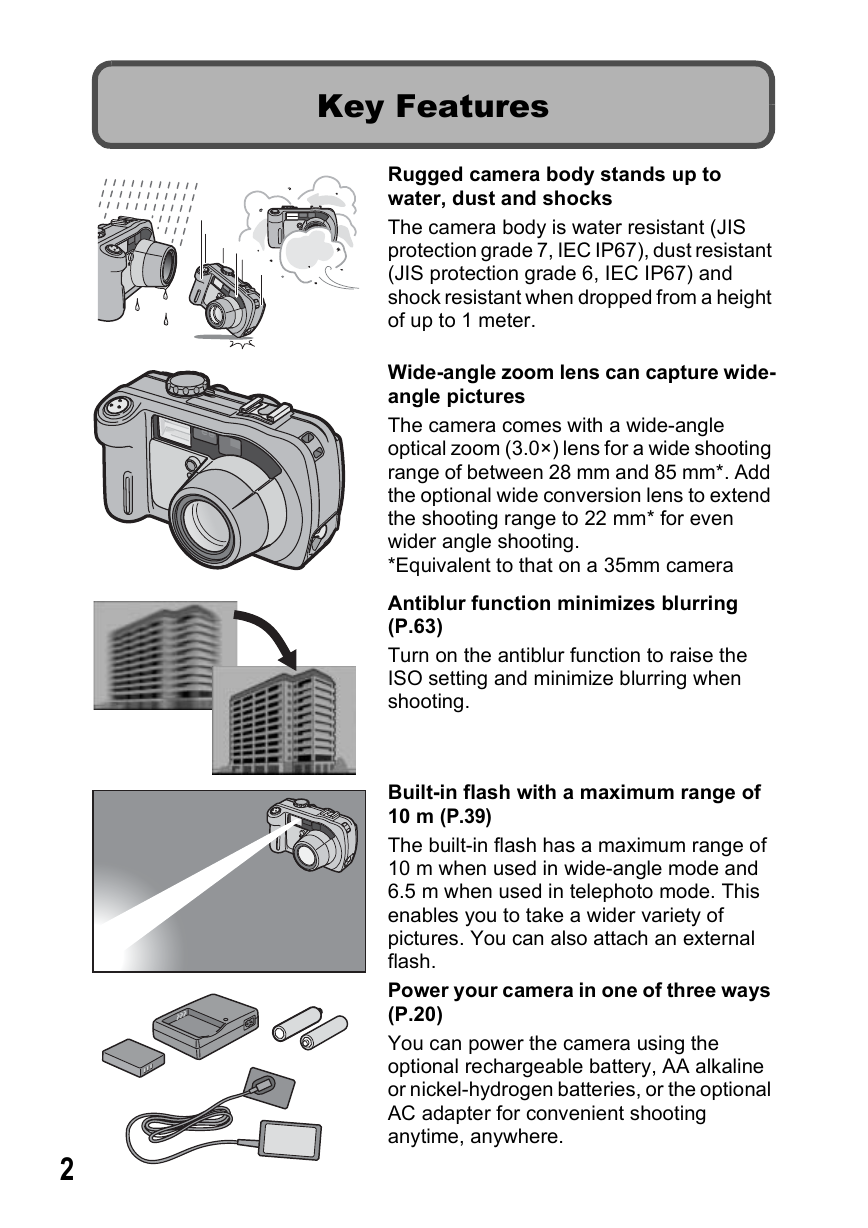
Rugged camera body stands up to
water, dust and shocks
The camera body is water resistant (JIS
protection grade 7, IEC IP67), dust resistant
(JIS protection grade 6, IEC IP67) and
shock resistant when dropped from a height
of up to 1 meter.
Wide-angle zoom lens can capture wide-
angle pictures
The camera comes with a wide-angle
optical zoom (3.0×) lens for a wide shooting
range of between 28 mm and 85 mm*. Add
the optional wide conversion lens to extend
the shooting range to 22 mm* for even
wider angle shooting.
*Equivalent to that on a 35mm camera
Antiblur function minimizes blurring
(P.63)
Turn on the antiblur function to raise the
ISO setting and minimize blurring when
shooting.
Built-in flash with a maximum range of
10 m (P.39)
The built-in flash has a maximum range of
10 m when used in wide-angle mode and
6.5 m when used in telephoto mode. This
enables you to take a wider variety of
pictures. You can also attach an external
flash.
Power your camera in one of three ways
(P.20)
You can power the camera using the
optional rechargeable battery, AA alkaline
or nickel-hydrogen batteries, or the optional
AC adapter for convenient shooting
anytime, anywhere.
2
�
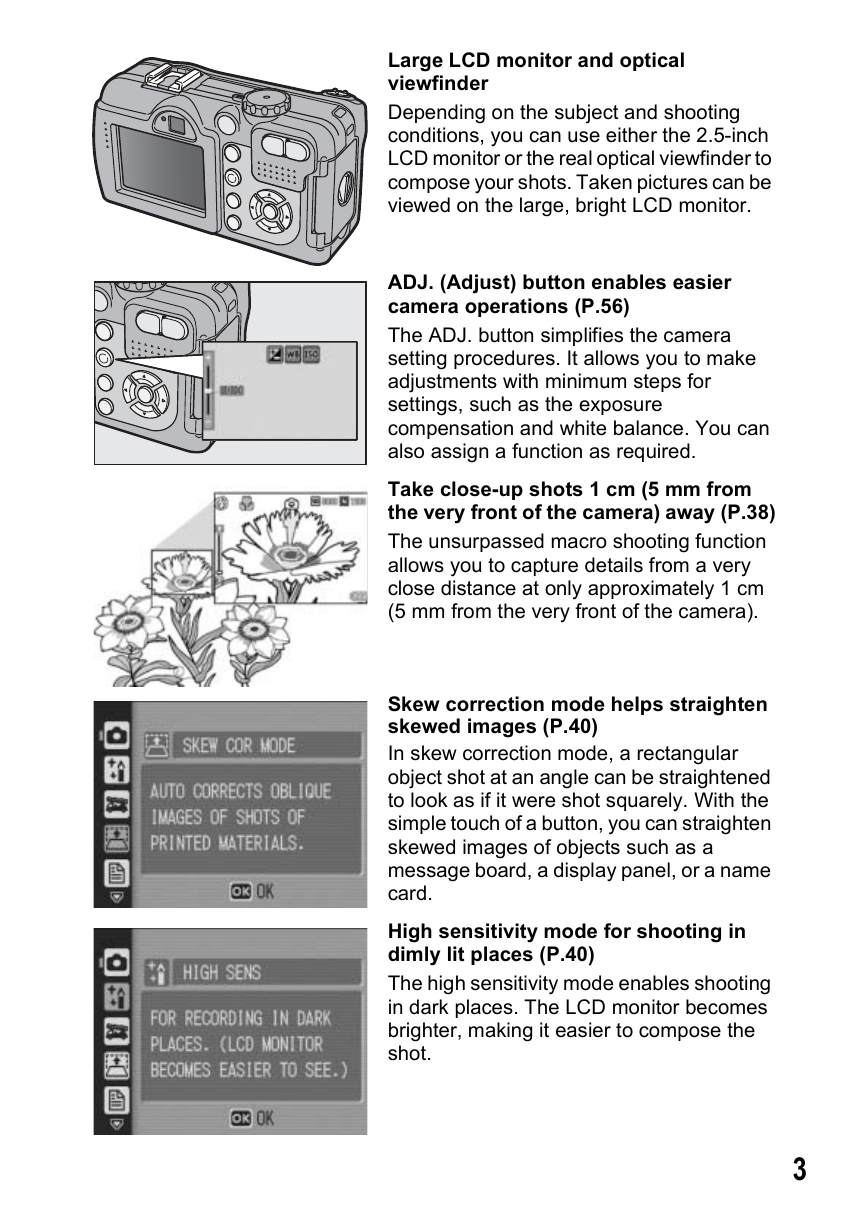
Large LCD monitor and optical
viewfinder
Depending on the subject and shooting
conditions, you can use either the 2.5-inch
LCD monitor or the real optical viewfinder to
compose your shots. Taken pictures can be
viewed on the large, bright LCD monitor.
ADJ. (Adjust) button enables easier
camera operations (P.56)
The ADJ. button simplifies the camera
setting procedures. It allows you to make
adjustments with minimum steps for
settings, such as the exposure
compensation and white balance. You can
also assign a function as required.
Take close-up shots 1 cm (5 mm from
the very front of the camera) away (P.38)
The unsurpassed macro shooting function
allows you to capture details from a very
close distance at only approximately 1 cm
(5 mm from the very front of the camera).
Skew correction mode helps straighten
skewed images (P.40)
In skew correction mode, a rectangular
object shot at an angle can be straightened
to look as if it were shot squarely. With the
simple touch of a button, you can straighten
skewed images of objects such as a
message board, a display panel, or a name
card.
High sensitivity mode for shooting in
dimly lit places (P.40)
The high sensitivity mode enables shooting
in dark places. The LCD monitor becomes
brighter, making it easier to compose the
shot.
3
�
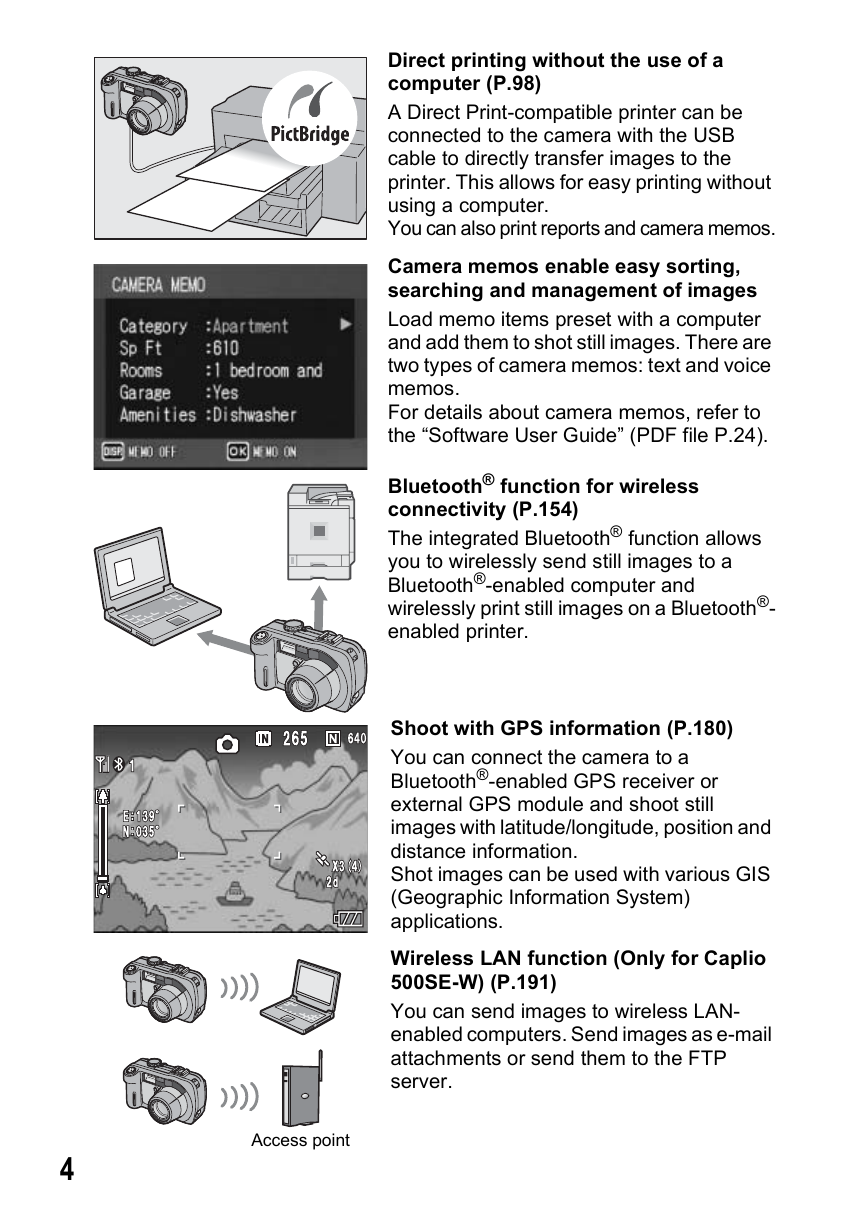
Direct printing without the use of a
computer (P.98)
A Direct Print-compatible printer can be
connected to the camera with the USB
cable to directly transfer images to the
printer. This allows for easy printing without
using a computer.
You can also print reports and camera memos.
Camera memos enable easy sorting,
searching and management of images
Load memo items preset with a computer
and add them to shot still images. There are
two types of camera memos: text and voice
memos.
For details about camera memos, refer to
the “Software User Guide” (PDF file P.24).
Bluetooth® function for wireless
connectivity (P.154)
The integrated Bluetooth® function allows
you to wirelessly send still images to a
Bluetooth®-enabled computer and
wirelessly print still images on a Bluetooth®-
enabled printer.
Shoot with GPS information (P.180)
You can connect the camera to a
Bluetooth®-enabled GPS receiver or
external GPS module and shoot still
images with latitude/longitude, position and
distance information.
Shot images can be used with various GIS
(Geographic Information System)
applications.
Wireless LAN function (Only for Caplio
500SE-W) (P.191)
You can send images to wireless LAN-
enabled computers. Send images as e-mail
attachments or send them to the FTP
server.
4
Access point
�
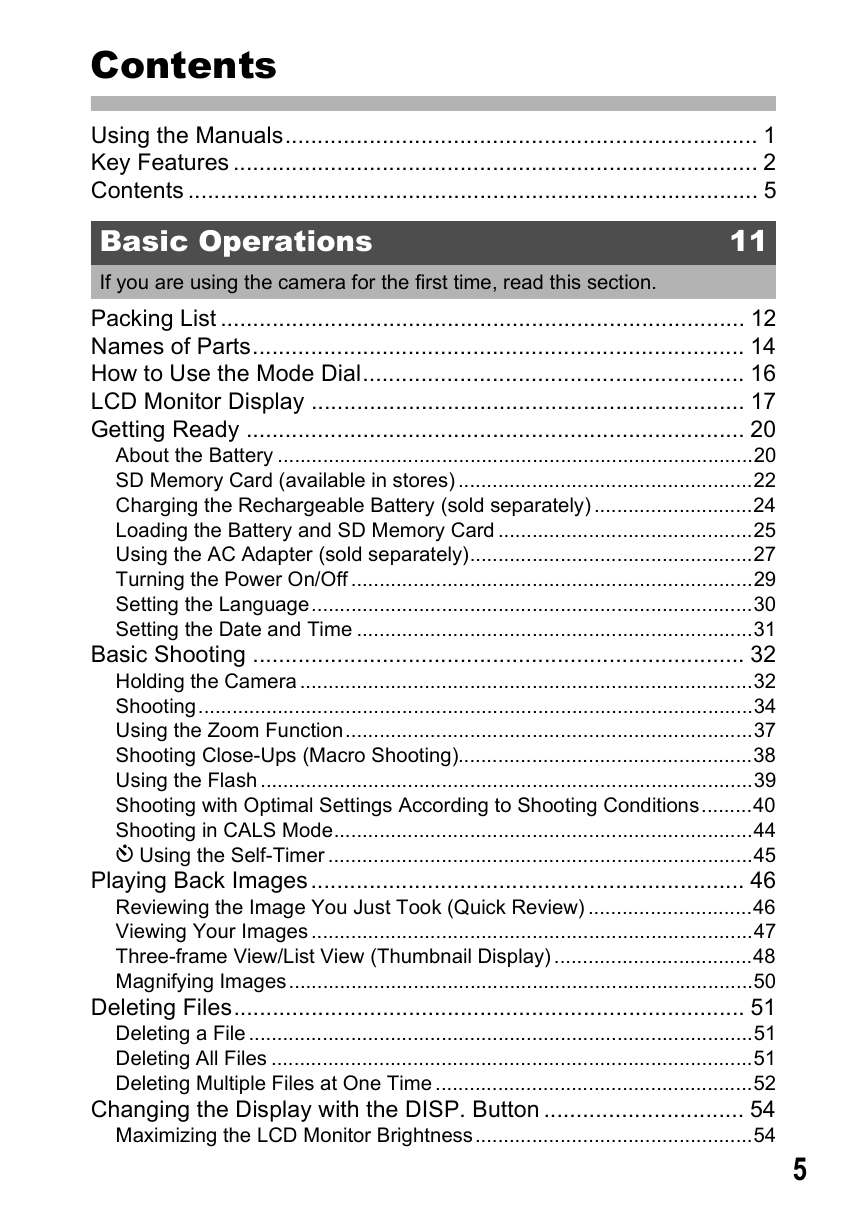
Contents
Using the Manuals......................................................................... 1
Key Features ................................................................................. 2
Contents ........................................................................................ 5
11
Basic Operations
If you are using the camera for the first time, read this section.
Packing List ................................................................................. 12
Names of Parts............................................................................ 14
How to Use the Mode Dial........................................................... 16
LCD Monitor Display ................................................................... 17
Getting Ready ............................................................................. 20
About the Battery ....................................................................................20
SD Memory Card (available in stores) ....................................................22
Charging the Rechargeable Battery (sold separately) ............................24
Loading the Battery and SD Memory Card .............................................25
Using the AC Adapter (sold separately)..................................................27
Turning the Power On/Off .......................................................................29
Setting the Language..............................................................................30
Setting the Date and Time ......................................................................31
Basic Shooting ............................................................................ 32
Holding the Camera ................................................................................32
Shooting..................................................................................................34
Using the Zoom Function........................................................................37
Shooting Close-Ups (Macro Shooting)....................................................38
Using the Flash .......................................................................................39
Shooting with Optimal Settings According to Shooting Conditions.........40
Shooting in CALS Mode..........................................................................44
t Using the Self-Timer ...........................................................................45
Playing Back Images................................................................... 46
Reviewing the Image You Just Took (Quick Review) .............................46
Viewing Your Images ..............................................................................47
Three-frame View/List View (Thumbnail Display) ...................................48
Magnifying Images..................................................................................50
Deleting Files............................................................................... 51
Deleting a File .........................................................................................51
Deleting All Files .....................................................................................51
Deleting Multiple Files at One Time ........................................................52
Changing the Display with the DISP. Button ............................... 54
Maximizing the LCD Monitor Brightness.................................................54
5
�




 2023年江西萍乡中考道德与法治真题及答案.doc
 2012年重庆南川中考生物真题及答案.doc
 2013年江西师范大学地理学综合及文艺理论基础考研真题.doc
 2020年四川甘孜小升初语文真题及答案I卷.doc
 2020年注册岩土工程师专业基础考试真题及答案.doc
 2023-2024学年福建省厦门市九年级上学期数学月考试题及答案.doc
 2021-2022学年辽宁省沈阳市大东区九年级上学期语文期末试题及答案.doc
 2022-2023学年北京东城区初三第一学期物理期末试卷及答案.doc
 2018上半年江西教师资格初中地理学科知识与教学能力真题及答案.doc
 2012年河北国家公务员申论考试真题及答案-省级.doc
 2020-2021学年江苏省扬州市江都区邵樊片九年级上学期数学第一次质量检测试题及答案.doc
 2022下半年黑龙江教师资格证中学综合素质真题及答案.doc