USER AND
INSTALLATION MANUAL
MANUALE D’USO E
INSTALLAZIONE
GEBRAUCHS-UND
INSTALLATIONSANLEITUNG
MANUAL DE USO E
INSTALACIÓN
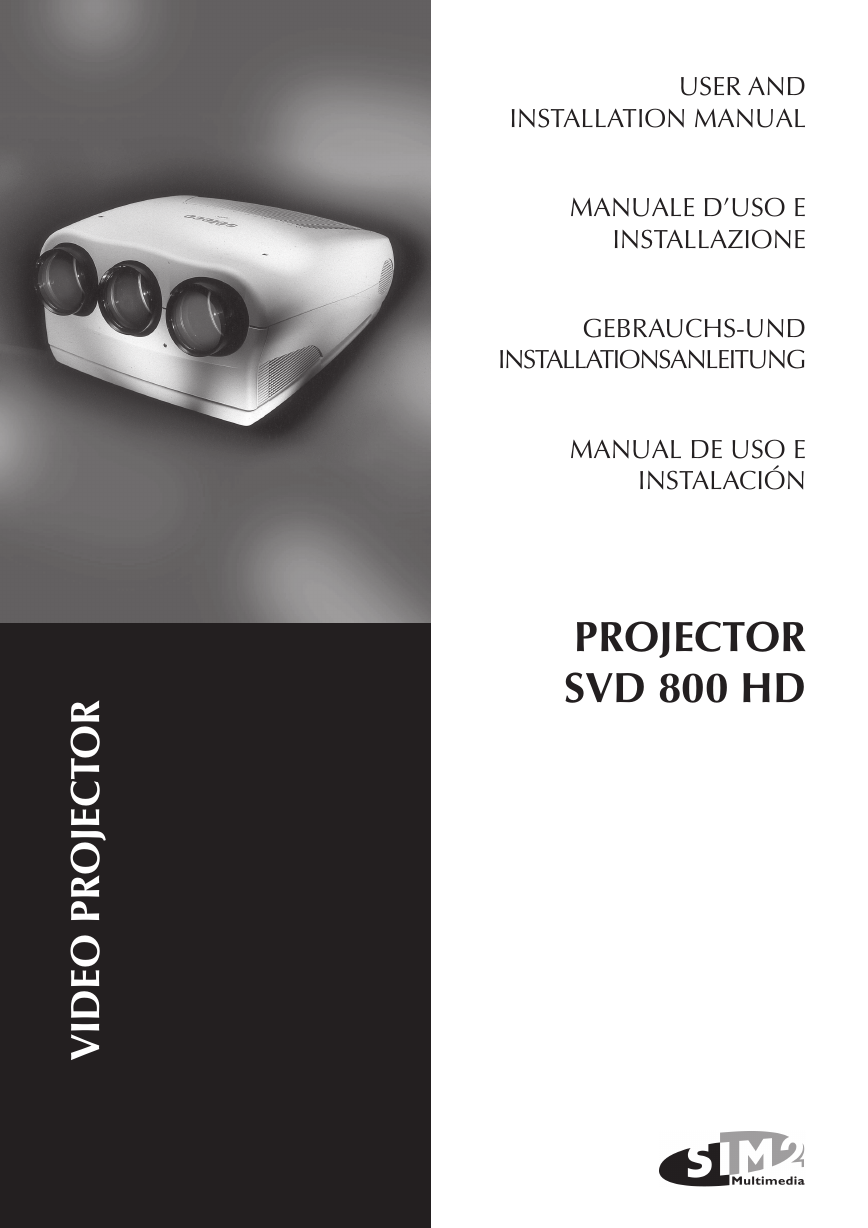
PROJECTOR
SVD 800 HD
R
O
T
C
E
J
O
R
P
O
E
D
V
I
�
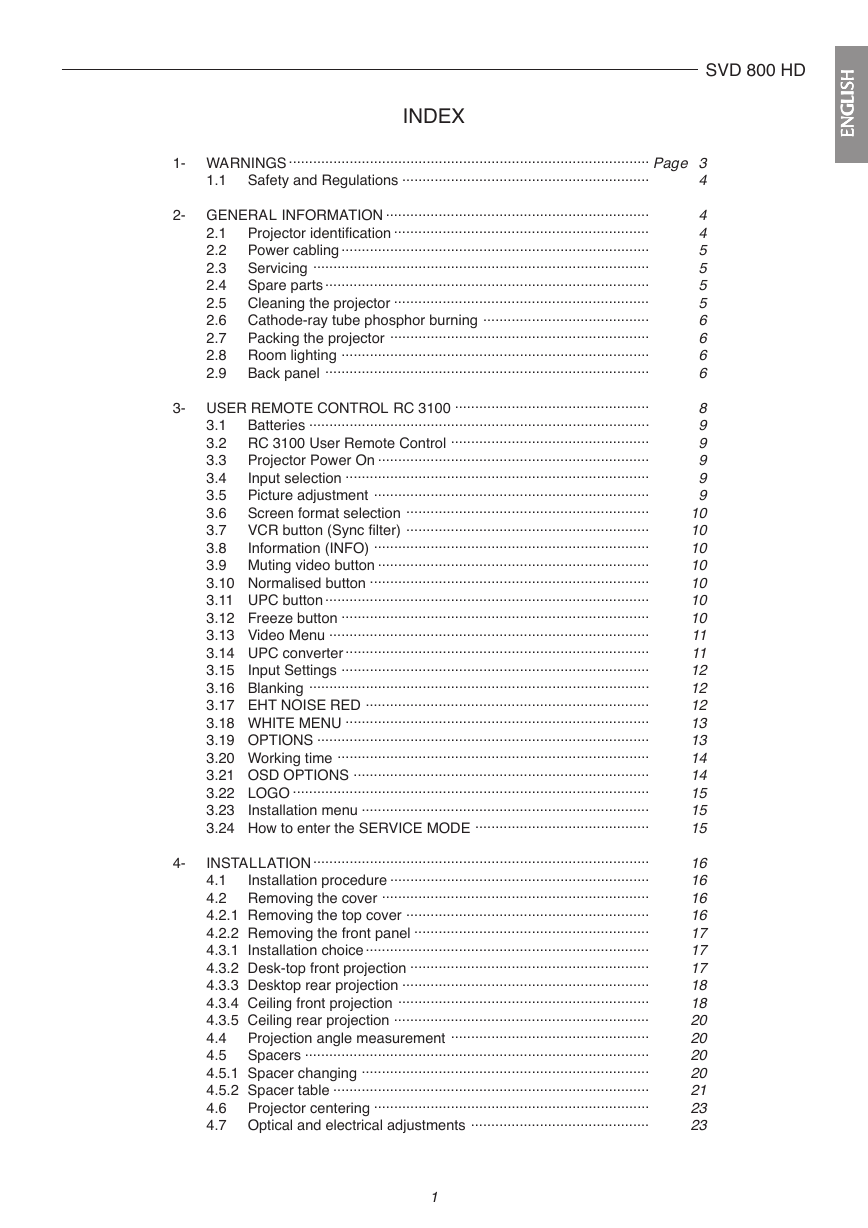
INDEX
SVD 800 HD
H
H
H
H
H
S
S
S
S
S
I
I
I
I
I
L
L
L
L
L
G
G
G
G
G
N
N
N
N
N
E
E
E
E
E
1- WARNINGS ......................................................................................... Page 3
4
Safety and Regulations .............................................................
1.1
2- GENERAL INFORMATION .................................................................
Projector identification ...............................................................
2.1
Power cabling ............................................................................
2.2
Servicing ...................................................................................
2.3
Spare parts ................................................................................
2.4
2.5 Cleaning the projector ...............................................................
2.6 Cathode-ray tube phosphor burning .........................................
Packing the projector ................................................................
2.7
2.8 Room lighting ............................................................................
Back panel ................................................................................
2.9
3- USER REMOTE CONTROL RC 3100 ................................................
Batteries ....................................................................................
3.1
3.2 RC 3100 User Remote Control .................................................
Projector Power On ...................................................................
3.3
Input selection ...........................................................................
3.4
Picture adjustment ....................................................................
3.5
Screen format selection ............................................................
3.6
VCR button (Sync filter) ............................................................
3.7
Information (INFO) ....................................................................
3.8
3.9 Muting video button ...................................................................
3.10 Normalised button .....................................................................
3.11 UPC button ................................................................................
3.12 Freeze button ............................................................................
3.13 Video Menu ...............................................................................
3.14 UPC converter ...........................................................................
3.15 Input Settings ............................................................................
3.16 Blanking ....................................................................................
3.17 EHT NOISE RED ......................................................................
3.18 WHITE MENU ...........................................................................
3.19 OPTIONS ..................................................................................
3.20 Working time .............................................................................
3.21 OSD OPTIONS .........................................................................
3.22 LOGO ........................................................................................
3.23 Installation menu .......................................................................
3.24 How to enter the SERVICE MODE ...........................................
4-
INSTALLATION ...................................................................................
Installation procedure ................................................................
4.1
4.2 Removing the cover ..................................................................
4.2.1 Removing the top cover ............................................................
4.2.2 Removing the front panel ..........................................................
4.3.1 Installation choice ......................................................................
4.3.2 Desk-top front projection ...........................................................
4.3.3 Desktop rear projection .............................................................
4.3.4 Ceiling front projection ..............................................................
4.3.5 Ceiling rear projection ...............................................................
Projection angle measurement .................................................
4.4
Spacers .....................................................................................
4.5
4.5.1 Spacer changing .......................................................................
4.5.2 Spacer table ..............................................................................
Projector centering ....................................................................
4.6
4.7 Optical and electrical adjustments ............................................
1
4
4
5
5
5
5
6
6
6
6
8
9
9
9
9
9
10
10
10
10
10
10
10
11
11
12
12
12
13
13
14
14
15
15
15
16
16
16
16
17
17
17
18
18
20
20
20
20
21
23
23
�
SVD 800 HD
4.8
4.9 Mechanical centering of the tubes ............................................
4.10 Correct screen viewing (deflections inversion) ..........................
4.11 Convergence adjustment ..........................................................
Lens focus adjustment .............................................................. Page23
24
24
24
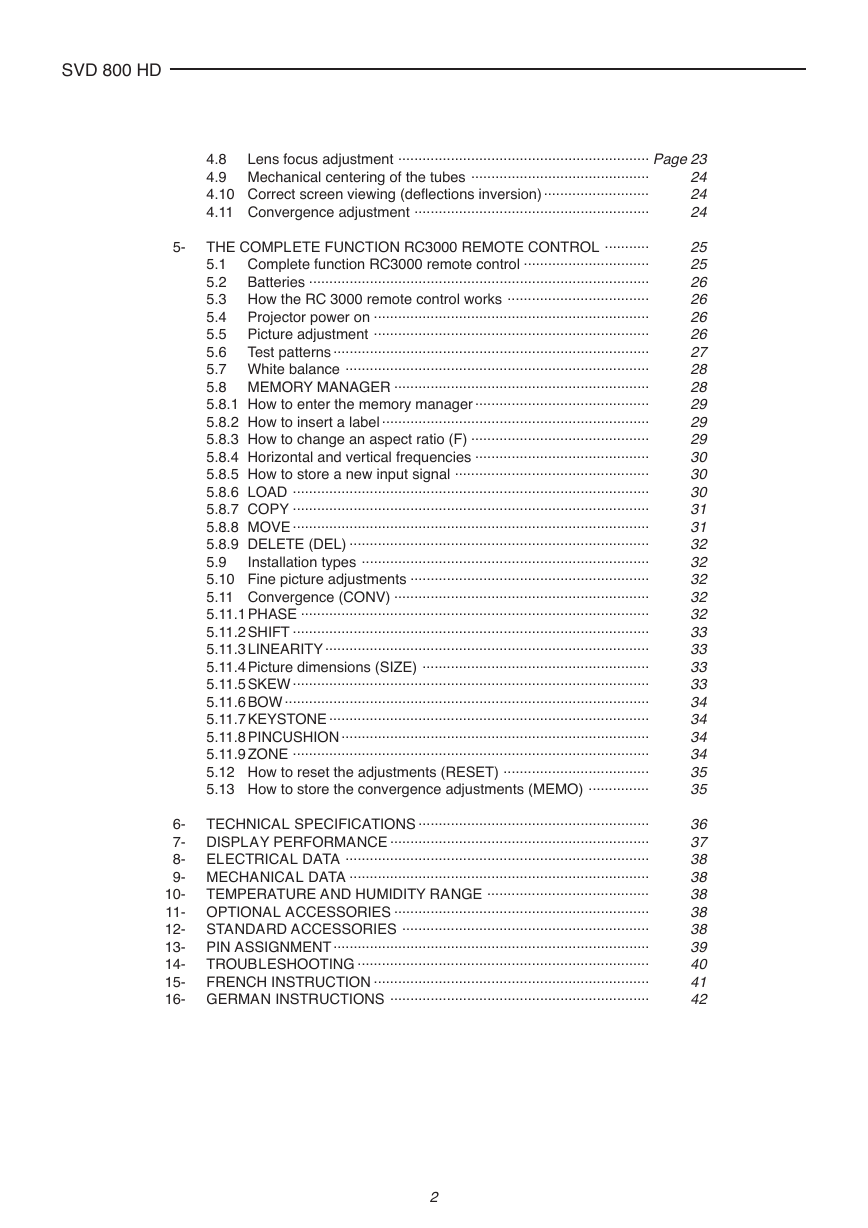
5-
THE COMPLETE FUNCTION RC3000 REMOTE CONTROL ...........
5.1 Complete function RC3000 remote control ...............................
Batteries ....................................................................................
5.2
5.3 How the RC 3000 remote control works ...................................
Projector power on ....................................................................
5.4
Picture adjustment ....................................................................
5.5
Test patterns ..............................................................................
5.6
5.7 White balance ...........................................................................
5.8 MEMORY MANAGER ...............................................................
5.8.1 How to enter the memory manager ...........................................
5.8.2 How to insert a label ..................................................................
5.8.3 How to change an aspect ratio (F) ............................................
5.8.4 Horizontal and vertical frequencies ...........................................
5.8.5 How to store a new input signal ................................................
5.8.6 LOAD ........................................................................................
5.8.7 COPY ........................................................................................
5.8.8 MOVE ........................................................................................
5.8.9 DELETE (DEL) ..........................................................................
Installation types .......................................................................
5.9
5.10 Fine picture adjustments ...........................................................
5.11 Convergence (CONV) ...............................................................
5.11.1 PHASE ......................................................................................
5.11.2 SHIFT ........................................................................................
5.11.3 LINEARITY ................................................................................
5.11.4 Picture dimensions (SIZE) ........................................................
5.11.5 SKEW ........................................................................................
5.11.6 BOW ..........................................................................................
5.11.7 KEYSTONE ...............................................................................
5.11.8 PINCUSHION ............................................................................
5.11.9 ZONE ........................................................................................
5.12 How to reset the adjustments (RESET) ....................................
5.13 How to store the convergence adjustments (MEMO) ...............
TECHNICAL SPECIFICATIONS .........................................................
6-
7- DISPLAY PERFORMANCE ................................................................
ELECTRICAL DATA ...........................................................................
8-
9- MECHANICAL DATA ..........................................................................
TEMPERATURE AND HUMIDITY RANGE ........................................
10-
11- OPTIONAL ACCESSORIES ...............................................................
STANDARD ACCESSORIES .............................................................
12-
PIN ASSIGNMENT ..............................................................................
13-
TROUBLESHOOTING ........................................................................
14-
FRENCH INSTRUCTION ....................................................................
15-
16- GERMAN INSTRUCTIONS ................................................................
25
25
26
26
26
26
27
28
28
29
29
29
30
30
30
31
31
32
32
32
32
32
33
33
33
33
34
34
34
34
35
35
36
37
38
38
38
38
38
39
40
41
42
2
�
1 - WARNINGS
SVD 800 HD
H
H
H
H
H
S
S
S
S
S
I
I
I
I
I
L
L
L
L
L
G
G
G
G
G
N
N
N
N
N
E
E
E
E
E
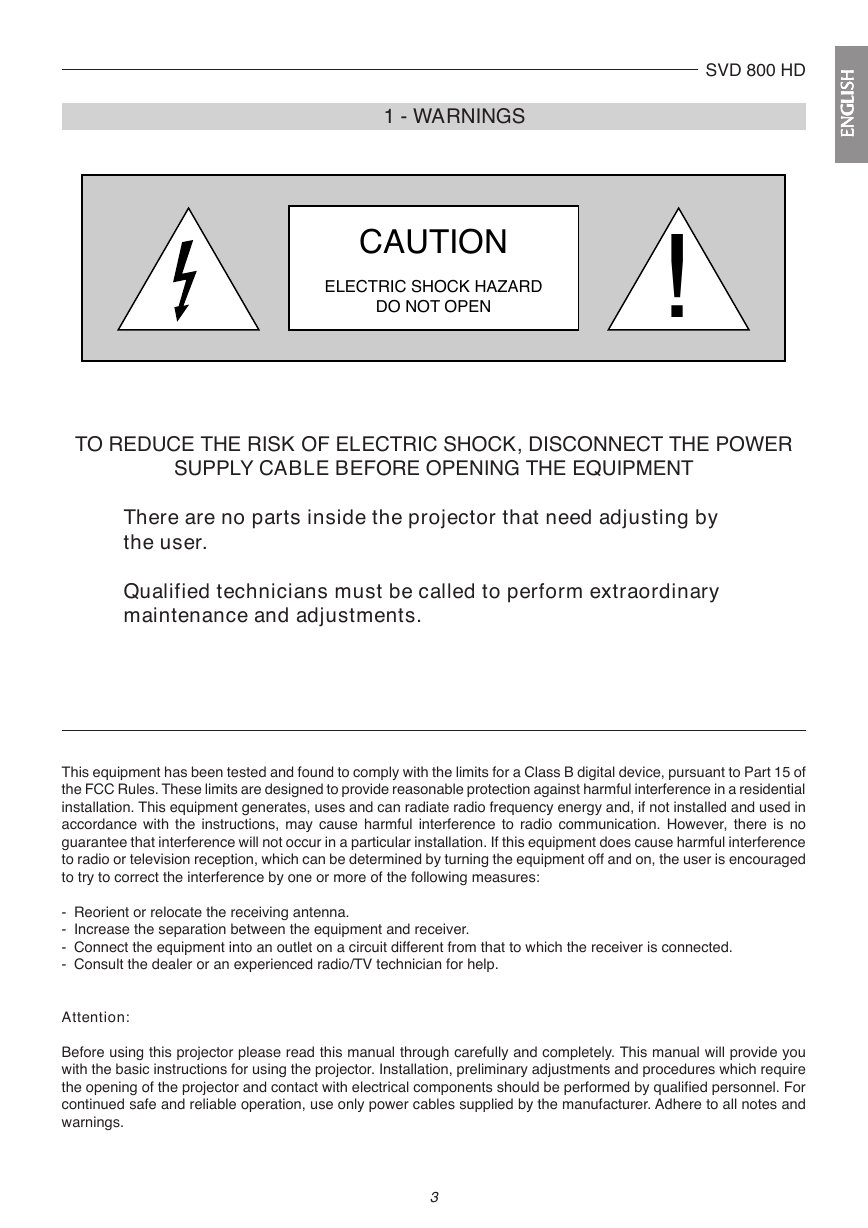
CAUTION
ELECTRIC SHOCK HAZARD
DO NOT OPEN
!
TO REDUCE THE RISK OF ELECTRIC SHOCK, DISCONNECT THE POWER
SUPPLY CABLE BEFORE OPENING THE EQUIPMENT
There are no parts inside the projector that need adjusting by
the user.
Qualified technicians must be called to perform extraordinary
maintenance and adjustments.
This equipment has been tested and found to comply with the limits for a Class B digital device, pursuant to Part 15 of
the FCC Rules. These limits are designed to provide reasonable protection against harmful interference in a residential
installation. This equipment generates, uses and can radiate radio frequency energy and, if not installed and used in
accordance with the instructions, may cause harmful interference to radio communication. However, there is no
guarantee that interference will not occur in a particular installation. If this equipment does cause harmful interference
to radio or television reception, which can be determined by turning the equipment off and on, the user is encouraged
to try to correct the interference by one or more of the following measures:
- Reorient or relocate the receiving antenna.
- Increase the separation between the equipment and receiver.
- Connect the equipment into an outlet on a circuit different from that to which the receiver is connected.
- Consult the dealer or an experienced radio/TV technician for help.
Attention:
Before using this projector please read this manual through carefully and completely. This manual will provide you
with the basic instructions for using the projector. Installation, preliminary adjustments and procedures which require
the opening of the projector and contact with electrical components should be performed by qualified personnel. For
continued safe and reliable operation, use only power cables supplied by the manufacturer. Adhere to all notes and
warnings.
3
�
SVD 800 HD
MAINS POWER
2.1 Projector identification
Mains power: 120-240Vac 48-62Hz +6%-10%
Max absorbed current: 4.2A
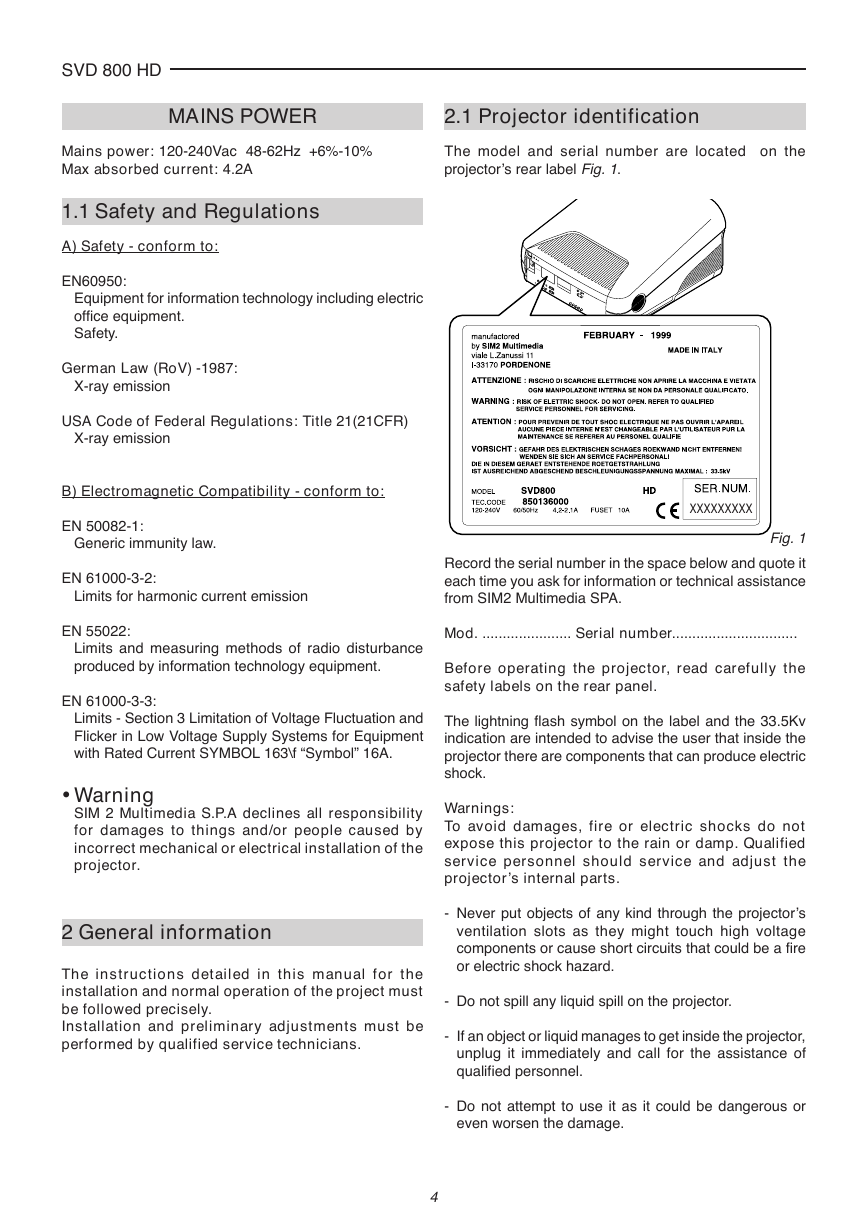
The model and serial number are located on the
projector’s rear label Fig. 1.
1.1 Safety and Regulations
A) Safety - conform to:
EN60950:
Equipment for information technology including electric
office equipment.
Safety.
German Law (RoV) -1987:
X-ray emission
USA Code of Federal Regulations: Title 21(21CFR)
X-ray emission
B) Electromagnetic Compatibility - conform to:
EN 50082-1:
Generic immunity law.
EN 61000-3-2:
Limits for harmonic current emission
EN 55022:
Limits and measuring methods of radio disturbance
produced by information technology equipment.
EN 61000-3-3:
Limits - Section 3 Limitation of Voltage Fluctuation and
Flicker in Low Voltage Supply Systems for Equipment
with Rated Current SYMBOL 163\f “Symbol” 16A.
• Warning
SIM 2 Multimedia S.P.A declines all responsibility
for damages to things and/or people caused by
incorrect mechanical or electrical installation of the
projector.
2 General information
The instructions detailed in this manual for the
installation and normal operation of the project must
be followed precisely.
Installation and preliminary adjustments must be
performed by qualified service technicians.
IMPUTS
INFO
-
+
XXXXXXXXX
Fig. 1
Record the serial number in the space below and quote it
each time you ask for information or technical assistance
from SIM2 Multimedia SPA.
Mod. ...................... Serial number...............................
Before operating the projector, read carefully the
safety labels on the rear panel.
The lightning flash symbol on the label and the 33.5Kv
indication are intended to advise the user that inside the
projector there are components that can produce electric
shock.
Warnings:
To avoid damages, fire or electric shocks do not
expose this projector to the rain or damp. Qualified
service personnel should service and adjust the
projector’s internal parts.
- Never put objects of any kind through the projector’s
ventilation slots as they might touch high voltage
components or cause short circuits that could be a fire
or electric shock hazard.
- Do not spill any liquid spill on the projector.
- If an object or liquid manages to get inside the projector,
unplug it immediately and call for the assistance of
qualified personnel.
- Do not attempt to use it as it could be dangerous or
even worsen the damage.
4
�
- If the projector is not used for long periods of time or
during storms, unplug the projector temporarily from the
mains to avoid damaging the projector caused by
lightning or temporary overcurrents.
- Do not stand the projector on unstable surfaces as it
could drop causing serious damage.
- The projector has slots for ventilating the internal
components - do not cover or block them.
- The projector should always be put on a solid, firm
surface.
- The projector should not be made part of a fitted
installation or closed unless there is sufficient ventilation.
- After technical assistance or repairs on the projector
have been completed, ask the technician to carry out a
safety check (all cables and components in the right
position) and to make sure the projector is in proper
operating conditions.
2.2 Power cabling
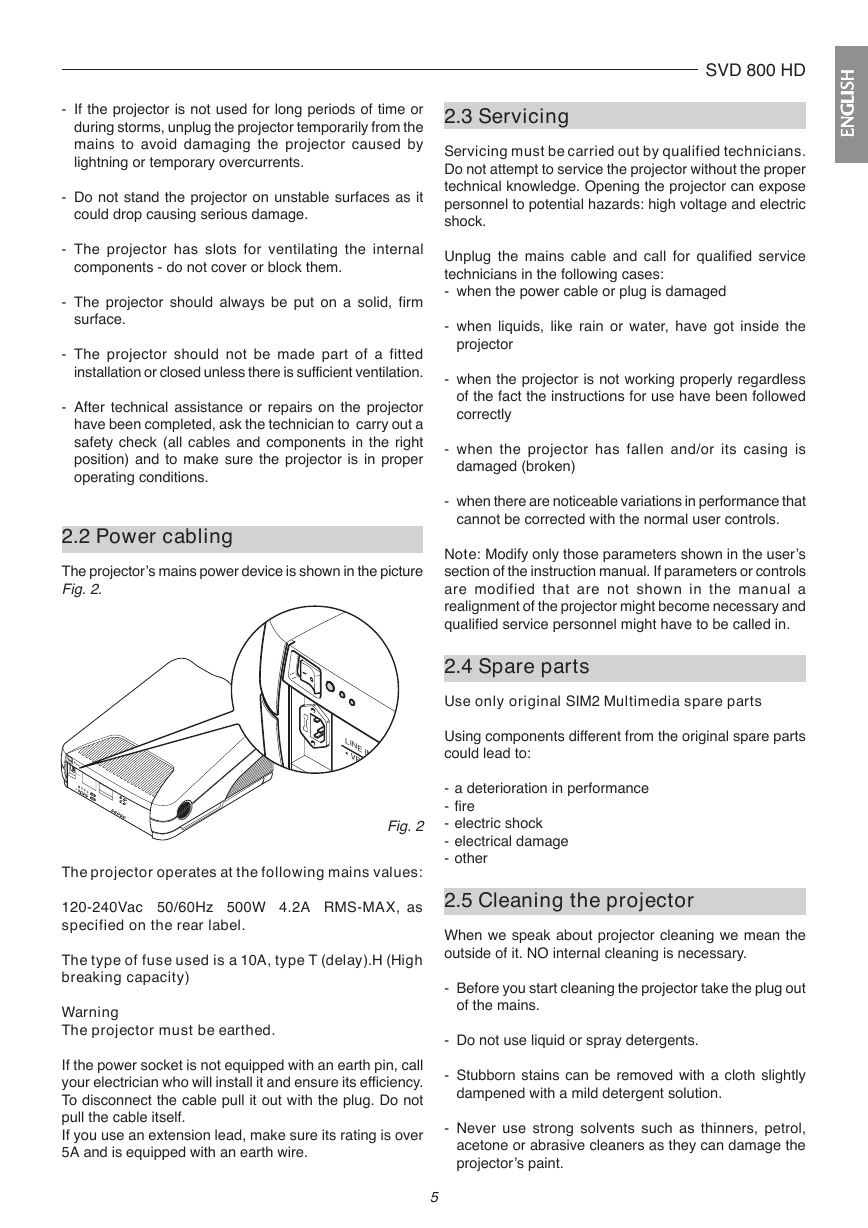
The projector’s mains power device is shown in the picture
Fig. 2.
LINE INPUT
• VE
D
E
IMPUTS
INFO
-
+
Fig. 2
The projector operates at the following mains values:
120-240Vac 50/60Hz 500W 4.2A RMS-MAX, as
specified on the rear label.
The type of fuse used is a 10A, type T (delay).H (High
breaking capacity)
Warning
The projector must be earthed.
If the power socket is not equipped with an earth pin, call
your electrician who will install it and ensure its efficiency.
To disconnect the cable pull it out with the plug. Do not
pull the cable itself.
If you use an extension lead, make sure its rating is over
5A and is equipped with an earth wire.
2.3 Servicing
SVD 800 HD
H
H
H
H
H
S
S
S
S
S
I
I
I
I
I
L
L
L
L
L
G
G
G
G
G
N
N
N
N
N
E
E
E
E
E
Servicing must be carried out by qualified technicians.
Do not attempt to service the projector without the proper
technical knowledge. Opening the projector can expose
personnel to potential hazards: high voltage and electric
shock.
Unplug the mains cable and call for qualified service
technicians in the following cases:
- when the power cable or plug is damaged
- when liquids, like rain or water, have got inside the
projector
- when the projector is not working properly regardless
of the fact the instructions for use have been followed
correctly
- when the projector has fallen and/or its casing is
damaged (broken)
- when there are noticeable variations in performance that
cannot be corrected with the normal user controls.
Note: Modify only those parameters shown in the user’s
section of the instruction manual. If parameters or controls
are modified that are not shown in the manual a
realignment of the projector might become necessary and
qualified service personnel might have to be called in.
2.4 Spare parts
Use only original SIM2 Multimedia spare parts
Using components different from the original spare parts
could lead to:
- a deterioration in performance
- fire
- electric shock
- electrical damage
- other
2.5 Cleaning the projector
When we speak about projector cleaning we mean the
outside of it. NO internal cleaning is necessary.
- Before you start cleaning the projector take the plug out
of the mains.
- Do not use liquid or spray detergents.
- Stubborn stains can be removed with a cloth slightly
dampened with a mild detergent solution.
- Never use strong solvents such as thinners, petrol,
acetone or abrasive cleaners as they can damage the
projector’s paint.
5
�
SVD 800 HD
- Avoid touching the lenses with your fingers, which would
leave marks. Clean them as you would any ordinary
photographic lens since they have an anti-reflection
coating (use special lens cleaning paper or special
photographic lens cloth with care).
Note: After 2000 hours working time it is essential to clean
the outside of the lenses with a soft cloth to avoid
scratching them.
Don’t forget to cover the lenses when the projector is not
going to be used for a long time.
2.6 Cathode-ray tube phosphor
burning
One of the possible causes for burning could be when a
static image of a computer or video recorder signal is
projected for more than an hour.
The static image remains impressed on the screen even
when the signal changes.
Whenever it is necessary to visualise a static image for
more than one hour lower the contrast as much as possible
(CONTR key).
The same problem arises when visualising an image in a
different format for a long time. The smaller picture could
remain impressed on the screen (for instance, visualising
a 16:9 image on a 4:3 screen or vice versa). In this case
we suggest reducing the contrast of the small picture as
much as possible. These measures will reduce the risk of
CRT phosphor burning. If possible, always use the same
picture size.
Read the warranty enclosed with the product and
consult your dealer or SIM2 qualified personnel.
1
23
22
21
3
2.7 Packing the projector
For the best protection pack the projector as it was
originally packed at the factory.
For air freight shipping use metal or plastic straps to secure
the box.
Always keep the original packing for any future necessity,
such as moving or servicing the projector.
2.8 Room lighting
To get the best quality of the projected images the room
should be reasonably dark.
2.9 Back panel
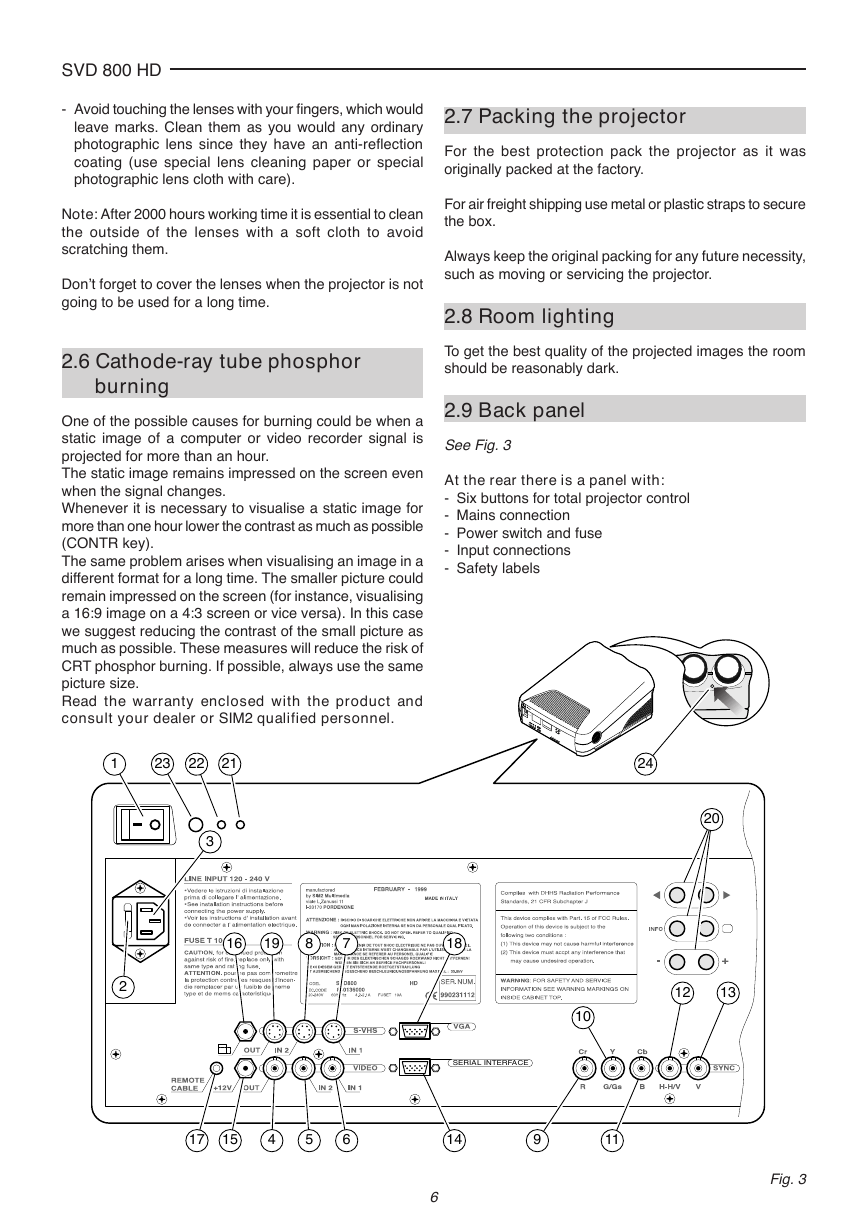
See Fig. 3
At the rear there is a panel with:
- Six buttons for total projector control
- Mains connection
- Power switch and fuse
- Input connections
- Safety labels
IMPUTS
INFO
-
+
24
20
16
19
8
7
18
2
12
13
10
SERIAL INTERFACE
17
15
4
5
6
14
9
11
6
Fig. 3
�
•
THE FOLLOWING FUNCTIONS ARE ON THE
PANEL:
21- Led pilot light (red=stand by - green=on).
22- LED, blinks (red) when signal from the remote control
is received.
1- Power switch.
2- Fuse holder. The fuse type is 10A, T-H delayed.
23- Remote control signal receiver (rear).
24- Remote control signal receiver (front).
SVD 800 HD
H
H
H
H
H
S
S
S
S
S
I
I
I
I
I
L
L
L
L
L
G
G
G
G
G
N
N
N
N
N
E
E
E
E
E
Attention:
For continued protection against the risk of fire,
replace only with one of the same type and rating.
3- Mains power connector. To connect the power cable
120-240Vac 48-62Hz
4- Video output: CVBS.
5- Video 2: CVBS: (Signal input).
6- Video 1: CVBS: (Signal input).
7- S-VHS 1: (Signal input).
8- S-VHS 2: (Signal input).
9- Red BNC input (RGB input) or Cr (components
input).
10- Green BNC input (RGB input) or Y (components
input).
11- Blue BNC input (RGB input) or Cb (components
input).
12- Sync H or H-V. Horizontal synchro or composite
synchro.
13- Sync V. Vertical synchronism.
14- RS422 connector. To connect and control the
projector from a PC.
15- +12V connector (output). It has a +12V output when
the projector is on. This output can activate a relay
with a current less than 10mA. (for example, to enable
a circuit for the automatic unwinding and rewinding
of the motorised screen).
16- Screen command. It has +12V in output when the
button is SMALL.
aspect ratio selected with the
It is used to change screen dimensions automatically.
17- Remote control cable input. To connect the RC3000
remote control cable.
18- VGA-SVGA signals input DB 15 connector
19- S-VHS output: (signal output)
20- Rear panel buttons:
Picture adjustment. Each time you press a button
you select one of the follow controls:
Contrast, Brightness, Colour-Hue, Peaking. Use
the + and - buttons to modify the value of the
selected control.
INFO Press this button to have the current projector
settings (ref. INFORMATION paragraph).
To modify the input selection sequentially; it starts
the projector from the STAND-BY state.
7
�


 2023年江西萍乡中考道德与法治真题及答案.doc
 2012年重庆南川中考生物真题及答案.doc
 2013年江西师范大学地理学综合及文艺理论基础考研真题.doc
 2020年四川甘孜小升初语文真题及答案I卷.doc
 2020年注册岩土工程师专业基础考试真题及答案.doc
 2023-2024学年福建省厦门市九年级上学期数学月考试题及答案.doc
 2021-2022学年辽宁省沈阳市大东区九年级上学期语文期末试题及答案.doc
 2022-2023学年北京东城区初三第一学期物理期末试卷及答案.doc
 2018上半年江西教师资格初中地理学科知识与教学能力真题及答案.doc
 2012年河北国家公务员申论考试真题及答案-省级.doc
 2020-2021学年江苏省扬州市江都区邵樊片九年级上学期数学第一次质量检测试题及答案.doc
 2022下半年黑龙江教师资格证中学综合素质真题及答案.doc