logo资料库

3D打印打印机-BFB 3D touch说明书.pdf

第1页 / 共74页
第2页 / 共74页
第3页 / 共74页
第4页 / 共74页
第5页 / 共74页
第6页 / 共74页
第7页 / 共74页
第8页 / 共74页
资料共74页,剩余部分请下载后查看
3D Touch Set Up and Operations Manual
1. Introduction
2. How this manual works
3. Manual symbols
4. Process overview... how the 3D Touch works
5. Print material
6. Pre-print checks
a. Clearing the print bed
b. Check the print bed is fitted correctly
c. Power up
d. Test all axes
e. Check the hot-end nozzles are clean from plastic debris
f. Check the print bed is level
g. Check the bed is referenced to the extruder nozzles
h. Load the extruders
i. Extruder control
j. Purge the extruder
k. How to start a print
l. Print a successful raft
7. Print the first model
8. Essential post-print operations
b. Check print bed flatness
c. Empty the waste bin
a. Print removal and post-processing
9. Further printing
10. Further operations
c. Setting the extruder pressure bearings
b. Reloading the extruders
d. Control panel functions
a. Power down
e. Upgrading your printer firmware
f. Adjusting the nozzle wipe
g. Fine adjustment to level the nozzles
h. Handling a ground-out filament
i. Handling snapped filament in the delivery tube
11. Troubleshooting
12. Specifications
13. Appendix
Home
BFB-Touch Set Up and Operations Manual
Page 1
1. 2. 1.1 1.2 1.3 1.4 1.5 1.6 3D Touch Set Up and Operations Manual . . . . . . . . . . . . . . . . . . . . . . . . . . . . . . . . . . . . . . . . . . . . . . . . . . . . . . . . . . . . . . . . . . . . . . . . . . . 3 1. Introduction . . . . . . . . . . . . . . . . . . . . . . . . . . . . . . . . . . . . . . . . . . . . . . . . . . . . . . . . . . . . . . . . . . . . . . . . . . . . . . . . . . . . . . . . . . . . 6 2. How this manual works . . . . . . . . . . . . . . . . . . . . . . . . . . . . . . . . . . . . . . . . . . . . . . . . . . . . . . . . . . . . . . . . . . . . . . . . . . . . . . . . . . . 7 3. Manual symbols . . . . . . . . . . . . . . . . . . . . . . . . . . . . . . . . . . . . . . . . . . . . . . . . . . . . . . . . . . . . . . . . . . . . . . . . . . . . . . . . . . . . . . . . 8 4. Process overview... how the 3D Touch works . . . . . . . . . . . . . . . . . . . . . . . . . . . . . . . . . . . . . . . . . . . . . . . . . . . . . . . . . . . . . . . . . 9 5. Print material . . . . . . . . . . . . . . . . . . . . . . . . . . . . . . . . . . . . . . . . . . . . . . . . . . . . . . . . . . . . . . . . . . . . . . . . . . . . . . . . . . . . . . . . . . . 15 6. Pre-print checks . . . . . . . . . . . . . . . . . . . . . . . . . . . . . . . . . . . . . . . . . . . . . . . . . . . . . . . . . . . . . . . . . . . . . . . . . . . . . . . . . . . . . . . . 17 a. Clearing the print bed . . . . . . . . . . . . . . . . . . . . . . . . . . . . . . . . . . . . . . . . . . . . . . . . . . . . . . . . . . . . . . . . . . . . . . . . . . . . . . . 18 1.6.1 b. Check the print bed is fitted correctly . . . . . . . . . . . . . . . . . . . . . . . . . . . . . . . . . . . . . . . . . . . . . . . . . . . . . . . . . . . . . . . . . . . 20 1.6.2 1.6.3 c. Power up . . . . . . . . . . . . . . . . . . . . . . . . . . . . . . . . . . . . . . . . . . . . . . . . . . . . . . . . . . . . . . . . . . . . . . . . . . . . . . . . . . . . . . . . . 22 d. Test all axes . . . . . . . . . . . . . . . . . . . . . . . . . . . . . . . . . . . . . . . . . . . . . . . . . . . . . . . . . . . . . . . . . . . . . . . . . . . . . . . . . . . . . . 23 1.6.4 e. Check the hot-end nozzles are clean from plastic debris . . . . . . . . . . . . . . . . . . . . . . . . . . . . . . . . . . . . . . . . . . . . . . . . . . . . 24 1.6.5 f. Check the print bed is level 1.6.6 . . . . . . . . . . . . . . . . . . . . . . . . . . . . . . . . . . . . . . . . . . . . . . . . . . . . . . . . . . . . . . . . . . . . . . . . . . . 25 g. Check the bed is referenced to the extruder nozzles . . . . . . . . . . . . . . . . . . . . . . . . . . . . . . . . . . . . . . . . . . . . . . . . . . . . . . . 29 1.6.7 1.6.8 h. Load the extruders . . . . . . . . . . . . . . . . . . . . . . . . . . . . . . . . . . . . . . . . . . . . . . . . . . . . . . . . . . . . . . . . . . . . . . . . . . . . . . . . . 31 i. Extruder control 1.6.9 . . . . . . . . . . . . . . . . . . . . . . . . . . . . . . . . . . . . . . . . . . . . . . . . . . . . . . . . . . . . . . . . . . . . . . . . . . . . . . . . . . . . 36 j. Purge the extruder . . . . . . . . . . . . . . . . . . . . . . . . . . . . . . . . . . . . . . . . . . . . . . . . . . . . . . . . . . . . . . . . . . . . . . . . . . . . . . . . . 37 1.6.10 k. How to start a print . . . . . . . . . . . . . . . . . . . . . . . . . . . . . . . . . . . . . . . . . . . . . . . . . . . . . . . . . . . . . . . . . . . . . . . . . . . . . . . . 38 1.6.11 1.6.12 l. Print a successful raft . . . . . . . . . . . . . . . . . . . . . . . . . . . . . . . . . . . . . . . . . . . . . . . . . . . . . . . . . . . . . . . . . . . . . . . . . . . . . . . 39 7. Print the first model . . . . . . . . . . . . . . . . . . . . . . . . . . . . . . . . . . . . . . . . . . . . . . . . . . . . . . . . . . . . . . . . . . . . . . . . . . . . . . . . . . . . . . 43 8. Essential post-print operations . . . . . . . . . . . . . . . . . . . . . . . . . . . . . . . . . . . . . . . . . . . . . . . . . . . . . . . . . . . . . . . . . . . . . . . . . . . . . 44 b. Check print bed flatness . . . . . . . . . . . . . . . . . . . . . . . . . . . . . . . . . . . . . . . . . . . . . . . . . . . . . . . . . . . . . . . . . . . . . . . . . . . . . 45 1.8.1 c. Empty the waste bin . . . . . . . . . . . . . . . . . . . . . . . . . . . . . . . . . . . . . . . . . . . . . . . . . . . . . . . . . . . . . . . . . . . . . . . . . . . . . . . . 46 1.8.2 1.8.3 a. Print removal and post-processing . . . . . . . . . . . . . . . . . . . . . . . . . . . . . . . . . . . . . . . . . . . . . . . . . . . . . . . . . . . . . . . . . . . . . 47 9. Further printing . . . . . . . . . . . . . . . . . . . . . . . . . . . . . . . . . . . . . . . . . . . . . . . . . . . . . . . . . . . . . . . . . . . . . . . . . . . . . . . . . . . . . . . . . 49 10. Further operations . . . . . . . . . . . . . . . . . . . . . . . . . . . . . . . . . . . . . . . . . . . . . . . . . . . . . . . . . . . . . . . . . . . . . . . . . . . . . . . . . . . . . 50 c. Setting the extruder pressure bearings . . . . . . . . . . . . . . . . . . . . . . . . . . . . . . . . . . . . . . . . . . . . . . . . . . . . . . . . . . . . . . . . . 51 1.10.1 b. Reloading the extruders . . . . . . . . . . . . . . . . . . . . . . . . . . . . . . . . . . . . . . . . . . . . . . . . . . . . . . . . . . . . . . . . . . . . . . . . . . . . 53 1.10.2 d. Control panel functions . . . . . . . . . . . . . . . . . . . . . . . . . . . . . . . . . . . . . . . . . . . . . . . . . . . . . . . . . . . . . . . . . . . . . . . . . . . . . 54 1.10.3 a. Power down . . . . . . . . . . . . . . . . . . . . . . . . . . . . . . . . . . . . . . . . . . . . . . . . . . . . . . . . . . . . . . . . . . . . . . . . . . . . . . . . . . . . . 58 1.10.4 1.10.5 e. Upgrading your printer firmware . . . . . . . . . . . . . . . . . . . . . . . . . . . . . . . . . . . . . . . . . . . . . . . . . . . . . . . . . . . . . . . . . . . . . . 59 f. Adjusting the nozzle wipe . . . . . . . . . . . . . . . . . . . . . . . . . . . . . . . . . . . . . . . . . . . . . . . . . . . . . . . . . . . . . . . . . . . . . . . . . . . . 60 1.10.6 g. Fine adjustment to level the nozzles . . . . . . . . . . . . . . . . . . . . . . . . . . . . . . . . . . . . . . . . . . . . . . . . . . . . . . . . . . . . . . . . . . . 61 1.10.7 h. Handling a ground-out filament . . . . . . . . . . . . . . . . . . . . . . . . . . . . . . . . . . . . . . . . . . . . . . . . . . . . . . . . . . . . . . . . . . . . . . . 63 1.10.8 1.10.9 i. Handling snapped filament in the delivery tube . . . . . . . . . . . . . . . . . . . . . . . . . . . . . . . . . . . . . . . . . . . . . . . . . . . . . . . . . . . 65 11. Troubleshooting . . . . . . . . . . . . . . . . . . . . . . . . . . . . . . . . . . . . . . . . . . . . . . . . . . . . . . . . . . . . . . . . . . . . . . . . . . . . . . . . . . . . . . 70 1.11 12. Specifications . . . . . . . . . . . . . . . . . . . . . . . . . . . . . . . . . . . . . . . . . . . . . . . . . . . . . . . . . . . . . . . . . . . . . . . . . . . . . . . . . . . . . . . . 71 1.12 13. Appendix . . . . . . . . . . . . . . . . . . . . . . . . . . . . . . . . . . . . . . . . . . . . . . . . . . . . . . . . . . . . . . . . . . . . . . . . . . . . . . . . . . . . . . . . . . . . 72 1.13 Home . . . . . . . . . . . . . . . . . . . . . . . . . . . . . . . . . . . . . . . . . . . . . . . . . . . . . . . . . . . . . . . . . . . . . . . . . . . . . . . . . . . . . . . . . . . . . . . . . . . . . . . 73 BFB-Touch Set Up and Operations Manual . . . . . . . . . . . . . . . . . . . . . . . . . . . . . . . . . . . . . . . . . . . . . . . . . . . . . . . . . . . . . . . . . . . . . 74 1.9 1.10 1.7 1.8 2.1 Page 2
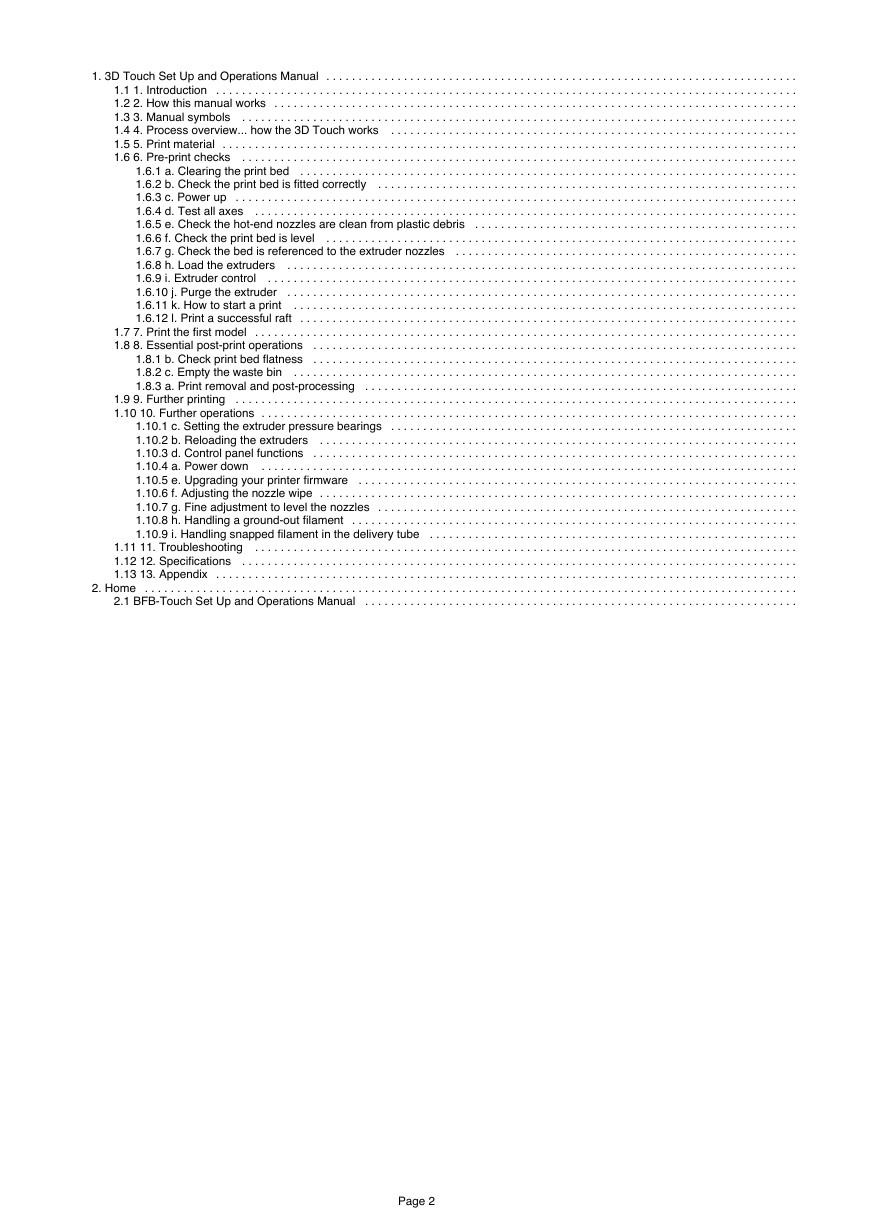
3D Touch 3D Touch Set Up and Operations Manual Welcome to the 3D Touch Setup and Operations Manual. This manual is designed to get you up and running as quickly as possible. It can be read either on-line or off-line (see below). Requirements To complete the exercises in this manual the user will need: All the items included in the 3D Touch box. Items should be unpacked. Unpacking instructions (which should be included in the top of the box) can be downloaded The setup print files: here . The print files required are already included on the USB memory stick supplied in your toolkit. If you do not have these files you can download them by clicking on the icon on the left. After downloading: The printer can only see uncompressed files at the root of the USB stick i.e. do not put them inside a folder. Unpack the files to the root of your USB stick. On-line reading (essential notes) Online reading includes embedded 3D content. However, if left idle for over 120 minutes, technical resources will automatically time-out, and direct you to a log in page. Please note the details below. Simply enter: Username: bfbcustomer Password: 3D printing Check the "Remember me" box This will prevent the timeout from happening again during your session. Page 3
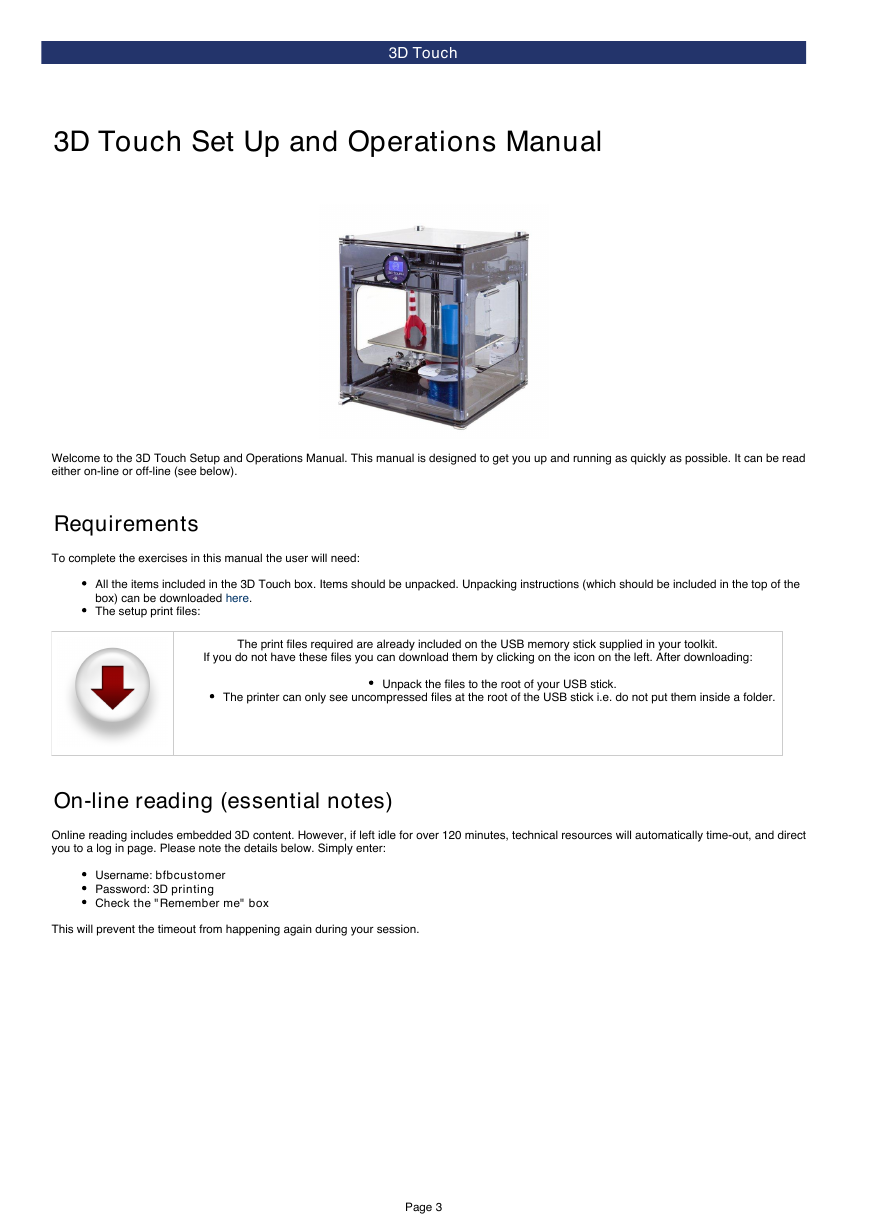
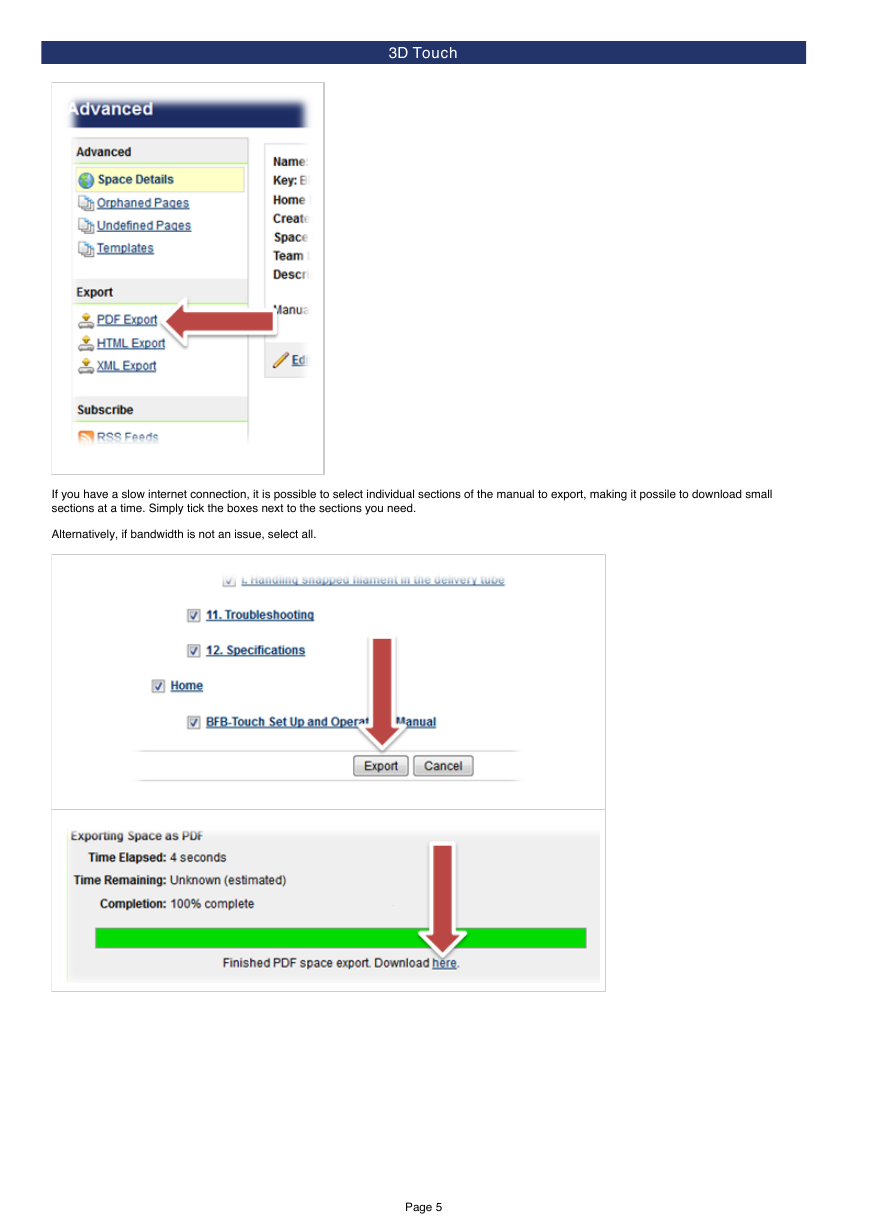
3D Touch You can start reading the manual by clicking the links on the navigation bar at the left of the screen: Off-line reading Simply click on the "Export this space" button at the top left of the screen to export the manual to a PDF. Follow the on screen instructions. Page 4
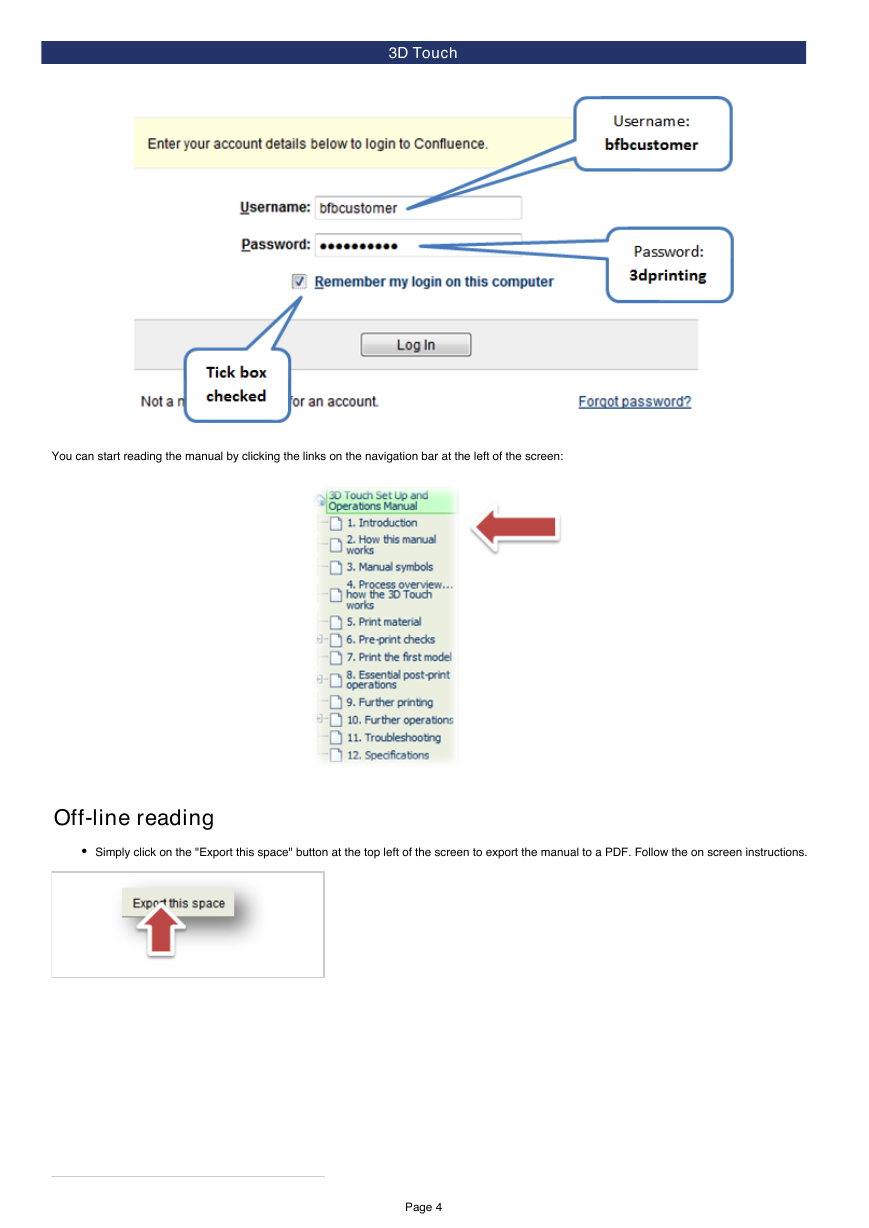
3D Touch If you have a slow internet connection, it is possible to select individual sections of the manual to export, making it possile to download small sections at a time. Simply tick the boxes next to the sections you need. Alternatively, if bandwidth is not an issue, select all. Page 5
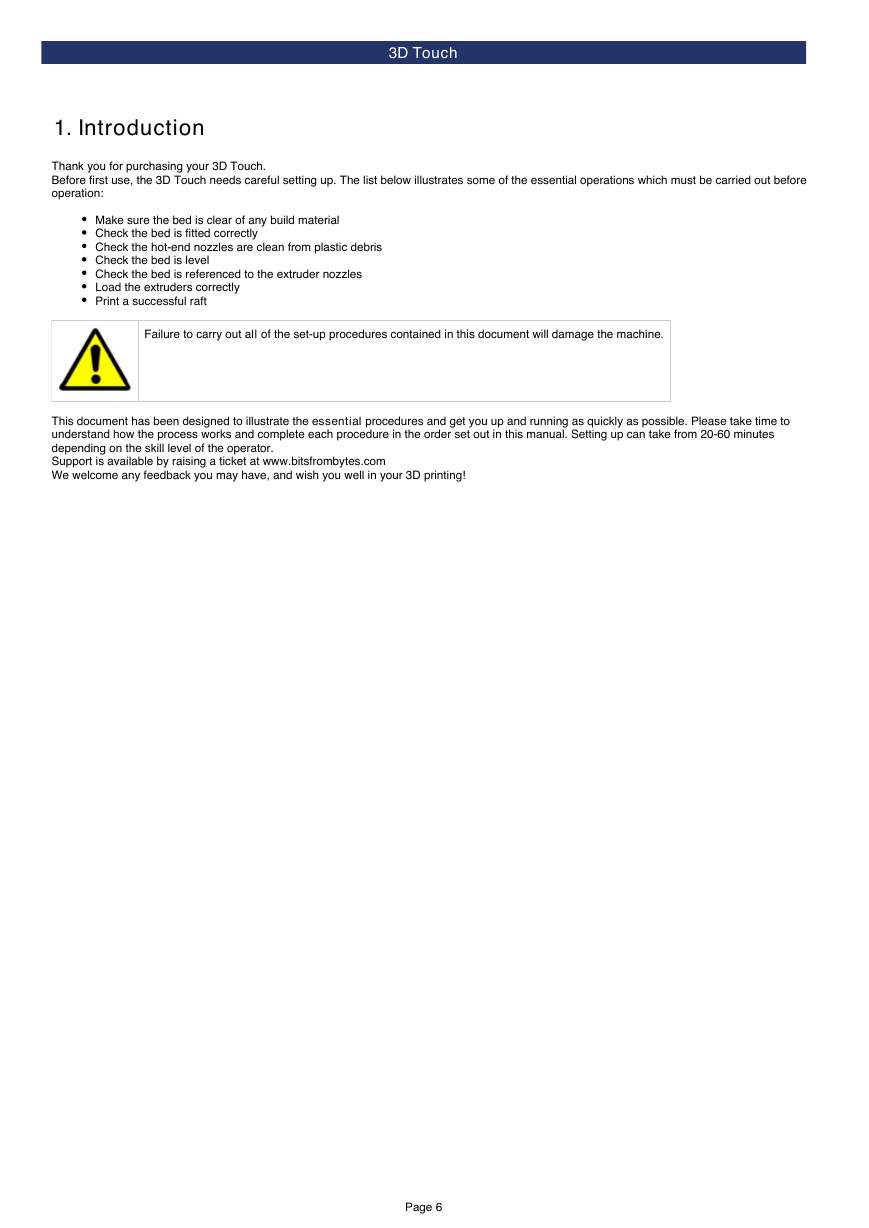
3D Touch 1. Introduction Thank you for purchasing your 3D Touch. Before first use, the 3D Touch needs careful setting up. The list below illustrates some of the essential operations which must be carried out before operation: Make sure the bed is clear of any build material Check the bed is fitted correctly Check the hot-end nozzles are clean from plastic debris Check the bed is level Check the bed is referenced to the extruder nozzles Load the extruders correctly Print a successful raft Failure to carry out all of the set-up procedures contained in this document will damage the machine. This document has been designed to illustrate the understand how the process works and complete each procedure in the order set out in this manual. Setting up can take from 20-60 minutes depending on the skill level of the operator. Support is available by raising a ticket at www.bitsfrombytes.com We welcome any feedback you may have, and wish you well in your 3D printing! procedures and get you up and running as quickly as possible. Please take time to essential Page 6
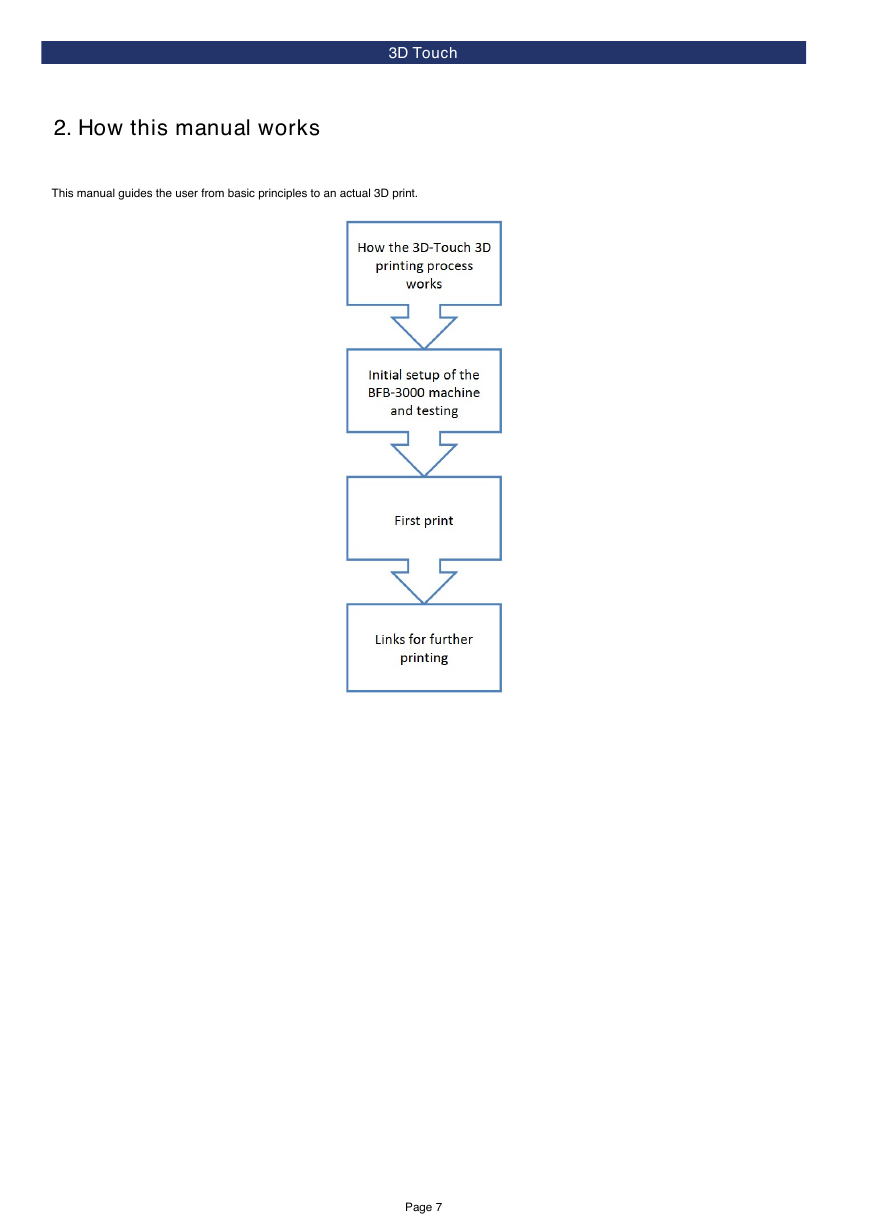
3D Touch 2. How this manual works This manual guides the user from basic principles to an actual 3D print. Page 7
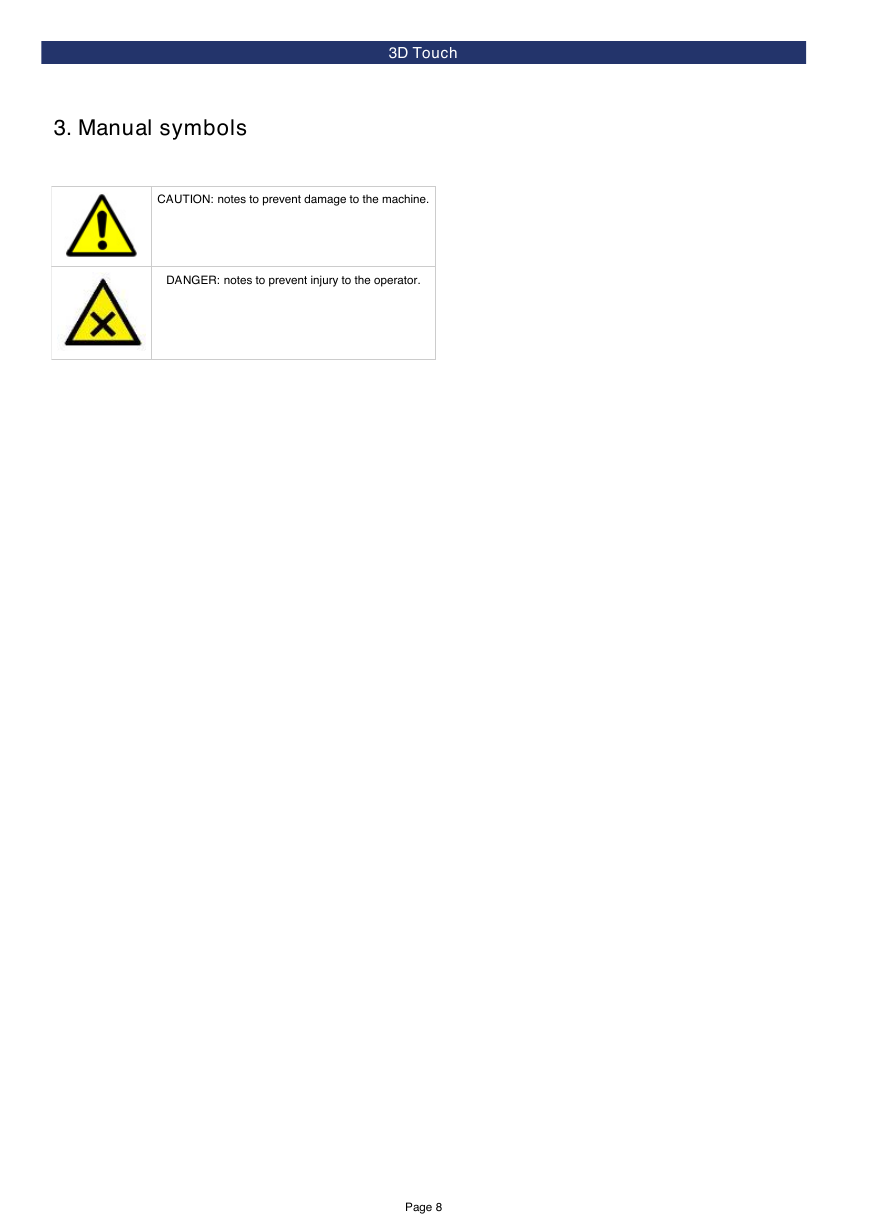
3D Touch 3. Manual symbols CAUTION: notes to prevent damage to the machine. DANGER: notes to prevent injury to the operator. Page 8
分享到:
收藏