NetApp磁盘阵列安装手册
�
目 录
目 录 ..............................................................................................................................................1
一、 磁盘阵列的系统安装.......................................................................................................2
初始化磁盘阵列
1.1
输入
license
1.2
1.3
配置
CIFS
1.4
在机头中安装阵列操作系统
安全认证配置
通过浏览器来管理磁盘阵列
2.1
2.2
配置
.................................................................................................................2
..............................................................................................................8
序列号
............................................................................................................................9
...........................................................................................11
......................................................................................13
...........................................................................................13
............................................................................................................15
安全认证
二、 磁盘阵列的
SSL
SSL
三、 磁盘阵列的空间配置和分配.........................................................................................18
在
3.1
aggr0
中添加新的磁盘
Aggregate
的快照预留空间
消除磁盘
3.2
vol0
3.3
缩小卷
的磁盘空间
3.4
Volume
创建新的
消除
的快照预留空间
Volume
3.5
在新建卷上的参数修改
3.6
3.7
在
创建
3.8
.................................................................................................18
..............................................................................22
...................................................................................................22
..............................................................................................................27
..........................................................................................31
...................................................................................................33
...............................................................34
NetApp
磁盘路径管理软件
主机上安装
IBM
..........................................................................................................36
存储单元
LUN
.........................................................................................................36
功能
3.8.1
开启
FCP
创建一个
3.8.2
Qtree
.......................................................................................................38
.........................................................................................39
存储单元
3.8.3
创建一个
Lun
LUN
来存储数据
3.8.4
在主机上使用
............................................................................44
2
�
1一、 磁盘阵列的系统安装
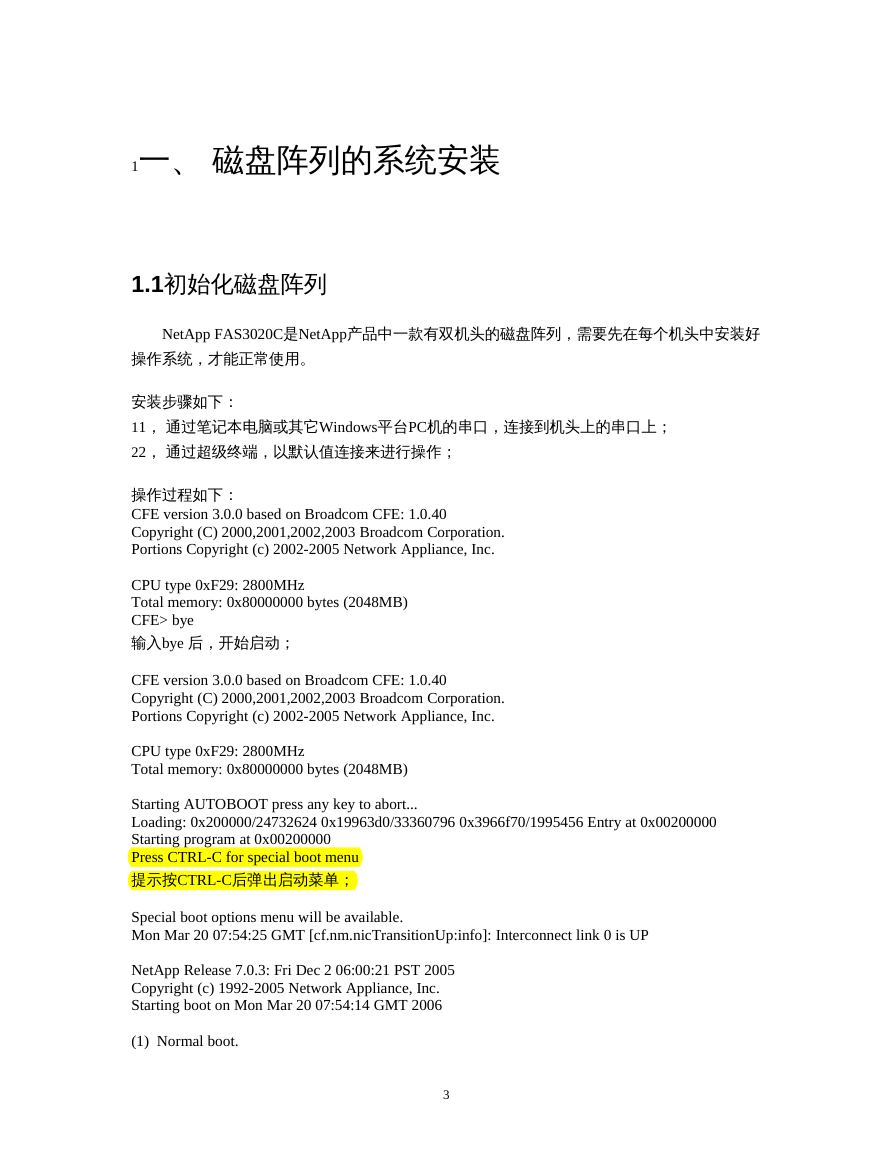
1.1初始化磁盘阵列
NetApp FAS3020C是NetApp产品中一款有双机头的磁盘阵列,需要先在每个机头中安装好
操作系统,才能正常使用。
安装步骤如下:
11, 通过笔记本电脑或其它Windows平台PC机的串口,连接到机头上的串口上;
22, 通过超级终端,以默认值连接来进行操作;
操作过程如下:
CFE version 3.0.0 based on Broadcom CFE: 1.0.40
Copyright (C) 2000,2001,2002,2003 Broadcom Corporation.
Portions Copyright (c) 2002-2005 Network Appliance, Inc.
CPU type 0xF29: 2800MHz
Total memory: 0x80000000 bytes (2048MB)
CFE> bye
输入bye 后,开始启动;
CFE version 3.0.0 based on Broadcom CFE: 1.0.40
Copyright (C) 2000,2001,2002,2003 Broadcom Corporation.
Portions Copyright (c) 2002-2005 Network Appliance, Inc.
CPU type 0xF29: 2800MHz
Total memory: 0x80000000 bytes (2048MB)
Starting AUTOBOOT press any key to abort...
Loading: 0x200000/24732624 0x19963d0/33360796 0x3966f70/1995456 Entry at 0x00200000
Starting program at 0x00200000
Press CTRL-C for special boot menu
提示按CTRL-C后弹出启动菜单;
Special boot options menu will be available.
Mon Mar 20 07:54:25 GMT [cf.nm.nicTransitionUp:info]: Interconnect link 0 is UP
NetApp Release 7.0.3: Fri Dec 2 06:00:21 PST 2005
Copyright (c) 1992-2005 Network Appliance, Inc.
Starting boot on Mon Mar 20 07:54:14 GMT 2006
(1) Normal boot.
3
�
(2) Boot without /etc/rc.
(3) Change password.
(4) Initialize all disks.
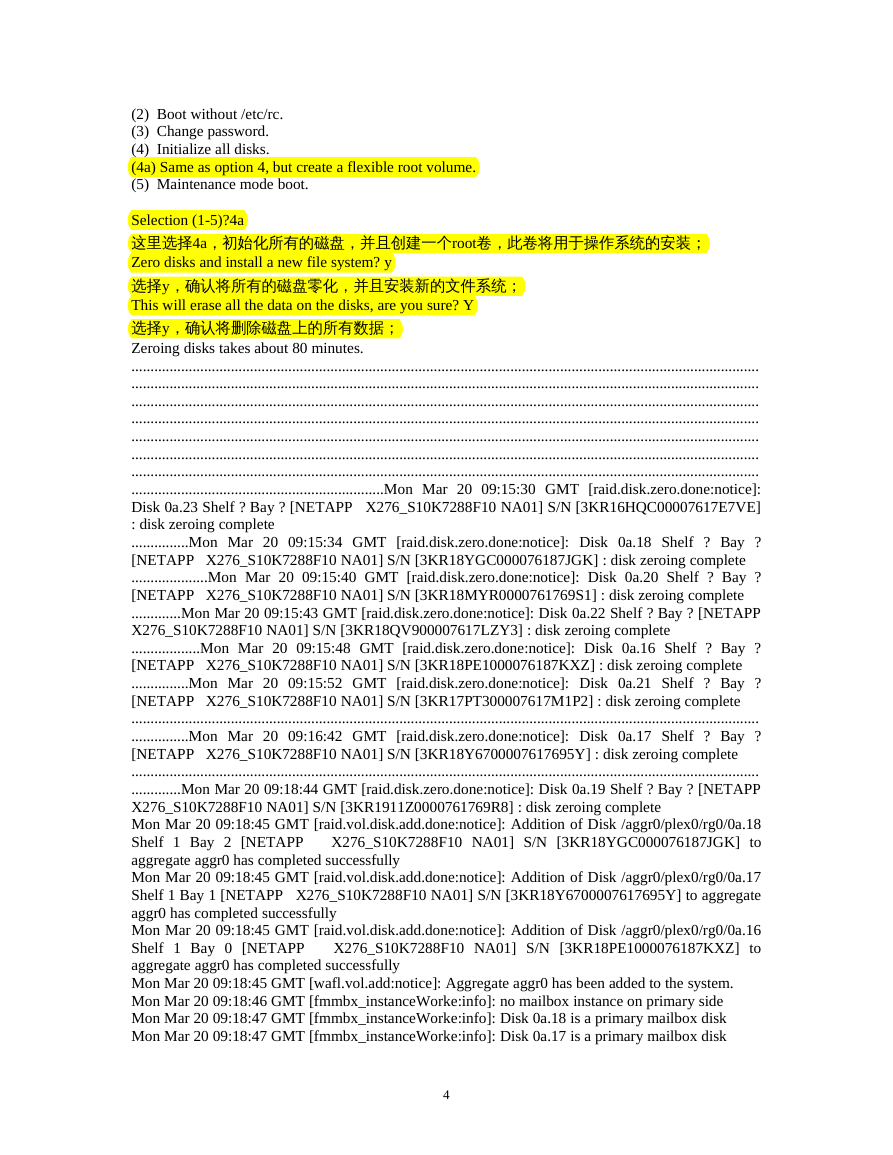
(4a) Same as option 4, but create a flexible root volume.
(5) Maintenance mode boot.
Selection (1-5)?4a
这里选择4a,初始化所有的磁盘,并且创建一个root卷,此卷将用于操作系统的安装;
Zero disks and install a new file system? y
选择y,确认将所有的磁盘零化,并且安装新的文件系统;
This will erase all the data on the disks, are you sure? Y
选择y,确认将删除磁盘上的所有数据;
Zeroing disks takes about 80 minutes.
....................................................................................................................................................................
....................................................................................................................................................................
....................................................................................................................................................................
....................................................................................................................................................................
....................................................................................................................................................................
....................................................................................................................................................................
....................................................................................................................................................................
..................................................................Mon Mar 20 09:15:30 GMT [raid.disk.zero.done:notice]:
Disk 0a.23 Shelf ? Bay ? [NETAPP X276_S10K7288F10 NA01] S/N [3KR16HQC00007617E7VE]
: disk zeroing complete
...............Mon Mar 20 09:15:34 GMT [raid.disk.zero.done:notice]: Disk 0a.18 Shelf ? Bay ?
[NETAPP X276_S10K7288F10 NA01] S/N [3KR18YGC000076187JGK] : disk zeroing complete
....................Mon Mar 20 09:15:40 GMT [raid.disk.zero.done:notice]: Disk 0a.20 Shelf ? Bay ?
[NETAPP X276_S10K7288F10 NA01] S/N [3KR18MYR0000761769S1] : disk zeroing complete
.............Mon Mar 20 09:15:43 GMT [raid.disk.zero.done:notice]: Disk 0a.22 Shelf ? Bay ? [NETAPP
X276_S10K7288F10 NA01] S/N [3KR18QV900007617LZY3] : disk zeroing complete
..................Mon Mar 20 09:15:48 GMT [raid.disk.zero.done:notice]: Disk 0a.16 Shelf ? Bay ?
[NETAPP X276_S10K7288F10 NA01] S/N [3KR18PE1000076187KXZ] : disk zeroing complete
...............Mon Mar 20 09:15:52 GMT [raid.disk.zero.done:notice]: Disk 0a.21 Shelf ? Bay ?
[NETAPP X276_S10K7288F10 NA01] S/N [3KR17PT300007617M1P2] : disk zeroing complete
....................................................................................................................................................................
...............Mon Mar 20 09:16:42 GMT [raid.disk.zero.done:notice]: Disk 0a.17 Shelf ? Bay ?
[NETAPP X276_S10K7288F10 NA01] S/N [3KR18Y6700007617695Y] : disk zeroing complete
....................................................................................................................................................................
.............Mon Mar 20 09:18:44 GMT [raid.disk.zero.done:notice]: Disk 0a.19 Shelf ? Bay ? [NETAPP
X276_S10K7288F10 NA01] S/N [3KR1911Z0000761769R8] : disk zeroing complete
Mon Mar 20 09:18:45 GMT [raid.vol.disk.add.done:notice]: Addition of Disk /aggr0/plex0/rg0/0a.18
Shelf 1 Bay 2 [NETAPP
X276_S10K7288F10 NA01] S/N [3KR18YGC000076187JGK] to
aggregate aggr0 has completed successfully
Mon Mar 20 09:18:45 GMT [raid.vol.disk.add.done:notice]: Addition of Disk /aggr0/plex0/rg0/0a.17
Shelf 1 Bay 1 [NETAPP X276_S10K7288F10 NA01] S/N [3KR18Y6700007617695Y] to aggregate
aggr0 has completed successfully
Mon Mar 20 09:18:45 GMT [raid.vol.disk.add.done:notice]: Addition of Disk /aggr0/plex0/rg0/0a.16
Shelf 1 Bay 0 [NETAPP
X276_S10K7288F10 NA01] S/N [3KR18PE1000076187KXZ] to
aggregate aggr0 has completed successfully
Mon Mar 20 09:18:45 GMT [wafl.vol.add:notice]: Aggregate aggr0 has been added to the system.
Mon Mar 20 09:18:46 GMT [fmmbx_instanceWorke:info]: no mailbox instance on primary side
Mon Mar 20 09:18:47 GMT [fmmbx_instanceWorke:info]: Disk 0a.18 is a primary mailbox disk
Mon Mar 20 09:18:47 GMT [fmmbx_instanceWorke:info]: Disk 0a.17 is a primary mailbox disk
4
�
Mon Mar 20 09:18:47 GMT [fmmbx_instanceWorke:info]: normal mailbox instance on primary side
Mon Mar 20 09:18:47 GMT [fmmbx_instanceWorke:info]: Disk 0b.18 is a backup mailbox disk
Mon Mar 20 09:18:47 GMT [fmmbx_instanceWorke:info]: Disk 0b.17 is a backup mailbox disk
Mon Mar 20 09:18:47 GMT [fmmbx_instanceWorke:info]: normal mailbox instance on backup side
Mon Mar 20 09:18:48 GMT [lun.metafile.dirCreateFailed:error]: Couldn't create vdisk metafile
directory /vol/vol0/vdisk.
DBG: Set filer.serialnum to: 1071155
ifconfig e0a mediatype auto
Configuring onboard ethernet e0a.
Contacting DHCP server.
Ctrl-C to skip DHCP search ...
Mon Mar 20 09:18:48 GMT [rc:info]: Contacting DHCP server
Mon Mar 20 09:18:52 GMT [rc:info]: DHCP config failed
Configuring e0a using DHCP failed.
NetApp Release 7.0.3: Fri Dec 2 06:00:21 PST 2005
System ID: 0101174361 (); partner ID: ()
System Serial Number: 1071155 ()
System Rev: E0
slot 0: System Board
Processors: 1
Memory Size: 2048 MB
slot 0: Dual 10/100/1000 Ethernet Controller VI
e0a MAC Address: 00:a0:98:03:88:13 (auto-unknown-cfg_down)
e0c MAC Address: 00:a0:98:03:88:10 (auto-unknown-cfg_down)
e0d MAC Address: 00:a0:98:03:88:11 (auto-unknown-cfg_down)
slot 0: FC Host Adapter 0a
8 Disks: 2176.0GB
1 shelf with ESH2
slot 0: FC Host Adapter 0b
8 Disks: 2176.0GB
1 shelf with ESH2
slot 0: Fibre Channel Target Host Adapter 0c
slot 0: Fibre Channel Target Host Adapter 0d
slot 0: SCSI Host Adapter 0e
slot 0: NetApp ATA/IDE Adapter 0f (0x000001f0)
0f.0 245MB
slot 3: NVRAM
Memory Size: 512 MB
Please enter the new hostname []: headb
输入这个机头的主机名,这里举例为headb;
Do you want to configure virtual network interfaces? [n]: y
问是否要配置虚拟网卡,如果要创建的话,输入y;
Number of virtual interfaces to configure? [0] 1
输入要配置几块虚拟网卡,如配置1块虚拟网卡,就输入1;
Name of virtual interface #1 []: vif1
输入虚拟网卡的名称,这里举例为vif1;
Is vif1 a single [s] or multi [m] virtual interface? [m] s
选择虚拟网卡的类型是single还是multi,这里选择s;
Number of links for vif1? [0] 2
虚拟网卡所包含真实网卡的数量,如果用两块网卡绑定成一块虚拟网卡就输入2;
Name of link #1 for vif1 []: e0a
5
�
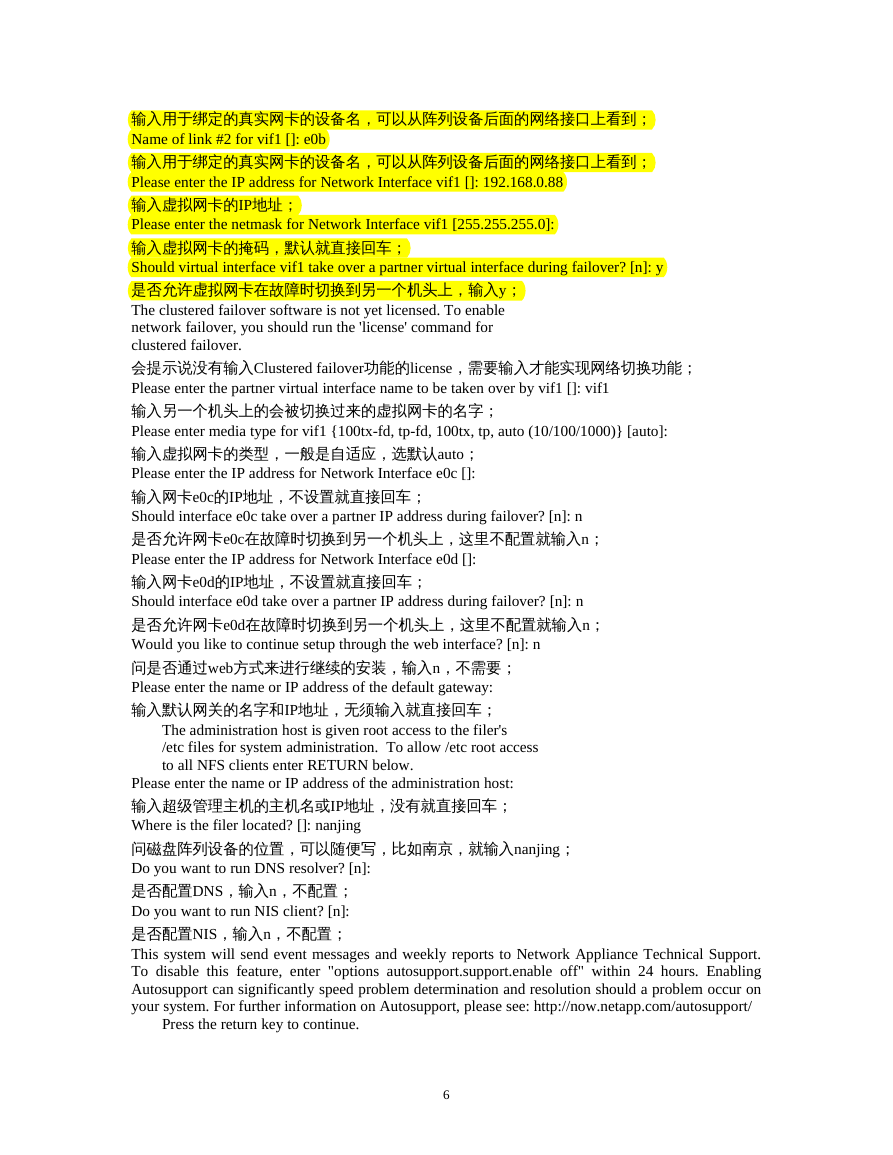
输入用于绑定的真实网卡的设备名,可以从阵列设备后面的网络接口上看到;
Name of link #2 for vif1 []: e0b
输入用于绑定的真实网卡的设备名,可以从阵列设备后面的网络接口上看到;
Please enter the IP address for Network Interface vif1 []: 192.168.0.88
输入虚拟网卡的IP地址;
Please enter the netmask for Network Interface vif1 [255.255.255.0]:
输入虚拟网卡的掩码,默认就直接回车;
Should virtual interface vif1 take over a partner virtual interface during failover? [n]: y
是否允许虚拟网卡在故障时切换到另一个机头上,输入y;
The clustered failover software is not yet licensed. To enable
network failover, you should run the 'license' command for
clustered failover.
会提示说没有输入Clustered failover功能的license,需要输入才能实现网络切换功能;
Please enter the partner virtual interface name to be taken over by vif1 []: vif1
输入另一个机头上的会被切换过来的虚拟网卡的名字;
Please enter media type for vif1 {100tx-fd, tp-fd, 100tx, tp, auto (10/100/1000)} [auto]:
输入虚拟网卡的类型,一般是自适应,选默认auto;
Please enter the IP address for Network Interface e0c []:
输入网卡e0c的IP地址,不设置就直接回车;
Should interface e0c take over a partner IP address during failover? [n]: n
是否允许网卡e0c在故障时切换到另一个机头上,这里不配置就输入n;
Please enter the IP address for Network Interface e0d []:
输入网卡e0d的IP地址,不设置就直接回车;
Should interface e0d take over a partner IP address during failover? [n]: n
是否允许网卡e0d在故障时切换到另一个机头上,这里不配置就输入n;
Would you like to continue setup through the web interface? [n]: n
问是否通过web方式来进行继续的安装,输入n,不需要;
Please enter the name or IP address of the default gateway:
输入默认网关的名字和IP地址,无须输入就直接回车;
The administration host is given root access to the filer's
/etc files for system administration. To allow /etc root access
to all NFS clients enter RETURN below.
Please enter the name or IP address of the administration host:
输入超级管理主机的主机名或IP地址,没有就直接回车;
Where is the filer located? []: nanjing
问磁盘阵列设备的位置,可以随便写,比如南京,就输入nanjing;
Do you want to run DNS resolver? [n]:
是否配置DNS,输入n,不配置;
Do you want to run NIS client? [n]:
是否配置NIS,输入n,不配置;
This system will send event messages and weekly reports to Network Appliance Technical Support.
To disable this feature, enter "options autosupport.support.enable off" within 24 hours. Enabling
Autosupport can significantly speed problem determination and resolution should a problem occur on
your system. For further information on Autosupport, please see: http://now.netapp.com/autosupport/
Press the return key to continue.
6
�
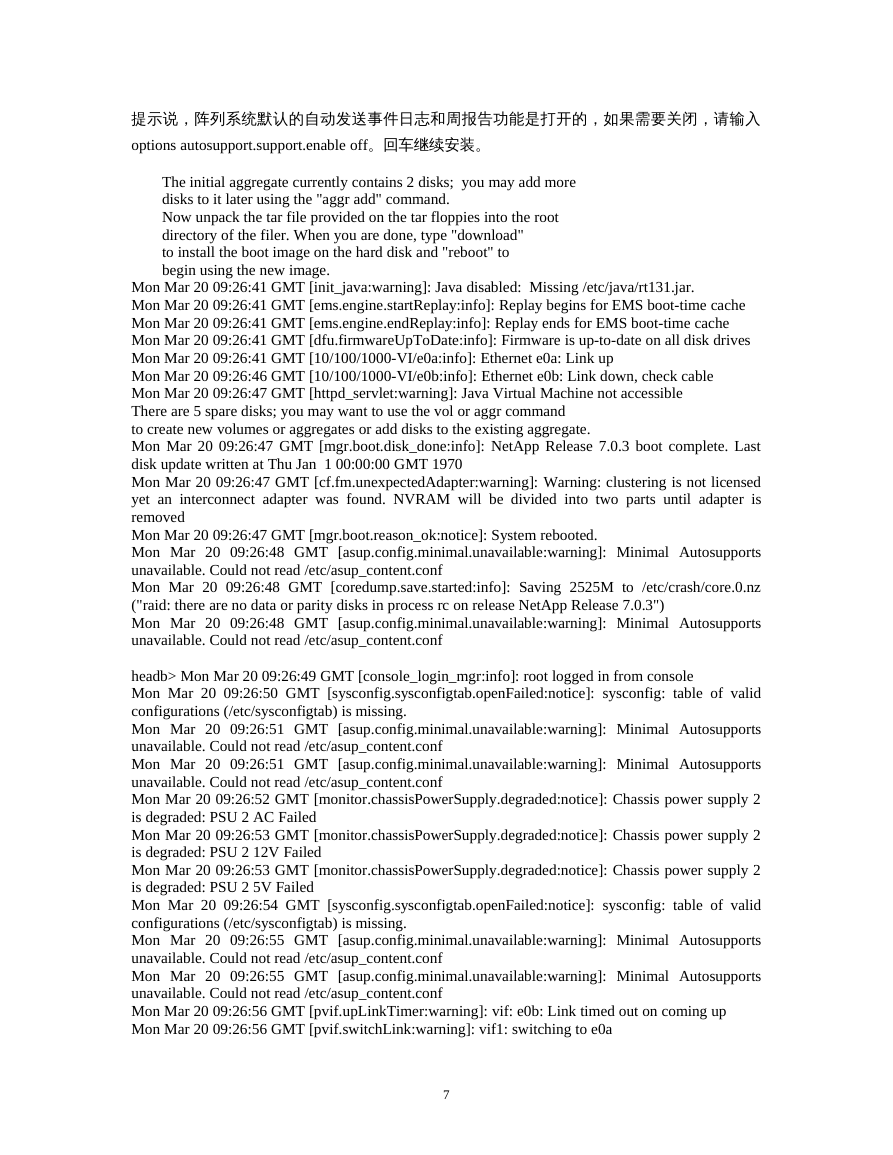
提示说,阵列系统默认的自动发送事件日志和周报告功能是打开的,如果需要关闭,请输入
options autosupport.support.enable off。回车继续安装。
The initial aggregate currently contains 2 disks; you may add more
disks to it later using the "aggr add" command.
Now unpack the tar file provided on the tar floppies into the root
directory of the filer. When you are done, type "download"
to install the boot image on the hard disk and "reboot" to
begin using the new image.
Mon Mar 20 09:26:41 GMT [init_java:warning]: Java disabled: Missing /etc/java/rt131.jar.
Mon Mar 20 09:26:41 GMT [ems.engine.startReplay:info]: Replay begins for EMS boot-time cache
Mon Mar 20 09:26:41 GMT [ems.engine.endReplay:info]: Replay ends for EMS boot-time cache
Mon Mar 20 09:26:41 GMT [dfu.firmwareUpToDate:info]: Firmware is up-to-date on all disk drives
Mon Mar 20 09:26:41 GMT [10/100/1000-VI/e0a:info]: Ethernet e0a: Link up
Mon Mar 20 09:26:46 GMT [10/100/1000-VI/e0b:info]: Ethernet e0b: Link down, check cable
Mon Mar 20 09:26:47 GMT [httpd_servlet:warning]: Java Virtual Machine not accessible
There are 5 spare disks; you may want to use the vol or aggr command
to create new volumes or aggregates or add disks to the existing aggregate.
Mon Mar 20 09:26:47 GMT [mgr.boot.disk_done:info]: NetApp Release 7.0.3 boot complete. Last
disk update written at Thu Jan 1 00:00:00 GMT 1970
Mon Mar 20 09:26:47 GMT [cf.fm.unexpectedAdapter:warning]: Warning: clustering is not licensed
yet an interconnect adapter was found. NVRAM will be divided into two parts until adapter is
removed
Mon Mar 20 09:26:47 GMT [mgr.boot.reason_ok:notice]: System rebooted.
Mon Mar 20 09:26:48 GMT [asup.config.minimal.unavailable:warning]: Minimal Autosupports
unavailable. Could not read /etc/asup_content.conf
Mon Mar 20 09:26:48 GMT [coredump.save.started:info]: Saving 2525M to /etc/crash/core.0.nz
("raid: there are no data or parity disks in process rc on release NetApp Release 7.0.3")
Mon Mar 20 09:26:48 GMT [asup.config.minimal.unavailable:warning]: Minimal Autosupports
unavailable. Could not read /etc/asup_content.conf
headb> Mon Mar 20 09:26:49 GMT [console_login_mgr:info]: root logged in from console
Mon Mar 20 09:26:50 GMT [sysconfig.sysconfigtab.openFailed:notice]: sysconfig: table of valid
configurations (/etc/sysconfigtab) is missing.
Mon Mar 20 09:26:51 GMT [asup.config.minimal.unavailable:warning]: Minimal Autosupports
unavailable. Could not read /etc/asup_content.conf
Mon Mar 20 09:26:51 GMT [asup.config.minimal.unavailable:warning]: Minimal Autosupports
unavailable. Could not read /etc/asup_content.conf
Mon Mar 20 09:26:52 GMT [monitor.chassisPowerSupply.degraded:notice]: Chassis power supply 2
is degraded: PSU 2 AC Failed
Mon Mar 20 09:26:53 GMT [monitor.chassisPowerSupply.degraded:notice]: Chassis power supply 2
is degraded: PSU 2 12V Failed
Mon Mar 20 09:26:53 GMT [monitor.chassisPowerSupply.degraded:notice]: Chassis power supply 2
is degraded: PSU 2 5V Failed
Mon Mar 20 09:26:54 GMT [sysconfig.sysconfigtab.openFailed:notice]: sysconfig: table of valid
configurations (/etc/sysconfigtab) is missing.
Mon Mar 20 09:26:55 GMT [asup.config.minimal.unavailable:warning]: Minimal Autosupports
unavailable. Could not read /etc/asup_content.conf
Mon Mar 20 09:26:55 GMT [asup.config.minimal.unavailable:warning]: Minimal Autosupports
unavailable. Could not read /etc/asup_content.conf
Mon Mar 20 09:26:56 GMT [pvif.upLinkTimer:warning]: vif: e0b: Link timed out on coming up
Mon Mar 20 09:26:56 GMT [pvif.switchLink:warning]: vif1: switching to e0a
7
�
Mon Mar 20 09:26:58 GMT [sysconfig.sysconfigtab.openFailed:notice]: sysconfig: table of valid
configurations (/etc/sysconfigtab) is missing.
Mon Mar 20 09:27:00 GMT [monitor.globalStatus.critical:CRITICAL]: Chassis temperature is too
low. Disk shelf fault.
Mon Mar 20 09:27:01 GMT [sysconfig.sysconfigtab.openFailed:notice]: sysconfig: table of valid
configurations (/etc/sysconfigtab) is missing.
1.2输入license序列号
1,通过超级终端登录,可以先执行sysconfig命令查看一下磁盘阵列的配置情况,如下;
headb> sysconfig
NetApp Release 7.0.3: Fri Dec 2 06:00:21 PST 2005
System ID: 0101174361 (headb); partner ID: ()
System Serial Number: 1071155 (headb)
System Rev: E0
slot 0: System Board
Processors: 2
Memory Size: 2048 MB
slot 0: Dual 10/100/1000 Ethernet Controller VI
e0a MAC Address: 00:a0:98:03:88:12 (auto-1000t-fd-up)
e0b MAC Address: 00:a0:98:03:88:13 (auto-unknown-down)
e0c MAC Address: 00:a0:98:03:88:10 (auto-unknown-cfg_down)
e0d MAC Address: 00:a0:98:03:88:11 (auto-unknown-cfg_down)
slot 0: FC Host Adapter 0a
8 Disks: 2176.0GB
1 shelf with ESH2
slot 0: FC Host Adapter 0b
8 Disks: 2176.0GB
1 shelf with ESH2
slot 0: Fibre Channel Target Host Adapter 0c
slot 0: Fibre Channel Target Host Adapter 0d
slot 0: SCSI Host Adapter 0e
slot 0: NetApp ATA/IDE Adapter 0f (0x000001f0)
0f.0 245MB
slot 3: NVRAM
Memory Size: 512 MB
2,使用license命令来添加所有已购买的license,如下;
headb> license add XXXXXXX
A cifs license has been installed.
Run cifs setup to enable cifs.
headb> Mon Mar 20 09:28:44 GMT [rc:notice]: cifs licensed
headb> license add XXXXXXX
A cluster license has been installed.
Clustered Failover will be enabled upon reboot.
Make sure that each individual service is licensed
on both nodes or on neither node. Remember to configure
the network interfaces for the other node.
headb> Mon Mar 20 09:29:08 GMT [rc:notice]: cluster licensed
8
�




 2023年江西萍乡中考道德与法治真题及答案.doc
 2012年重庆南川中考生物真题及答案.doc
 2013年江西师范大学地理学综合及文艺理论基础考研真题.doc
 2020年四川甘孜小升初语文真题及答案I卷.doc
 2020年注册岩土工程师专业基础考试真题及答案.doc
 2023-2024学年福建省厦门市九年级上学期数学月考试题及答案.doc
 2021-2022学年辽宁省沈阳市大东区九年级上学期语文期末试题及答案.doc
 2022-2023学年北京东城区初三第一学期物理期末试卷及答案.doc
 2018上半年江西教师资格初中地理学科知识与教学能力真题及答案.doc
 2012年河北国家公务员申论考试真题及答案-省级.doc
 2020-2021学年江苏省扬州市江都区邵樊片九年级上学期数学第一次质量检测试题及答案.doc
 2022下半年黑龙江教师资格证中学综合素质真题及答案.doc