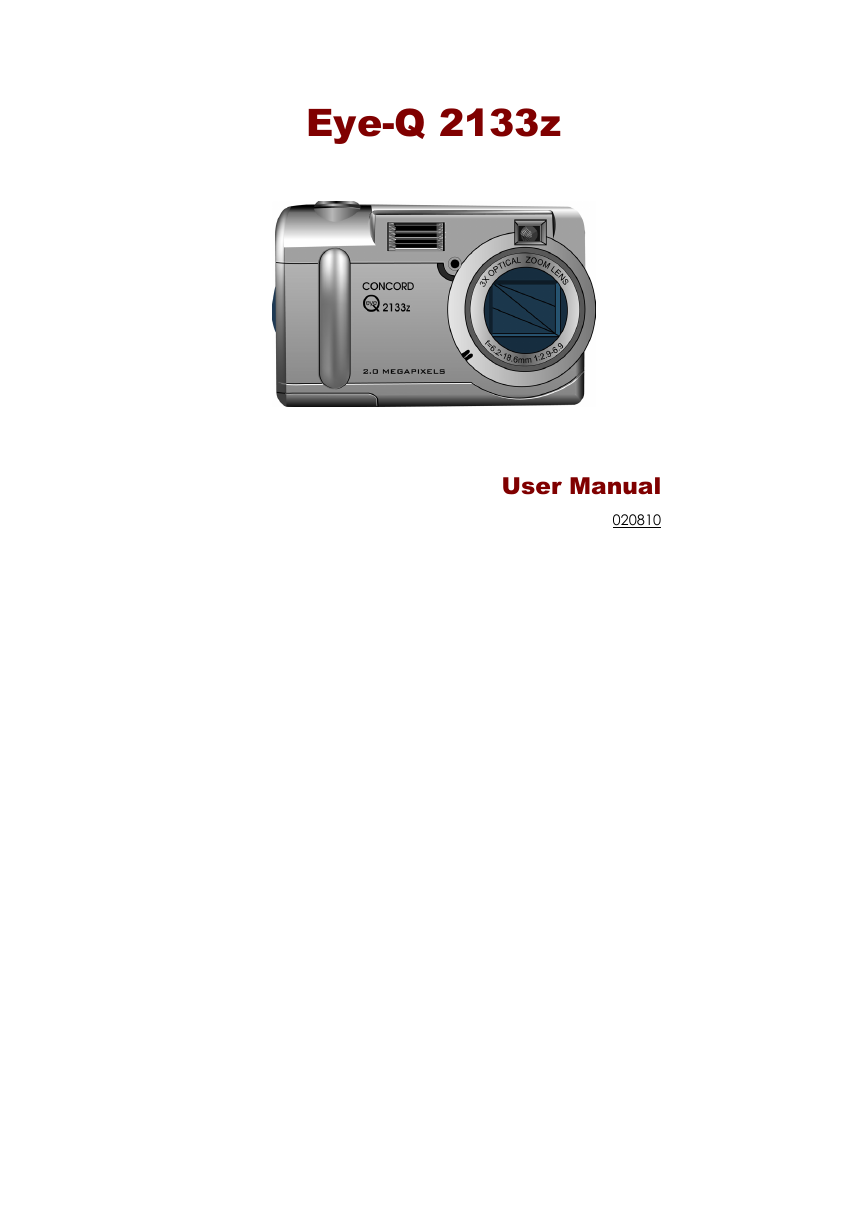
Eye-Q 2133z
User Manual
020810
�
About this manual
This manual makes using the Eye-Q 2133z as easy as possible.
Information in this document has been carefully checked for accuracy;
however, no guarantee is given to the correctness of the contents. The
information in this document is subject to change without notice.
Copyright
© Copyright 2002
This document contains proprietary information protected by copyright.
All rights are reserved.
Trademarks
All trademarks and registered trademarks are the property of their
respective owners.
Photo Express, DVD PictureShow, Cool 360 and PhotoExplorer,
Copyright 2002, Ulead Systems Inc. All Rights Reserved.
Presto! VideoWorks, Presto! Image Folio and Presto! Mr. Photo,
Copyright 2002, NewSoft Technology Corporation. All Rights Reserved.
Electronic Certification
ii
�
Table of Contents
Chapter 1 – Getting Started............................................................. 1
Features ................................................................................... 1
Safety Information.................................................................. 2
Included Components .......................................................... 3
Camera Overview.................................................................. 5
Front View................................................................... 5
Rear View ................................................................... 7
Bottom View............................................................. 10
Install the Memory Card...................................................... 11
Install the Batteries................................................................ 13
Choose a Language ........................................................... 15
Set the Time and Date......................................................... 17
Chapter 2 – Taking Pictures ........................................................... 21
Prepare the Camera ........................................................... 21
Select the Camera Mode................................................... 22
Frame the Shot...................................................................... 22
Zoom and Shoot................................................................... 23
Turn off the Camera............................................................. 25
Chapter 3 – Reviewing Your Pictures ............................................ 26
Switch to Playback Mode................................................... 26
Full-Screen Review .................................................. 26
Thumbnail Review................................................... 27
Chapter 4 – Connecting to a Computer ...................................... 28
Installing Software................................................................. 29
Making the Connection...................................................... 31
iii
�
...................................................... 32
Copying Photos to a PC
cintosh ........................................ 33
Copying Photos to a Ma
Using as a PC Camera (Windows only) ............................ 34
Chapter 5 – Mode / Operation Guide .......................................... 35
Snapshot Mode .................................................................... 35
Video Mode .......................................................................... 36
Preset Mode .......................................................................... 37
Landscape............................................................... 38
Portrait....................................................................... 38
Night Scene.............................................................. 38
Self-Timer................................................................... 39
Macro ....................................................................... 39
Playback Mode .................................................................... 40
SET UP Mode.......................................................................... 41
Delete All .................................................................. 42
Format....................................................................... 42
Quality....................................................................... 43
Buzzer ........................................................................ 44
DPOF ......................................................................... 44
Date/Time................................................................. 45
Memory Type........................................................... 45
Language................................................................. 46
Video Out................................................................. 47
era Mode................................................................ 48
ing the LCD Display................................................ 49
LCD Icon Descriptions.......................................................... 50
dix 1 – Button Function Guide............................................ 52
dix 2 – Troubleshooting....................................................... 53
Chapter 6 – Us
PC Cam
Appen
Appen
iv
�
Chap
ter 1 – Getting Started
Featu
res
• Optical Zoom (3x), Digital Zoom (3x)
• 1
600x1200 resolution (up to 2048x1536 resolution
rough interpolation)
th
• C
olor LCD viewfinder screen
• A
udio-Video Clip Recording
• USB 1.1 interface
• Auto exposure, user-defined exposure, auto focus
•
ash: Auto / Always On / Auto Flash with Auto
Fl
ash with Red-Eye Reduction / OFF
Fl
• W
hite Balance Modes: Auto/ Daylight / Shade /
ngsten / Fluorescent
Tu
• 1
0-second Timer mode
•
ll screen or Thumbnail photo review
Fu
•
SD
/MMC Card slot
1
�
Eye-Q 2133z User’s Manual
Safety Information
Do not look at the sun through the viewfinder. Viewing the sun or other
strong light source through the viewfinder could cause permanent visual
impairment.
Do not disassemble the camera. Touching the product’s internal parts
could result in injury. In the event of a malfunction, only a qualified
technician should repair the product. Should the product break open as a
result of a fall or other accident, take the product to an authorized service
center for inspection.
Avoid contact with liquid crystal. Should the LCD display break, care should
be taken to avoid injury due to broken glass and to prevent the liquid
crystal from touching the skin or entering the eyes or mouth.
Do not use in the presence of flammable gas. Using electronic equipment
near flammable gas could result in explosion or fire.
Observe caution when operating the flash. Do not use the flash close to
anyone’s eyes. This can cause temporary damage to eyesight. Particular
care should be observed when photographing infants – keep the flash at a
distance of at least 1 meter from infants’ eyes.
bserve proper precautions when handling batteries. Use only size AA
alkaline batteries. Batteries may leak or explode if handled improperly.
Remove batteries (and memory card) from the camera if you are going to
store the camera for extended periods of time. Ensure the camera is turned
off before inserting or removing batteries. Do not insert batteries backwards
or upside down. Do not disassemble batteries. Do not expose batteries to
flame or excessive heat. Do not immerse batteries in or expose to water.
Discontinue use immediately if you notice any changes in the battery such
as discoloration, deformation or leakage.
2
�
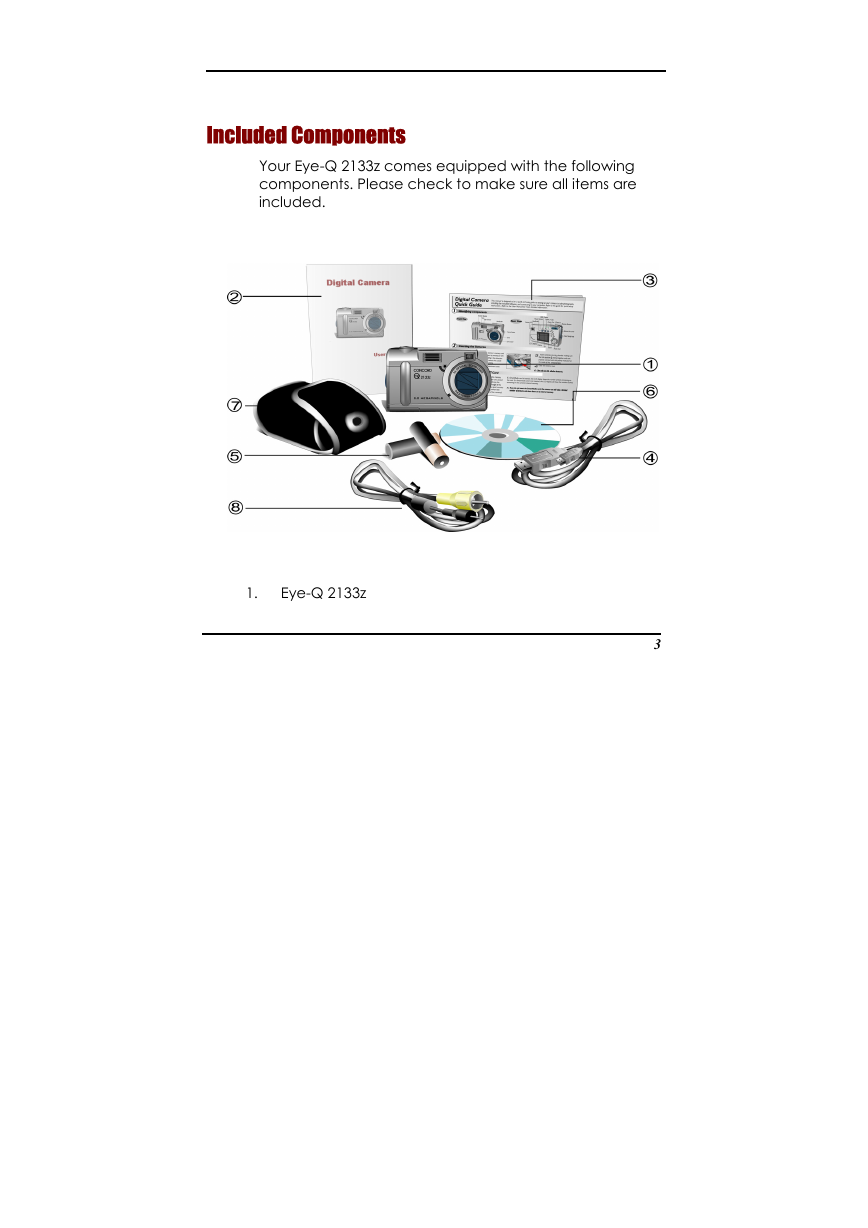
Included Components
Your Eye-Q 2133z comes equipped with the following
ponents. Please check to make sure all items are
com
ded.
inclu
1.
Eye-Q 2133z
3
�
Eye-Q 2133z User’s Manual
ce Guide
2. User’s Manual
3. Quick Referen
4. USB Cable
5.
6.
7.
8. Video Cable
Two (2) AA Alkaline Batteries
Installation CD-ROM
Soft Carrying Case
4
�




 2023年江西萍乡中考道德与法治真题及答案.doc
 2012年重庆南川中考生物真题及答案.doc
 2013年江西师范大学地理学综合及文艺理论基础考研真题.doc
 2020年四川甘孜小升初语文真题及答案I卷.doc
 2020年注册岩土工程师专业基础考试真题及答案.doc
 2023-2024学年福建省厦门市九年级上学期数学月考试题及答案.doc
 2021-2022学年辽宁省沈阳市大东区九年级上学期语文期末试题及答案.doc
 2022-2023学年北京东城区初三第一学期物理期末试卷及答案.doc
 2018上半年江西教师资格初中地理学科知识与教学能力真题及答案.doc
 2012年河北国家公务员申论考试真题及答案-省级.doc
 2020-2021学年江苏省扬州市江都区邵樊片九年级上学期数学第一次质量检测试题及答案.doc
 2022下半年黑龙江教师资格证中学综合素质真题及答案.doc