2.2 实验1.2 虚拟机VM软件安装
1、实验目的
在配备 Windows 操作系统 Host 机上,安装虚拟机软件, 进行 BIOS 设定, 对硬盘进
行分区和格式化,安装 Linux 操作系统,以便在一台机器上模拟出多种操作系统运行环境。
可选的虚拟机软件有:VirtualBox,VMware For Windows,Virtual PC for Windows
通过本实验,进一步掌握课堂上所讲的虚拟机的概念。
2、实验内容
实验前的准备:
1、 获取安装介质
2、 熟悉虚拟机的操作
安装步骤(以 Vmware 为例):
1、 虚拟机软件的安装及设置
(1)、安装 VMware,输入虚拟机序列号
(2)、创建一个新的虚拟机。
第一步:“File”->“New Virtual Machine”->“Custom”->“Next”->操作系统那栏选
Linux->“Next”。
第二步:设置虚拟机名以及配置文件 ->“Next”。
第三步:设置虚拟机的内存大小。
第四步:网络连接,使用默认设置->“Next”。
第五步:磁盘设定,如果你不是想让红旗 Linux 桌面 4.0 终生运行在虚拟机里,请选
“Use a physical disk”,让虚拟机与当前系统共用同一硬盘,而不是虚拟出一个硬盘。有一定
风险,但是只要不胡乱操作,风险不大->“Next”。
第六步:指定要使用的硬盘->“Next”,设置配置文件的位置->“Finish”,忽略那个风险
提示。
(3)、光驱软驱默认情况下也是和当前系统共用的,使用 iso 文件引导虚拟机,则“Edit virtual
machine settings”,在左侧列表中选“DVD/CD-ROM”那项,再在右侧选“Use ISO image:”,指
定安装红旗 Linux 桌面 4.1 的 iso 文件。
(4)、虚拟机默认不是从光盘引导的,要在它的 BIOS 里改,得先“Start this virtual machine”。
如果出现“Do not forget to ...”的提示框,直接点“OK”。待 VMware 窗口中一大块变黑的时候,
赶快用鼠标点那块黑,那块黑是虚拟机的屏幕。现在你的鼠标和键盘就转为控制虚拟机了。
注意虚拟机屏幕下方的进度条,在走完之前,按“F2”键进行 BIOSs 设定。
(5)、用键盘的左右箭头键选中“Boot”标签,用上下箭头键选中“CD-ROM”。同时用“Shift”
键和“+”键,把“CD-ROM”拎到顶上。用键盘的左右箭头键选中“Exit”标签,用上下箭头键选
中“Exit Saving Changes”,回车->“YES”,等待虚拟机重新启动。同时按“Ctrl”和“Alt”键,鼠
标和键盘就从虚拟机中解脱出来了。看到进度条的时候按 VMware 窗口左上方的红方块,停
掉虚拟机。
�
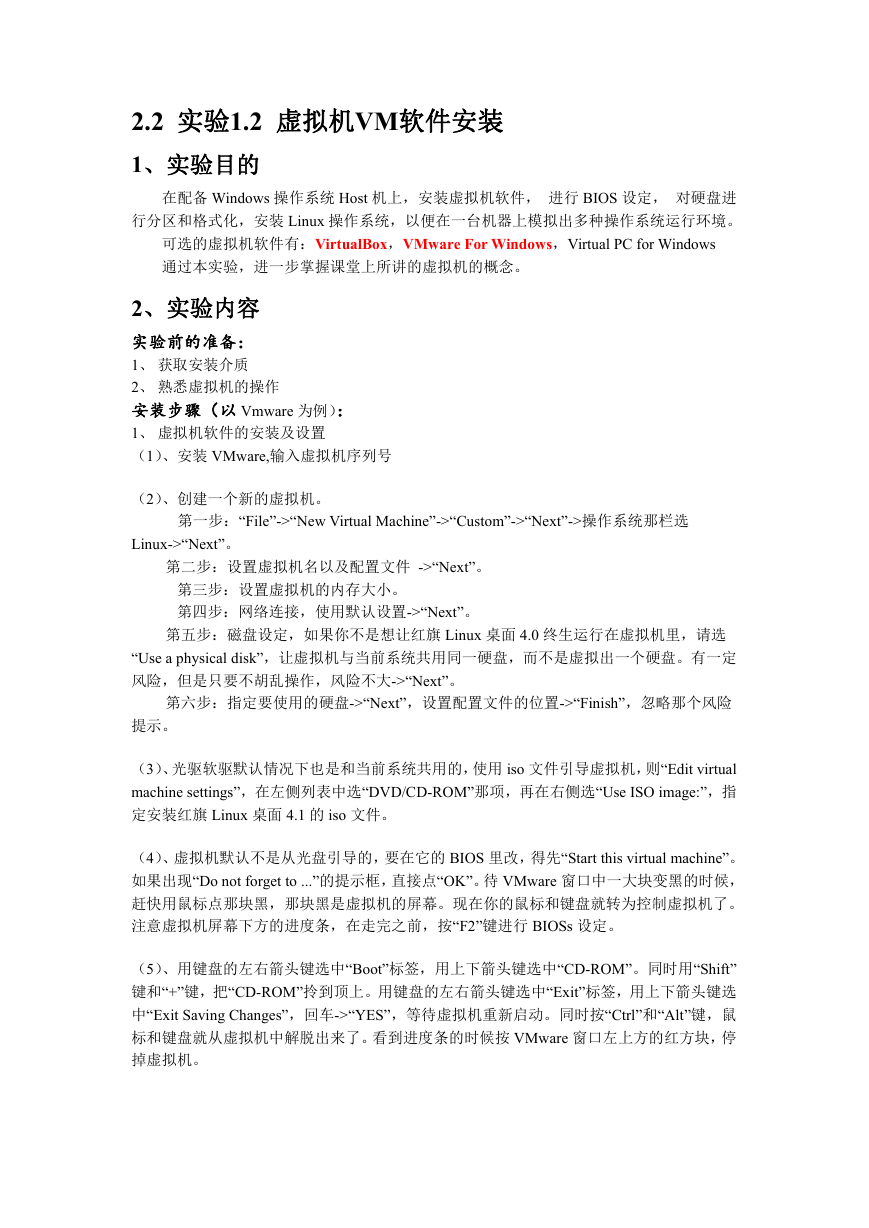
3、实验结果
实验2.1 观察Linux行为
1、实验目的
学习 linux 内核、进程、存储和其他资源的一些重要特性。通过使用/proc 文件系统接
口, 编写一个程序检查反映机器平衡负载、进程资源利用率方面的各种内核值, 学会使用
/proc 文件系统这种内核状态检查机制。
2、实验内容
编写一个默认版本的程序通过检查内核状态报告 Linux 内核行为。程序应该在 stdout
上打印以下值:
1,CPU 类型和型号;
2,所使用的 Linux 内核版本;
�
3,从系统最后一次启动以来已经经历了多长时间(天,小时和分钟);
4,总共有多少 CPU 时间执行在用户态,系统态,空闲态;
5,配置内存数量;当前可用内存数,磁盘读写请求数;
6,内核上下文转换数;
7,系统启动到目前创建了多少进程。
设计思路:
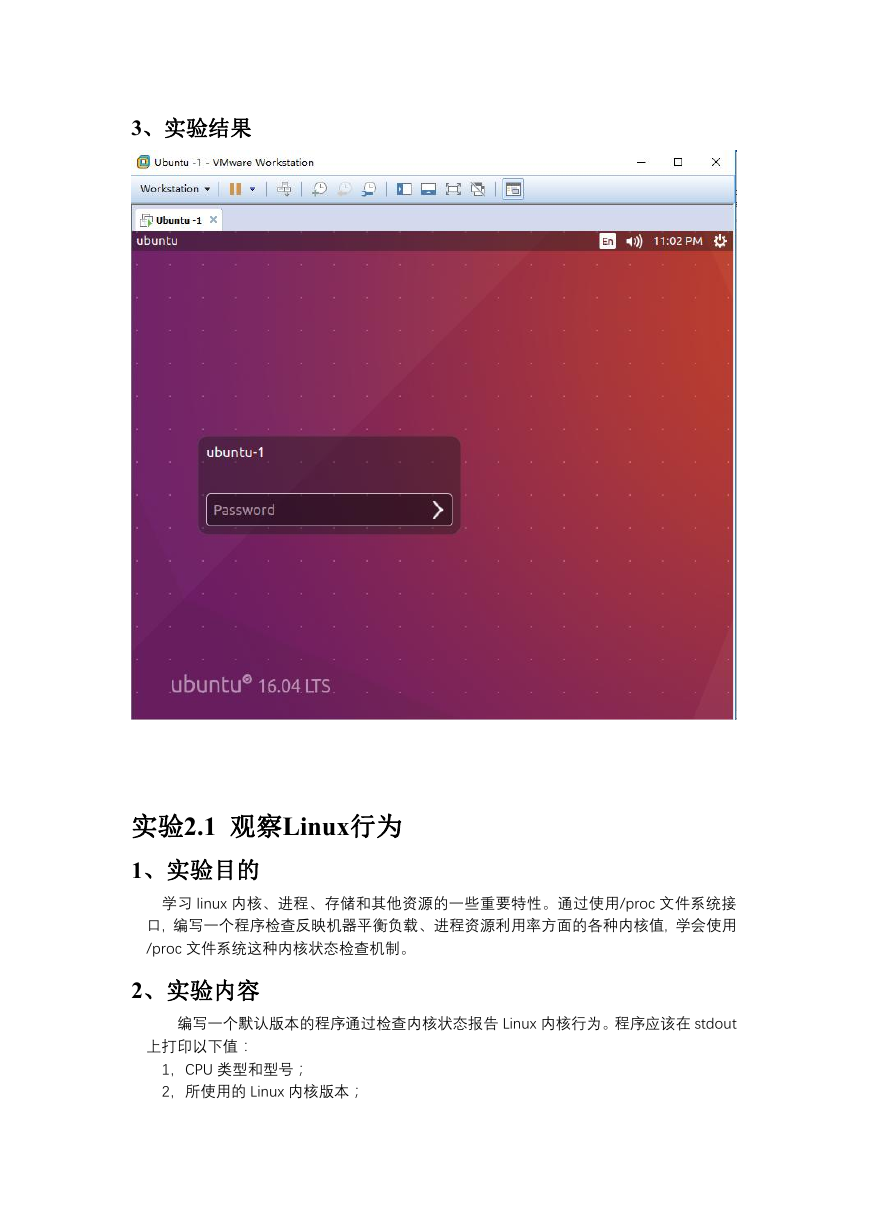
首先得到命令行,再解释命令行,然后到/proc 查找文件,最后执行命令。
需要用到的文件如下:
/etc/hostname
/proc/cpuinfo
/proc/version
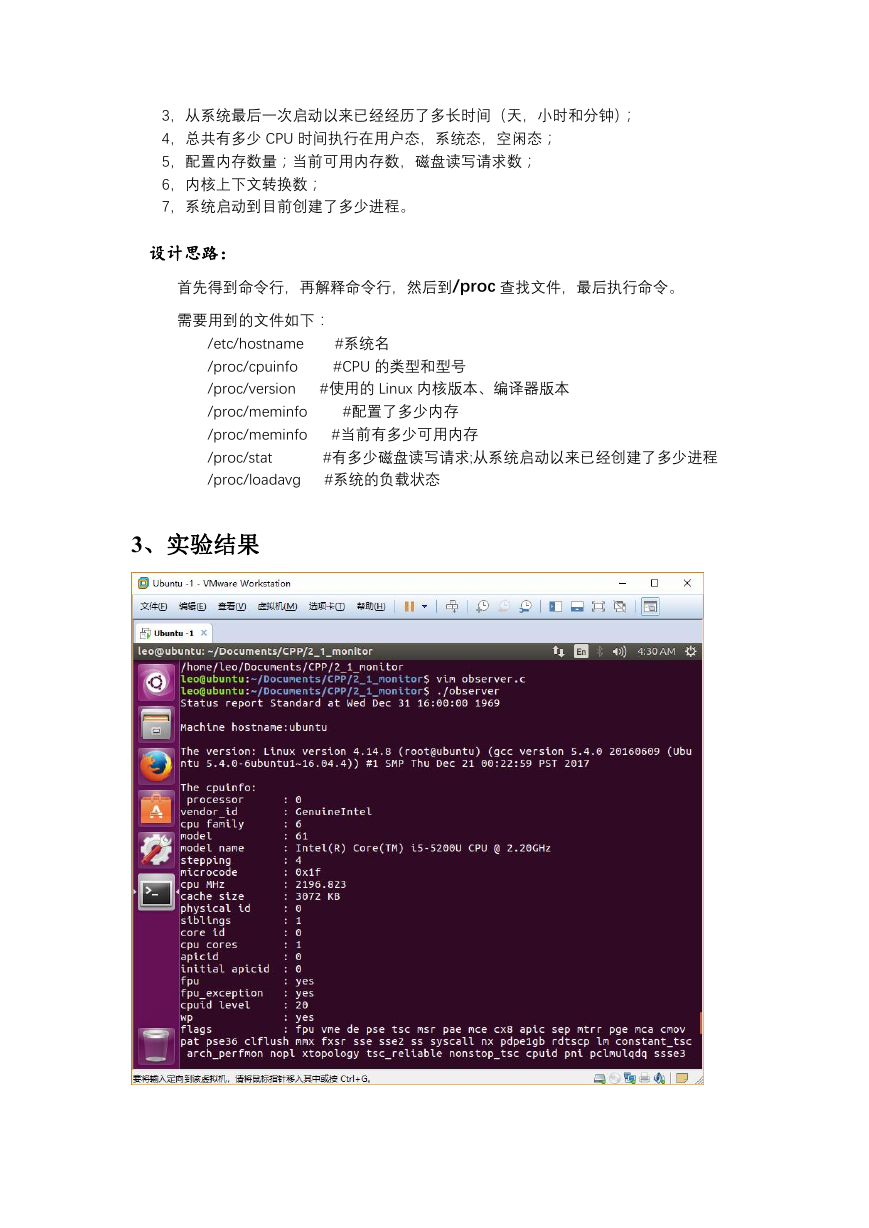
/proc/meminfo
/proc/meminfo
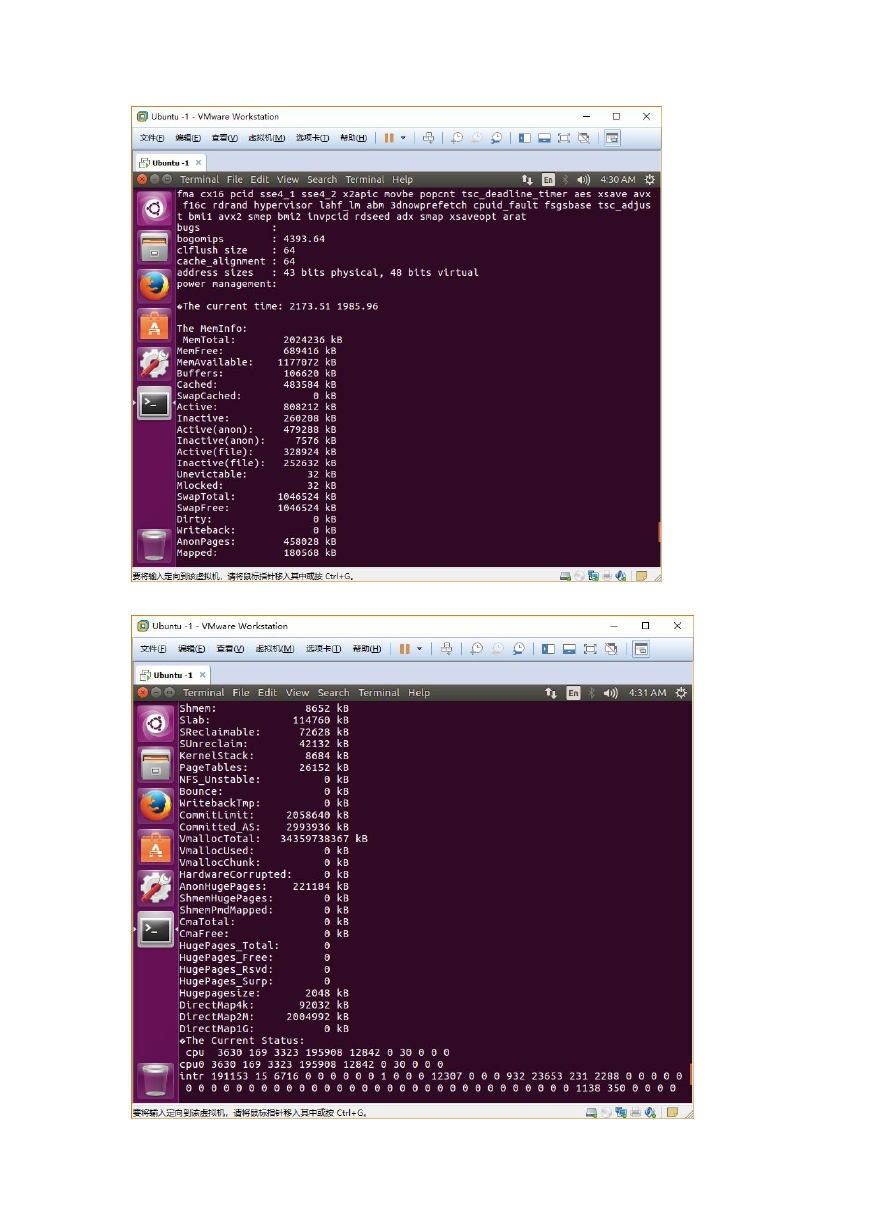
/proc/stat
/proc/loadavg
#系统名
#CPU 的类型和型号
#使用的 Linux 内核版本、编译器版本
#配置了多少内存
#当前有多少可用内存
#有多少磁盘读写请求;从系统启动以来已经创建了多少进程
#系统的负载状态
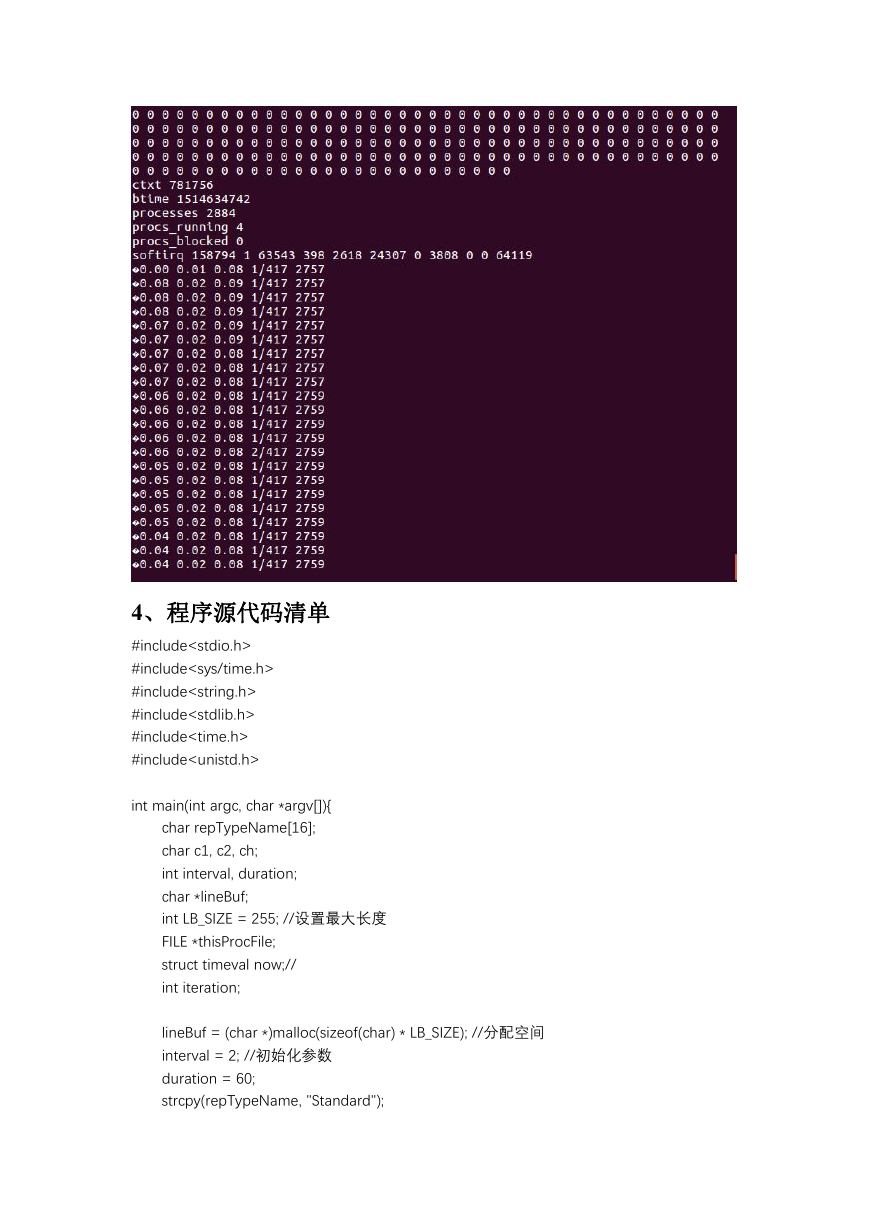
3、实验结果
�
�
4、程序源代码清单
#include
#include
#include
#include
#include
#include
int main(int argc, char *argv[]){
char repTypeName[16];
char c1, c2, ch;
int interval, duration;
char *lineBuf;
int LB_SIZE = 255; //设置最大长度
FILE *thisProcFile;
struct timeval now;//
int iteration;
lineBuf = (char *)malloc(sizeof(char) * LB_SIZE); //分配空间
interval = 2; //初始化参数
duration = 60;
strcpy(repTypeName, "Standard");
�
if(argc < 1){//
sscanf(argv[1], "%c%c", &c1, &c2);
if(c1 != '-'){
fprintf(stderr, "usage:ksamp [-s][-l int dur]\n");
exit(1);
}
if(c2 == 's'){
strcpy(repTypeName, "Short");
}
if(c2 == 'l'){
strcpy(repTypeName, "Long");
interval = atoi(argv[2]);
duration = atoi(argv[3]);
}
}
//获取时间
printf("Status report %s at %s\n", repTypeName, ctime(&(now.tv_sec)));
//读取 hostname
thisProcFile = fopen("/etc/hostname", "r");
memset(lineBuf, 0, LB_SIZE);
fgets(lineBuf, LB_SIZE - 1, thisProcFile);
printf("Machine hostname:%s\n", lineBuf);
fclose(thisProcFile);
//读取版本信息
thisProcFile = fopen("/proc/version", "r");
memset(lineBuf, 0, LB_SIZE);
fgets(lineBuf, LB_SIZE - 1, thisProcFile);
printf("The version: %s\n", lineBuf);
fclose(thisProcFile);
//读取 CPU 信息
printf("The cpuinfo:\n ");
thisProcFile = fopen("/proc/cpuinfo", "r");
while(!feof(thisProcFile)){
putchar(fgetc(thisProcFile));
}
fclose(thisProcFile);
//读取当前时间
thisProcFile = fopen("/proc/uptime", "r");
memset(lineBuf, 0, LB_SIZE);
fgets(lineBuf, LB_SIZE - 1, thisProcFile);
printf("The current time: %s\n", lineBuf);
fclose(thisProcFile);
//读取内存信息
printf("The MemInfo:\n ");
�
thisProcFile = fopen("/proc/meminfo", "r");
while(!feof(thisProcFile)){
putchar(fgetc(thisProcFile));
}
fclose(thisProcFile);
//当前状态
printf("The Current Status:\n ");
thisProcFile = fopen("/proc/stat", "r");
while(!feof(thisProcFile)){
putchar(fgetc(thisProcFile));
}
fclose(thisProcFile);
#读取系统负载信息
iteration = 0;
while(iteration < duration){
sleep(interval);
thisProcFile = fopen("/proc/loadavg", "r");
while(!feof(thisProcFile)){
putchar(fgetc(thisProcFile));
}
fclose(thisProcFile);
iteration += interval;
}
return 0;
}
3.2 实验2.2 内核定时器
1、实验目的
学习掌握内核定时器的实现原理和方法,建立一种用户空间机制来测量多线程程序的执
行时间。
2、实验内容
A、 用定时器 ITIMER_REAL 实现 gettimeofday 的功能。使其一秒钟产生一个信号,
计算已经过的秒数。
设计思路:
设 置 定 时 器 ITIMER_REAL 间 隔 为 一 秒 钟 。 并 为 计 时 到 时 设 定 信 号 处 理 程 序 , 即
singal(SIGALRM,…),使其输出当前所记时间。
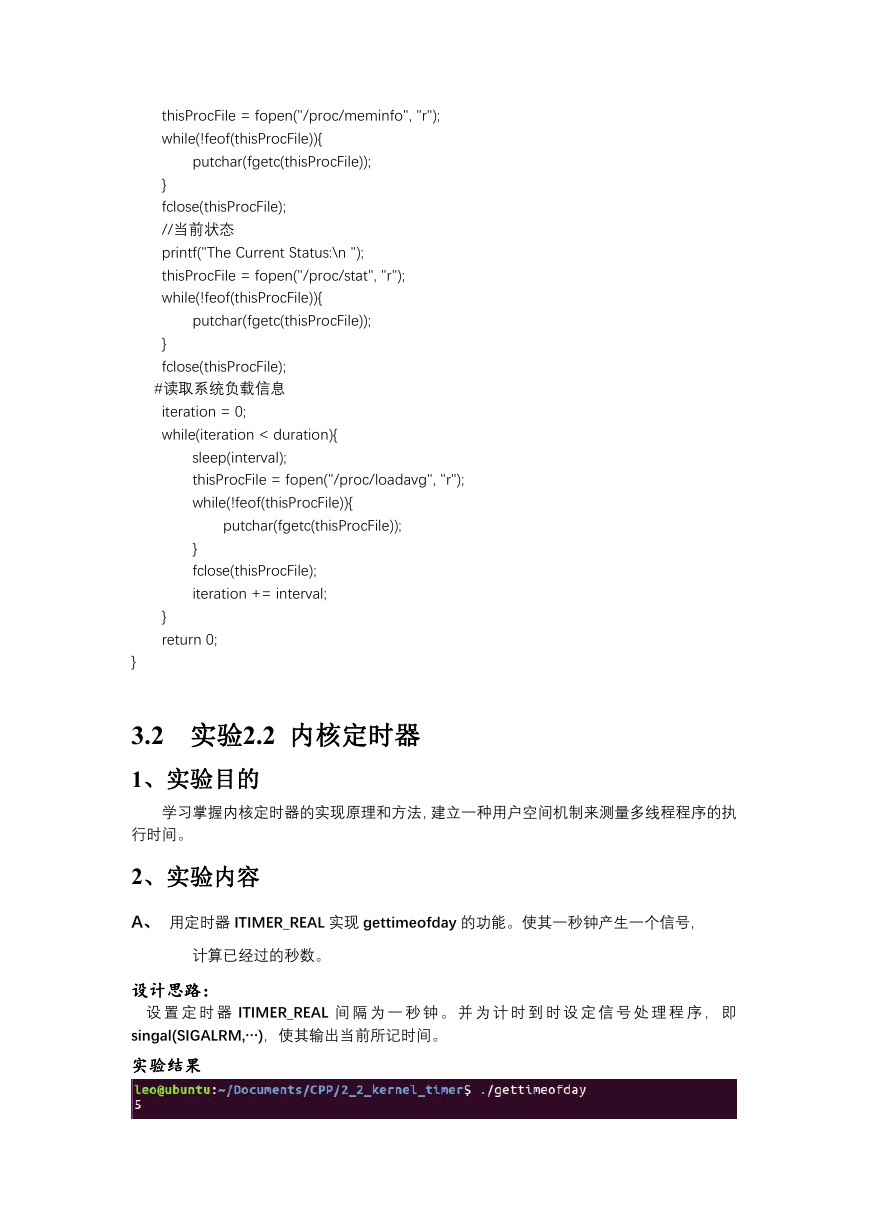
实验结果
�
程序源代码清单
#include
#include
#include
static void sighandle(int);
static int second = 0;
int main(){
struct itimerval v;
signal(SIGALRM,sighandle);
v.it_interval.tv_sec = 1;
v.it_interval.tv_usec = 0;
v.it_value.tv_sec = 1;
v.it_value.tv_usec = 0;
setitimer(ITIMER_REAL,&v,NULL);
for(;;);
}
static void sighandle(int s)
{second++;
printf("%d\r",second);
fflush(stdout);
}
B、记录一个进程运行时所占用的 real time, cpu time,user time ,kernel time。
设计思路:
任务开始前设置好定时器 ITIMER_REAL,ITIMER_VIRTUAL,ITIMER_PROF,即其相应的
信号处理程序。在任务执行过程中内核定时器通过产生等间隔的信号来记录进程所需的各种
时间参量,并在任务结束后打印出来。
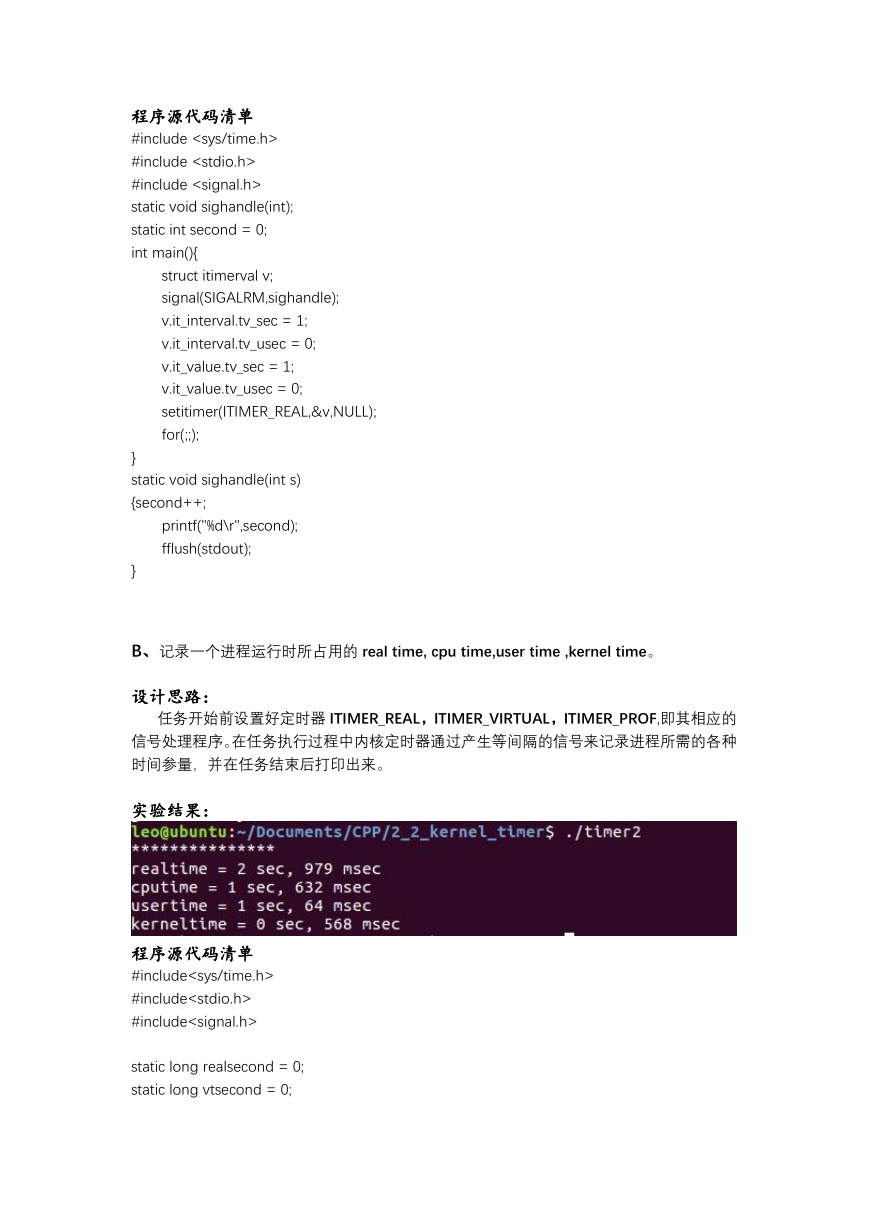
实验结果:
程序源代码清单
#include
#include
#include
static long realsecond = 0;
static long vtsecond = 0;
�


 2023年江西萍乡中考道德与法治真题及答案.doc
 2012年重庆南川中考生物真题及答案.doc
 2013年江西师范大学地理学综合及文艺理论基础考研真题.doc
 2020年四川甘孜小升初语文真题及答案I卷.doc
 2020年注册岩土工程师专业基础考试真题及答案.doc
 2023-2024学年福建省厦门市九年级上学期数学月考试题及答案.doc
 2021-2022学年辽宁省沈阳市大东区九年级上学期语文期末试题及答案.doc
 2022-2023学年北京东城区初三第一学期物理期末试卷及答案.doc
 2018上半年江西教师资格初中地理学科知识与教学能力真题及答案.doc
 2012年河北国家公务员申论考试真题及答案-省级.doc
 2020-2021学年江苏省扬州市江都区邵樊片九年级上学期数学第一次质量检测试题及答案.doc
 2022下半年黑龙江教师资格证中学综合素质真题及答案.doc