JamCam Layout 11/3/02 2:41 pm Page 1
USER’S GUIDE
�
JamCam Layout 11/3/02 2:41 pm Page 2
Welcome
Getting Started
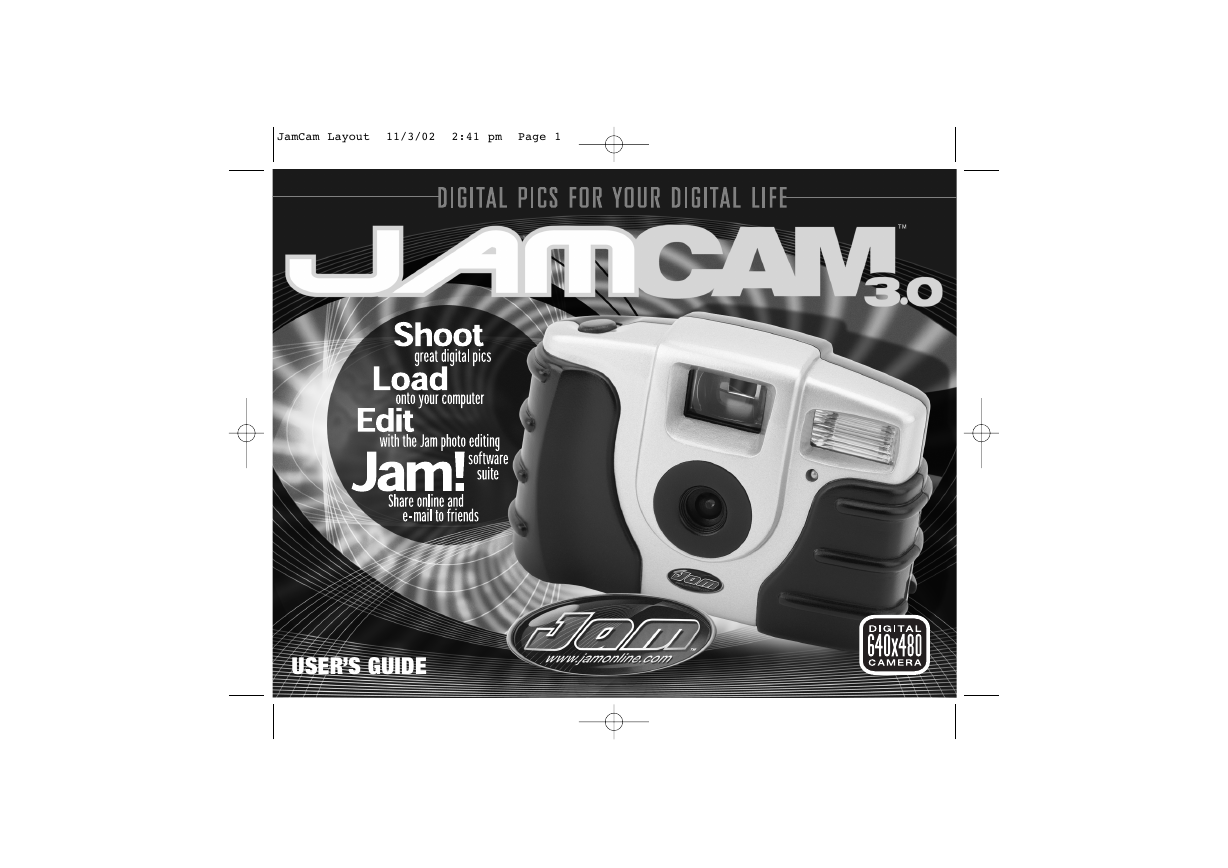
Thank you for purchasing JamCam 3.0, the
digital camera for your digital life.
JamCam 3.0 makes getting connected to the
digital photo revolution as easy as 1-2-3-JAM! In just
a few simple steps, you’ll be taking high-quality digital
pictures, loading them onto your computer, editing,
and sharing them online with family and friends.
It’s that easy!
This manual provides a step-by-step guide that
will get you up and running with JamCam 3.0 in no
time. Don’t forget to visit www.jamonline.com
for photo sharing, activities, and updates. You can even
order high-quality prints of your JamCam 3.0 pics.
Introduce the world to the digital you
with JamCam 3.0!
It’s time to get started using your JamCam 3.0.
You’ll find the following sections in this manual:
great digital pics
onto your computer
1
Shoot ..................................3
2
Load ......................................5
3
Edit ..........................................8
Jam!...............................11
4
with the Jam photo editing software suite
Share online and e-mail to friends
Before you can get started, JamCam 3.0 does
require a 9V alkaline battery. To insert the battery,
first pop open the compartment door on the
bottom of your JamCam 3.0 and pull out the
connectors. Then, line up the connectors, firmly
connect the battery, insert the battery into the
compartment, and close the door.
For more battery information see page 15.
Now, let’s get jamming!
�
JamCam Layout 11/3/02 2:41 pm Page 3
Package Contents
USB
Serial
The JamCam 3.0 package comes with all the tools
you need to snap, edit, and print quality digital photos
– no film, no developing time. The following components
are the essential parts to the JamCam 3.0 photo suite:
Digital Camera
The JamCam 3.0 digital camera is durable, portable,
and easy-to-use. It features a flash, self-timer, two
resolution settings, and a MultiMediaCard slot
(to add picture storage capacity).
See pages 2-4 for more details.
Software
The JamCam 3.0 software suite, featuring JamCam
software and Adobe PhotoDeluxe®, makes digital
photography easy and fun. The JamCam 3.0
software includes essential editing tools and links
to fun projects, online photo sharing scrapbooks,
and high-quality printing.
See pages 6-13 for more details.
Cables
JamCam 3.0 comes with both a USB and a serial
cable. You can choose either one to connect your
camera to your computer.
See pages 5-6 for use and connection details.
1
�
JamCam Layout 11/3/02 2:41 pm Page 4
JamCamTM3.0
Shutter Button
LED - indicates picture
has been taken
Flash
Viewfinder
MultiMediaCard Slot
Self-Timer Indicator Light
Carrying Strap
USB Port
(recommended)
Serial Port
LCD
(Liquid Crystal Display)
On/Off/Select button
has two functions:
1. To turn the camera
on and off
2. To change the menu
settings
Battery
Compartment
(underneath)
Menu button scrolls through
the 5 camera options:
1. Self-timer on/off
2. Flash on/off automatic
3. Resolution setting
4. Clear all pictures
5. Take a picture
2
�
JamCam Layout 11/3/02 2:41 pm Page 5
1 Shoot
great digital pics
It’s easy to get started taking great photos with
JamCam 3.0. Here are some important tips and an
overview of the camera functions.
Taking Pictures with JamCam 3.0
To take a picture, aim through
the viewfinder and press the
shutter button until the red
LED light goes on. While the
light is on, the subject and the
camera should stay steady. When the red LED light
goes off, the picture has been stored.
Click! Click! – Tips for better pics
1. Hold that pose! – Digital cameras take a few
seconds to adjust for lighting. Hold your camera
still until you see the red LED light go off.
2. Get out of my face! – JamCam 3.0 takes its best
pictures at 3 to 8 feet away from the subject.
Indoors and Outdoors – No matter what the
lighting, JamCam 3.0 has the situation covered.
The built-in flash can automatically assess the
setting and flash if necessary.
For more information on how to improve your photos after
you have taken them, see pages 6-10.
Additional features and functions
of the JamCam 3.0:
Using the Self-Timer
Press the Menu button until the self-
timer icon is selected. Use the
On/Off/Select button to turn the
self-timer on or off. After you press the
3
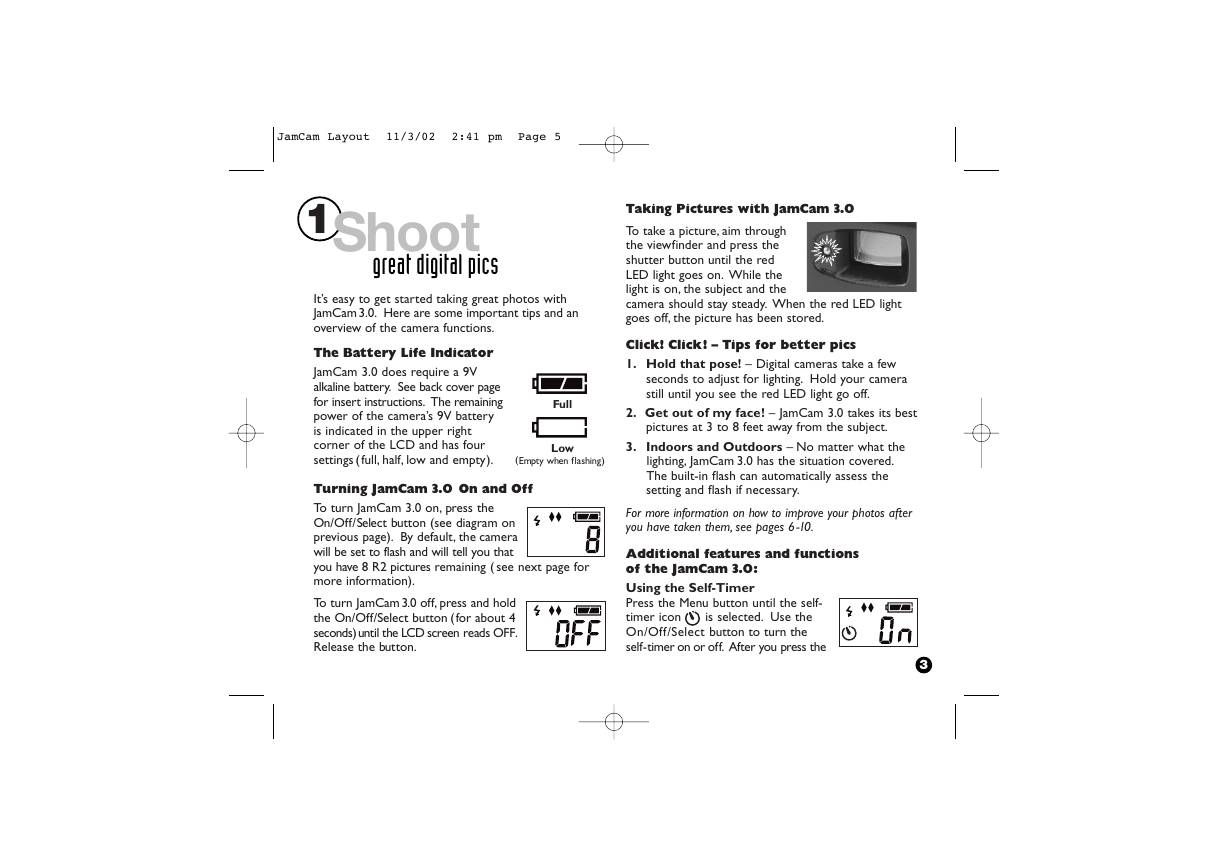
The Battery Life Indicator
JamCam 3.0 does require a 9V
alkaline battery. See back cover page
for insert instructions. The remaining
power of the camera’s 9V battery
is indicated in the upper right
corner of the LCD and has four
settings (full, half, low and empty).
Full
Low
(Empty when flashing)
3.
Turning JamCam 3.0 On and Off
To turn JamCam 3.0 on, press the
On/Off/Select button (see diagram on
previous page). By default, the camera
will be set to flash and will tell you that
you have 8 R2 pictures remaining ( see next page for
more information).
To turn JamCam 3.0 off, press and hold
the On/Off/Select button (for about 4
seconds)until the LCD screen reads OFF.
Release the button.
�
JamCam Layout 11/3/02 2:41 pm Page 6
shutter button, the Self-Timer Indicator light on the front
of the camera will flash at increasingly rapid rates before
the camera takes a picture. The total time is 10 seconds.
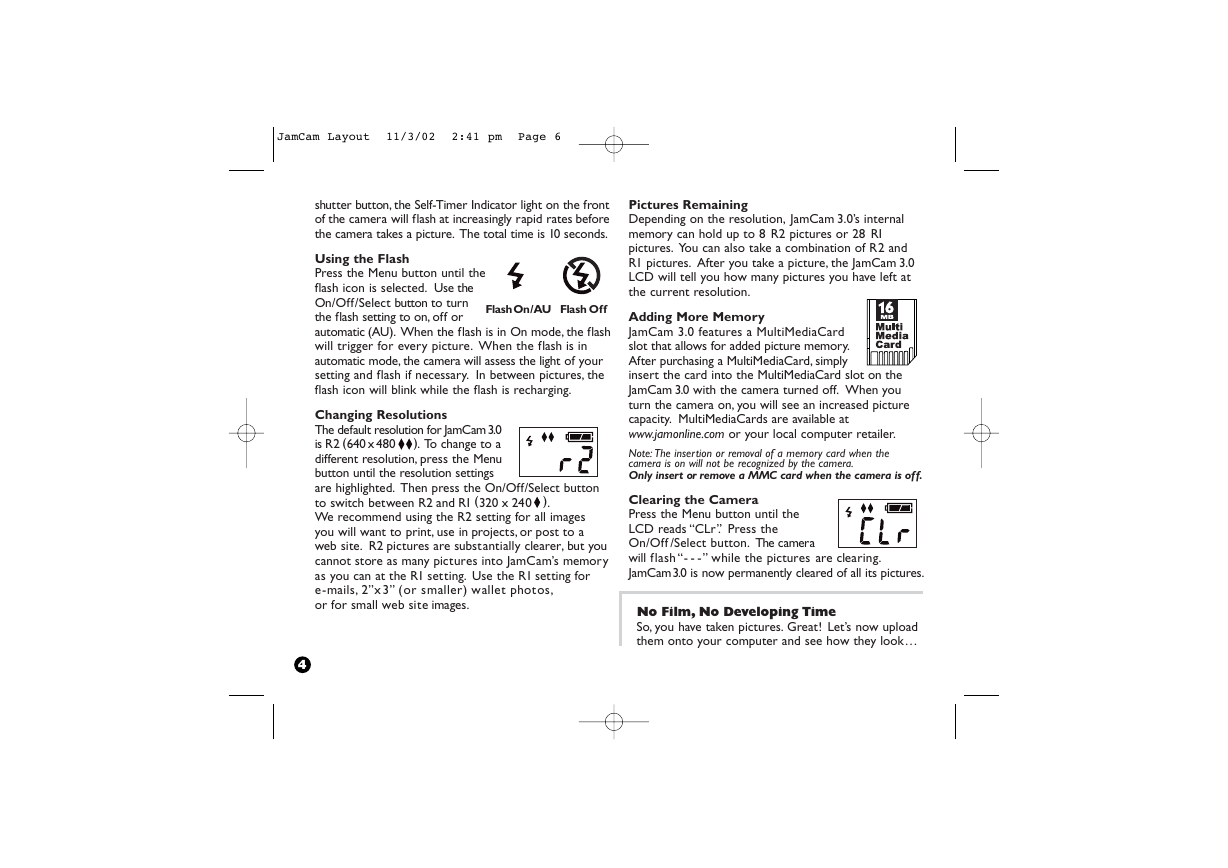
Using the Flash
Press the Menu button until the
flash icon is selected. Use the
On/Off/Select button to turn
the flash setting to on, off or
automatic (AU). When the flash is in On mode, the flash
will trigger for every picture. When the flash is in
automatic mode, the camera will assess the light of your
setting and flash if necessary.
In between pictures, the
flash icon will blink while the flash is recharging.
FlashOn/AU Flash Off
Changing Resolutions
The default resolution for JamCam 3.0
is R2 (640 x 480
). To change to a
different resolution, press the Menu
button until the resolution settings
are highlighted. Then press the On/Off/Select button
to switch between R2 and R1 (320 x 240 ).
We recommend using the R2 setting for all images
you will want to print, use in projects, or post to a
web site. R2 pictures are substantially clearer, but you
cannot store as many pictures into JamCam’s memory
as you can at the R1 setting. Use the R1 setting for
e-mails, 2”x 3” (or smaller) wallet photos,
or for small web site images.
Pictures Remaining
Depending on the resolution, JamCam 3.0’s internal
memory can hold up to 8 R2 pictures or 28 R1
pictures. You can also take a combination of R2 and
R1 pictures. After you take a picture, the JamCam 3.0
LCD will tell you how many pictures you have left at
the current resolution.
Adding More Memory
JamCam 3.0 features a MultiMediaCard
slot that allows for added picture memory.
After purchasing a MultiMediaCard, simply
insert the card into the MultiMediaCard slot on the
JamCam 3.0 with the camera turned off. When you
turn the camera on, you will see an increased picture
capacity. MultiMediaCards are available at
www.jamonline.com or your local computer retailer.
Note: The insertion or removal of a memory card when the
camera is on will not be recognized by the camera.
Only insert or remove a MMC card when the camera is off.
Clearing the Camera
Press the Menu button until the
LCD reads “CLr”. Press the
On/Off /Select button. The camera
will flash “- - -” while the pictures are clearing.
JamCam3.0 is now permanently cleared of all its pictures.
No Film, No Developing Time
So, you have taken pictures. Great! Let’s now upload
them onto your computer and see how they look…
4
�
JamCam Layout 11/3/02 2:41 pm Page 7
2 Load
onto your computer
Once you have taken some great JamCam 3.0 digital
pictures, you will want to load them onto your computer
and see the results. Follow the instructions below:
Windows
( For Macintosh instructions turn to page 14)
Step 1: Installing your software
The first thing you’ll need to do is install the camera
driver and photo editing software from the CD.
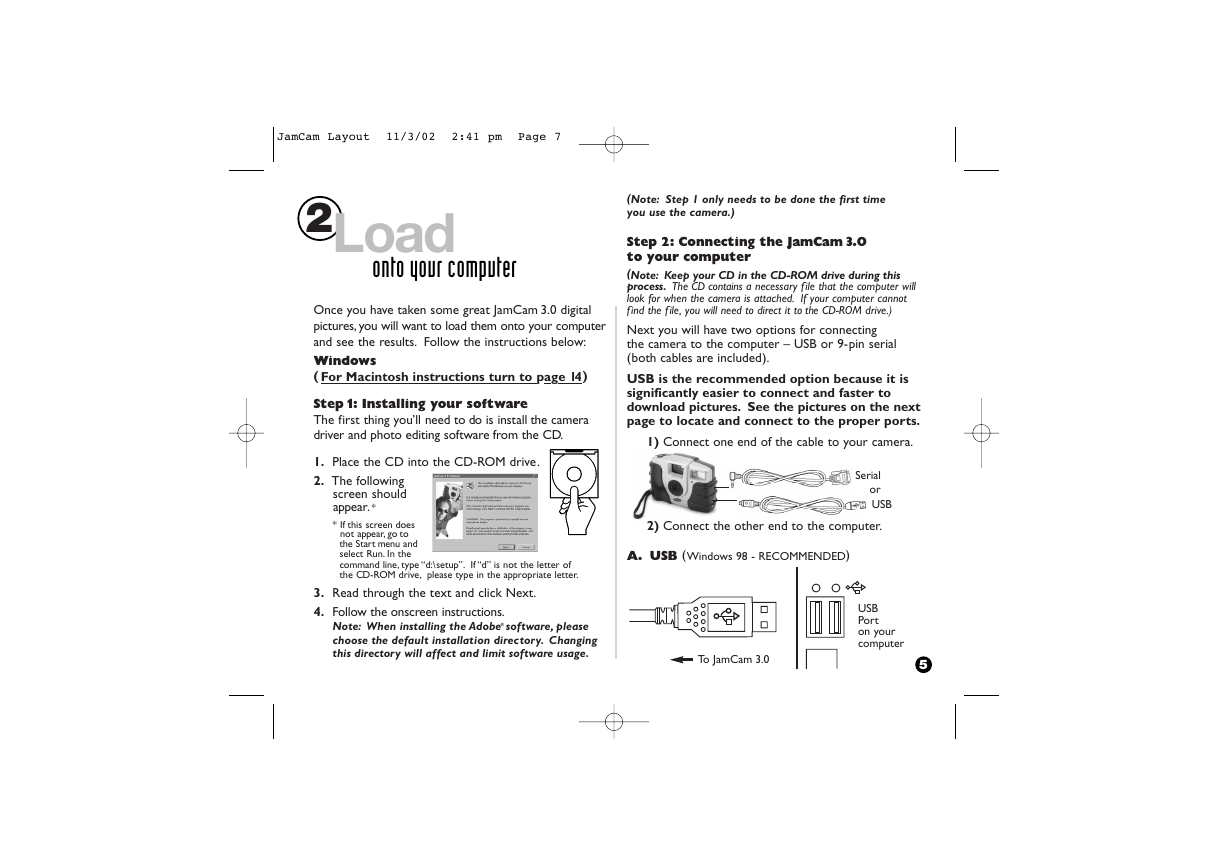
1. Place the CD into the CD-ROM drive.
2. The following
screen should
appear. *
* If this screen does
not appear, go to
the Start menu and
select Run. In the
command line, type “d:\setup”.
If “d” is not the letter of
the CD-ROM drive, please type in the appropriate letter.
3. Read through the text and click Next.
4. Follow the onscreen instructions.
Note: When installing the Adobe® software, please
choose the default installation directory. Changing
this directory will affect and limit software usage.
(Note: Step 1 only needs to be done the first time
you use the camera.)
If your computer cannot
Step 2: Connecting the JamCam 3.0
to your computer
(Note: Keep your CD in the CD-ROM drive during this
process. The CD contains a necessary file that the computer will
look for when the camera is attached.
find the file, you will need to direct it to the CD-ROM drive.)
Next you will have two options for connecting
the camera to the computer – USB or 9-pin serial
(both cables are included).
USB is the recommended option because it is
significantly easier to connect and faster to
download pictures. See the pictures on the next
page to locate and connect to the proper ports.
1) Connect one end of the cable to your camera.
Serial
or
USB
2) Connect the other end to the computer.
A. USB (Windows 98 - RECOMMENDED)
To JamCam 3.0
USB
Port
on your
computer
5
�
JamCam Layout 11/3/02 2:41 pm Page 8
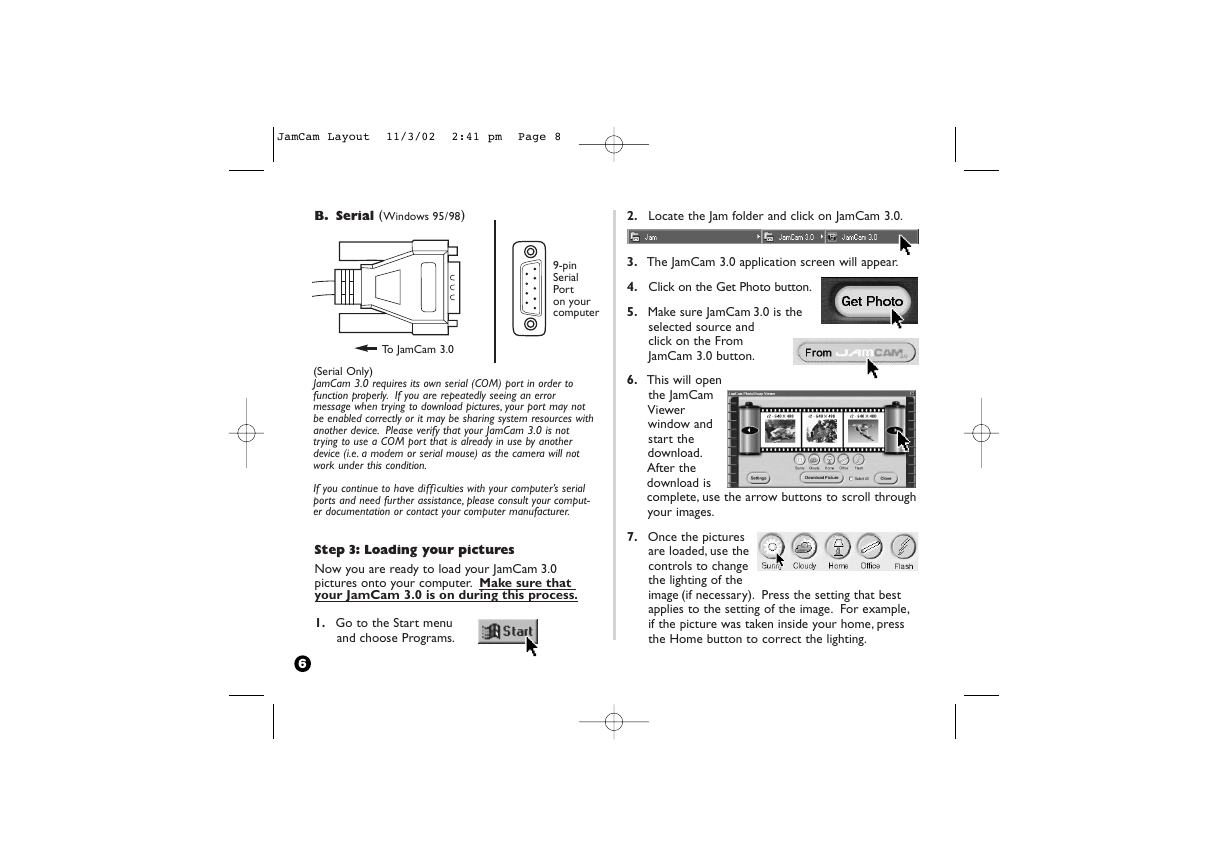
B. Serial (Windows 95/98)
2. Locate the Jam folder and click on JamCam 3.0.
9-pin
Serial
Port
on your
computer
To JamCam 3.0
If you are repeatedly seeing an error
(Serial Only)
JamCam 3.0 requires its own serial (COM) port in order to
function properly.
message when trying to download pictures, your port may not
be enabled correctly or it may be sharing system resources with
another device. Please verify that your JamCam 3.0 is not
trying to use a COM port that is already in use by another
device (i.e. a modem or serial mouse) as the camera will not
work under this condition.
If you continue to have difficulties with your computer’s serial
ports and need further assistance, please consult your comput-
er documentation or contact your computer manufacturer.
Step 3: Loading your pictures
Now you are ready to load your JamCam 3.0
pictures onto your computer. Make sure that
your JamCam 3.0 is on during this process.
1. Go to the Start menu
and choose Programs.
6
3. The JamCam 3.0 application screen will appear.
4. Click on the Get Photo button.
5. Make sure JamCam 3.0 is the
selected source and
click on the From
JamCam 3.0 button.
6. This will open
the JamCam
Viewer
window and
start the
download.
After the
download is
complete, use the arrow buttons to scroll through
your images.
7. Once the pictures
are loaded, use the
controls to change
the lighting of the
image (if necessary). Press the setting that best
applies to the setting of the image. For example,
if the picture was taken inside your home, press
the Home button to correct the lighting.
�




 2023年江西萍乡中考道德与法治真题及答案.doc
 2012年重庆南川中考生物真题及答案.doc
 2013年江西师范大学地理学综合及文艺理论基础考研真题.doc
 2020年四川甘孜小升初语文真题及答案I卷.doc
 2020年注册岩土工程师专业基础考试真题及答案.doc
 2023-2024学年福建省厦门市九年级上学期数学月考试题及答案.doc
 2021-2022学年辽宁省沈阳市大东区九年级上学期语文期末试题及答案.doc
 2022-2023学年北京东城区初三第一学期物理期末试卷及答案.doc
 2018上半年江西教师资格初中地理学科知识与教学能力真题及答案.doc
 2012年河北国家公务员申论考试真题及答案-省级.doc
 2020-2021学年江苏省扬州市江都区邵樊片九年级上学期数学第一次质量检测试题及答案.doc
 2022下半年黑龙江教师资格证中学综合素质真题及答案.doc