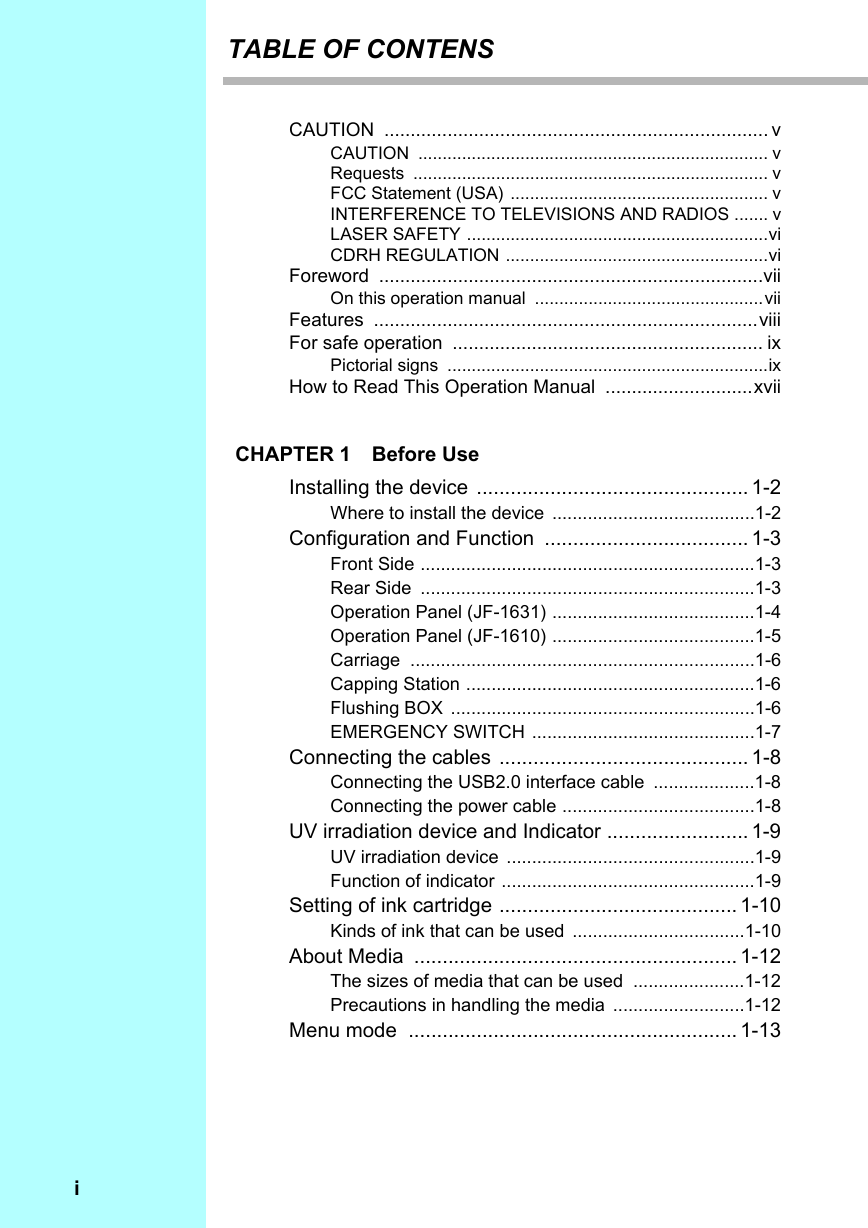
TABLE OF CONTENS
CAUTION
CAUTION
Requests
FCC Statement (USA)
INTERFERENCE TO TELEVISIONS AND RADIOS
LASER SAFETY
CDRH REGULATION
Foreword
On this operation manual
Features
Ultraviolet ray curing ink
High-speed interface
Curing fixation of ink after printing
Wide printing width
Printing on media having thickness up to 50mm
Vacuum table
For safe operation
Pictorial signs
Example of pictorial signs
Never do the following
Precautions for use
Notices for installation
How to Read This Operation Manual
CHAPTER 1 Before Use
Installing the device
Where to install the device
Configuration and Function
Front Side
Rear Side
Operation Panel (JF-1631)
Function of Jog Keys
Operation Panel (JF-1610)
Carriage
Capping Station
Flushing BOX
EMERGENCY SWITCH
Connecting the cables
Connecting the USB2.0 interface cable
Connecting the power cable
UV irradiation device and Indicator
UV irradiation device
Function of indicator
Setting of ink cartridge
Kinds of ink that can be used
Precautions at the time of setting the ink cartridge
Precautions in handling ink cartridge
Handling of white ink
About Media
The sizes of media that can be used
Precautions in handling the media
Menu mode
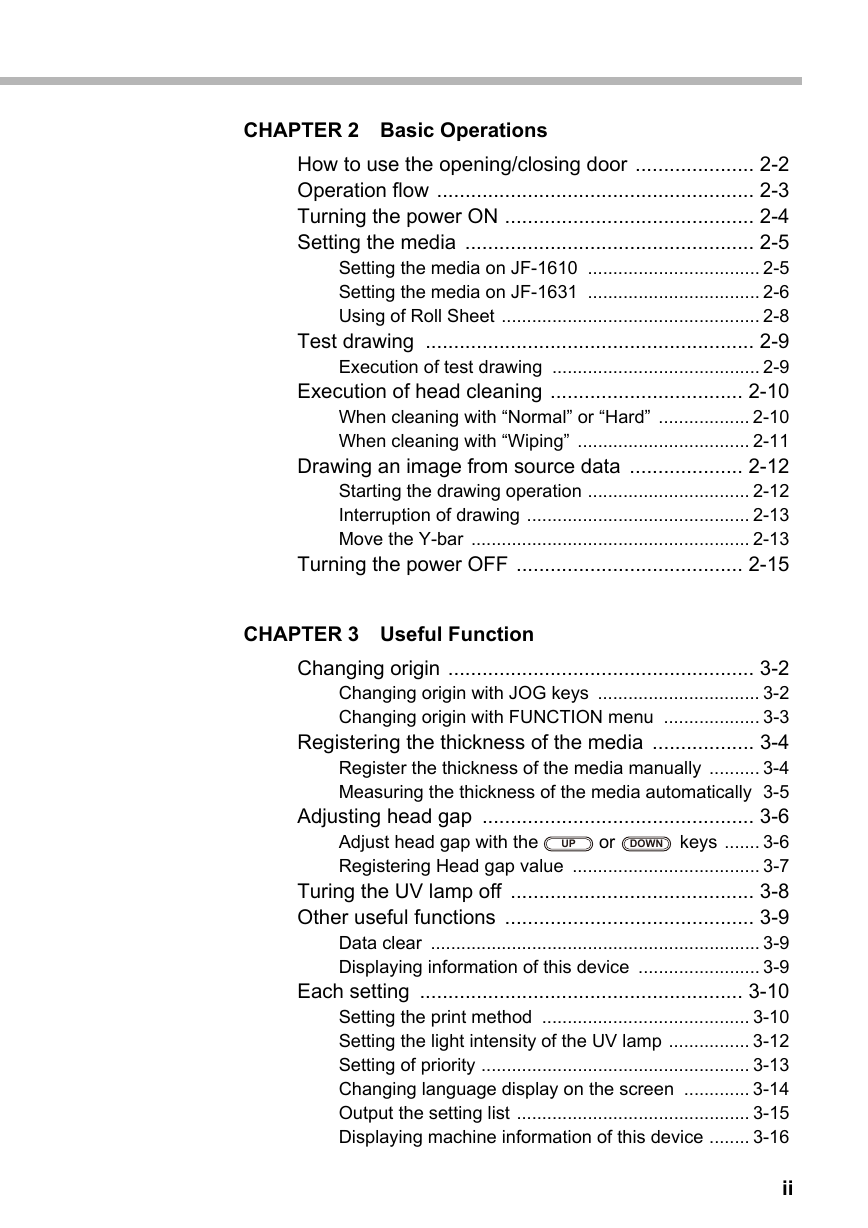
CHAPTER 2 Basic Operations
How to use the opening/closing door
When setting the media
When drawing the image
Operation flow
Turning the power ON
Setting the media
Setting the media on JF-1610
Setting the media on JF-1631
On the absorption area
Size of the media and switch-over of the valve
Using of Roll Sheet
Test drawing
Execution of test drawing
Execution of head cleaning
When cleaning with “Normal” or “Hard”
When cleaning with “Wiping”
Drawing an image from source data
Starting the drawing operation
Interruption of drawing
Move the Y-bar
Setting the view position
Evacuation of Y-bar from the table
Turning the power OFF
CHAPTER 3 Useful Function
Changing origin
Changing origin with JOG keys
Changing origin with FUNCTION menu
Registering the thickness of the media
Register the thickness of the media manually
Measuring the thickness of the media automatically
Adjusting head gap
Adjust head gap with the [UP] or [DOWN] keys
Registering Head gap value
Turing the UV lamp off
Other useful functions
Data clear
Displaying information of this device
Each setting
Setting the print method
Setting the light intensity of the UV lamp
Setting of priority
Changing language display on the screen
Output the setting list
Displaying machine information of this device
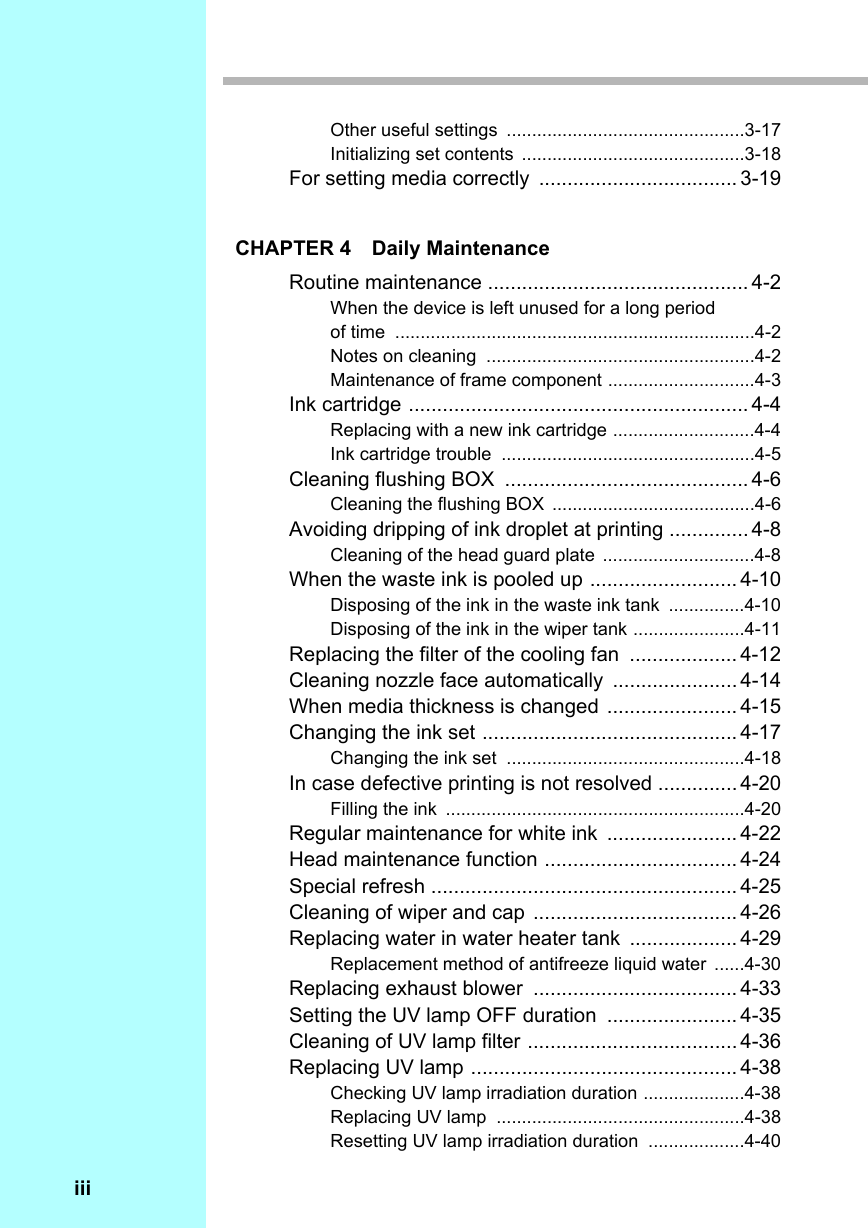
Other useful settings
Initializing set contents
For setting media correctly
Arrangement of guide holes
CHAPTER 4 Daily Maintenance
Routine maintenance
When the device is left unused for a long period of time
Notes on cleaning
Maintenance of frame component
Ink cartridge
Replacing with a new ink cartridge
Replacement of ink cartridges
Ink cartridge trouble
Cleaning flushing BOX
Cleaning the flushing BOX
Avoiding dripping of ink droplet at printing
Cleaning of the head guard plate
When the waste ink is pooled up
Disposing of the ink in the waste ink tank
Disposing of the ink in the wiper tank
Replacing the filter of the cooling fan
Cleaning nozzle face automatically
When media thickness is changed
Samples of pattern drawn
Changing the ink set
Available Ink Sets
Ink Set Changing Flow
Changing the ink set
In case defective printing is not resolved
Filling the ink
Regular maintenance for white ink
Head maintenance function
Special refresh
Cleaning of wiper and cap
Replacing water in water heater tank
Replacement method of antifreeze liquid water
Replacing using water heater exchange mode
Replacing when the power is turned OFF
Replacing exhaust blower
Setting the UV lamp OFF duration
Cleaning of UV lamp filter
Replacing UV lamp
Checking UV lamp irradiation duration
Replacing UV lamp
Resetting UV lamp irradiation duration
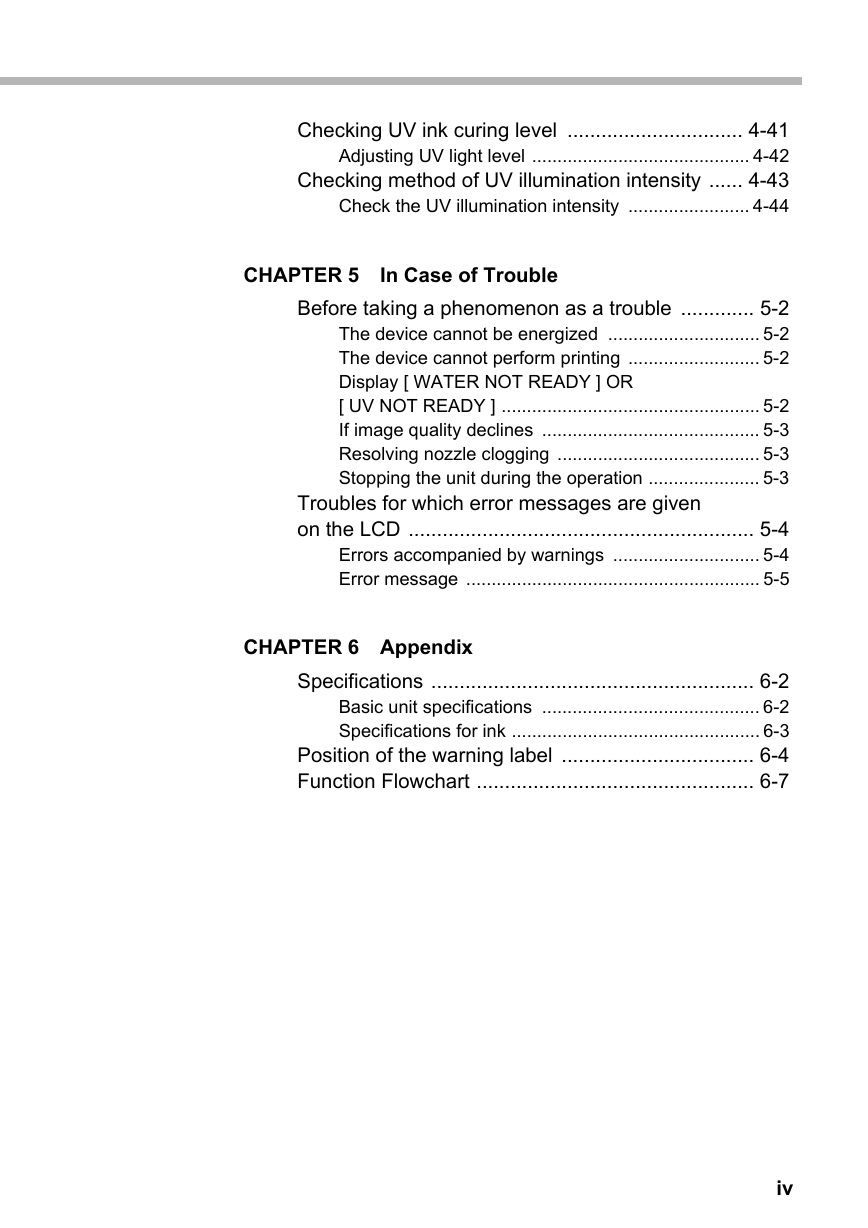
Checking UV ink curing level
Adjusting UV light level
Checking method of UV illumination intensity
Check the UV illumination intensity
CHAPTER 5 In Case of Trouble
Before taking a phenomenon as a trouble
The device cannot be energized
The device cannot perform printing
Display [ WATER NOT READY ] OR [ UV NOT READY ]
If image quality declines
Resolving nozzle clogging
Stopping the unit during the operation
Troubles for which error messages are given on the LCD
Errors accompanied by warnings
Error message
CHAPTER 6 Appendix
Specifications
Basic unit specifications
Specifications for ink
Position of the warning label
Function Flowchart



 2023年江西萍乡中考道德与法治真题及答案.doc
 2012年重庆南川中考生物真题及答案.doc
 2013年江西师范大学地理学综合及文艺理论基础考研真题.doc
 2020年四川甘孜小升初语文真题及答案I卷.doc
 2020年注册岩土工程师专业基础考试真题及答案.doc
 2023-2024学年福建省厦门市九年级上学期数学月考试题及答案.doc
 2021-2022学年辽宁省沈阳市大东区九年级上学期语文期末试题及答案.doc
 2022-2023学年北京东城区初三第一学期物理期末试卷及答案.doc
 2018上半年江西教师资格初中地理学科知识与教学能力真题及答案.doc
 2012年河北国家公务员申论考试真题及答案-省级.doc
 2020-2021学年江苏省扬州市江都区邵樊片九年级上学期数学第一次质量检测试题及答案.doc
 2022下半年黑龙江教师资格证中学综合素质真题及答案.doc